1. Introdución
This manual provides instructions for the safe and effective operation of your RDINSCOS MT68 Pinless Moisture Meter. Please read this manual thoroughly before use and retain it for future reference.
1.1 Información de seguridade
- Do not attempt to modify or repair the device.
- Manteña o dispositivo lonxe da auga e das temperaturas extremas.
- Retire as pilas se o dispositivo non se utiliza durante un período prolongado.
- Evite usar o dispositivo preto de campos electromagnéticos fortes.
2. Produto rematadoview
The RDINSCOS MT68 Pinless Moisture Meter features a non-invasive ball sensor for detecting moisture without damaging surfaces.

Imaxe: Fronte view of the RDINSCOS MT68 Pinless Moisture Meter, showing the ball sensor, LCD display, and control buttons.
2.1 Compoñentes e pantalla

Imaxe: Detallada view of the MT68's display and buttons, highlighting the display screen, indicator light, power button, UP button, Measure/Hold button, alarm threshold setting button, Down/Flashlight button, and battery compartment.
- Pantalla de visualización: Shows measured values, battery level, and other indicators.
- Luz indicadora: Tri-color LED (Green for DRY, Yellow for RISK, Red for WET).
- Botón de encendido: Acende/apaga o dispositivo.
- Botón ARRIBA: Úsase para a navegación e os axustes de configuración.
- Measure/Hold Screen Button: Initiates measurement or holds the current reading.
- Alarm Threshold Setting Button: Adjusts the moisture alarm levels.
- Down/Flashlight Button: Used for navigation and activating the built-in flashlight.
- Compartimento de batería: Located at the back for battery installation.
3. Configuración
3.1 Instalación da batería
- Abra a tapa do compartimento da batería na parte traseira do dispositivo.
- Insira tres pilas AAA, asegurándose da polaridade correcta (+/-).
- Pecha a tapa do compartimento da batería de forma segura.
The device will power on automatically or can be turned on using the Power button.
4. Instrucións de funcionamento
4.1 Medición básica
- Preme o botón de acendido para acender o dispositivo.
- Place the ball sensor flat against the surface to be measured. Ensure there is no metal within 2 inches of the testing area.

Image: Illustration showing correct and incorrect placement of the moisture meter, emphasizing the need to avoid metal objects like rebar or pipes within 2 inches of the measurement area.
- The display will show the moisture level. The tri-color LED indicator will light up: Green for Dry, Yellow for Risk, Red for Wet.
- For optimal accuracy, the measured material thickness should be greater than 20-40 mm.

Image: Diagram illustrating the measurement depth of the ball sensor, showing optimal performance for material thickness greater than 20-40mm (up to 40mm or 1.57 inches).
- Press the Measure/Hold button to hold the current reading on the display. Press again to release.
4.2 Material Selection and Alarm Thresholds
The MT68 allows users to set moisture alarm thresholds for different materials. Refer to the reference table below for guidance.

Image: A table showing recommended LCD display digit ranges and corresponding moisture levels (DRY, RISK, WET) for Plaster and Anhydrite, Cement-based materials, and Wood. This image also shows the meter displaying a reading of 19.0.
To adjust alarm thresholds:
- Press the Alarm threshold setting button.
- Use the UP and Down buttons to navigate through material types or adjust threshold values.
- Confirme a súa selección.
4.3 Función da lanterna
The built-in LED flashlight can be activated for use in dimly lit environments.

Image: The MT68 moisture meter with its flashlight illuminated, demonstrating its use in a dark environment. The image also indicates a 30-minute auto power-off feature.
Press the Down/Flashlight button to turn the flashlight on or off.
4.4 Apagado automático
The device features an automatic power-off function after approximately 30 minutes of inactivity to conserve battery life.
5. Mantemento
5.1 Limpeza
Limpe o dispositivo cun pano suave e seco. Non empregue produtos de limpeza abrasivos nin disolventes.
5.2 Almacenamento
Store the meter in a dry, cool place, away from direct sunlight and extreme temperatures. Remove batteries if storing for extended periods.
6 Solución de problemas
6.1 Problemas comúns
| Problema | Causa posible | Solución |
|---|---|---|
| Sen pantalla/o dispositivo non se acende | Low batteries; Incorrect battery installation | Substituír as baterías; comprobar a polaridade das baterías |
| Lecturas inexactas | Interference from metal objects; Sensor not flat on surface; Material too thin | Ensure no metal within 2 inches; Place sensor flat; Ensure material thickness > 20mm |
| Alarma constantemente activa | High moisture levels; Incorrect alarm threshold settings | Verify moisture levels; Adjust alarm thresholds for the material |
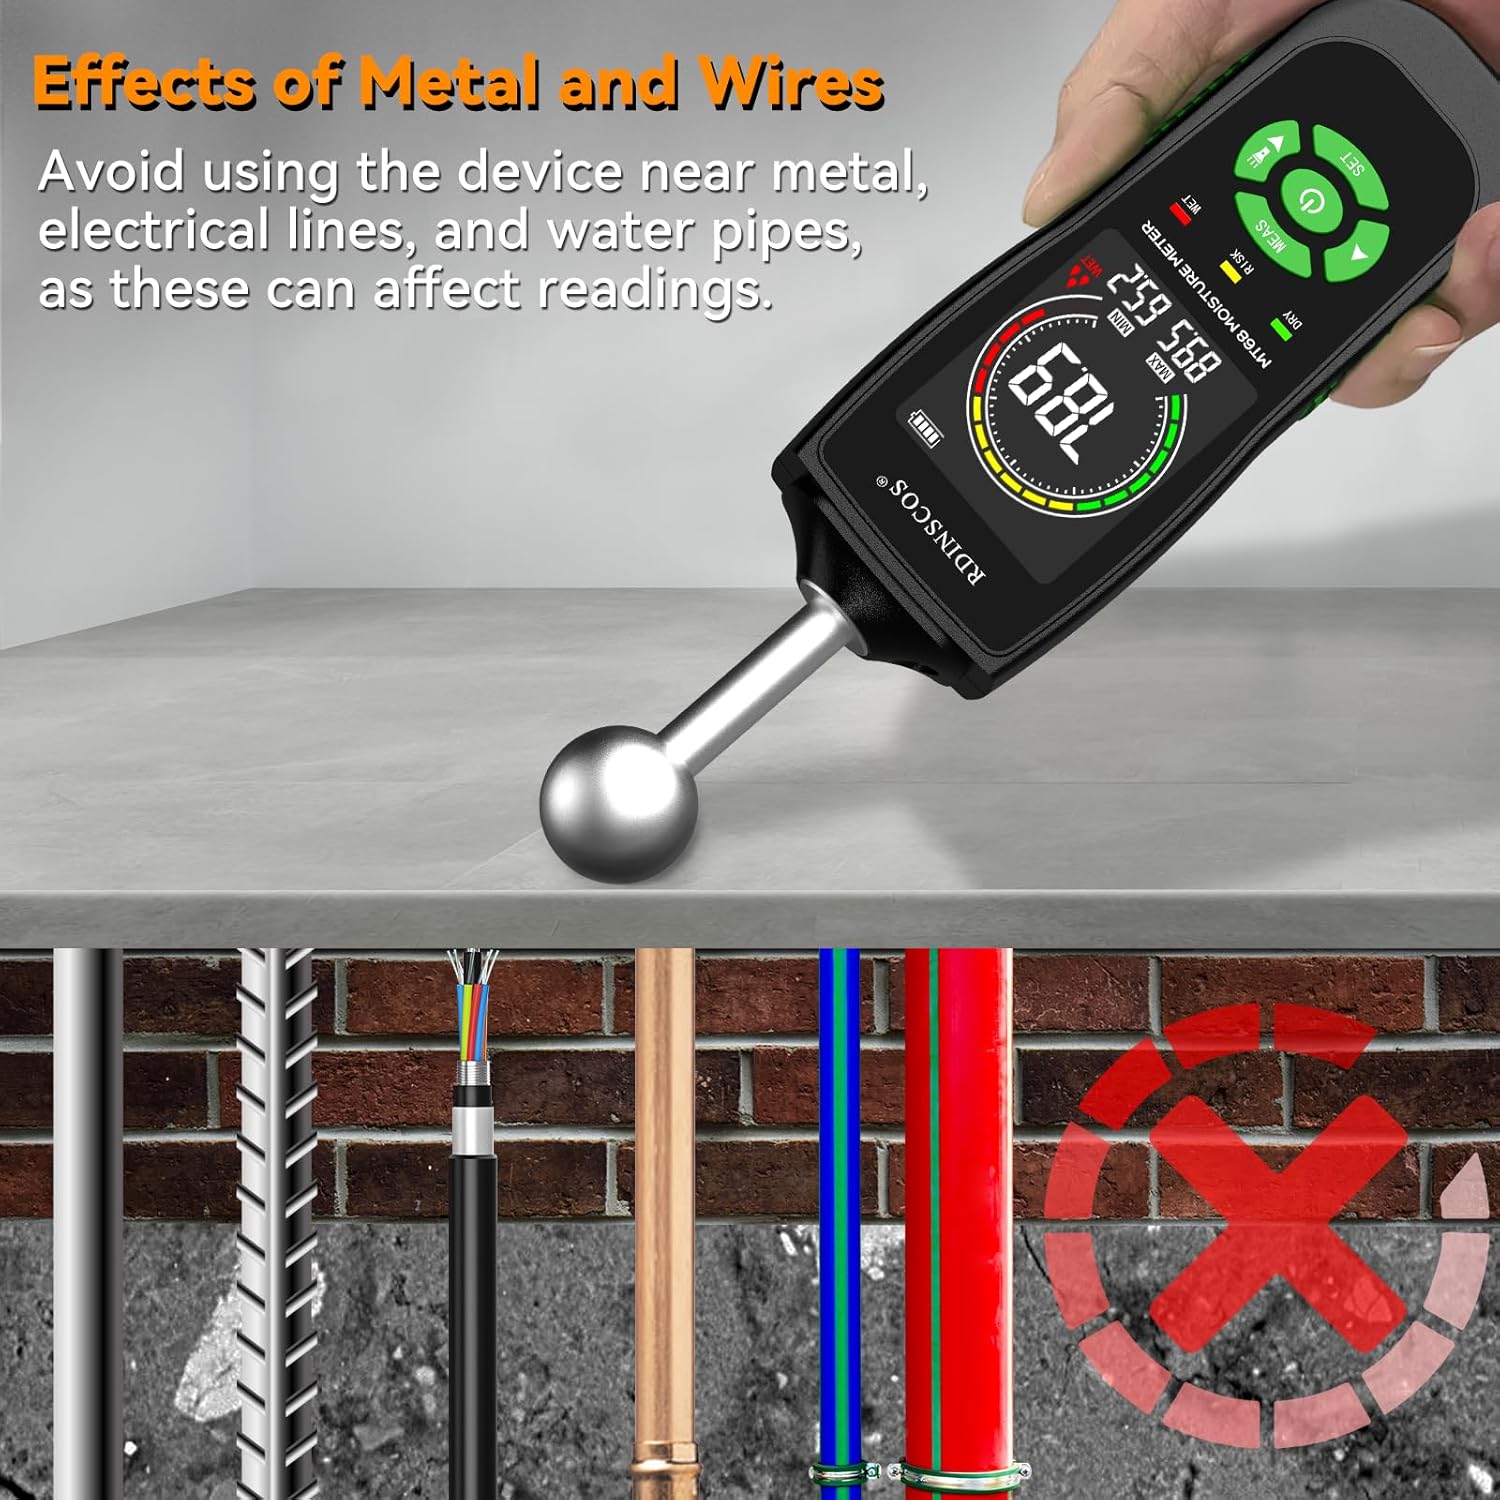
Image: An illustration demonstrating how metal objects like rebar, electrical lines, and water pipes can affect the moisture meter's readings, advising users to avoid these areas.
7. Especificacións
7.1 Datos técnicos
- Modelo: MT68
- Principio de medición: Non-invasive ball sensor
- Visualización: LCD with tri-color LED indicator
- Fonte de enerxía: 3 pilas AAA
- Apagado automático: Aproximadamente 30 minutos
- Dimensións: 18 x 6 x 4 cm
- Peso: 249 g
- Compoñentes incluídos: 1*Wood Moisture Meter; 3*AAA battery
8. Garantía e soporte
8.1 Atención ao cliente
For technical assistance, warranty information, or service inquiries, please contact RDINSCOS customer support through your retailer or the official brand websitio. Garde o recibo da compra como xustificante da mesma.