
1. Produto rematadoview
The VANTRUE E2 Dual Dash Cam is designed to provide comprehensive front and rear vehicle recording with advanced features for enhanced safety and convenience. This manual provides instructions for proper installation, operation, and maintenance of your device.

Figure 1: VANTRUE E2 Dual Dash Cam Main Unit
2. Contido do paquete
Verifique que todos os elementos que se indican a continuación estean incluídos no seu paquete. Se falta algún elemento ou está danado, póñase en contacto co servizo de atención ao cliente.

Figura 2: Compoñentes incluídos
- VANTRUE E2 Main Dash Cam Unit
- Cámara traseira
- Magnetic GPS Mount
- Control remoto sen fíos
- Cargador de coche
- Rear Camera Cable (Standard 6m)
- Type-C USB Cable (1m)
- Ferramenta de instalación
- Cinta adhesiva 3M
- Película electrostática
- Guía de inicio rápido
3. Configuración e instalación
Follow these steps to properly install your VANTRUE E2 Dual Dash Cam.
3.1 Montaxe da cámara para o salpicadero
The compact design and magnetic mount allow for flexible installation on the front windshield, dashboard, or rear window.

Figure 3: Mounting Options (Front Glass, Dashboard, Rear Window)

Figura 4: Diagrama de instalación sinxela
- Clean the desired mounting area on your windshield or dashboard.
- Attach the electrostatic film to the windshield first, then attach the magnetic mount to the film.
- Secure the main dash cam unit to the magnetic mount.
- Connect the rear camera to the main unit using the provided rear camera cable.
- Route the cables neatly using the installation tool to hide them along the vehicle's interior trim.
- Connect the car charger to your vehicle's cigarette lighter socket and the dash cam.
3.2 SD Card Insertion and Formatting
Insert a high-speed Micro SD card (Class 10 or higher, up to 1TB, sold separately) into the dash cam. It is crucial to format the SD card within the dash cam before its first use and periodically thereafter to ensure optimal performance and prevent recording errors.
4. Instrucións de funcionamento
The VANTRUE E2 offers various operating modes and control methods.
4.1 Encendido/apagado
A cámara do salpicadero acenderase automaticamente e comezará a gravar cando se acenda o contacto do vehículo. Apagarase automaticamente cando se apague o contacto.
4.2 Modos de gravación
The E2 records simultaneously from both front and rear cameras at 1944P (2.7K) resolution, utilizing STARVIS IMX335 sensors for clear footage.

Figure 5: Front and Rear 2.7K Recording
4.3 Night Vision and WDR
Equipped with STARVIS night vision and WDR technology, the E2 captures clear images in low-light conditions and balances exposure in high-contrast environments.
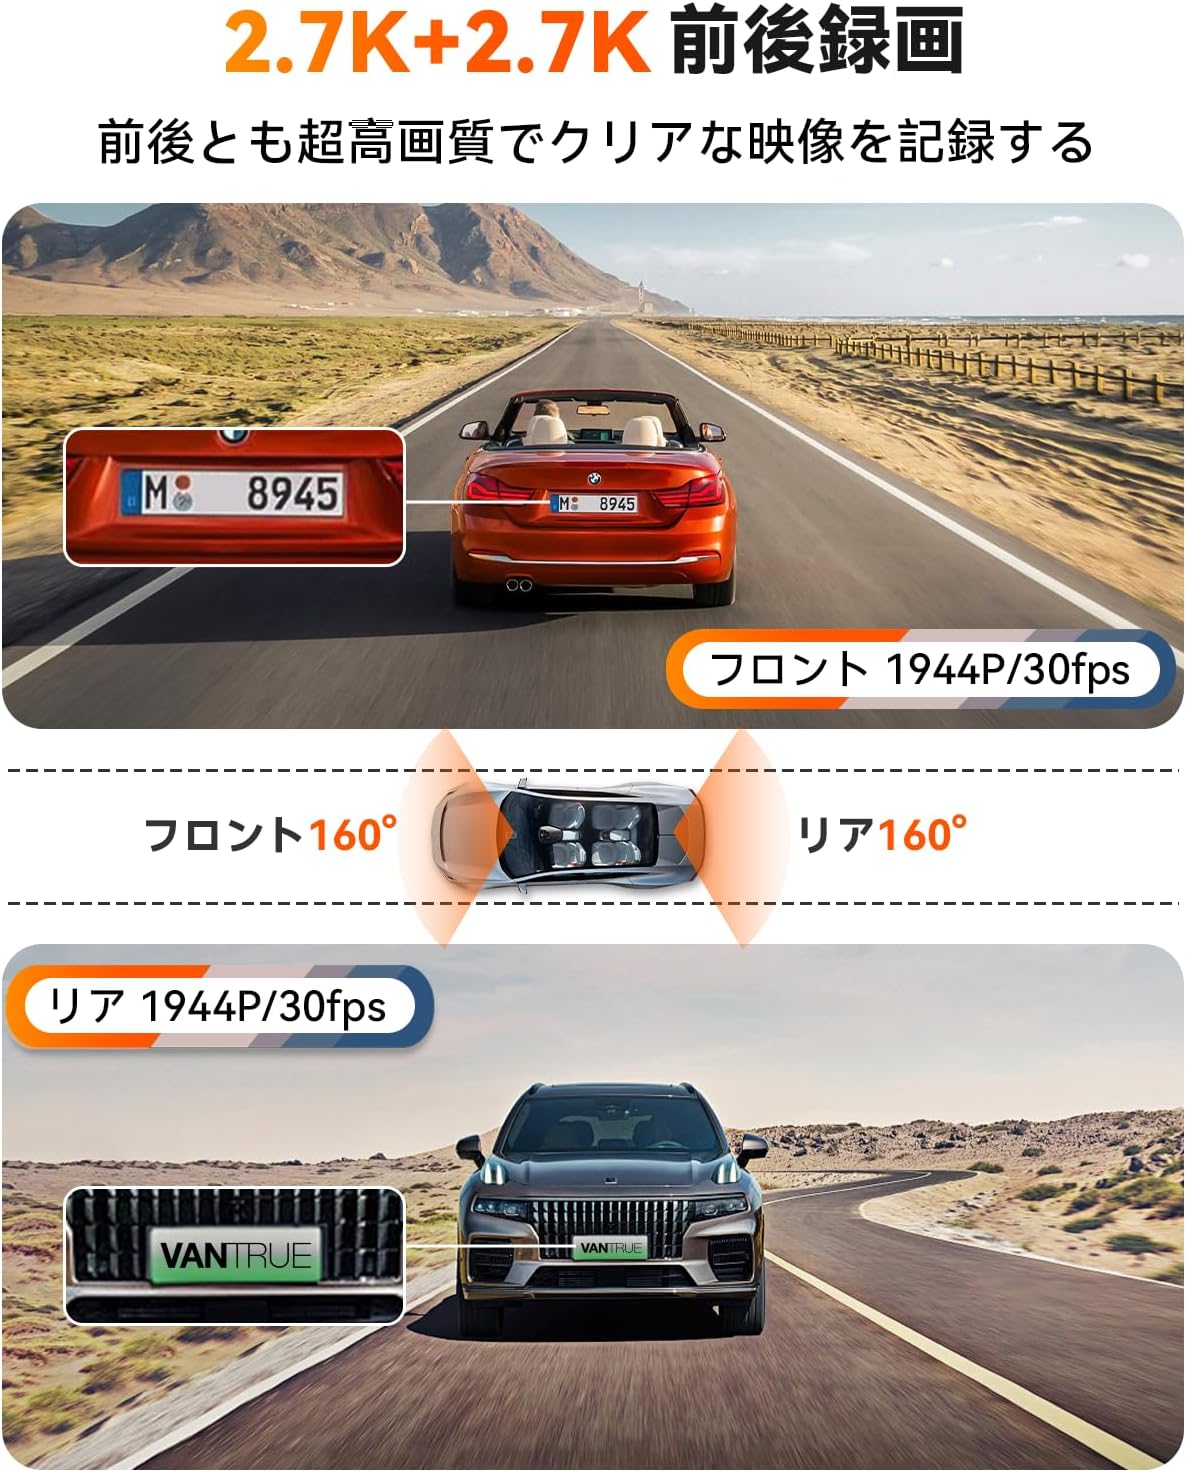
Figure 6: Enhanced Night Vision and WDR

Figure 7: WDR in Action
4.4 Funcionalidade do GPS
The built-in GPS module records your vehicle's speed, location (latitude and longitude), and driving route, embedding this data into the video files. Esta información pode ser viewed using the dedicated VANTRUE app or desktop viewer.
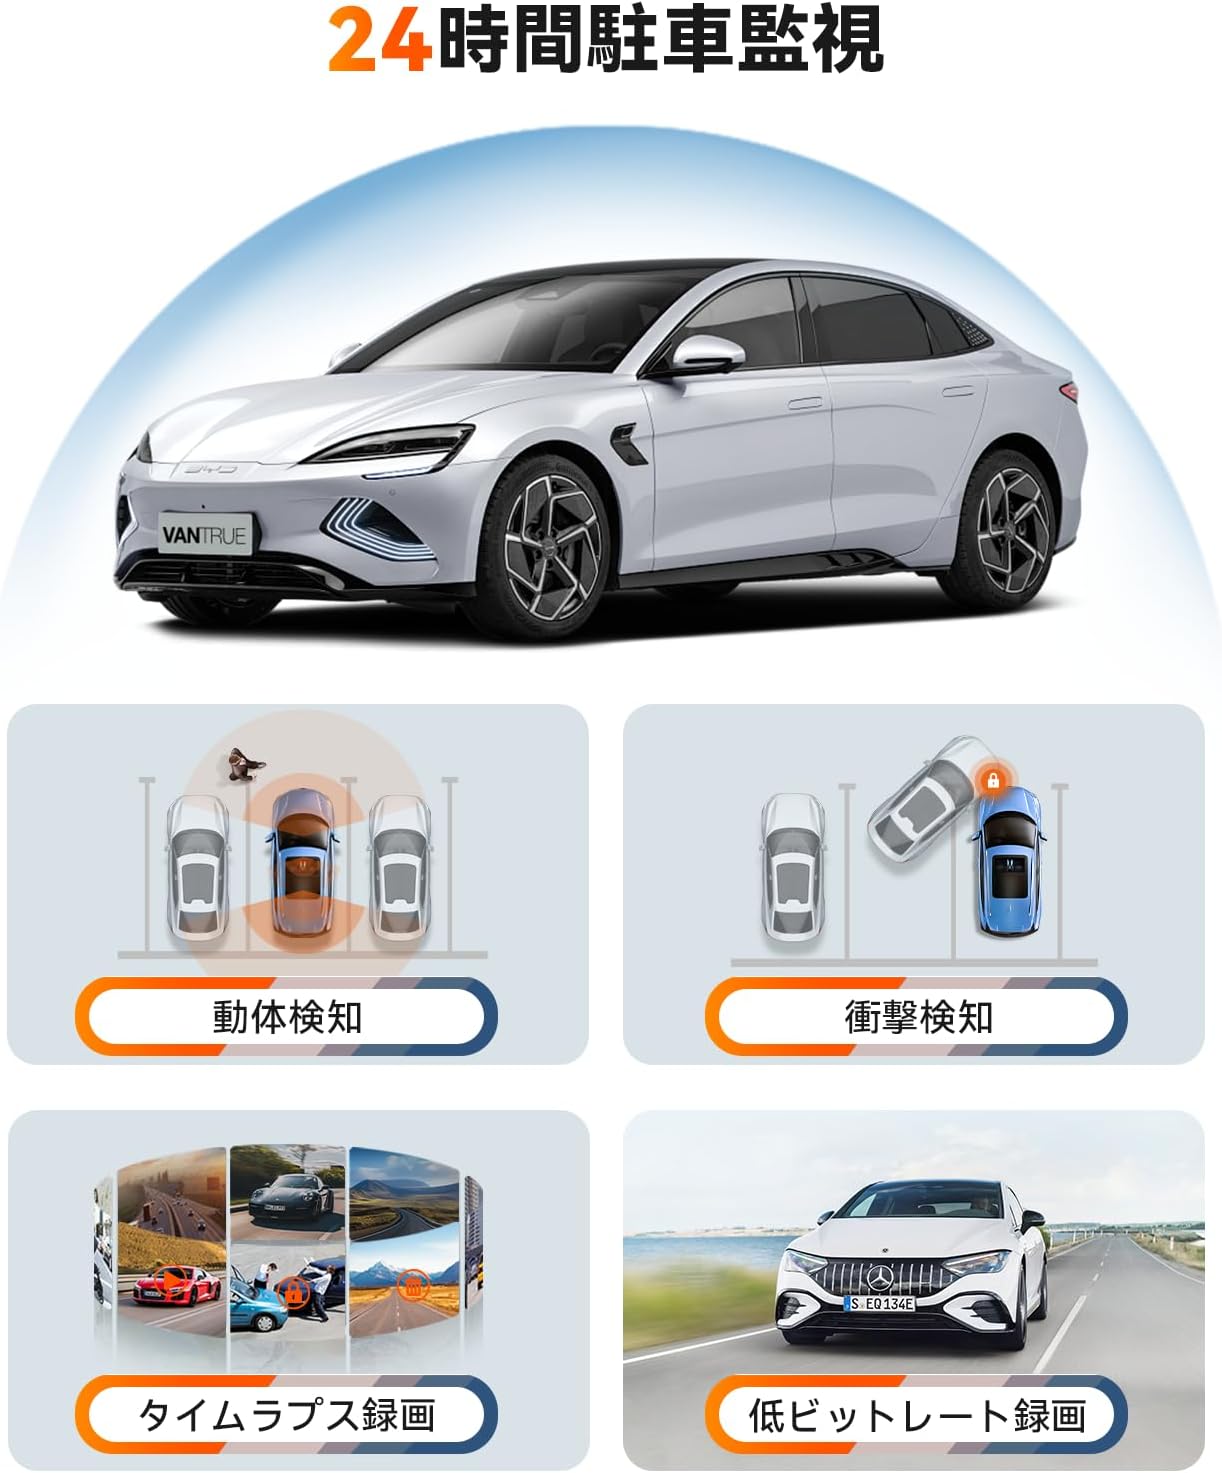
Figure 8: GPS Tracking
4.5 Control por voz
Control your dash cam hands-free using simple voice commands. This allows you to perform actions like taking photos, locking videos, or toggling audio recording without diverting your attention from the road.
Video 1: Demonstration of Voice Commands for VANTRUE E2.

Figure 9: Voice Control Features
4.6 Control remoto sen fíos
The included wireless remote allows for quick actions such as capturing photos or locking important video segments with a single press.

Figura 10: Funcións do control remoto
4.7 5.8GHz WiFi and App Control
Connect your smartphone to the dash cam via high-speed 5.8GHz WiFi using the VANTRUE app. This enables live streaming, video playback, downloading, editing, and sharing of recorded footage, as well as adjusting device settings.

Figure 11: WiFi App Control Interface
Vídeo 2: Rematadoview of VANTRUE E2 features including wide-angle, resolution, night vision, GPS, G-sensor, remote, 5GHz WiFi, parking modes, and CPL filter.
4.8 Parking Surveillance Modes
The E2 offers four distinct parking surveillance modes to protect your vehicle when parked. Note: A separately sold direct-wire power cable (ASIN: B094882TJC) is required to enable these functions.

Figure 12: 24-Hour Parking Surveillance
- Detección de movemento: Records 15 seconds before and 30 seconds after motion is detected, saving the footage to a normal folder.
- Impact Detection (Low Power Consumption): Automatically starts recording when an impact is detected while the vehicle is parked (power off).
- Low Bitrate Recording (Space Saving): Records at 1080P@15FPS or 720P@15FPS, optimizing storage space.
- Time-Lapse Recording (Space Saving): Captures images at a low frame rate and stitches them into a time-lapse video, condensing long periods into short, viewable clips.
5. Mantemento
Un mantemento regular garante a lonxevidade e o rendemento óptimo da túa cámara de salpicadero.
5.1 Coidado da tarxeta SD
To prevent data corruption and ensure continuous recording, format your Micro SD card within the dash cam at least once a month. Use a high-quality, reputable brand of Micro SD card (Class 10 or higher).
5.2 Limpeza do dispositivo
Use a soft, dry cloth to clean the dash cam's lens and screen. Avoid using abrasive cleaners or solvents that could damage the device.
6 Solución de problemas
If you encounter issues with your VANTRUE E2, refer to the following common solutions:
- A cámara do salpicadero non se acende: Check the power connection to the car charger and ensure the vehicle's ignition is on. Verify the car charger is functioning correctly.
- Erros de gravación: Format the SD card within the dash cam. Ensure you are using a compatible high-speed SD card. Replace the SD card if errors persist.
- Baixa calidade do vídeo: Clean the camera lenses. Ensure the protective film has been removed from the lenses. Check that the resolution settings are appropriate.
- Problemas de conexión WiFi: Ensure the dash cam's WiFi is enabled. Restart both the dash cam and your smartphone. Reinstall the VANTRUE app if necessary.
- O modo de estacionamento non funciona: Confirm that the optional direct-wire power cable (ASIN: B094882TJC) is correctly installed and connected.
For further assistance, please contact VANTRUE customer support.
7. Especificacións
Detailed technical specifications for the VANTRUE E2 Dual Dash Cam.
| Característica | Especificación |
|---|---|
| Marca | VANTRUE |
| Número de modelo | Element 2 (E2) |
| Resolución de vídeo | Front: 1944P (2.7K), Rear: 1944P (2.7K) |
| Campo de View | 160 degrees (Front & Rear) |
| Apertura | F1.8 |
| Tipo de visualización | LCD |
| Tamaño da pantalla | 2.45 polgadas |
| Conectividade | Wi-Fi de 5.8 GHz |
| GPS | Módulo GPS integrado |
| Sensor G | Si |
| Parking Modes | Motion Detection, Impact Detection, Low Bitrate, Time-Lapse |
| Métodos de control | App, Push Button, Voice, Wireless Remote |
| Almacenamento | Micro SD card (up to 1TB, sold separately) |
| Dimensións (D x W x H) | 2.9 x 7.4 x 4.4 cm |
| Peso | 0.88 kg |
| País de Orixe | China |
8. Garantía e soporte
The VANTRUE E2 Dual Dash Cam comes with a standard 12-month warranty. You can extend this warranty to 18 months by registering your product on the official VANTRUE website within 6 months of purchase.
For any questions, concerns, or technical support, please contact VANTRUE customer service through Amazon or visit our official websitio.