
Introdución
This manual provides detailed instructions for the setup, operation, and maintenance of your LFF Atomic Clock Model LWC204. This digital clock features a large, easy-to-read display, atomic time synchronization, and a wireless sensor for indoor and outdoor temperature readings. Please read this manual thoroughly before use to ensure proper functionality and longevity of your device.
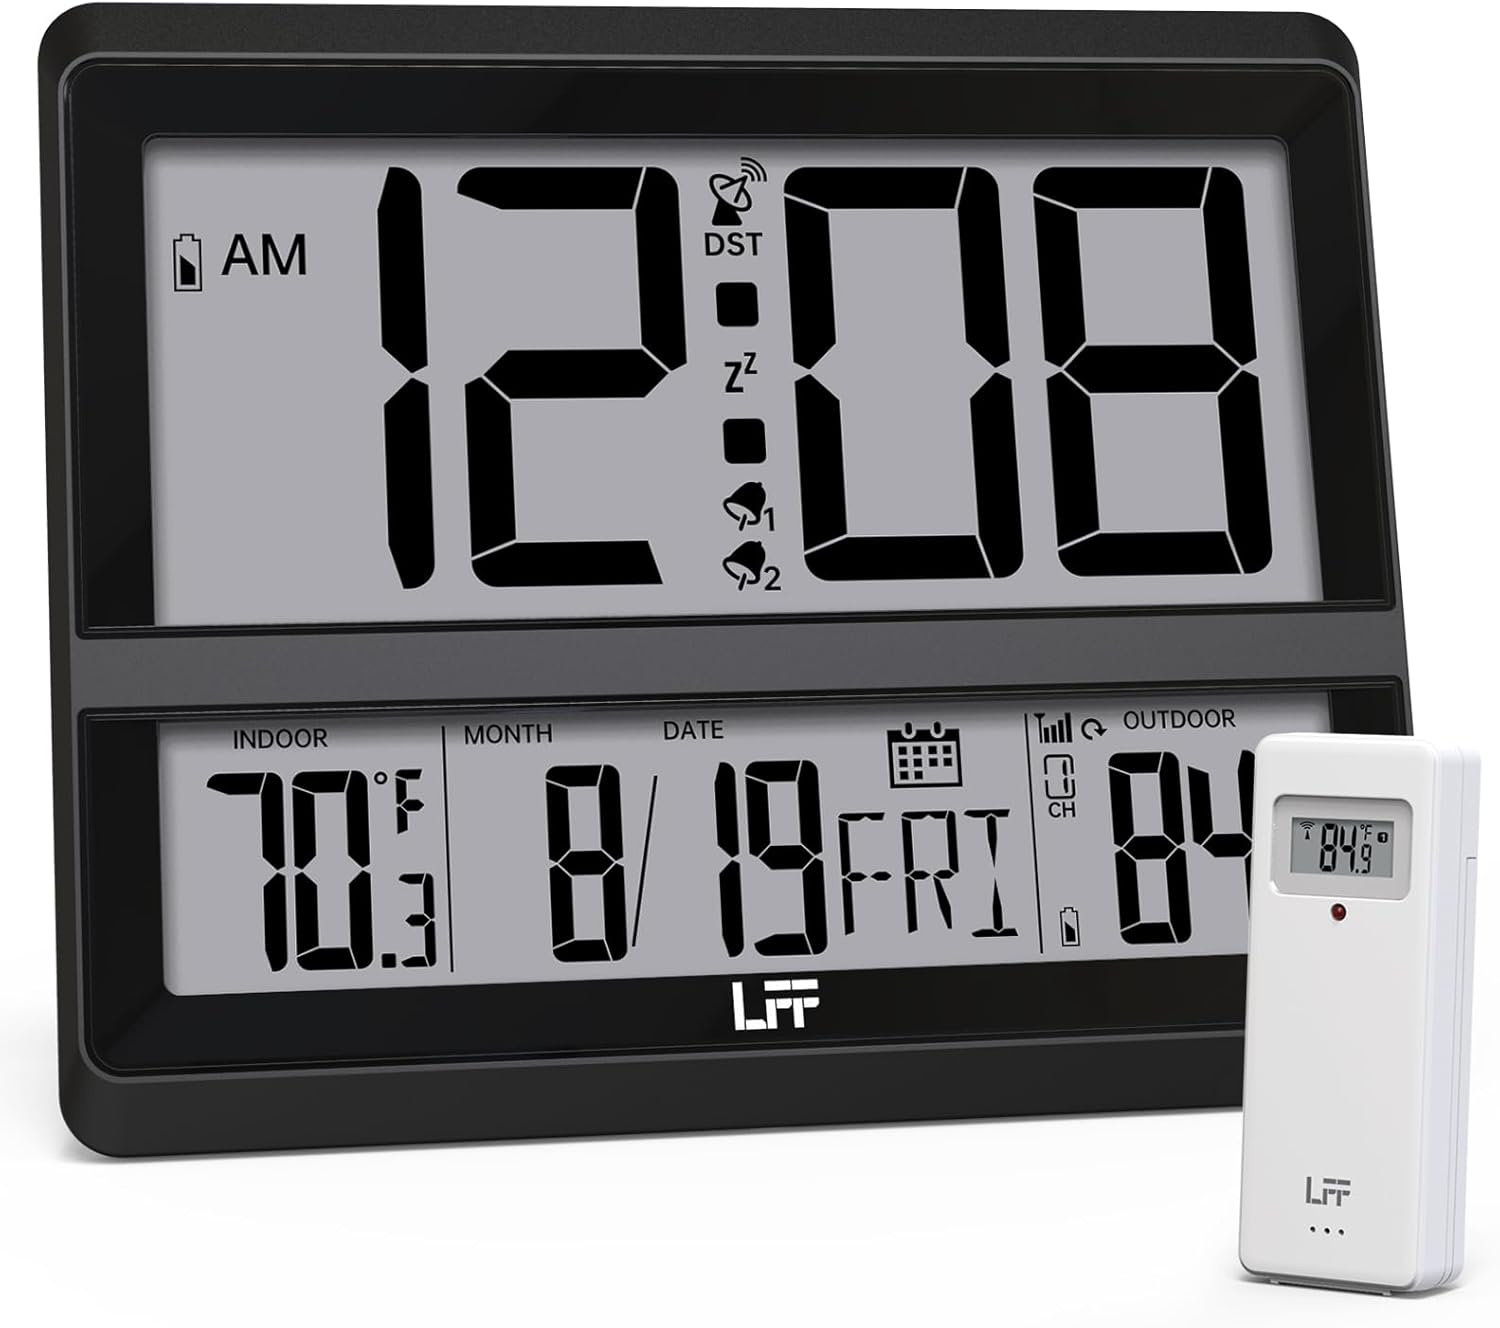
Image: The LFF Atomic Clock main unit with its wireless outdoor temperature sensor.
Contido do paquete
- LFF Atomic Clock Main Unit
- Sensor de temperatura exterior sen fíos
- Manual de instrucións (este documento)
- Bracket for table standing
Note: Batteries are not included. The main clock unit requires 3x AA batteries, and the outdoor sensor requires 2x AAA batteries.
Produto rematadoview
Familiarize yourself with the main components and controls of your LFF Atomic Clock.

Image: Front display and rear button layout of the LFF Atomic Clock.
Características de visualización:
- Visualización do tempo: Large digits for current time (12/24 Hour format).
- Indicador AM/PM: For 12-hour format.
- DST Symbol: Indicates Daylight Saving Time is active.
- RCC Reception Icon: Shows status of atomic time signal reception.
- Alarm Icons (Zz, 1, 2): Indicate active alarms and snooze function.
- Temperatura interior: Current temperature inside (°C/°F).
- Temperatura exterior: Current temperature from wireless sensor (°C/°F).
- Date & Weekday: Month, Day, and Day of the Week.
- Indicador de batería baixa: For both main unit and outdoor sensor.
Botóns traseiros:
- Botón SET: Entra no modo de configuración.
- Botón ALARMA: Accede á configuración da alarma.
- Botón CANAL: Cycles through outdoor sensor channels (if multiple sensors are used).
- DOWN/WAVE/°C/°F Button: Decreases values in setting mode, manually initiates atomic signal search (WAVE), or switches temperature units.
- UP/ALARM Button: Increases values in setting mode, or activates/deactivates alarm.
Configuración
1. Instalación da batería
- Sensor exterior:
- Abra o compartimento das baterías na parte traseira do sensor exterior sen fíos.
- Introduza 2 pilas AAA, respectando a polaridade correcta (+/-).
- Pecha o compartimento da batería de forma segura.
- Note: For temperatures below -4°F (-20°C), Lithium batteries are recommended for the outdoor sensor.
- Main Clock Unit:
- Open the battery compartment on the back of the main clock unit.
- Insira 3 pilas AA, respectando a polaridade correcta (+/-).
- Pecha o compartimento da batería de forma segura.

Image: Battery compartments for the main clock and outdoor sensor.
2. Initial Synchronization and Settings
Upon battery installation, the clock will automatically begin searching for the WWVB atomic time signal and attempt to connect with the outdoor sensor.
- The RCC Reception Icon will flash during the atomic signal search. This process may take several minutes or up to 24 hours depending on signal strength.
- The outdoor temperature should appear on the display within a few minutes after the sensor batteries are installed. If not, press the CANLE button on the main unit to cycle through channels or press the reset button on the outdoor sensor.
3. Manual Settings (if needed)
If the atomic signal is not received or you wish to adjust settings manually:
- Configuración da zona horaria:
- Manteña premido o SET button for 3 seconds to enter time zone setting.
- Usa o UP/ALARM or DOWN/WAVE/°C/°F buttons to select your time zone (e.g., PST, MST, CST, EST).
- Preme SET para confirmar e pasar á seguinte configuración.
- Formato 12/24 horas:
- After time zone, the hour format will flash. Use UP/ALARM or DOWN/WAVE/°C/°F to select 12-hour or 24-hour format.
- Preme SET para confirmar.
- Manual Time and Date Setting:
- Continúa presionando SET to cycle through Year, Month, Day, Hour, Minute settings.
- Use UP/ALARM or DOWN/WAVE/°C/°F para axustar cada valor.
- Preme SET para confirmar cada configuración.
- Horario de verán (DST):
- After setting the time, the DST setting will flash. Use UP/ALARM or DOWN/WAVE/°C/°F to enable or disable DST.
- Preme SET para saír do modo de configuración.

Image: The clock automatically corrects time daily via WWVB signal.
4. Colocación do sensor exterior
- Place the wireless outdoor sensor within 330 feet (100 meters) of the main unit.
- Choose a shaded location to avoid direct sunlight, which can affect temperature accuracy.
- Asegúrese de que o sensor estea protexido da choiva e da neve directas.
- Avoid placing the sensor near large metal objects or electrical appliances that may interfere with the wireless signal.

Image: Wireless range of 330 feet for the outdoor sensor.
Instrucións de funcionamento
1. Modos de visualización
- The clock continuously displays time, indoor temperature, outdoor temperature, date, and day of the week.
- Preme o DOWN/WAVE/°C/°F para cambiar entre Celsius (°C) e Fahrenheit (°F) para a visualización da temperatura.
2. Función de alarma
- Configuración da alarma:
- Preme o ALARMA button once to display Alarm 1 time. Press again for Alarm 2.
- While an alarm time is displayed, press and hold the ALARMA button for 3 seconds to enter alarm setting mode. The hour will flash.
- Use UP/ALARM or DOWN/WAVE/°C/°F para axustar a hora. Prema ALARMA para confirmar.
- Os minutos parpadearán. Usa UP/ALARM or DOWN/WAVE/°C/°F para axustar o minuto. Preme ALARMA para confirmar e saír da configuración da alarma.
- Activación/Desactivación da alarma:
- Preme o ALARMA button to display Alarm 1 or Alarm 2.
- Preme o UP/ALARM button to toggle the alarm ON or OFF. The corresponding alarm icon (1 or 2) will appear/disappear on the display.
- Función de Snooze:
- Cando soe a alarma, prema o botón AMORTAR button (usually located on top or a dedicated button) to activate snooze. The alarm will sound again after approximately 5-10 minutes.
- To stop the alarm completely, press any other button (e.g., ALARMA, SET).
3. Manual Atomic Signal Search
If you wish to manually initiate a search for the WWVB atomic time signal, press and hold the DOWN/WAVE/°C/°F button for 3 seconds. The RCC Reception Icon will flash, indicating the search is in progress.
Mantemento
- Limpeza: Wipe the clock and sensor with a soft, dry cloth. Do not use abrasive cleaners or solvents.
- Substitución da batería: When the low battery indicator appears on the display for either the main unit or the outdoor sensor, replace the batteries promptly to ensure continuous operation and accurate readings. Refer to the "Battery Installation" section for details.
- Almacenamento: Se garda o dispositivo durante un período prolongado, retire todas as baterías para evitar fugas.
Resolución de problemas
| Problema | Causa posible | Solución |
|---|---|---|
| Sen pantalla na unidade principal. | As baterías están agotadas ou están mal instaladas. | Comprobe a polaridade das pilas e substitúaas por pilas AA novas. |
| A temperatura exterior non se mostra ou é incorrecta. |
|
|
| Atomic time signal not received (RCC icon flashing or not displayed). |
|
|
| Time is incorrect after atomic synchronization. | Configuración incorrecta da zona horaria. | Adjust the time zone setting as described in the "Manual Settings" section. |
Especificacións
| Característica | Detalle |
|---|---|
| Número de modelo | LWC204 |
| Tipo de visualización | LCD dixital |
| Fonte de alimentación (unidade principal) | 3 pilas AA (non incluídas) |
| Fonte de alimentación (sensor exterior) | 2 pilas AAA (non incluídas) |
| Rango de temperatura interior | 32 °F a 122 °F (0 °C a 50 °C) |
| Rango de temperatura exterior | -58 °F a 158 °F (-50 °C a 70 °C) |
| distancia wireless | Ata 100 metros (330 pés) ao aire libre |
| Formato de tempo | Seleccionable de 12/24 horas |
| Dimensións (unidade principal) | 7.48" de ancho x 8.66" de alto (aprox.) |
| Opcións de montaxe | Wall Mount or Tabletop (bracket included) |
Garantía e Soporte
LFF products are designed for reliability and performance. For specific warranty information, please refer to the warranty card included with your purchase or contact LFF customer support.
For technical assistance or further inquiries, please visit the official LFF websitio web ou póñase en contacto co seu departamento de atención ao cliente. Os datos de contacto adoitan estar dispoñibles na embalaxe do produto ou na presenza oficial en liña da marca.