
1. Introdución e finalview
This manual provides detailed instructions for the proper setup, operation, and maintenance of your Techbee TE02 Indoor Digital Electrical Outlet Timer Plug. This device is designed to automate the power supply to your electrical appliances, offering convenience, energy savings, and enhanced home security through its programmable features.
The Techbee TE02 timer plug features a large, easy-to-read display and intuitive controls, allowing for precise scheduling of up to 20 ON/OFF programs per day. It also includes advanced functions such as a countdown timer and a random ON/OFF mode for vacation security. Its built-in battery ensures that your programmed settings are retained even during power outages.
2. Características do produto
- Extensive Programming: Supports up to 20 weekly ON-OFF timing programs for flexible scheduling.
- Función de conta atrás: Allows for precise delay ON/OFF timing, from 1 second up to 99 hours, 59 minutes, and 59 seconds.
- Anti-theft Random Mode: Activates lights or other appliances at varying times to simulate occupancy, deterring potential intruders.
- Pantalla fácil de usar: Features a large screen for clear visibility of digits and numbers.
- Poder Outage Protección: Equipped with a built-in NiMH 1.2V battery to retain programmed settings for over 30 days during power interruptions.
- Versatile Time Format: Interchangeable 12-hour (AM/PM) and 24-hour formats.
- Toma de terra: Designed with a 3-prong plug and socket for safe use with a wide range of appliances.
- Funcionamento silencioso: Operates completely silently, making it suitable for home use.
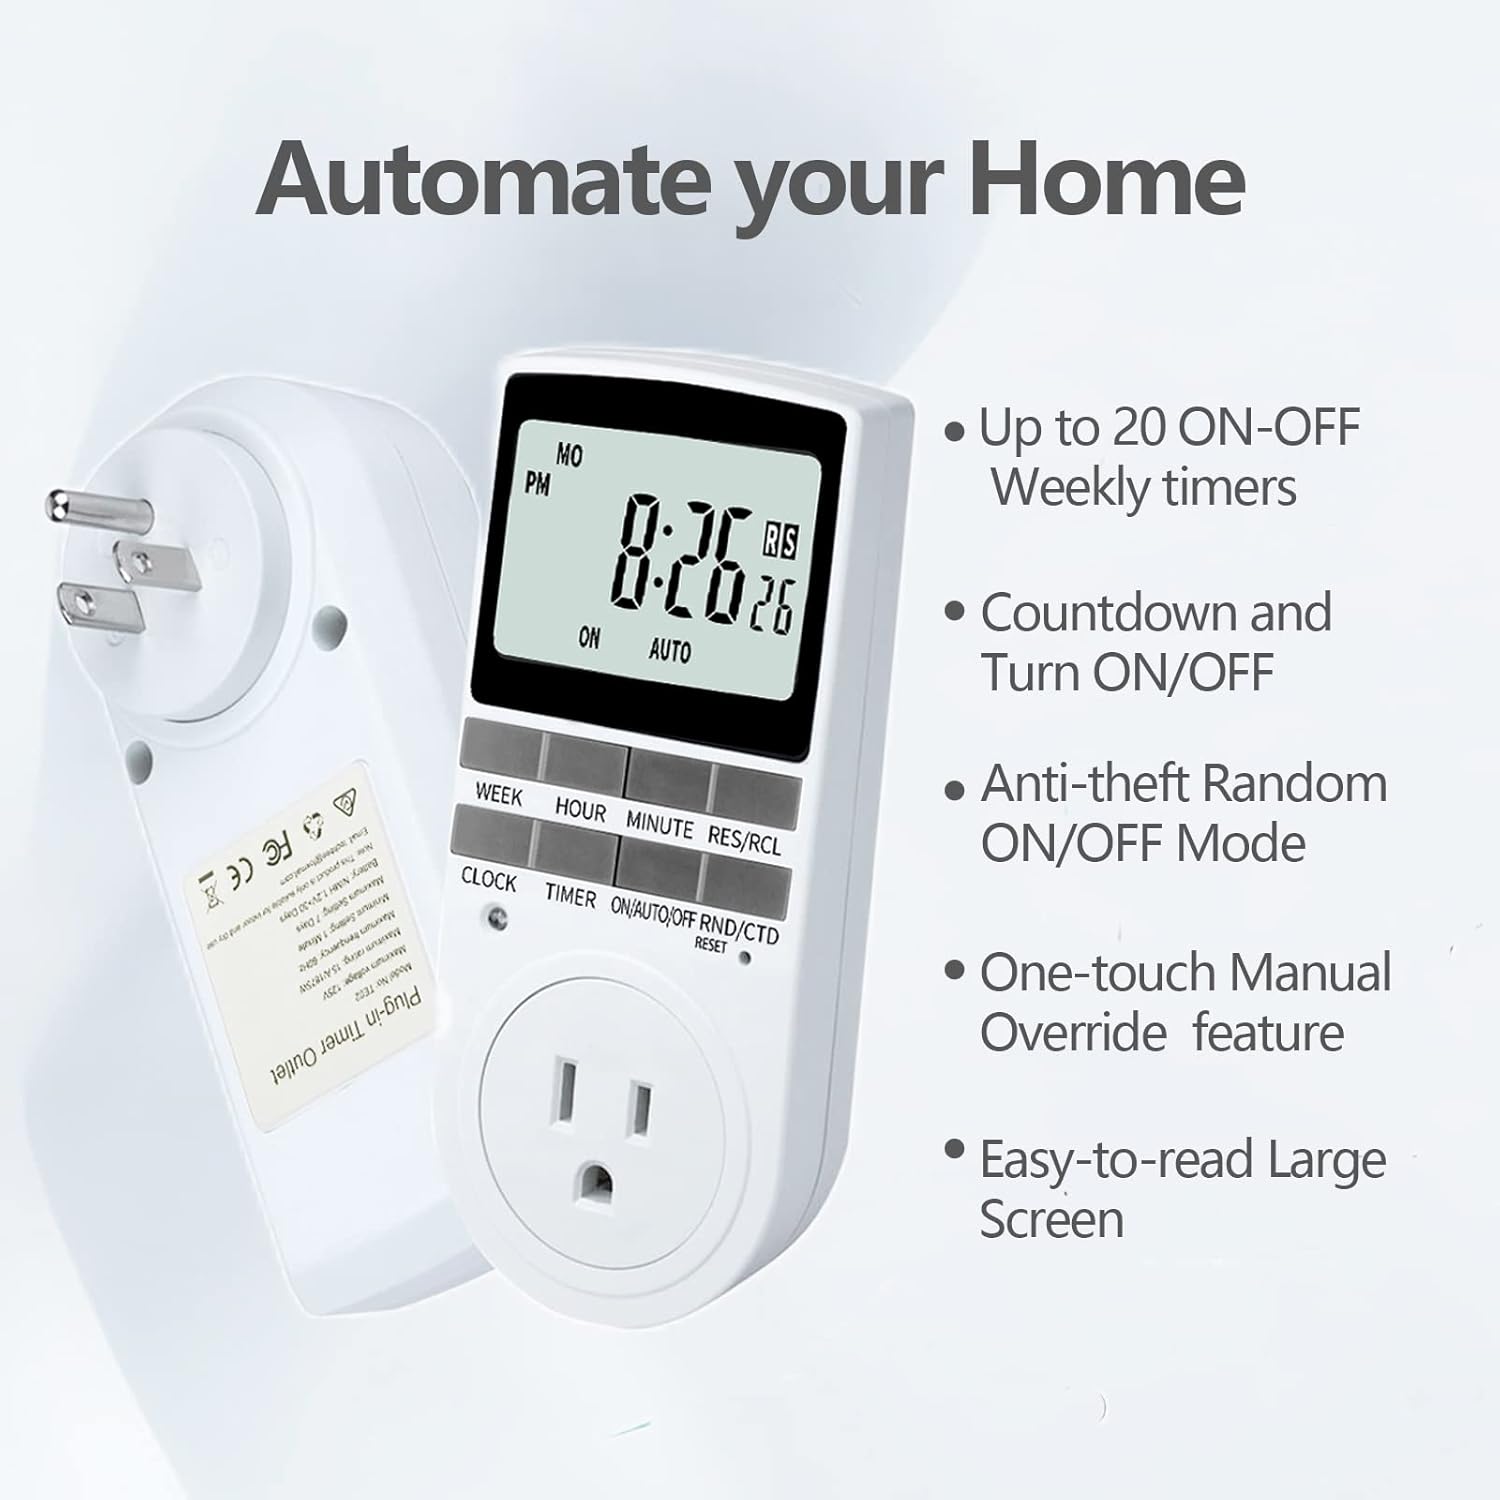
Figure 2.1: Key features of the Techbee TE02 Digital Timer Plug.
3. Especificacións
| Especificación | Valor |
|---|---|
| Número de modelo | TE02 |
| Vol. Máximotage | 125 V |
| Valoración máxima | 15A / 1875W |
| Frecuencia máxima | 60 Hz |
| Minimum Setting Interval | 1 Minute (1 second for countdown) |
| Maximum Setting Duration | 7 días |
| Tipo de batería | NiMH 1.2V (retains settings >30 days) |
| Número de configuracións | 20 ON-OFF programs |

Figure 3.1: Technical data and features as displayed on the product packaging.
4. Configuración
Before initial use, it is recommended to plug the timer into a live outlet for at least 30 minutes to charge the internal battery. This ensures that the timer retains its settings even if unplugged or during a power outage.
- Unpack the timer plug and included instruction manual.
- Locate a standard 125V grounded electrical outlet.
- Plug the Techbee TE02 timer directly into the wall outlet. The display should illuminate.
- Preme o RESET button (usually a small recessed button) using a non-metallic pointed object (like a pen tip) to clear all previous settings and ensure proper function.
- Proceed to set the current time and day as described in the 'Operating Instructions' section.

Figure 4.1: The Techbee TE02 Digital Timer Plug ready for setup.
Vídeo 4.1: Un overview of the Techbee TE02 timer plug, including unboxing and initial setup steps.
5. Instrucións de funcionamento
5.1. Axuste da hora e do día actuais
- Preme o RELOXO button. The display will show the current time.
- Mentres sostén o RELOXO botón, prema SEMANA to set the current day (MO, TU, WE, TH, FR, SA, SU).
- Mentres sostén o RELOXO botón, prema HORA to set the current hour (12-hour or 24-hour format).
- Mentres sostén o RELOXO botón, prema MINUTO para configurar o minuto actual.
- Soltar o RELOXO botón para gardar a configuración.
5.2. Programming ON/OFF Times (Up to 20 Programs)
- Preme o TEMPORIZADOR button to enter programming mode. The display will show "1 ON".
- Preme SEMANA to select the day(s) for this program (e.g., MO, TU, WE, TH, FR, SA, SU, or various combinations).
- Preme HORA para axustar a hora de acendido desexada.
- Preme MINUTO para axustar o minuto de acendido desexado.
- Preme TEMPORIZADOR de novo. A pantalla mostrará "1 OFF".
- Repita os pasos 2-4 para axustar a hora de apagado desexada para este programa.
- Continúa presionando TEMPORIZADOR to cycle through programs "2 ON", "2 OFF" up to "20 ON", "20 OFF", setting each as needed.
- Despois de configurar todos os programas desexados, prema o botón RELOXO botón para saír do modo de programación e volver á visualización da hora actual.

Figure 5.1: Programming the timer for daily routines.
5.3. Función de conta atrás
The countdown function allows the timer to turn ON or OFF after a specified duration.
- Preme o ON/AUTO/OFF RND/CTD button repeatedly until "CTD" appears on the display.
- Preme HORA, MINUTO, e RES/RCL (for seconds) to set the desired countdown duration.
- Preme TEMPORIZADOR to start the countdown. The display will show the remaining time.
- Once the countdown reaches zero, the connected appliance will either turn ON or OFF, depending on its initial state.

Figure 5.2: Setting a countdown timer to turn an appliance ON or OFF.
5.4. Random Function (Anti-theft Mode)
The random function helps deter intruders by turning connected lights or appliances ON and OFF at irregular intervals.
- Preme o ON/AUTO/OFF RND/CTD button repeatedly until "RND" appears on the display.
- The timer will now randomly turn the connected appliance ON and OFF within a set time window (typically 6 PM to 6 AM, but the Techbee TE02 offers random from any time).
- Para desactivar, prema a tecla ON/AUTO/OFF RND/CTD button again until "AUTO" or "ON"/"OFF" is displayed.

Figure 5.3: Utilizing the random function for home security.
5.5. Anulación manual
You can manually switch the timer's output state without affecting the programmed settings.
- Preme o ON/AUTO/OFF RND/CTD botón para percorrer os modos: ON (sempre aceso), AUTO (follows programs), DESACTIVADO (always off), RND (random), CTD (countdown).
- Seleccione ON or DESACTIVADO for immediate control. The timer will remain in this state until manually changed or switched back to AUTO.
6. Mantemento
- Limpeza: Desconecte o temporizador da toma de corrente antes de limpalo. Limpe o exterior cun pano suave e seco. Non empregue produtos de limpeza líquidos nin materiais abrasivos.
- Almacenamento: If storing the timer for an extended period, ensure the internal battery is charged by plugging it in for a few hours every few months. Store in a cool, dry place away from direct sunlight and extreme temperatures.
- Batería: The internal NiMH battery is designed for long-term use and retains settings for over 30 days. It is not user-replaceable.
7 Solución de problemas
- A pantalla do temporizador está en branco:
- Asegúrate de que o temporizador estea conectado correctamente a unha toma de corrente activa.
- The internal battery might be fully discharged. Plug the timer in for at least 30 minutes to charge it.
- Programas que non se activan:
- Verifique que a hora e o día actuais estean configurados correctamente.
- Check that the timer is in AUTO modo.
- Ensure the ON/OFF programs are set correctly and do not overlap in an unintended way.
- Confirm the connected appliance is functioning correctly and its power switch is in the ON position.
- Timer Not Responding to Buttons:
- Perform a full reset by pressing the RESET button with a pointed object. You will need to re-enter all settings after a reset.
- Appliance Does Not Turn ON/OFF with Countdown:
- Asegúrate de que o temporizador estea activado CTD mode and the countdown duration is set.
- Verify the connected appliance is working and its power switch is ON.
8. Garantía e soporte
For warranty information, technical support, or any inquiries regarding your Techbee TE02 Digital Timer Plug, please refer to the official documentation provided with your product or visit the official Techbee store.
You can find additional support and product information by visiting the Techbee Store on Amazon.
A detailed PDF instruction manual is also available for download: Instrucións de uso (PDF).