
1. Introdución
This manual provides essential instructions for the safe and efficient operation, maintenance, and troubleshooting of your Cecotec Cumbia Power Matic-ccino 9000 S automatic coffee machine. Please read this manual thoroughly before first use and keep it for future reference.
The Cecotec Cumbia Power Matic-ccino 9000 S is a mega-automatic coffee machine featuring a Plug&Play system, designed to prepare a wide variety of coffees with a single touch. It offers 20 types of hot beverages, including espresso, ristretto, lungo, doppio, americano, latte, flat white, latte macchiato, cortado, hot milk, and cappuccino.
Key features include a Custom Coffee System for personalizing intensity, temperature, pressure, coffee quantity, milk, cream, and foam, as well as the pouring order. The machine can memorize your favorite coffee settings for quick access. It incorporates a rapid Thermoblock heating system for optimal temperature and a powerful 19-bar ForceAroma pressure pump for maximum cream and aroma. The All Cappuccino System automatically adds milk or foam for perfect lattes and cappuccinos.
The machine is equipped with a high-quality, interactive touch control panel, a 250g bean reservoir with an airtight lid, an integrated conical grinder with 5 grinding levels, and a removable 1.7L water tank. It also includes a 500ml Full Latte milk tank accessory and features an adjustable coffee spout (10.5 cm to 15 cm) and a cup warmer tray.

Imaxe 1.1: Acabadoview of the Cecotec Cumbia Power Matic-ccino 9000 S coffee machine, showing two cups of coffee being dispensed and the milk tank.
2. Instrucións de seguridade
Siga sempre as precaucións de seguridade básicas ao usar electrodomésticos para reducir o risco de incendio, descarga eléctrica e lesións.
- Le todas as instrucións antes de usar.
- Non mergulle o aparello, o cable de alimentación nin o enchufe en auga ou outros líquidos.
- Asegurar o voltagO voltaxe indicado no aparello coincide coa tensión da rede eléctrica localtage.
- Manteña o aparello fóra do alcance dos nenos.
- Desenchufe o aparello da toma de corrente cando non estea en uso e antes de limpalo.
- Non faga funcionar o aparello cun cable ou enchufe danados.
- Non use accesorios non recomendados polo fabricante.
- Use o aparello só para o uso doméstico previsto.
- Evite o contacto con superficies quentes.
3. Compoñentes do produto
Familiarízate coas partes principais da túa máquina de café:
- Control Panel / Touch Screen
- Coffee Bean Hopper with Airtight Lid
- Water Tank (Removable, 1.7L capacity)
- Coffee Spout (Adjustable height)
- Drip Tray and Grids
- Recipiente de café molido
- Milk Tank (Full Latte, 500ml capacity)
- Bandexa quentadora de copas
- Cable de alimentación

Image 3.1: Close-up of the interactive touch control panel, showing beverage selection options.
4. Configuración
4.1 Desembalaxe e colocación inicial
- Retire con coidado todos os materiais de embalaxe.
- Place the machine on a stable, flat, heat-resistant surface, away from water sources and direct heat.
- Garantir unha ventilación adecuada ao redor do aparello.
4.2 Limpeza inicial
- Wash the removable water tank, milk tank, drip tray, and ground coffee container with warm, soapy water. Rinse thoroughly and dry.
- Limpe o exterior da máquina cun anuncioamp pano.
4.3 Enchendo o depósito de auga
- Retire o depósito de auga de 1.7 litros da parte traseira da máquina.
- Fill it with fresh, cold tap water up to the MAX level indicator.
- Reinsert the water tank securely into its position.
4.4 Encher o depósito de grans
- Open the airtight lid of the coffee bean hopper located on top of the machine.
- Verte grans de café frescos no depósito. Non o enchas demasiado.
- Close the lid firmly to preserve aroma.
4.5 Connecting the Milk Tank (Optional)
- If preparing milk-based beverages, fill the 500ml Full Latte milk tank with fresh milk.
- Connect the milk tank to the designated port on the coffee machine as per the diagram in the quick start guide.
4.6 Primeiro uso / Imprimación
- Conecte a máquina a unha toma de corrente con conexión a terra.
- Follow the on-screen instructions for the initial priming cycle. This typically involves dispensing hot water to rinse the internal circuits.
5. Instrucións de funcionamento
5.1 Encendido/apagado
- Press the power button on the touch screen to turn the machine on. It will perform a brief self-cleaning cycle.
- To turn off, press the power button again. The machine will perform a final rinse before shutting down.
5.2 Selecting a Beverage
- On the touch screen, browse through the 20 available beverage options.
- Tap on your desired drink (e.g., Espresso, Latte, Cappuccino).
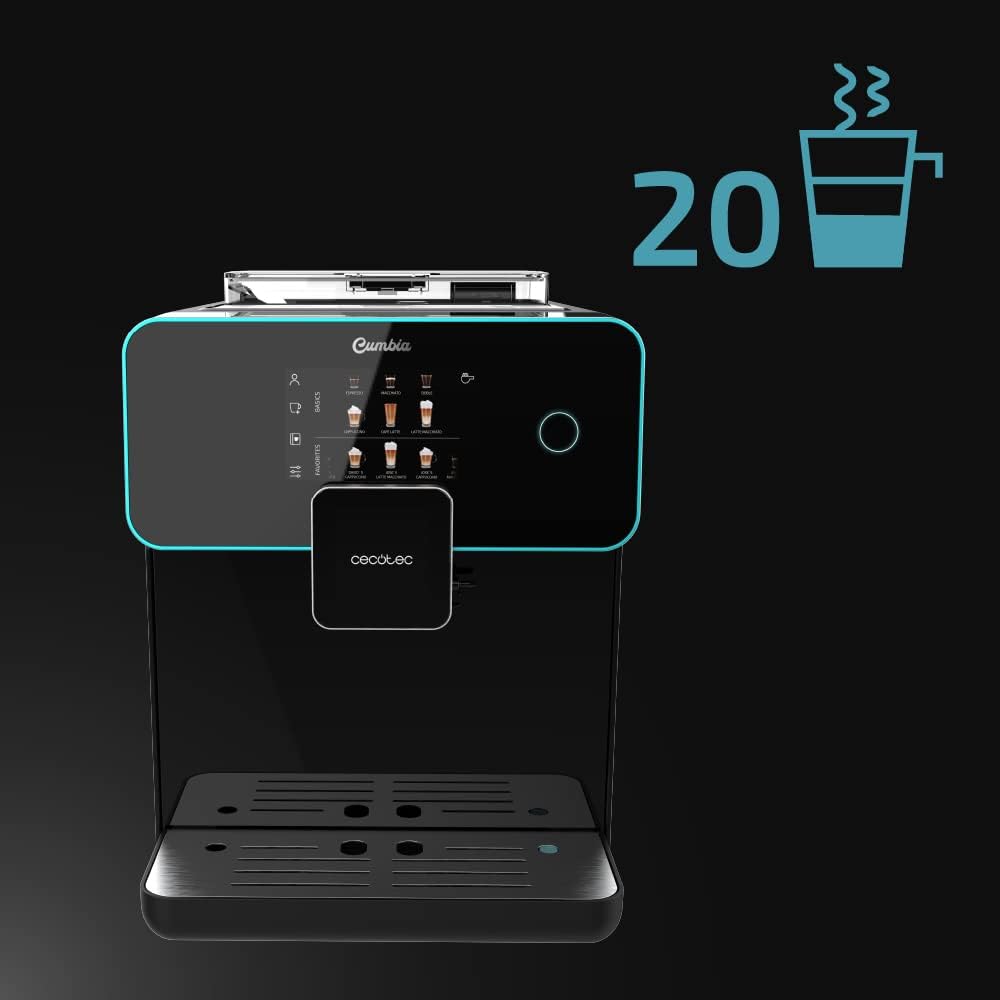
Image 5.1: The touch screen displaying the wide selection of 20 hot beverages available.
5.3 Customizing Beverages (Custom Coffee System)
- After selecting a drink, the Custom Coffee System interface will appear.
- Adjust parameters such as coffee intensity, temperature, pressure, coffee quantity, milk quantity, and foam level using the on-screen sliders.
- You can also customize the pouring order (e.g., milk first or coffee first).
- Confirm your selections to start brewing.

Image 5.2: The 'Custom Coffee' interface, allowing users to personalize various aspects of their drink.
5.4 Saving Favorite Coffees
- After customizing a beverage, you can save it as a favorite for quick access.
- Follow the on-screen prompt to name and save your personalized drink. It will appear on the main screen under your profile.

Image 5.3: Icon indicating the ability to save up to 10 user profiles or favorite drink settings.
5.5 Adjusting Spout Height
- The coffee spout can be adjusted vertically from 10.5 cm to 15 cm.
- Manually slide the spout up or down to fit your cup size, from small espresso cups to tall breakfast mugs.
5.6 Using the Cup Warmer Tray
- Place cups on the designated cup warmer tray on top of the machine.
- This feature helps maintain coffee temperature and enhances aroma and cream.
6. Mantemento
Unha limpeza e un mantemento regulares garanten un rendemento óptimo e unha maior duración da súa máquina de café.
6.1 Limpeza diaria
- Bandexa de goteo: Baleirar e enxaugar a bandexa de goteo e a grella diariamente.
- Recipiente de café moído: Empty the ground coffee container when prompted or daily to prevent mold growth.
- Sistema de leite: After each milk-based beverage, perform a quick rinse cycle for the milk system as prompted by the machine. For thorough cleaning, disassemble and wash the milk tank and frothing components with warm, soapy water.
6.2 Limpeza do depósito de auga
- Clean the water tank weekly with warm, soapy water. Rinse thoroughly to remove any soap residue.
6.3 Bean Hopper and Grinder Maintenance
- Periodically empty the bean hopper and wipe it clean with a dry cloth. Ensure no coffee residue accumulates.
- The integrated conical grinder has 5 grinding levels. Adjust as needed for your preferred coffee strength. Refer to the on-screen menu for grinder adjustment options.
6.4 Descalcificación
- A máquina indicará cando sexa necesario descalcificar.
- Use a descaling solution recommended by Cecotec and follow the on-screen instructions for the descaling process.
- Regular descaling is crucial for maintaining machine performance and coffee quality, especially in areas with hard water.

Image 6.1: Icon representing the machine's 'Always Clean' feature, highlighting its automatic cleaning cycles.
7 Solución de problemas
Esta sección aborda problemas comúns cos que podes atoparte. Para problemas que non aparecen na lista, ponte en contacto co servizo de atención ao cliente.
| Problema | Causa posible | Solución |
|---|---|---|
| Non se dispensa café | Depósito de auga baleiro; grans de café baleiros; unidade de preparación atascada. | Refill water tank; refill bean hopper; clean the brewing unit as per maintenance instructions. |
| O café é demasiado débil | Grind setting too coarse; insufficient coffee quantity; old coffee beans. | Adjust grinder to a finer setting; increase coffee intensity in Custom Coffee settings; use fresh coffee beans. |
| O leite non fai escuma correctamente | Milk tank or frothing components dirty; milk type unsuitable; milk temperature too high/low. | Clean milk tank and frothing system thoroughly; use cold, fresh milk (preferably semi-skimmed or full-fat); ensure milk is cold. |
| Mensaxe de erro na pantalla | Specific machine fault; component not correctly inserted. | Refer to the specific error code in the full manual (if available) or contact customer support. Ensure all removable parts are correctly seated. |
8. Especificacións
| Característica | Detalle |
|---|---|
| Marca | Cecotec |
| Número de modelo | 01644 |
| Cor | Serie Nera |
| Dimensións do produto (L x W x H) | 51.5 x 35.5 x 44 cm |
| Peso do elemento | 11.1 quilogramos |
| Capacidade do depósito de auga | 1.7 litros |
| Capacidade do tanque de leite | 500 ml (Full Latte accessory) |
| Poder | 1500 vatios |
| Bomba de presión | 19 Bars (ForceAroma Technology) |
| Capacidade da tolva de granos de café | 250 g |
| Tipo de moedor | Integrated Conical Grinder (5 levels) |
| Coffee Spout Height Adjustment | 10.5 cm a 15 cm |
| Características especiais | Milk Frother, Touch Control Panel, Thermoblock System, Custom Coffee System, Auto-off |
| Material | Plástico |
| Dispoñibilidade de Recambios | 10 Anos |
9. Garantía e soporte
9.1 Información da garantía
Your Cecotec Cumbia Power Matic-ccino 9000 S coffee machine is covered by a manufacturer's warranty. Please refer to the warranty card included with your product or visit the official Cecotec websitio web para obter termos e condicións detallados. Garda o comprobante de compra para reclamacións de garantía.
9.2 Atención ao cliente
For technical assistance, spare parts, or any questions regarding your product, please contact Cecotec customer support. Contact details can typically be found on the official Cecotec websitio ou na embalaxe do produto.