1. Introdución
This manual provides essential information for the safe and effective use of your Lovskoo Mini Video Projector. Please read these instructions thoroughly before operating the device and retain them for future reference.
2. Información de seguridade
- Non expoña o proxector á choiva nin á humidade para evitar incendios ou descargas eléctricas.
- Non abras a c.asing. Encomende todo o mantemento a persoal cualificado.
- Asegúrese de que haxa unha ventilación axeitada. Non bloquee as aberturas de ventilación.
- Use só o adaptador de corrente especificado para este dispositivo.
- Avoid direct eye exposure to the projector lens when the device is operating.
- Manteña o proxector lonxe de fontes de calor e da luz solar directa.
3. Contido do paquete
Verifica que todos os elementos estean presentes no paquete:
- Lovskoo Mini Video Projector (Host)
- Cable de alimentación USB
- Control remoto
- Manual de usuario
4. Produto rematadoview
Familiarize yourself with the components and dimensions of your projector.

Figura 4.1: Fronte view of the Lovskoo Mini Video Projector.

Figure 4.2: Dimensions of the Lovskoo Mini Video Projector (approximately 4.3 x 1.9 x 3.5 inches).
The projector features a compact design with a lens at the front and control buttons on the top surface. Connectivity ports are located on the sides or rear, typically including USB and a 3.5mm audio output.
5. Configuración
Follow these steps to set up your projector for first use:
- Conexión de alimentación: Connect the provided USB power cable to the projector's micro USB input and then to a compatible 5V 2A power source (e.g., a wall adapter or power bank).
- Colocación: Place the projector on a stable, flat surface. Ensure there are no obstructions in front of the lens. The recommended projection distance is 2-13.1 feet for a 14-100 inch screen size. For optimal viewing, a 9.32 feet distance is suggested for a 100-inch display.
- Encendido: Preme o botón de acendido do proxector ou do control remoto para acender o dispositivo.
- Axuste do foco: Adjust the focus ring (if available) near the lens until the projected image is clear and sharp.
Video 5.1: This video demonstrates the projector's capability to display various screen sizes (40" to 60") and shows the projector in different color variants. It illustrates the projection distance and how the image scales.
6. En funcionamento
Once powered on, the projector will display its main interface. Use the remote control or the buttons on the projector to navigate menus and select input sources.
6.1 Controis básicos
- Botón de encendido: Acende ou apaga o proxector.
- Botóns de navegación: Used to move through menu options (Up, Down, Left, Right).
- Botón Aceptar/Intro: Confirma as seleccións.
- Botón Atrás/Saída: Returns to the previous menu or exits the current function.
- Botóns de volume: Axusta o nivel de saída de audio.
6.2 Conectividade
The projector supports various input methods:
- Entrada USB: Connect a USB drive to play media files directamente.
- Saída de audio de 3.5 mm: Conecte altofalantes ou auriculares externos para mellorar o audio.
- Conexión de teléfono móbil: Connect your Android or iOS phone to the projector to mirror content. Specific connection methods (e.g., wired screen mirroring) may vary by phone model and require additional adapters (not included).

Figure 6.1: The projector can be powered by a mobile power supply (power bank) for portable use.
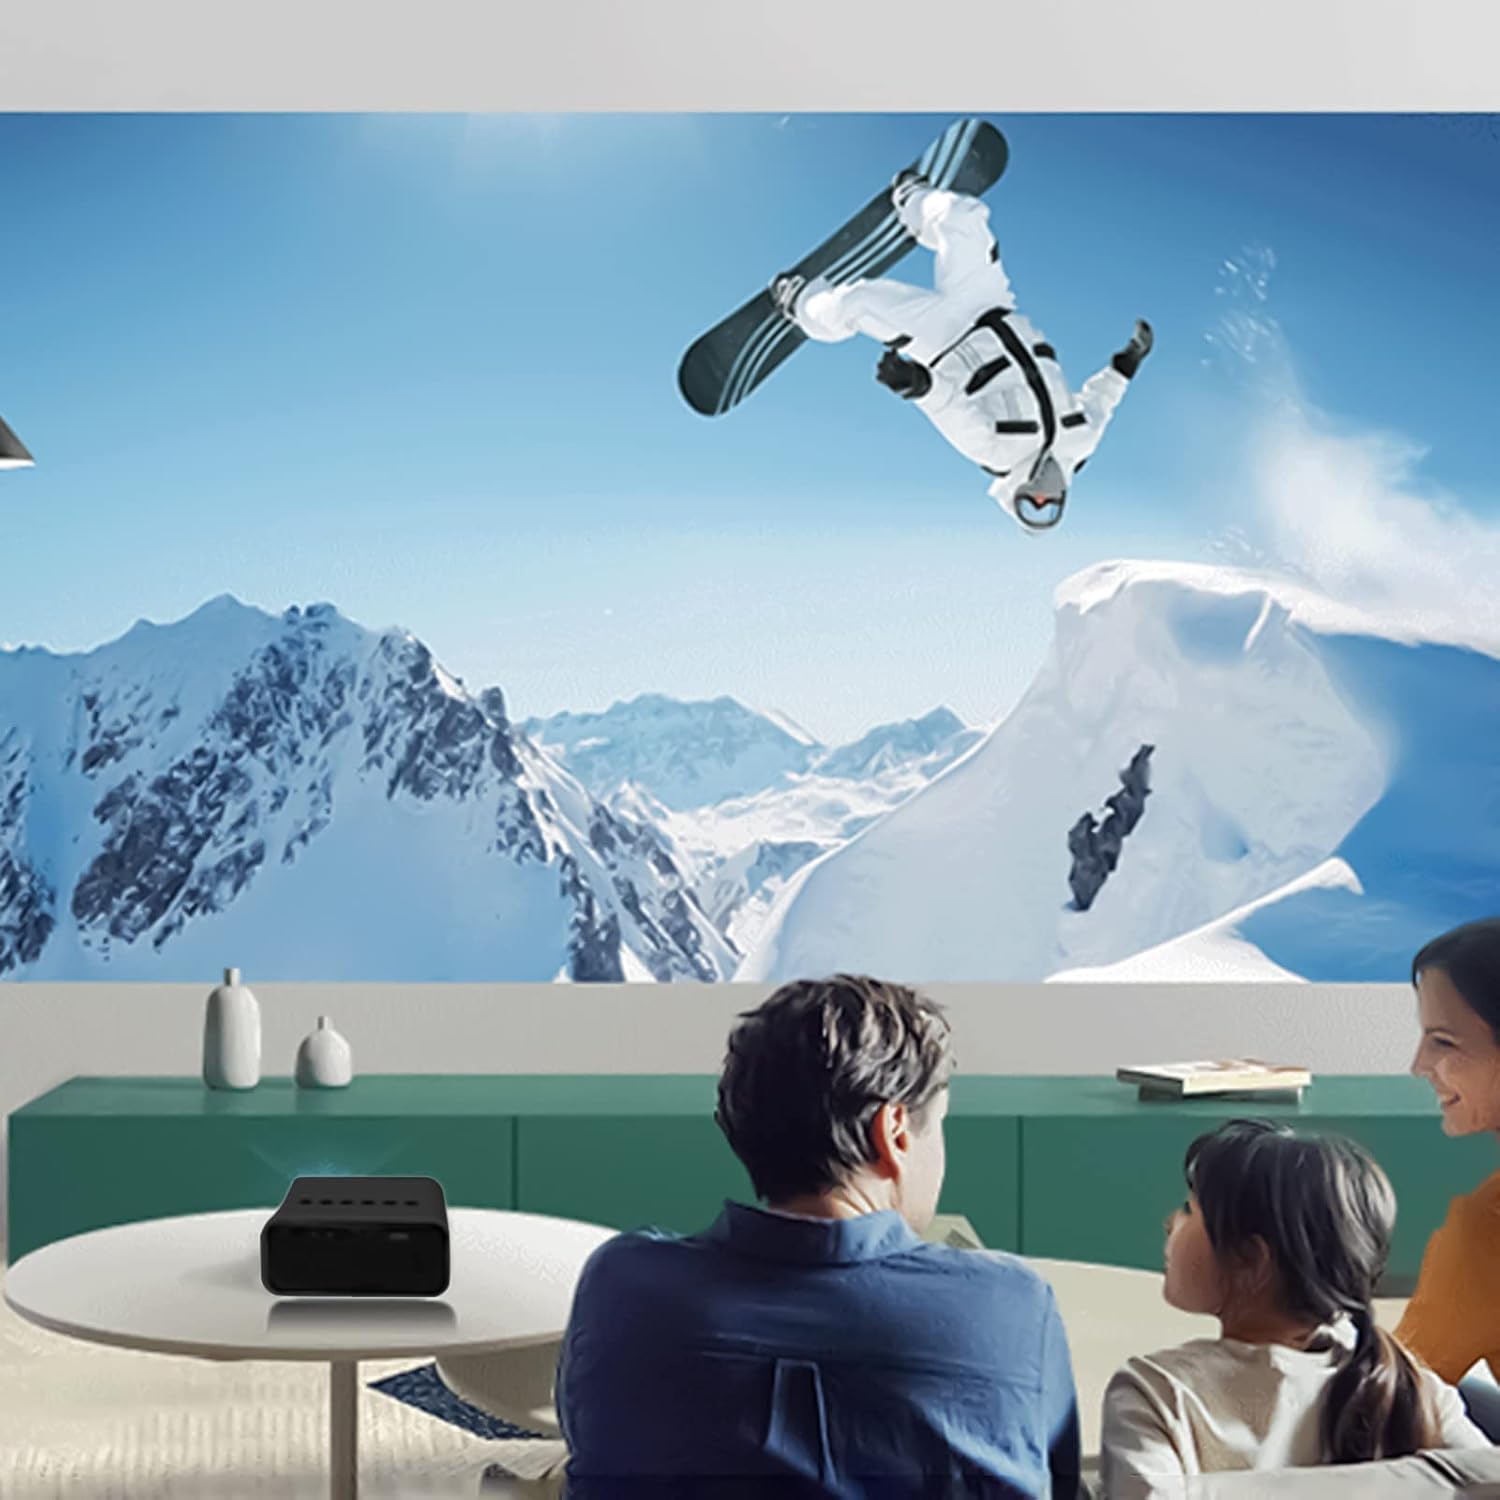
Figura 6.2: Example of indoor projection setup.

Figura 6.3: Example of outdoor projection setup, ideal for camping.
7. Mantemento
Un mantemento axeitado garante a lonxevidade e o rendemento do teu proxector.
- Limpeza de lentes: Usa un pano suave e sen fiapos deseñado especificamente para lentes ópticas para limpar con coidado a lente do proxector. Non empregues produtos de limpeza abrasivos nin forzas excesivas.
- Eliminación de po: Periodically clean the projector's exterior with a soft, dry cloth. Ensure ventilation openings are free from dust and debris.
- Almacenamento: Cando non o use, garde o proxector nun lugar fresco e seco, lonxe da luz solar directa e de temperaturas extremas.
8 Solución de problemas
Se tes problemas co teu proxector, consulta os seguintes problemas e solucións comúns:
| Problema | Causa posible | Solución |
|---|---|---|
| Sen Poder | Power cable not connected properly; faulty power source. | Ensure the USB power cable is securely connected. Try a different power adapter or USB port. |
| Sen Imaxe | Incorrect input source selected; lens cap on; focus issue. | Select the correct input source (e.g., USB). Remove any lens cap. Adjust the focus. |
| Imaxe borrosa | Desenfocado; distancia de proxección incorrecta. | Adjust the focus ring. Ensure the projector is within the recommended projection distance. |
| Sen son | Volume too low; external speakers not connected or faulty. | Increase the volume. Check external speaker connections if used. |
9. Especificacións
Key technical specifications for the Lovskoo Mini Video Projector:
- Modelo: Mini proxector de vídeo
- Resolución admitida: 1080P HD (1920 x 1080 Max)
- Resolución nativa: 320 x 180
- Tecnoloxía de visualización: LCD TFT
- Tamaño da proxección: 14-100 polgadas
- Distancia de proxección: 2-13.1 pés
- Vida LED: Ata 30,000 horas
- Consumo de enerxía: 10 W
- Voltage/Actual: 5V 2A
- Modo de control: Manual buttons / Remote control
- Interfaces: USB x 1, 3.5mm Audio Output x 1, Micro USB (Power Input)
- Dimensións: Approximately 4.3 x 1.9 x 3.5 inches (11 x 4.7 cm)
- Peso: Aproximadamente 11.3 onzas
- Altavoz incorporado: Si
10. Garantía e soporte
For warranty information and customer support, please refer to the documentation provided at the time of purchase or contact Lovskoo customer service through their official channels. Keep your purchase receipt as proof of purchase.