
CRUXGG 55854d46-84c5-48f2-8749-9927a6f8f352
MUSA 6.5 Qt. Air Pro Cook & Fry Pressure Cooker And Air Fryer User Manual
Model: 55854d46-84c5-48f2-8749-9927a6f8f352 | Brand: CRUXGG
Introdución
Welcome to the MUSA 6.5 Qt. Air Pro Cook & Fry Pressure Cooker and Air Fryer. This innovative appliance combines the functionality of a pressure cooker and an air fryer into a single, compact unit, designed to simplify your cooking process. With its versatile cooking modes, including Pressure Cook, Slow Cook, Air Fry, Roast, Bake, Broil, Steam, Sauté, Rice/Grains, Proof, and Dehydrate, you can prepare a wide variety of meals efficiently. This manual provides essential information for safe operation, setup, maintenance, and troubleshooting to ensure you get the most out of your appliance.
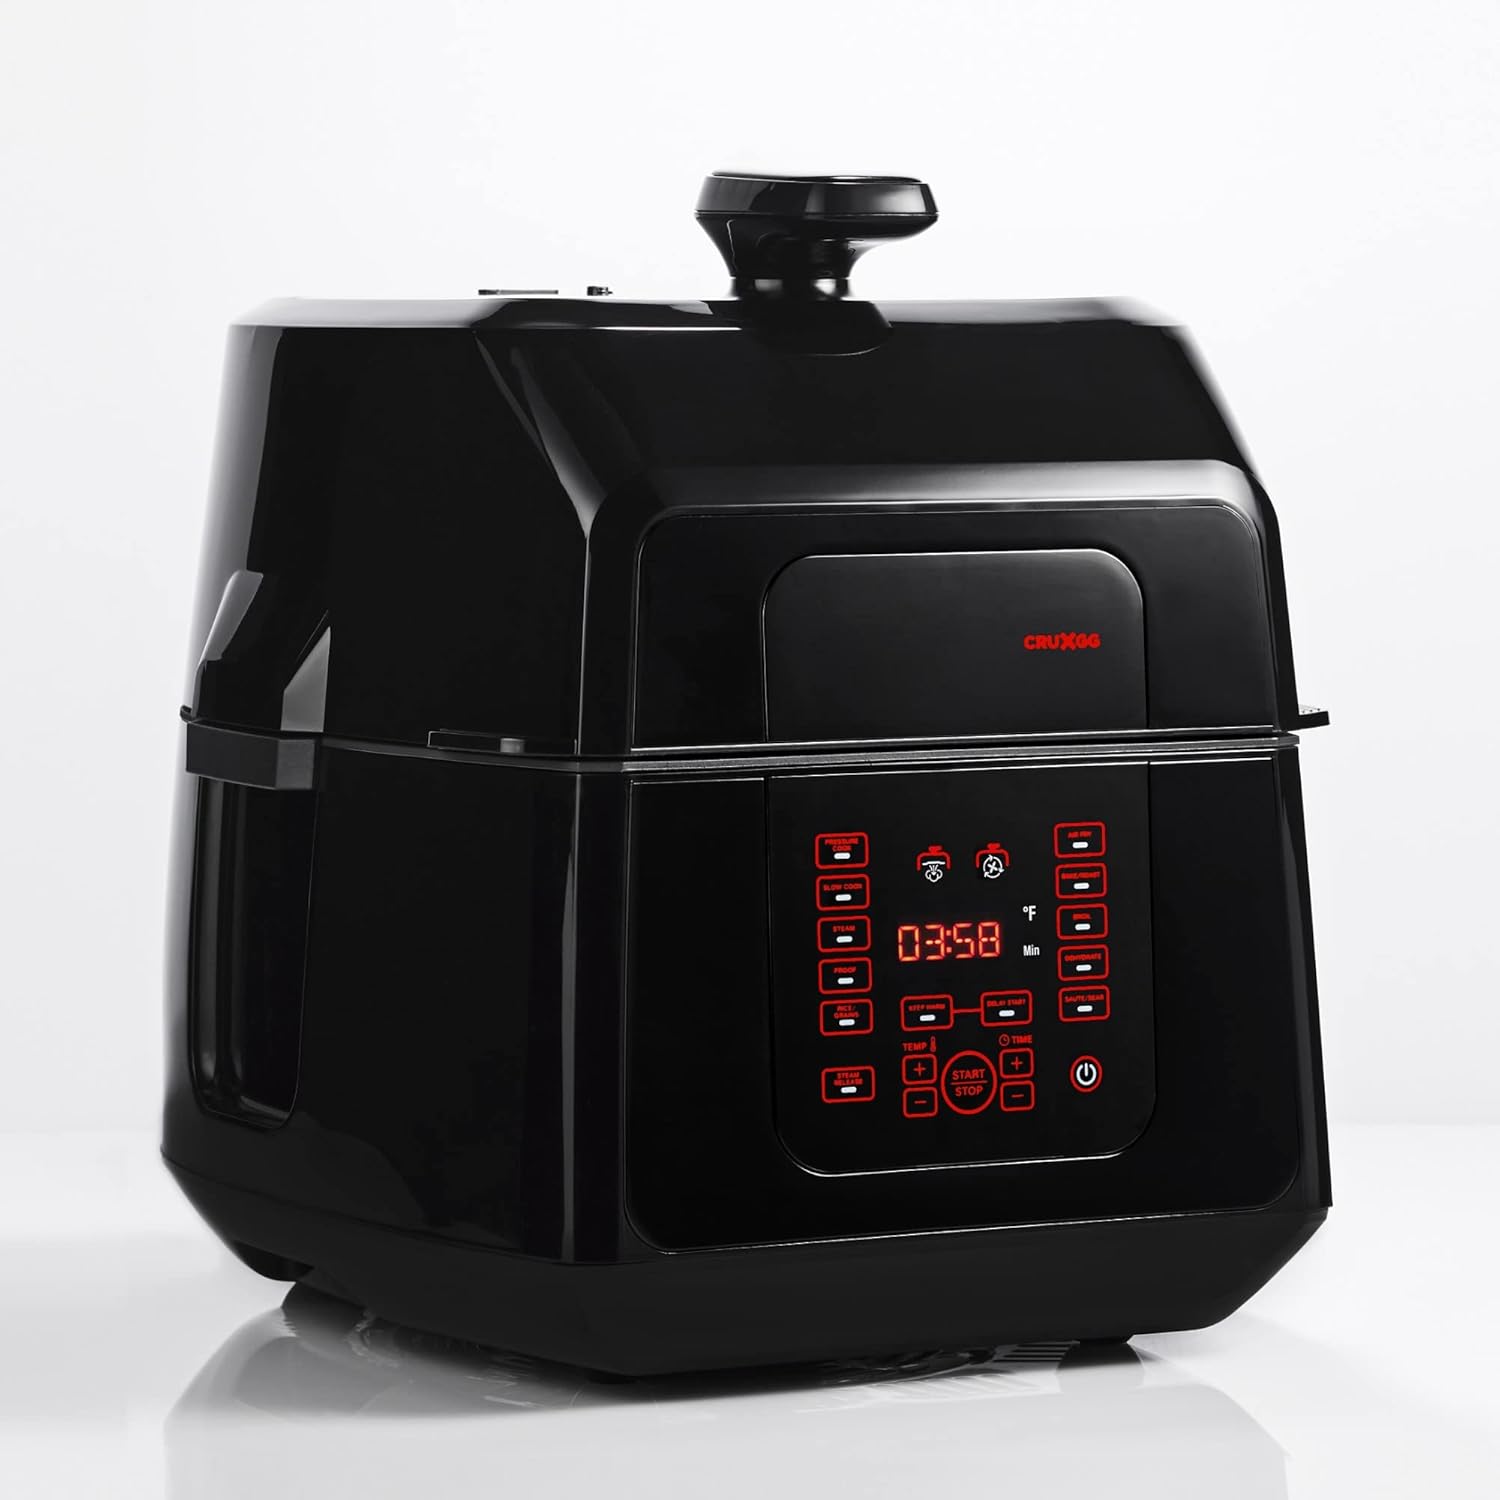
Figura 1: Fronte view of the MUSA 6.5 Qt. Air Pro Cook & Fry Pressure Cooker and Air Fryer.
Garantías importantes
Cando se utilicen aparellos eléctricos, deben seguirse sempre as precaucións básicas de seguridade para reducir o risco de incendio, descarga eléctrica e/ou lesións ás persoas, incluíndo as seguintes:
- Le todas as instrucións antes de usar o aparello.
- Non toque superficies quentes. Use asas ou botóns.
- Para protexerse contra descargas eléctricas, non mergulle o cable, os enchufes nin a unidade principal en auga ou noutro líquido.
- É necesaria unha estreita supervisión cando calquera aparello é usado por nenos ou preto de eles.
- Desenchufe da toma cando non estea en uso e antes de limpalo. Deixar arrefriar antes de poñer ou quitar pezas.
- Non faga funcionar ningún aparello cun cable ou enchufe danados, ou despois de que o aparello funcione mal ou teña dano dalgún xeito.
- O uso de accesorios non recomendados polo fabricante do aparello pode causar lesións.
- Non use ao aire libre.
- Non deixes que o cable colgue do bordo da mesa ou do mostrador nin toque superficies quentes.
- Non o coloque sobre ou preto dun queimador eléctrico ou de gas quente, nin nun forno quente.
- Débese ter moito coidado ao mover un aparello que conteña aceite quente ou outros líquidos quentes.
- Conecte sempre primeiro o enchufe ao electrodoméstico e, a seguir, o cable á toma de corrente. Para desconectalo, poña calquera control na posición de apagado e, a seguir, retire o enchufe da toma de corrente.
- Non use o aparello para outros usos que os previstos.
- Este aparello cociña a presión. Un uso inadecuado pode provocar lesións por escaldas. Asegúrese de que a unidade estea correctamente pechada antes de funcionar.
- Never force open the appliance. Ensure pressure is completely released before opening.
- Non enchas a unidade ata máis de 2/3 da súa capacidade. Ao cociñar alimentos que se expandan durante a cocción, como arroz ou verduras secas, non enchas a unidade ata máis de 1/2 da súa capacidade.
- Comprobe sempre se a válvula de liberación de presión e a válvula de flotación están obstruídas antes do uso.
Produto rematadoview
Compoñentes e accesorios
The MUSA Air Pro Cook & Fry comes with several key components and accessories to facilitate various cooking methods.
- Unidade principal: O aparello principal que alberga o elemento calefactor e o panel de control.
- Single-Lid Design: An innovative lid that easily switches between pressure cooking and air frying functions.
- 6.5-Qt. Nonstick Pressure Cooking Pot: The main cooking vessel with handles, featuring a PFOA/PFOS-free ultra-nonstick GG Red surface.
- 4-Qt. Crisping Basket: Used for air frying, roasting, and dehydrating.
- Reversible Steam Rack: For steaming and elevating food during pressure cooking.
- Pressure Plate Insert: Essential for pressure cooking operations.
- Air Fry Grate: Placed inside the crisping basket for optimal air circulation during air frying.
- Plate Handle: Para inserir e retirar accesorios quentes con seguridade.
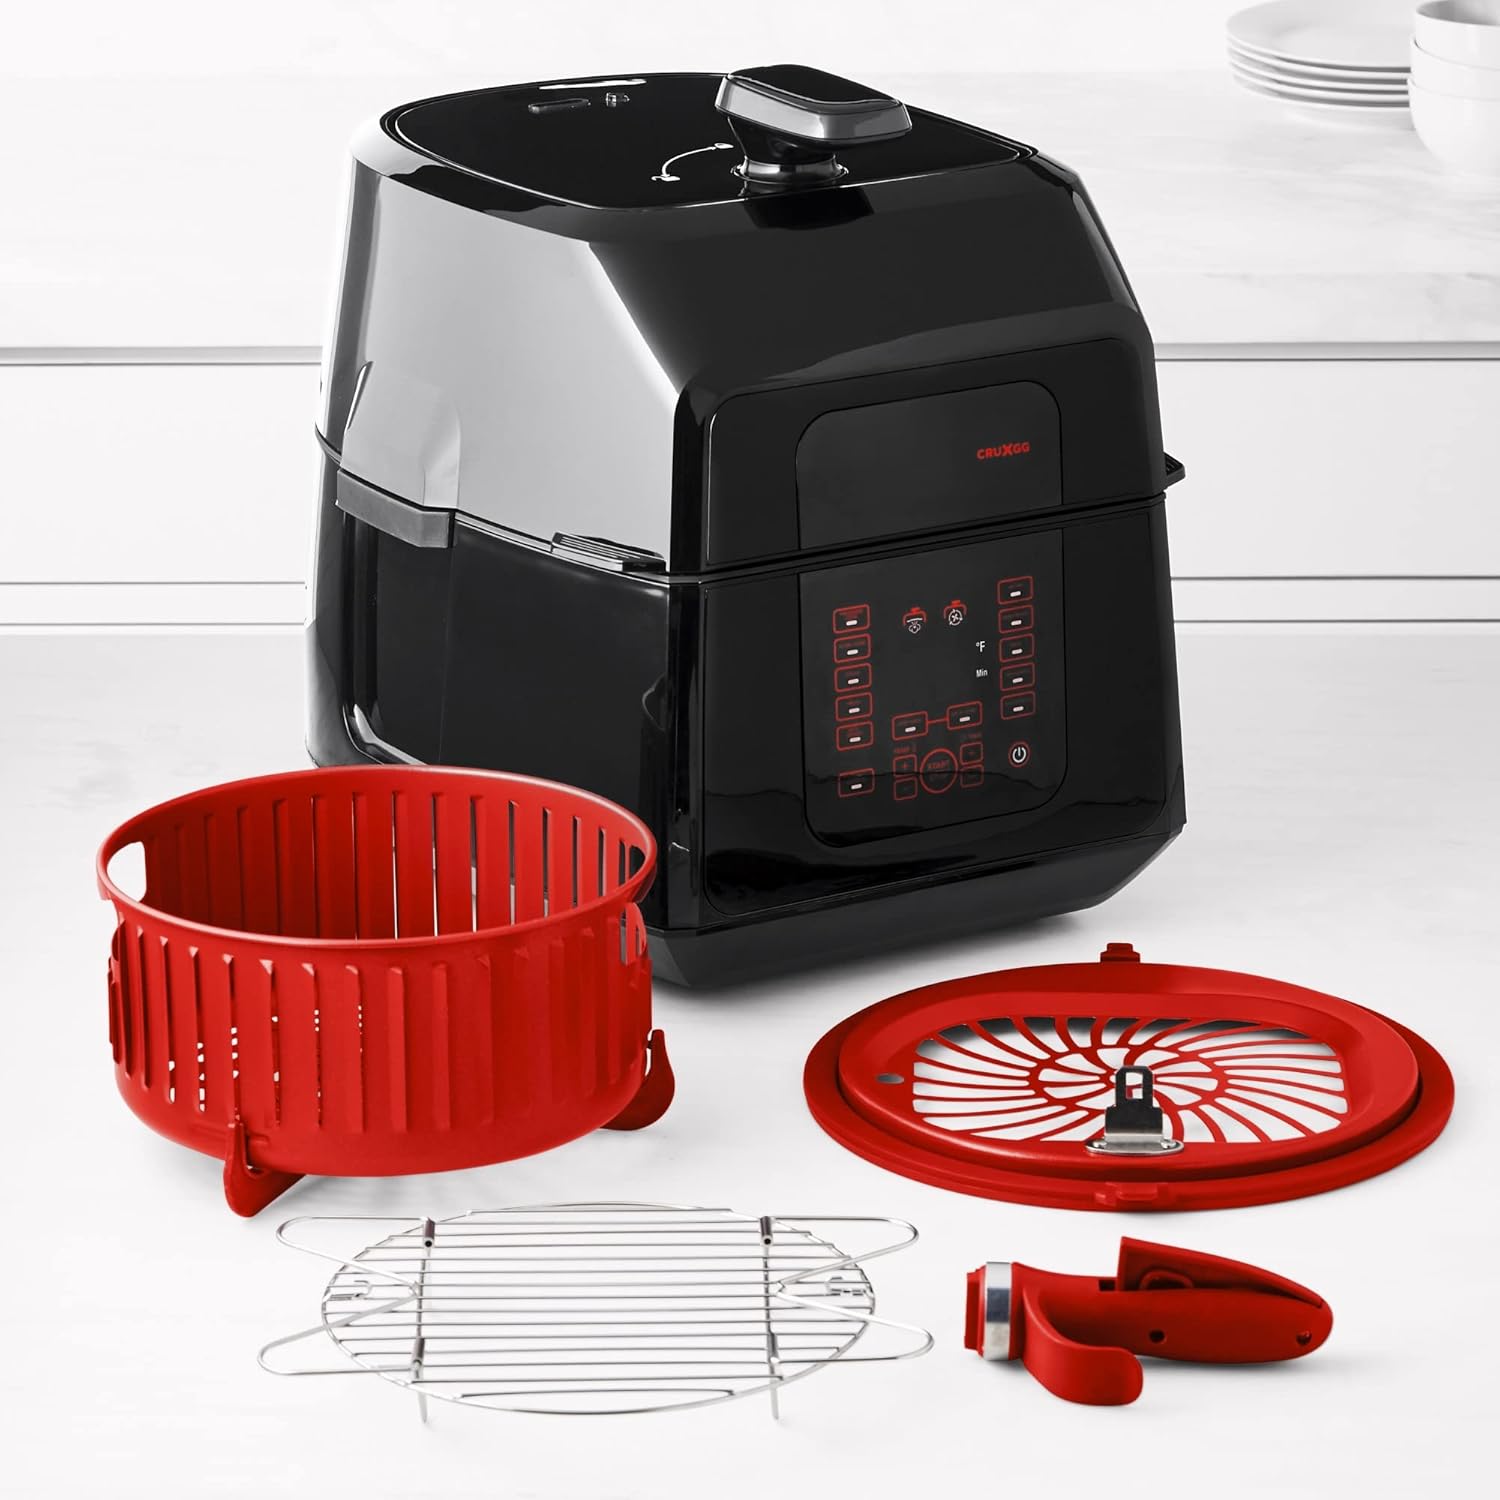
Figure 2: MUSA Air Pro Cook & Fry with its included accessories: pressure cooking pot, crisping basket, reversible steam rack, pressure plate insert, air fry grate, and plate handle.
Panel de control
The Signature GG Glow control panel features Precision Touch controls and a digital display for easy operation.
- Pantalla dixital: Shows cooking time, temperature, and status indicators.
- Botóns de función: Dedicated buttons for Pressure Cook, Slow Cook, Air Fry, Roast, Bake, Broil, Steam, Sauté, Rice/Grains, Proof, and Dehydrate.
- Botóns TEMP +/-: Axustar a temperatura de cocción.
- Botóns TEMPO +/-: Axustar o tempo de cocción.
- Botón START/STOP: Inicia ou cancela un programa de cocción.
- KEEP WARM Button: Mantén a temperatura dos alimentos despois da cocción.
- DELAY START Button: Define unha hora de inicio diferida para a cocción.
- STEAM RELEASE Button: Manually releases pressure after pressure cooking.
- Botón de encendido: Acende ou apaga o aparello.

Figura 3: detallada view of the Signature GG Glow control panel with Precision Touch controls.
Configuración e primeiro uso
- Desembalaxe: Carefully remove all components and accessories from the packaging. Retain packaging materials for future storage or transport if needed.
- Limpeza inicial: Before first use, wash the pressure cooking pot, crisping basket, steam rack, pressure plate insert, air fry grate, and plate handle in warm, soapy water. Rinse thoroughly and dry completely. Wipe the main unit with a damp pano. Non mergullo a unidade principal na auga.
- Colocación: Place the appliance on a stable, level, heat-resistant surface, away from walls or other appliances to allow for proper air circulation. Ensure there is adequate space above and around the unit.
- Conexión de alimentación: Conecta o cable de alimentación a unha toma de corrente con conexión a terra. A pantalla dixital iluminarase.
- Lid Orientation: Familiarize yourself with the single-lid design. The lid can be positioned for pressure cooking (sealed) or air frying (vented, or removed for certain functions).
Instrucións de funcionamento
Cociña a presión
- Place the pressure cooking pot into the main unit.
- Add ingredients and the required liquid to the pot. Ensure the liquid level is at least 1 cup for proper pressure build-up. Do not exceed the MAX fill line (2/3 full, or 1/2 full for expanding foods).
- Place the pressure plate insert over the food if required by the recipe.
- Close the lid, ensuring it is properly sealed for pressure cooking. The lid should click into place.
- Press the "Pressure Cook" button. The default time and temperature will appear.
- Use the "TEMP +/-" and "TIME +/-" buttons to adjust settings as needed.
- Press "START/STOP" to begin cooking. The unit will preheat and build pressure. Once pressure is reached, the float valve will rise, and the cooking timer will begin.
- Once cooking is complete, the unit will beep and may automatically switch to "KEEP WARM" mode.
- Liberación de presión:
- Liberación natural: Allow pressure to release naturally. This is suitable for foods that benefit from continued cooking or for foamy foods. The float valve will drop when pressure is fully released.
- Liberación rápida: Press the "STEAM RELEASE" button to quickly release pressure. Keep hands and face away from the steam vent. Only use for recipes that specify quick release. The float valve will drop when pressure is fully released.
- Once pressure is fully released and the float valve has dropped, carefully open the lid.
Fritir ao aire
- Place the crisping basket into the main unit. If using, place the air fry grate inside the crisping basket.
- Add food to the crisping basket. Do not overfill; ensure air can circulate around the food.
- Close the lid, ensuring it is properly positioned for air frying (it may not seal completely like pressure cooking, allowing for air circulation).
- Press the "Air Fry" button. The default time and temperature will appear.
- Use the "TEMP +/-" and "TIME +/-" buttons to adjust settings as needed.
- Press "START/STOP" to begin cooking. The unit will preheat, and the fan will start.
- During cooking, you may pause the cycle to shake or flip food for even crisping. Close the lid to resume.
- Once cooking is complete, the unit will beep. Carefully open the lid and remove food using heat-resistant utensils.
Outros modos de cocción
The MUSA Air Pro Cook & Fry offers additional cooking modes. Refer to the specific function buttons on the control panel and adjust time/temperature as required by your recipe.
- Cociña lenta: Ideal for tenderizing meats and simmering stews over extended periods.
- Roast/Bake/Broil: Use with the crisping basket for oven-like results.
- Vapor: Requires liquid in the pot and the steam rack for healthy steaming.
- Saltear/Selar: Use the pressure cooking pot directly for browning ingredients before other cooking methods.
- Rice/Grains: Optimized settings for various grains.
- Proba: Provides a warm environment for dough rising.
- Deshidratar: Low-temperature cooking for drying fruits, vegetables, or jerky.

Figure 4: The MUSA Air Pro Cook & Fry in operation, demonstrating its versatility in meal preparation.
Mantemento e Limpeza
Regular cleaning and maintenance will extend the life of your MUSA Air Pro Cook & Fry and ensure optimal performance. Always unplug the appliance and allow it to cool completely before cleaning.
- Pote interior e accesorios: The 6.5-qt. nonstick pressure cooking pot, 4-qt. crisping basket, reversible steam rack, pressure plate insert, air fry grate, and plate handle are dishwasher-safe. For best results, hand wash with warm, soapy water and a non-abrasive sponge. Rinse thoroughly and dry completely.
- Tapa: Limpe a tapa co anuncioamp cloth. Pay attention to the sealing ring and float valve area, ensuring they are free of food debris. The sealing ring can be removed for thorough cleaning and should be reinserted correctly before next use.
- Unidade principal: Wipe the exterior of the main unit and the control panel with a soft, damp pano. Non empregue produtos de limpeza abrasivos nin estropaxos. Nunca mergulle a unidade principal en auga nin en ningún outro líquido.
- Almacenamento: Asegúrate de que todas as pezas estean limpas e secas antes de gardalo. Garda o aparello nun lugar fresco e seco.
Resolución de problemas
If you encounter issues with your MUSA Air Pro Cook & Fry, consult the table below for common problems and their solutions.
| Problema | Causa posible | Solución |
|---|---|---|
| A unidade non se acende. | Non conectado; problema coa toma de corrente; avaría da unidade. | Ensure cord is securely plugged into a working outlet. Check household circuit breaker. If problem persists, contact customer support. |
| Non se acumula presión durante a cocción a presión. | Lid not properly sealed; sealing ring not in place or damaged; insufficient liquid; steam release valve open. | Ensure lid is fully closed and locked. Check sealing ring for proper placement and damage. Add at least 1 cup of liquid. Ensure steam release valve is in the sealed position. |
| A comida non se croca durante a fritura ao aire. | Overcrowding the basket; insufficient cooking time/temperature; food not flipped. | Do not overcrowd the basket; cook in batches if necessary. Increase cooking time or temperature. Flip or shake food halfway through cooking. |
| Código de erro mostrado. | Problema interno específico. | Note the error code and refer to the full troubleshooting guide on the manufacturer's websitio ou póñase en contacto co servizo de atención ao cliente. |
Especificacións
| Número de modelo | 55854d46-84c5-48f2-8749-9927a6f8f352 |
| Marca | CRUXGG |
| Capacidade | 6.5 cuartos |
| Wattage | 1500 vatios |
| Dimensións (D x W x H) | 16.5" D x 13.25" W x 15.5" H |
| Material | Plastic (exterior), Nonstick (inner pot) |
| Cor | Negro |
| Método de control | Toca |
| Pezas seguras para lavalouzas | Inner pot, crisping basket, steam rack, pressure plate insert, air fry grate, plate handle |
| UPC | 829486149801 |
Garantía e Soporte
The MUSA 6.5 Qt. Air Pro Cook & Fry Pressure Cooker And Air Fryer is backed by a manufacturer's warranty. Please refer to the warranty card included with your purchase for specific terms and conditions, including warranty period and coverage details.
For technical support, troubleshooting assistance beyond this manual, or warranty claims, please contact CRUXGG Customer Service.
- Atención ao cliente: Refer to the contact information provided on the CRUXGG official websitio ou a embalaxe do produto.
- Recursos en liña: Visit the official CRUXGG website for FAQs, recipe ideas, and additional product information.
Documentos relacionados - 55854d46-84c5-48f2-8749-9927a6f8f352
 |
CRUXGG NEFI Air Fryer Toaster Oven: Comprehensive Instruction Manual Explore the full capabilities of the CRUXGG NEFI Air Fryer Toaster Oven with this detailed instruction manual. Learn about its versatile functions including air frying, toasting, baking, broiling, and dehydrating, along with essential safety guidelines, operation procedures, and maintenance tips for optimal performance. |
 |
CRUXGG TRNR Rotating Double Waffle Maker Instruction Manual Comprehensive instruction manual for the CRUXGG TRNR Rotating Double Waffle Maker, covering safety precautions, operating instructions, baking tips, maintenance, and warranty information. |
 |
CRUXGG 14-Cup Programmable Drip Coffee Maker Instruction Manual Learn how to operate, maintain, and troubleshoot your CRUXGG 14-Cup Programmable Drip Coffee Maker with this comprehensive instruction manual. Includes setup, brewing, cleaning, and safety guidelines. |
Ask a question about this manual
Ask about setup, troubleshooting, compatibility, parts, safety, or missing instructions. Manuals+ will review the question and use this page’s manual context to help answer it.