
1. Introdución
Grazas pola compraasing the ELAC Varro Dual Reference DS1200 Powered Subwoofer. This manual provides essential information for the proper setup, operation, and maintenance of your new subwoofer. Please read these instructions thoroughly before use to ensure optimal performance and safety.
2. Instrucións de seguridade
- Fonte de enerxía: Connect the subwoofer only to an AC power outlet of the specified voltage (100-240 V CA, 50/60 Hz).
- Ventilación: Ensure adequate ventilation around the subwoofer. Do not block any ventilation openings. Maintain a minimum distance of 4 inches (10 cm) from walls or other objects.
- Colocación: Place the subwoofer on a stable, level surface. Avoid placing it near heat sources, direct sunlight, or in areas with high humidity or dust.
- Auga e humidade: Do not expose the subwoofer to water or moisture. Do not place objects filled with liquids, such as vases, on or near the unit.
- Cables: Protexa os cables de alimentación para que non os pisen nin os aprisionen. Non tire do cable de alimentación para desconectalo da toma de corrente.
- Servizo: Non intente atender este produto vostede mesmo. Remita todo o servizo a persoal de servizo cualificado.
- Limpeza: Desconecte o cable de alimentación antes de limpalo. Use un pano suave e seco. Non empregue produtos de limpeza líquidos nin aerosois.
3. Contido do paquete
Comprobe que todos os elementos estean presentes na embalaxe:
- ELAC Varro Dual Reference DS1200 Powered Subwoofer
- Cable de alimentación
- Manual de usuario (este documento)
4. Produto rematadoview
Fronte View

Figura 4.1: Fronte view of the ELAC Varro DS1200 subwoofer, showcasing the 12-inch HEX surround woofer and gloss black finish.

Figura 4.2: Fronte view of the ELAC Varro DS1200 subwoofer with the protective grille attached, maintaining its sleek appearance.
Panel traseiro e conexións

Figure 4.3: Rear panel of the ELAC Varro DS1200 subwoofer, detailing the input/output options and controls.
The rear panel provides all necessary connections for integrating the subwoofer into your audio system. Key connections include:
- Entradas RCA: Standard unbalanced inputs for connecting to most AV receivers or pre-amplevantadores.
- Balanced XLR Inputs: Professional-grade balanced inputs for longer cable runs and reduced noise interference.
- Speaker-Level Inputs: Allows connection directly from your amplifier's speaker outputs, useful for systems without dedicated subwoofer outputs.
- Disparador de 12 V: For automatic power on/off synchronization with other components.
- Porto Ethernet: For third-party control systems and network connectivity.
- Porto USB: Para actualizacións de firmware.
- Entrada de alimentación: Para conectar o cable de alimentación incluído.
Lado View
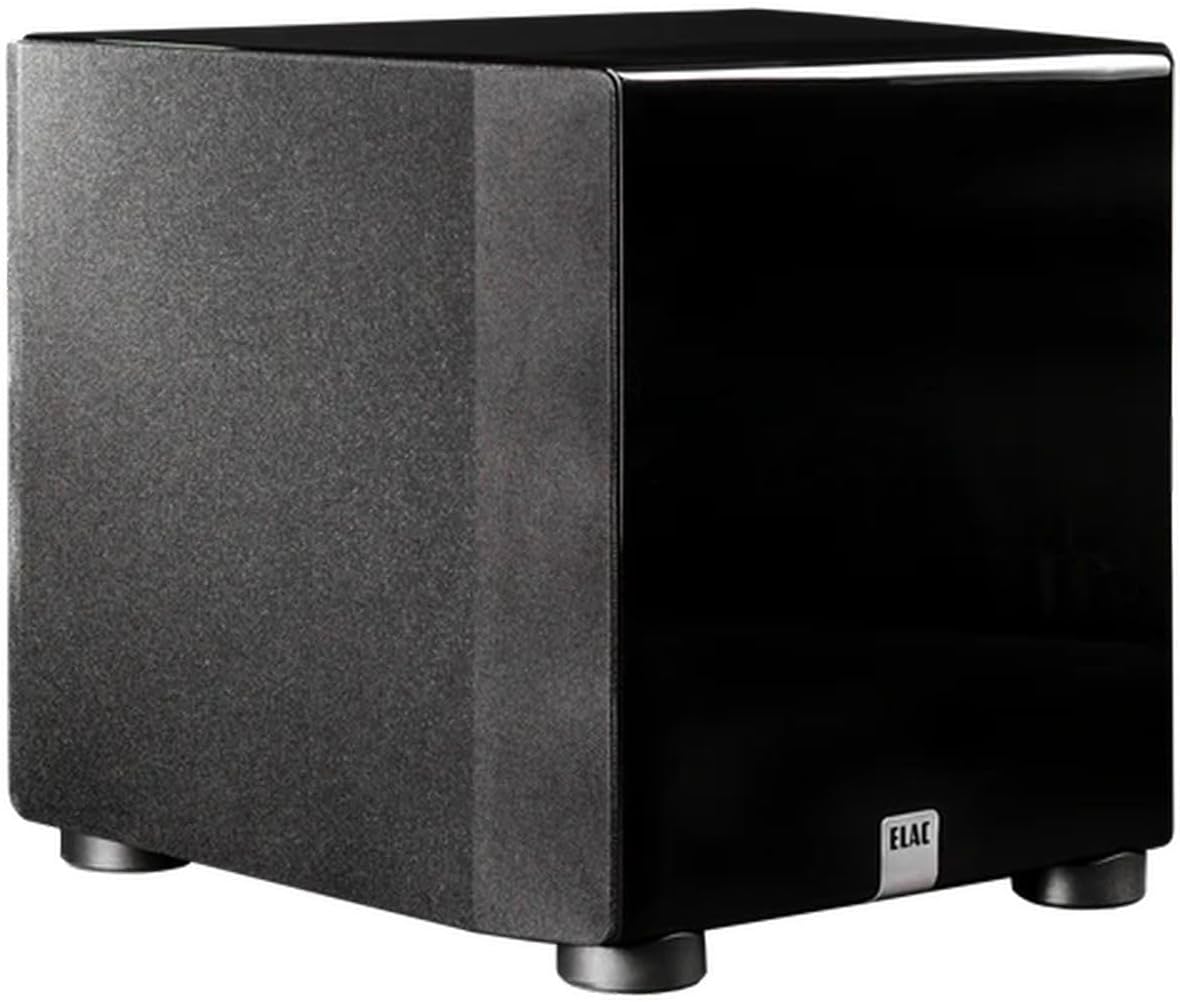
Figura 4.4: Lateral view of the ELAC Varro DS1200 subwoofer, highlighting its compact design with the grille in place.
5. Configuración
5.1 Colocación
Subwoofer placement significantly impacts bass performance. Experiment with different locations in your room to find the best balance of output and smoothness. Common placement options include:
- Colocación de cantos: Often provides the most output but can sometimes lead to boomy bass.
- Front Wall Placement: Near the main speakers, can improve integration with the front soundstage.
- Mid-Room Placement: Can offer smoother bass response but may require more power.
Consider using the 'subwoofer crawl' method: place the subwoofer in your primary listening position, play bass-heavy music, and crawl around the room to find where the bass sounds best. That location is often ideal for the subwoofer.
5.2 Conexión ao sistema
Ensure all audio equipment is powered off before making connections.
RCA/XLR Connection (Recommended for AV Receivers)
- Connect an RCA or XLR cable from your AV receiver's 'Subwoofer Out' or 'LFE Out' to the corresponding RCA or XLR input on the DS1200 subwoofer.
- If using a stereo pre-amplifier with a dedicated subwoofer output, connect it similarly.
Speaker-Level Connection (For Ampamplificadores sen saída de subwoofer)
- Conecte os cables dos altofalantes do seu amplifier's left and right speaker outputs to the 'Speaker Level Input' terminals on the DS1200.
- Then, connect your main speakers to the 'Speaker Level Output' terminals on the DS1200. Ensure correct polarity (+ to + and - to -).
5.3 Conexión de alimentación
- Connect the included power cord to the power inlet on the rear of the subwoofer.
- Conecte o outro extremo do cable de alimentación a unha toma de corrente alterna axeitada.
6. En funcionamento
6.1 Encendido inicial
After making all connections, switch on the power to the subwoofer. The power indicator light will illuminate. If your receiver has an auto-setup feature (e.g., Audyssey, MCACC, YPAO), run it now to calibrate the subwoofer with your system.
6.2 Axustes básicos
For initial listening, set the subwoofer's volume to a moderate level. Adjust the crossover frequency and phase settings as needed. For precise control and optimization, utilize the ELAC Varro App.
7. App Control and Auto EQ
The ELAC Varro DS1200 features advanced control and room correction capabilities via a dedicated smartphone application.
7.1 Descarga da aplicación
Download the 'ELAC Varro' app from the Apple App Store (for iOS devices) or Google Play Store (for Android devices).
7.2 Connecting to the Subwoofer
- Asegúrate de que o Bluetooth do teu teléfono intelixente estea activado.
- Open the ELAC Varro app. The app will search for available ELAC subwoofers.
- Select your DS1200 from the list to establish a connection.
7.3 Funcións da aplicación
The app provides comprehensive control over your subwoofer's settings, including:
- Control de volume: Precise adjustment of output level.
- Frecuencia de cruce: Set the upper frequency limit for the subwoofer.
- Control de fase: Adjust the phase to ensure seamless integration with your main speakers.
- EQ paramétrico: Fine-tune specific frequency bands to address room acoustics.
- Ecualizador automático: Utilizes your smartphone's microphone to measure and automatically correct the subwoofer's response for your room, optimizing bass performance.
8. Mantemento
8.1 Limpeza
To clean the subwoofer, first disconnect it from the power outlet. Use a soft, dry, lint-free cloth to wipe the surfaces. Avoid using abrasive cleaners, solvents, or chemical sprays, as these can damage the finish.
8.2 Coidados xerais
Periodically check all cable connections to ensure they are secure. Avoid placing heavy objects on the subwoofer or exposing it to extreme temperatures.
9 Solución de problemas
If you experience issues with your ELAC Varro DS1200 subwoofer, refer to the following common problems and solutions:
| Problema | Causa posible | Solución |
|---|---|---|
| Non hai son do subwoofer |
|
|
| Baixos distorsionados ou retumbantes |
|
|
| App cannot connect to subwoofer |
|
|
If the problem persists after trying these solutions, please contact ELAC customer support.
10. Especificacións
The following are the technical specifications for the ELAC Varro Dual Reference DS1200 Powered Subwoofer:
- Modelo: Varro Dual Reference DS1200
- Tipo de altofalante: Subwoofer alimentado
- Diámetro do woofer: Dobre de 12 polgadas
- AmpPoder máis vivo: 1200 Watts RMS (2400 Watts Peak)
- Resposta en frecuencia: 17Hz-150Hz (Anechoic) / 14Hz-150Hz (In-Room)
- Tecnoloxía de conectividade: Wired (RCA, XLR, Speaker Level, Ethernet, USB)
- Método de control: Control de aplicacións
- Características adicionais: App Control, Auto EQ, 12V Trigger
- Cor: Negro brillante
- Dimensións do artigo (D x W x H): Aproximadamente 25" x 22.25" x 25" (63.5 cm x 56.5 cm x 63.5 cm)
- Peso do artigo: 98 libras (44.45 kg)
- Fonte de enerxía: Eléctrico con cable
- Vol. De entradatage: 12 Volts (for trigger)
- UPC: 853720006698

Figure 10.1: Approximate dimensions of the ELAC Varro DS1200 subwoofer.
11. Garantía e soporte
11.1 Garantía limitada
The ELAC Varro Dual Reference DS1200 Powered Subwoofer comes with a 1 ano de garantía limitada. This warranty covers defects in materials and workmanship under normal use. Please retain your proof of purchase for warranty claims. The warranty does not cover damage caused by misuse, accident, unauthorized modification, or improper installation.
11.2 Atención ao cliente
For technical assistance, warranty inquiries, or service requests, please visit the official ELAC website or contact your authorized ELAC dealer. Please have your model number (DS1200) and serial number ready when contacting support.


