
1. Introdución
Thank you for choosing the TECKNET Wireless Doorbell. This manual provides detailed instructions for the installation, operation, and maintenance of your new doorbell system. Please read this manual thoroughly before use to ensure proper function and longevity of the product.
2. Contido do paquete
Please check the package contents carefully. If any items are missing or damaged, please contact TECKNET customer support.
- 1 receptor de timbre sen fíos
- 1 x Transmisor de timbre sen fíos (botón)
- Mounting Hardware (Screws, Wall Anchors, Adhesive Tape)
- 1 x Manual de usuario (este documento)
3. Características do produto
The TECKNET Wireless Doorbell offers a range of features designed for convenience and reliability:
- 60 Selectable Melodies: Choose from a wide variety of chimes.
- 5 niveis de volume axustables: Ranging from 0dB (silent with LED flash) to 90dB.
- Transmisor impermeable IP65: Deseñado para soportar diversas condicións meteorolóxicas no exterior.
- 400M (1300ft) Operating Range: Ensures reliable signal transmission across large homes or properties.
- Indicador de flash LED: Visual alert for visitors, especially useful in noisy environments or for hearing-impaired individuals.

Image: Features of the TECKNET Wireless Doorbell receiver, highlighting melody and volume options.
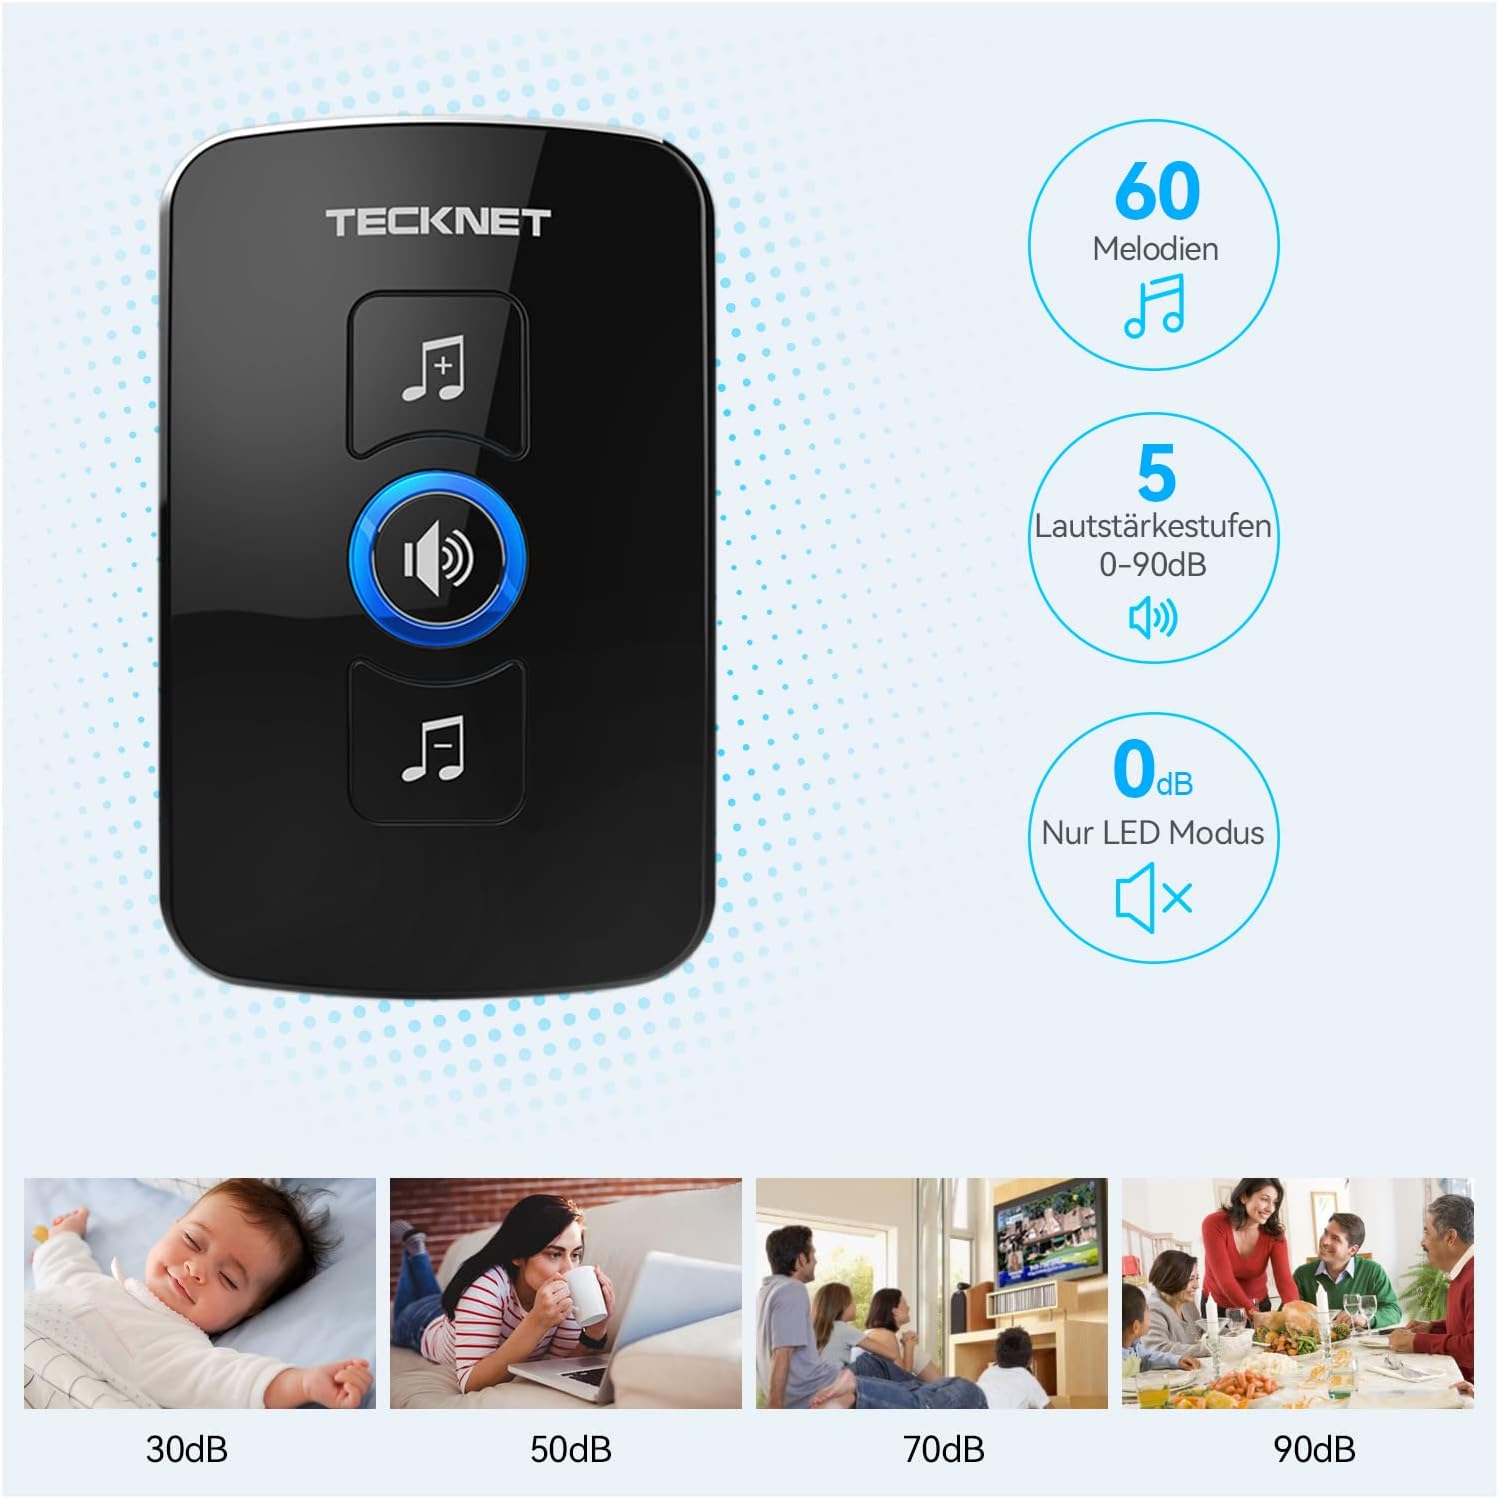
Image: The doorbell transmitter's IP65 waterproof rating and wide operating temperature range.
4. Configuración e instalación
Follow these steps to set up your TECKNET Wireless Doorbell system.
4.1 Instalación da batería do transmisor
- Locate the small notch on the side or bottom of the transmitter.
- Use a small flat-head screwdriver to gently pry open the back cover of the transmitter.
- Insert the CR2032 lithium coin cell battery (included or purchased separately) into the battery compartment, ensuring the positive (+) side faces up.
- Pecha a tapa posterior de forma segura.
Nota: The transmitter typically uses a CR2032 battery. Please refer to the packaging for specific battery requirements.
4.2 Colocación do receptor
Plug the receiver into a standard electrical outlet in a central location within your home. Ensure it is within the operating range of the transmitter and not obstructed by large metal objects or thick walls, which can reduce signal strength.
4.3 Montaxe do transmisor
There are two primary methods for mounting the transmitter:

Image: Steps for battery installation and two mounting methods for the transmitter.
Method 1: Screw Mounting
- Mark the desired mounting location on your wall or door frame.
- Drill two small holes at the marked spots.
- Insert the wall anchors (if necessary for your surface).
- Align the transmitter's back plate with the holes and secure it with the provided screws.
- Attach the transmitter unit to the back plate.
Method 2: Adhesive Mounting
- Limpa ben a superficie de montaxe para asegurarte de que estea seca e libre de po ou graxa.
- Peel off one side of the protective film from the adhesive tape.
- Attach the adhesive tape to the back of the transmitter.
- Peel off the other side of the protective film.
- Firmly press the transmitter onto the desired mounting surface for at least 30 seconds.
Recomendación: For best results and long-term stability, screw mounting is recommended, especially for outdoor use.
5. Instrucións de funcionamento
5.1 Changing Melodies
To change the melody on your receiver:
- Press the "Melody Selection" button (often indicated by a music note icon) on the receiver.
- Each press will cycle through the available 60 melodies.
- Stop pressing when you hear your desired melody. The receiver will automatically save the selection.
5.2 Axuste do volume
Para axustar o nivel de volume:
- Press the "Volume Control" button (often indicated by a speaker icon) on the receiver.
- Each press will cycle through the 5 available volume levels (including silent mode).
- Select the volume level that suits your preference.
5.3 Emparellamento (se é necesario)
Your doorbell system usually comes pre-paired. If the transmitter and receiver lose connection or if you add additional transmitters/receivers, follow these steps to pair them:
- Conecta o receptor.
- Press and hold the "Volume Control" button on the receiver for approximately 5 seconds until you hear a "ding" sound or the LED indicator flashes rapidly. This indicates pairing mode.
- Immediately press the transmitter (push button) once.
- You should hear the selected melody, confirming successful pairing.
- If pairing fails, unplug the receiver and repeat the process.
6. Mantemento
- Limpeza: Wipe the doorbell units with a soft, dry cloth. Do not use abrasive cleaners or solvents.
- Substitución da batería: When the transmitter's LED indicator no longer lights up or the range decreases significantly, it's time to replace the CR2032 battery. Follow the battery installation steps in Section 4.1.
- Condicións ambientais: While the transmitter is IP65 waterproof, extreme temperatures or prolonged direct exposure to harsh weather conditions may affect its lifespan.
7 Solución de problemas
| Problema | Causa posible | Solución |
|---|---|---|
| O timbre non soa. |
|
|
| Curto alcance operativo. |
|
|
| Receiver LED flashes but no sound. | Volume is set to 0dB (silent mode). | Increase the volume using the "Volume Control" button (see Section 5.2). |
8. Especificacións
| Característica | Detalle |
|---|---|
| Marca | TECNET |
| Número de modelo | B0BZVDJHCS |
| Fabricante | TECNET |
| Peso do elemento | 3.87 onzas (aprox. 110 gramos) |
| Dimensións do produto | 2.36 x 2.32 x 3.62 polgadas (receptor) |
| Fonte de alimentación (receptor) | Eléctrico con cable |
| Fonte de alimentación (transmisor) | Battery (CR2032, typically not included as per specifications, but required for operation) |
| Clasificación de impermeabilidade (transmisor) | IP65 |
| Rango de operación | Ata 400 metros (1300 pés) ao aire libre |
| Melodías | 60 seleccionables |
| Niveis de volume | 5 (0dB to 90dB) |
| Compoñentes incluídos | Manual (and doorbell units, mounting hardware) |
| Data de primeira dispoñibilidade | 18 de maio de 2024 |
9. Garantía e soporte
TECKNET products come with a standard warranty. For specific warranty details, please refer to the warranty card included with your product or visit the official TECKNET website. If you encounter any issues or have questions regarding your doorbell, please contact TECKNET customer support:
- Websitio: www.tecknet.co.uk (ou rexional relevante websitio)
- Correo electrónico: Consulte a embalaxe do produto ou websitio para correo electrónico de contacto.
Please have your model number (B0BZVDJHCS) and purchase date ready when contacting support.