1. Introdución
Thank you for choosing the COUGAR MX360 RGB Mid Tower Case. This manual provides essential information for the proper installation, operation, and maintenance of your new PC case. The MX360 RGB combines a sleek design with ARGB LED strips on the front panel, offering excellent cooling performance and support for a wide range of components, including up to a 360mm radiator, 315mm graphics cards, and 170mm CPU coolers. Its compact layout and full-length PSU shroud contribute to a clean and organized build.
2. Información de seguridade
- Desconecte sempre a fonte de alimentación da toma de corrente antes de instalar ou retirar calquera compoñente.
- Handle components with care to avoid damage from static electricity. Consider using an anti-static wrist strap.
- Keep small parts and screws away from children.
- Asegúrate de que haxa unha ventilación axeitada arredor da carcasa para evitar o sobrequecemento.
- Do not attempt to modify the case or its components, as this may void your warranty and pose safety risks.
3. Contido do paquete
Verifique que o seu paquete inclúa todos os seguintes elementos:
- Carcasa de torre media COUGAR MX360 RGB
- Caixa de accesorios (que contén parafusos, separadores, bridas para cables, etc.)
- Manual de usuario (este documento)
4. Produto rematadoview
The COUGAR MX360 RGB case features a minimalist design with integrated ARGB lighting and a tempered glass side panel for showcasina túa construción.

Figura 4.1: Parte frontal view of the COUGAR MX360 RGB case, showing the interior and active RGB lighting.
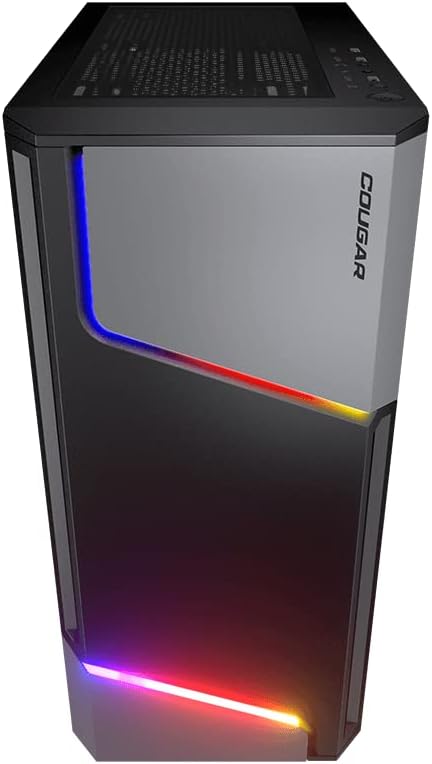
Figura 4.2: Fronte view of the COUGAR MX360 RGB case, highlighting the integrated ARGB LED strips.
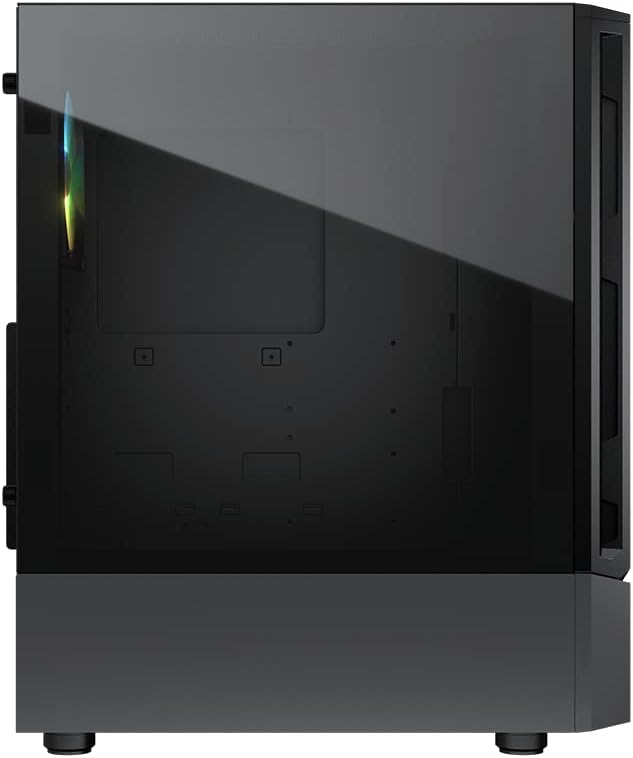
Figura 4.3: Lateral view of the COUGAR MX360 RGB case, featuring the tempered glass panel.

Figura 4.4: Fronte angulada view of the COUGAR MX360 RGB case, showcasing its design and ARGB elements.
5. Configuración e instalación
Follow these steps to install your components into the COUGAR MX360 RGB case.
5.1 Preparación do caso
- Coloque a caixa sobre unha superficie plana e estable.
- Remove the tempered glass side panel by unscrewing the thumb screws at the rear of the case and carefully sliding the panel off.
- Remove the opposite metal side panel by unscrewing the thumb screws and sliding it off.
5.2 Instalación da placa base
- Instala a protección de E/S (se non está preinstalada na placa base) na abertura traseira da caixa.
- Ensure the correct standoffs are installed for your motherboard form factor (ATX, Micro-ATX, Mini-ITX). Adjust or add standoffs as needed.
- Coloca con coidado a placa base sobre os separadores, aliñando os orificios dos parafusos.
- Fixe a placa base cos parafusos proporcionados.
5.3 Instalación da Unidade de Alimentación (PSU).
- Locate the PSU shroud at the bottom of the case.
- Slide your PSU into the designated compartment from the rear of the case.
- Fixe a fonte de alimentación con parafusos na parte traseira da caixa.
- Route necessary cables through the cutouts in the PSU shroud for cable management.
5.4 Instalación da unidade de almacenamento
The MX360 RGB supports various storage configurations.
- Discos duros de 3.5 polgadas: Instáleo na caixa da unidade situada debaixo da carcasa da fonte de alimentación.
- 2.5" SSDs/HDDs: Mount onto the dedicated trays or mounting points behind the motherboard tray.
5.5 Instalación da tarxeta gráfica (GPU)
- Retire as tapas das ranuras PCIe necesarias da parte traseira da caixa.
- Insira a tarxeta gráfica na ranura PCIe correspondente da placa base.
- Secure the graphics card with screws. The case supports graphics cards up to 315mm in length.
5.6 Cooling System Installation (Fans/Radiators)
The case supports up to six fans and a 360mm water cooling radiator.
- Fronte: Supports up to 3 x 120mm or 2 x 140mm fans, or a 240/280/360mm radiator.
- Arriba: Supports up to 2 x 120mm or 2 x 140mm fans, or a 240/280mm radiator.
- Traseira: Admite 1 ventilador de 120 mm.
Install fans or radiators using the provided screws, ensuring proper airflow direction.
5.7 Conexións do panel frontal
Connect the front panel cables (USB, Audio, Power, Reset, LED) to their corresponding headers on your motherboard. Refer to your motherboard manual for exact header locations.
5.8 ARGB Lighting Connection
The integrated ARGB LED strips on the front panel connect via a 5V/3Pin ARGB connector. Connect this cable to a compatible 5V/3Pin ARGB header on your motherboard to synchronize lighting effects with your system.
6. Funcionamento da caixa
Once all components are installed and connected, replace the side panels. Power on your system using the power button on the top I/O panel. The ARGB lighting will illuminate, controlled by your motherboard's software or a dedicated ARGB controller if you have one installed.
7. Mantemento
Un mantemento regular axuda a garantir un rendemento óptimo e unha maior duración dos compoñentes do teu PC.
- Filtros de po: The MX360 RGB includes removable dust filters (e.g., top, bottom). Periodically remove and clean these filters with compressed air or water (ensure they are completely dry before reinstallation).
- Limpeza de interiores: Use compressed air to remove dust from internal components like fans, heatsinks, and the motherboard.
- Limpeza exterior: Limpe as superficies exteriores cun suave, damp pano. Evite produtos de limpeza abrasivos.
8 Solución de problemas
Se tes problemas, consulta os seguintes pasos comúns para a resolución de problemas:
- Sen enerxía: Ensure all power cables (24-pin ATX, 8-pin CPU, GPU power) are securely connected. Check the PSU switch is in the 'ON' position. Verify front panel power button connection to the motherboard.
- A iluminación ARGB non funciona: Confirm the 5V/3Pin ARGB connector is correctly plugged into a compatible motherboard header. Check your motherboard's RGB software for control settings.
- Sobrequecemento: Ensure all case fans are spinning and oriented correctly for optimal airflow. Check for dust buildup on filters and components. Verify CPU cooler and GPU cooler are properly installed.
- Conexións soltas: Re-seat all components (RAM, GPU, storage drives) and check all power and data cables.
9. Especificacións
| Característica | Especificación |
|---|---|
| Marca | PUMA |
| Nome do modelo | MX360 RGB |
| Número de modelo do artigo | CGR-5CC6G-RGB |
| Tipo de caso | Torre media |
| Dimensións (LxWxH) | 14.88 x 8.27 x 18.11 polgadas (378 x 210 x 460 mm) |
| Peso do elemento | 10.56 libras (4.8 quilogramos) |
| Material | Tempered Glass, Fine Metal |
| Cor | Negro |
| Soporte de placa base | Mini ITX / Micro ATX / ATX |
| Máx. Lonxitude da tarxeta gráfica | 315 mm |
| Máx. Altura do enfriador da CPU | 170 mm |
| Soporte PSU | Estándar ATX PS2 |
| Método de arrefriamento | Aire / Auga |
| Soporte radiador | Front: 360mm / 280mm / 240mm / 140mm / 120mm Top: 280mm / 240mm / 140mm / 120mm Traseira: 120 mm |
| Soporte de fans | Frontal: 3 x 120 mm / 2 x 140 mm Parte superior: 2 x 120 mm / 2 x 140 mm Traseiro: 1 x 120 mm |
| Unidade Bays | 3.5" HDD: 2 2.5" SSD: 2+2 (converted from 3.5" drive bays) |
| Panel de E/S | USB 3.0 x 2, USB 2.0 x 1, Mic x 1, Audio x 1, RGB Button |
| Característica especial | ARGB LED Strips, Full-length PSU Cover for Cable Hiding and Improved Airflow |
10. Garantía e soporte
COUGAR products are designed and manufactured to the highest quality standards. For warranty information, please refer to the warranty card included with your product or visit the official COUGAR websitio. Garda o comprobante de compra para reclamacións de garantía.
For technical support or further assistance, please visit the official COUGAR website or contact their customer service department. You can find more information and resources on the COUGAR Store on Amazon.