1. Introdución
The Garosa 45° Portable Pneumatic Chamfering Machine is a compact and efficient tool designed for deburring, trimming, and chamfering various materials such as metal, plastic, and composites. It provides a precise 45° chamfer, making it ideal for machinists, fabricators, and maintenance professionals requiring smooth edge finishes. This manual provides essential information for the safe and effective use of your new tool.
2. Instrucións de seguridade
Observe sempre as seguintes precaucións de seguridade para evitar lesións e danos na ferramenta:
- Lea o manual completo: Lea todas as instrucións e advertencias antes de operar a ferramenta.
- Usar equipo de protección individual (EPI): Use sempre lentes de seguridade, protección auditiva e luvas.
- Ensure proper air supply: Connect the tool to a clean, dry, regulated air supply within the specified pressure range.
- Asegurar a peza de traballo: Sempre clamp ou fixar firmemente a peza de traballo para evitar que se mova durante o funcionamento.
- Manteña as mans libres: Never place hands or fingers near the rotating cutter head.
- Disconnect air supply: Desconecte sempre a subministración de aire antes de cambiar accesorios, realizar mantemento ou cando a ferramenta non estea en uso.
- Inspect tool: Before each use, check the tool for any damage, loose parts, or dull blades. Do not use a damaged tool.
- Work in a well-ventilated area: Ensure adequate ventilation to disperse any dust or debris generated.
- Evite o arranque accidental: Ensure the safety switch is engaged when not actively chamfering.
3. Contido do paquete
Ao desembalar, comproba que todos os elementos estean presentes e sen danos:
- Garosa 45° Portable Pneumatic Chamfering Machine
- Conector pneumático
- Hex Wrenches (for blade replacement)
- Manual de usuario (este documento)

Figura 3.1: Chamfering machine with its accessories and examples of finished edges.
4. Produto rematadoview
Familiarize yourself with the components of your chamfering machine:

Figura 4.1: Key components of the chamfering machine.
- Chamfer Size Adjustment: Dial to set the desired chamfer depth.
- Safety Start Switch: Lever mechanism to prevent accidental activation.
- Admisión de aire: Port for connecting the pneumatic air supply.
- Tungsten Carbide Triangular Double Piece Cutter Head: The durable cutting component.
- Alloy Baffle: Protective guard around the cutter head.
- Saída de aire: Exhaust port for spent air.
5. Configuración
Follow these steps to set up your chamfering machine for first use:
- Conectar a subministración de aire: Attach the pneumatic connector to the air intake port of the tool. Ensure your air compressor provides clean, dry air at the recommended pressure (refer to specifications). The air port requires access of at least 7 mm (0.28 inches).
- Adjust Chamfer Depth: The chamfer depth can be adjusted from 0.1 mm to 0.9 mm. Rotate the chamfer size adjustment dial (located near the cutter head) to your desired depth. This twist-and-lock mechanism does not require additional tools.
- Inspeccionar a lámina: Ensure the tungsten carbide blade is securely installed and sharp. Replace if dull or damaged (refer to Maintenance section).
6. Instrucións de funcionamento
Once set up, the chamfering machine is ready for operation:
- Peza de traballo segura: Firmly secure the material you intend to chamfer.
- Grip Tool: Hold the chamfering machine firmly with one hand, ensuring a stable grip.
- Activar ferramenta: Press the safety start switch to activate the tool. The cutter head will reach a no-load speed of up to 30,000 rpm.
- Begin Chamfering: Gently guide the rotating cutter head along the edge of the workpiece. Apply steady, even pressure. The tool is designed for quick and clean chamfering.
- Monitor de progreso: Observe the chamfer being created and adjust your technique or depth setting as needed.
- Deactivate Tool: Release the safety start switch to stop the tool.

Figura 6.1: Operating the chamfering machine on a workpiece.
7. Mantemento
Regular maintenance ensures the longevity and performance of your chamfering machine.
Substitución da lámina
The tungsten carbide blade is a wear item and will need replacement when it becomes dull or damaged. Use the provided hex wrenches for this procedure.

Figura 7.1: Tungsten carbide triangular blade.

Figura 7.2: Blade dimensions for replacement.
- Desconectar o aire: Always disconnect the air supply from the tool before attempting any maintenance.
- Remove Baffle: Use the appropriate hex wrench to loosen and remove the screws securing the alloy baffle. Carefully remove the baffle.
- Retirar a lámina: Use the smaller hex wrench to loosen the screw holding the triangular blade in place. Carefully remove the old blade.
- Instalar unha nova lámina: Position the new tungsten carbide blade onto the cutter head, ensuring it sits flush. Secure it with the screw, but do not overtighten.
- Reattach Baffle: Place the alloy baffle back into position and secure it with its screws.
Mantemento xeral
- Lubricación: Apply a few drops of pneumatic tool oil into the air intake before and after each use to lubricate internal components.
- Limpeza: Keep the tool clean and free of debris. Use compressed air to blow out any dust from the air outlet and around the cutter head.
- Almacenamento: Store the tool in a dry, clean environment when not in use.
8 Solución de problemas
If you encounter issues with your chamfering machine, refer to the following common problems and solutions:
| Problema | Causa posible | Solución |
|---|---|---|
| Tool does not start or runs slowly | Low air pressure; Clogged air intake; Safety switch not fully engaged | Check air compressor pressure; Clean air intake; Ensure safety switch is fully pressed |
| Poor chamfer quality or excessive vibration | Dull or damaged blade; Incorrect chamfer depth setting; Loose components | Replace blade; Adjust chamfer depth; Check for loose screws and tighten |
| Fuga de aire | Loose air connector; Damaged O-rings or seals | Tighten air connector; Inspect and replace O-rings/seals if necessary |
9. Especificacións
Technical specifications for the Garosa 45° Portable Pneumatic Chamfering Machine:
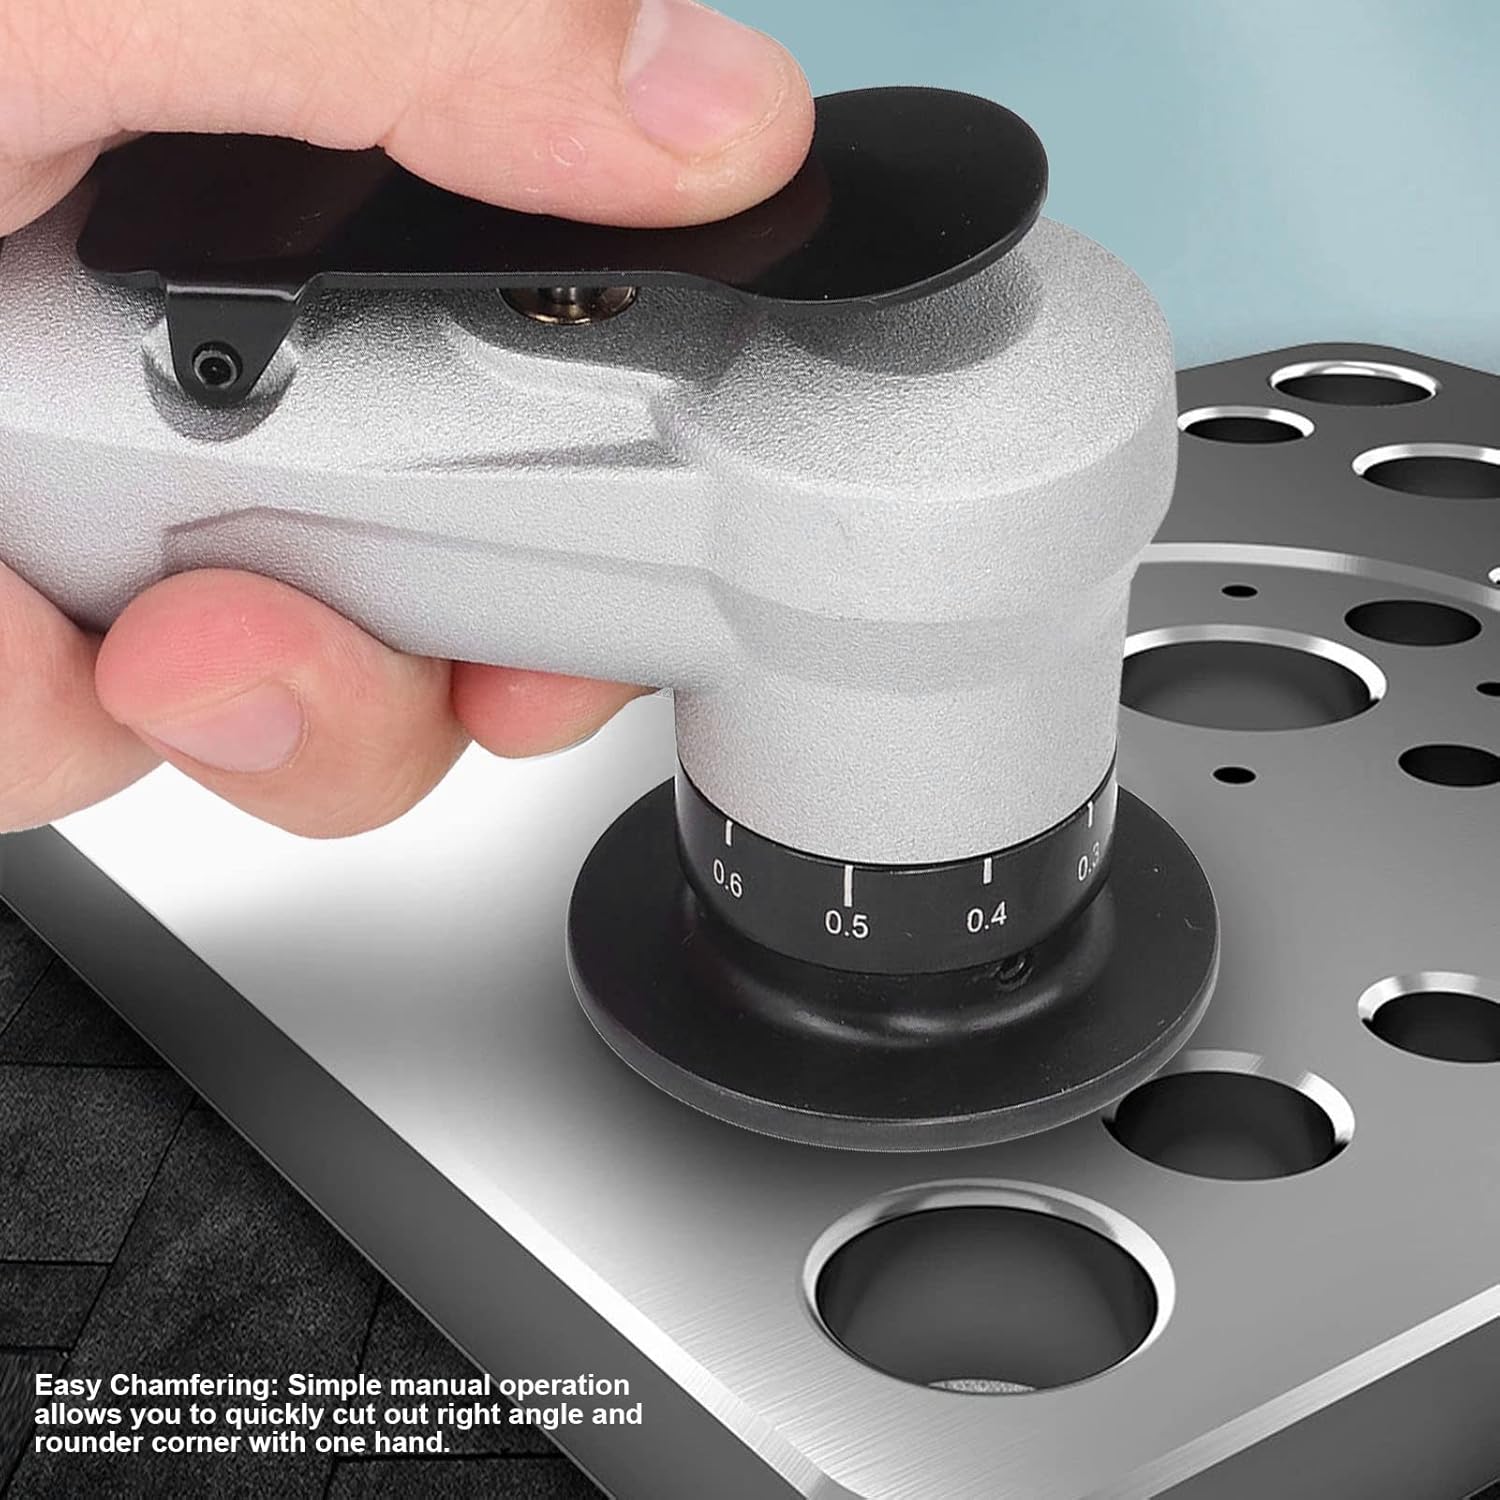
Figura 9.1: Dimensións do produto.
| Característica | Especificación |
|---|---|
| Número de modelo | Garosapnzs2643rm |
| Velocidade sen carga | Ata 30,000 rpm |
| Consumo de aire | 0.14 m³/min |
| Air Port Access | ≥7 mm (0.28 inches) |
| Adjustable Chamfer Depth | 0.1 mm a 0.9 mm |
| Chamfer Angle | 45° |
| Material do corpo | Aliaxe de aluminio |
| Material do cortador | Carburo de volframio |
| Peso do elemento | 440 g (0.97 lb) |
| Dimensións do produto | 15.6 x 9.4 x 4.9 cm (6.14 x 3.7 x 1.93 polgadas) |
10. Garantía e soporte
For warranty information or technical support, please refer to the retailer where the product was purchased or visit the official Garosa brand store online. Keep your purchase receipt as proof of purchase.
Garosa Brand Store: Visit Garosa Store