
1. Introdución
This manual provides detailed instructions for the proper setup, operation, and maintenance of your Radioddity QT40 10 Meter SSB Ham Radio. Please read this manual thoroughly before using the device to ensure safe and optimal performance.
2. Información de seguridade
- Do not operate the radio without a properly connected antenna.
- Asegúrese de que a fonte de alimentación voltage matches the radio's requirements.
- Evite expoñer a radio a temperaturas extremas, á luz solar directa ou á humidade.
- Do not attempt to disassemble or modify the radio. Refer all servicing to qualified personnel.
- Maintain a safe distance from the antenna during transmission to avoid exposure to RF energy.
3. Contido do paquete
Verifica que todos os elementos estean presentes no teu paquete:
- QT40 Radio x 1
- Micrófono x 1
- USB Programming Cable x 1
4. Produto rematadoview
The Radioddity QT40 is a 10-meter SSB ham radio designed for reliable communication. It features 40 watts of transmission power, digital noise reduction, and a frequency range of 28.000-29.695MHz.
4.1 Controis do panel frontal

This image displays the front panel of the Radioddity QT40, highlighting the various controls and indicators. Key elements include the S-Meter, NB/ANL control, NRC function control, Monitor/10K on/off switch, Echo function control, H/L/WX band switch, TX/RX indicator, Channel Display, 4-Pin Mic Connector, Power/Volume control, Squelch Level control, SSB Frequency FINE function, RF Gain Level, PA/FM/AM/USB/LSB Mode selector, Working Band Selection, Mic Gain Level control, Power Level control, and Channel Switch.
- Medidor S: Indicates signal strength and output power.
- NB/ANL Control: Noise Blanker and Automatic Noise Limiter.
- NRC Function Control: Digital Noise Reduction activation.
- Control Monitor/10K on/off: Monitor function and 10KHz step switch.
- ECHO Function Control: Activates and adjusts echo effect.
- H/L/WX Band Switch: High/Low power and Weather band selection.
- Indicador TX / RX: Shows transmit (TX) or receive (RX) status.
- Visualización da canle: Shows the current operating channel.
- 4-Pin Mic Connector: For connecting the supplied microphone.
- Power/Volume Control: Turns the radio on/off and adjusts audio volume.
- Squelch Level Control: Adjusts the squelch threshold.
- SSB Frequency FINE Function: Fine-tunes SSB frequency.
- RF Gain Level: Adjusts receiver RF gain.
- PA/FM/AM/USB/LSB Mode: Selects the operating modulation mode.
- Working Band Selection: Selects the operating frequency band.
- Mic Gain Level Control: Adjusts microphone input sensitivity.
- Power Level Control: Adjusts transmit power output.
- Cambio de canle: Selects operating channels.
4.2 Conexións do panel traseiro

This image illustrates the rear panel connections of the Radioddity QT40. These include the SO-239 Antenna Connector, External PA Jack, PC Programming Port, 3.5MM External Speaker Jack, and Power Supply Jack.
- SO-239 Antenna Connector: For connecting your external antenna.
- External PA Jack: For connecting an external Public Address speaker.
- PC Programming Port: For connecting the USB programming cable to a computer.
- 3.5MM External Speaker Jack: Para conectar un altofalante externo opcional.
- Jack de alimentación: For connecting the DC power cable.
4.3 Micrófono

The included microphone features Channel Up/Down buttons, a Push-To-Talk (PTT) button, the microphone element, and a 4-Pin Microphone Connector for connection to the radio.
- Channel Up: Aumenta o número da canle.
- Channel Down: Diminúe o número da canle.
- PTT (Push-To-Talk): Activa a transmisión ao premela.
- Micrófono: Microphone element.
- Cable do micrófono: Connects the microphone to the radio.
- 4-Pin Microphone Connector: Connects to the radio's front panel.
5. Configuración
5.1 Conexión de antena
Connect a suitable 10-meter antenna to the SO-239 Antenna Connector on the rear panel of the radio. Ensure the connection is secure. An improperly connected or mismatched antenna can damage the radio.
5.2 Conexión de alimentación
Connect the DC power cable to the Power Supply Jack on the rear panel. Connect the other end of the power cable to a compatible 13.8V DC power source. Observe correct polarity (red to positive, black to negative).
5.3 Conexión de micrófono
Plug the 4-Pin Microphone Connector into the corresponding jack on the front panel of the radio.
6. Instrucións de funcionamento
6.1 Funcionamento básico
- Encendido/apagado: Xire o Control de potencia/volume clockwise to turn the radio on. Continue rotating to adjust the audio volume.
- Axuste do silenciador: Xire o Control de nivel de silenciador clockwise until background noise disappears. Rotate counter-clockwise to hear weaker signals.
- Selección de canles: Usa o Cambio de canle botón no panel frontal ou no Canle arriba/abajo buttons on the microphone to select your desired operating channel.
6.2 Modulation Modes (AM/FM/SSB)
Usa o PA/FM/AM/USB/LSB Mode selector to choose your desired modulation mode:
- AM (AmpModulación da Ltitude): Common for local communication.
- FM (Modulación de frecuencia): Offers clearer audio over shorter distances.
- USB (Upper Sideband) / LSB (Lower Sideband): Used for long-distance SSB communication. Fine-tune with the SSB Frequency FINE Function.
- Megafonía (PA): Outputs audio to an external PA speaker.
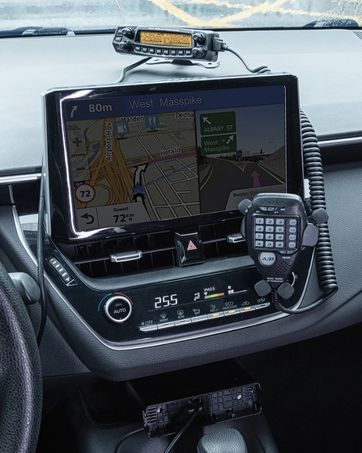
This image shows the Radioddity QT40 radio in a vehicle, illustrating its capability for AM/FM/SSB modulation, crucial for various communication needs.
6.3 Digital Noise Reduction (NRC)
The QT40 features TX and RX digital noise reduction technology. Activate the NRC Function Control to reduce background noise during transmission and reception, improving audio clarity.
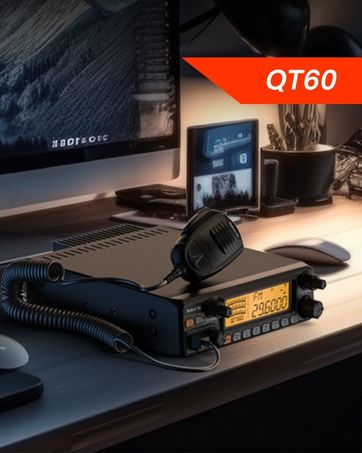
This image depicts the Radioddity QT40 radio installed in a vehicle, emphasizing its digital noise reduction feature for clearer communication in noisy environments.
6.4 Weather Channel and NOAA Alert
To access weather channels and NOAA alerts, use the H/L/WX Band Switch to select the WX band. This feature provides timely weather information and alerts.
6.5 CTCSS/DCS
The radio supports CTCSS (Continuous Tone-Coded Squelch System) and DCS (Digital Coded Squelch) for selective calling. These features can be configured via the programming software.
6.6 Función VOX
The VOX (Voice Operated Transmit) function allows for hands-free operation. When activated, the radio will transmit automatically when it detects your voice. Adjust VOX sensitivity via the programming software.
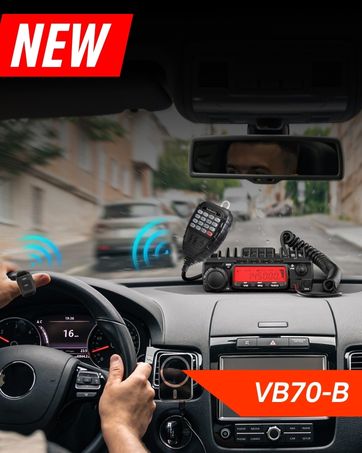
This image shows the Radioddity QT40 microphone mounted in a vehicle, demonstrating the convenience of the VOX hands-free function for drivers.
6.7 Programación en PC
The Radioddity QT40 can be customized using PC programming software and the included USB programming cable. This allows for advanced settings adjustments, including CTCSS/DCS codes, VOX levels, and other features. Software and drivers are typically available on the manufacturer's websitio.
7. Mantemento
- Limpeza: Use un suave, damp pano para limpar o exterior da radio. Non empregue produtos químicos agresivos nin produtos de limpeza abrasivos.
- Almacenamento: When not in use for extended periods, store the radio in a dry, dust-free environment.
- Comprobación da antena: Periodically inspect antenna connections for corrosion or damage.
8 Solución de problemas
| Problema | Causa posible | Solución |
|---|---|---|
| Sen poder | Power cable disconnected; incorrect voltage; blown fuse. | Check power connections; verify power source; inspect fuse. |
| Sen recepción | Squelch too high; antenna disconnected; incorrect channel/mode. | Adjust squelch; check antenna connection; verify channel and mode settings. |
| Non se pode transmitir | Microphone not connected; PTT button faulty; antenna issue. | Ensure microphone is connected; test PTT; check antenna and SWR. |
| Mala calidade de audio | Low signal strength; high noise; incorrect mode. | Adjust RF Gain; activate NRC; ensure correct modulation mode. |
| Código de erro E5 | High SWR (Standing Wave Ratio) detected, indicating an antenna mismatch or fault. | Check antenna connection; verify antenna tuning for the operating frequency; inspect antenna cable for damage. Do not transmit with high SWR to prevent radio damage. |
9. Especificacións
| Característica | Especificación |
|---|---|
| Marca | Radiodidade |
| Número de modelo | QT40 |
| Rango de frecuencias | 28.000-29.7 MHz |
| Número de canles | 40 |
| Potencia de transmisión | 40 vatios |
| Modos de modulación | AM, FM, SSB (USB/LSB), PA |
| Características especiais | Automatic Squelch, Echo, PC programmable, VOX Function, Digital Noise Reduction, NOAA Alert |
| Peso do elemento | 3.3 libras (1.5 kg) |
| Dimensións do produto | 11.3 x 7.87 x 2.4 polgadas (287 x 200 x 61 mm) |
| Rango de conversación máximo | 10 millas (aproximadamente, dependendo das condicións) |
| Nivel de resistencia á auga | Non resistente á auga |

This image provides a visual representation of the Radioddity QT40's dimensions (11.2 inches length, 7.9 inches width, 2.4 inches height) and weight (3.3 lbs).
10. Información da garantía
The Radioddity QT40 comes with an 18-month warranty from the date of purchase. This warranty covers manufacturing defects. Please retain your proof of purchase for warranty claims. The warranty does not cover damage caused by misuse, unauthorized modifications, or improper installation.
11. Apoio
For technical assistance, troubleshooting beyond this manual, or warranty inquiries, please contact Radioddity customer support. Refer to the official Radioddity websitio para obter a información de contacto e os recursos de asistencia máis actuais.
Official Radioddity Websitio: www.radioddity.com


