Introdución
This manual provides detailed instructions for the installation, operation, and maintenance of your Diyeeni B75 MS Mini ITX Motherboard. Please read this manual thoroughly before proceeding with installation to ensure proper setup and functionality.
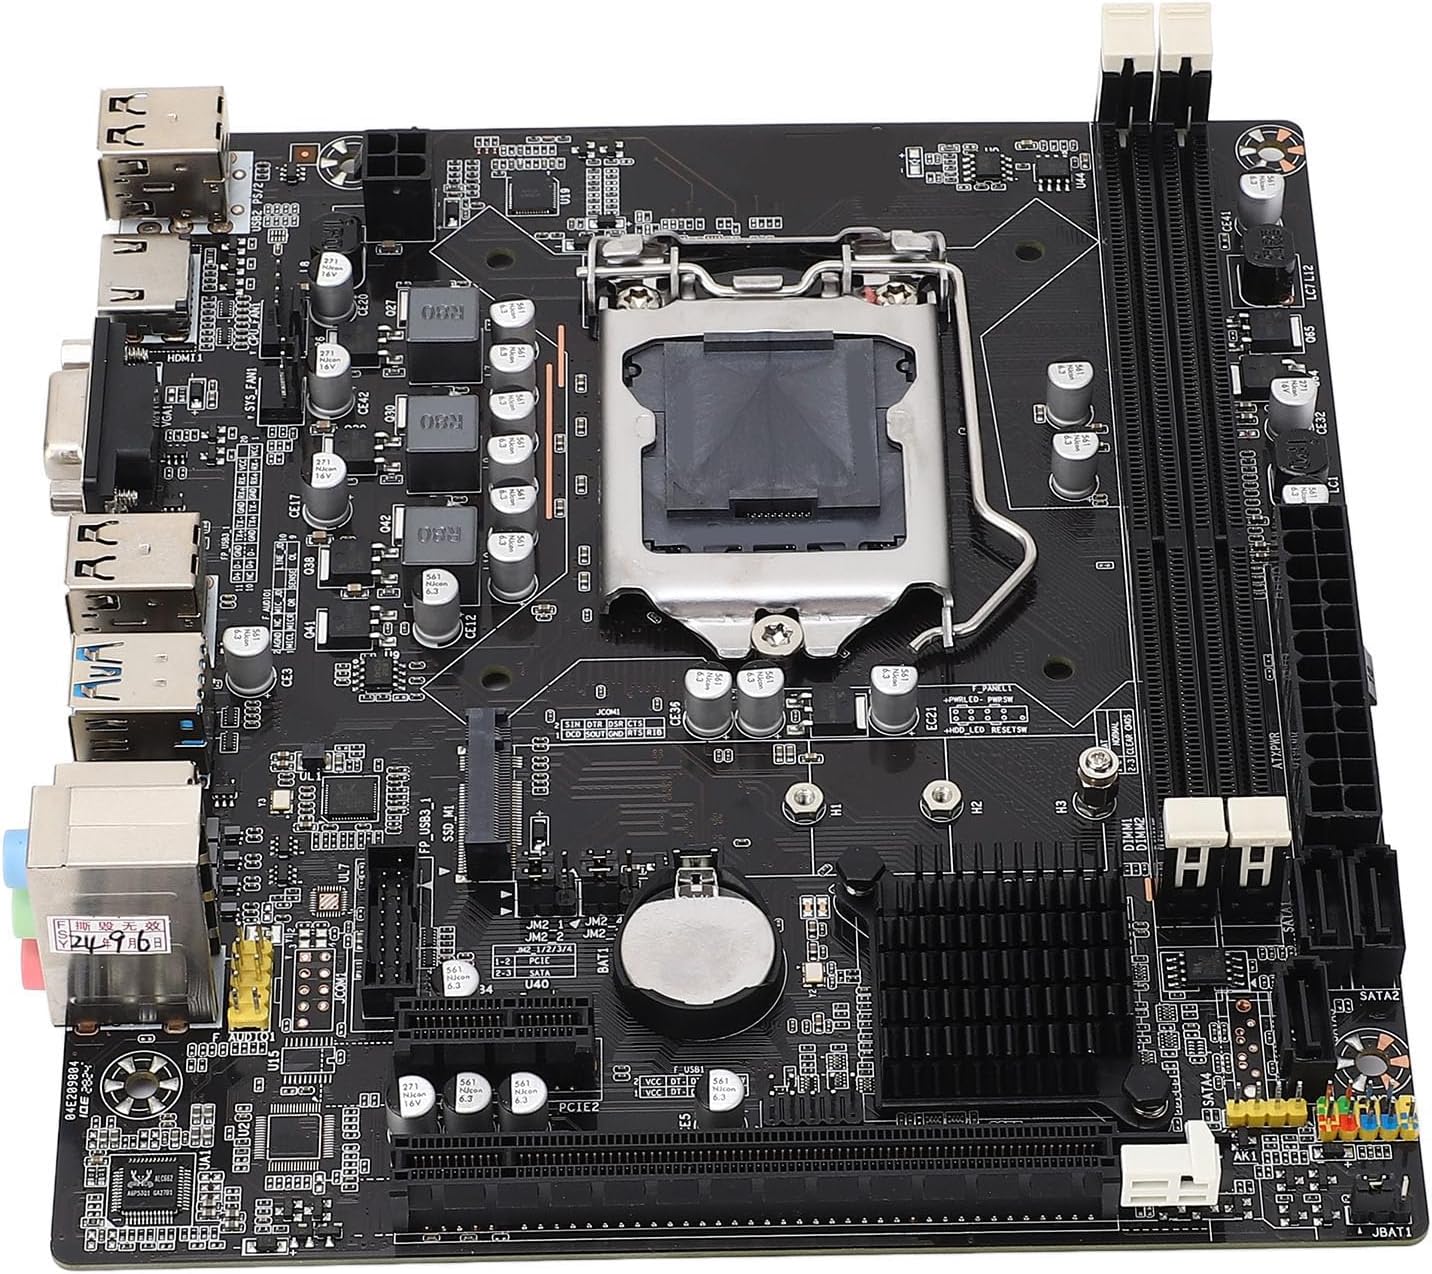
Imaxe: De arriba abaixo view of the Diyeeni B75 MS Mini ITX Motherboard, highlighting the CPU socket, RAM slots, and various connectors.
Información de seguridade
- Desconecte sempre a alimentación do ordenador antes de instalar ou retirar calquera compoñente.
- Use unha pulseira antiestática para evitar danos por descarga electrostática (ESD) nos compoñentes.
- Sujete a placa base polos bordos para evitar tocar os compoñentes sensibles.
- Asegúrate de ventilar axeitadamente a carcasa do teu ordenador para evitar o sobrequecemento.
Contido do paquete
Verifica que todos os elementos estean presentes no paquete:
- 1 x Diyeeni B75 MS Motherboard
- 1 x Connection Cable (SATA cable)
- 1 x Metal Plate (I/O Shield)
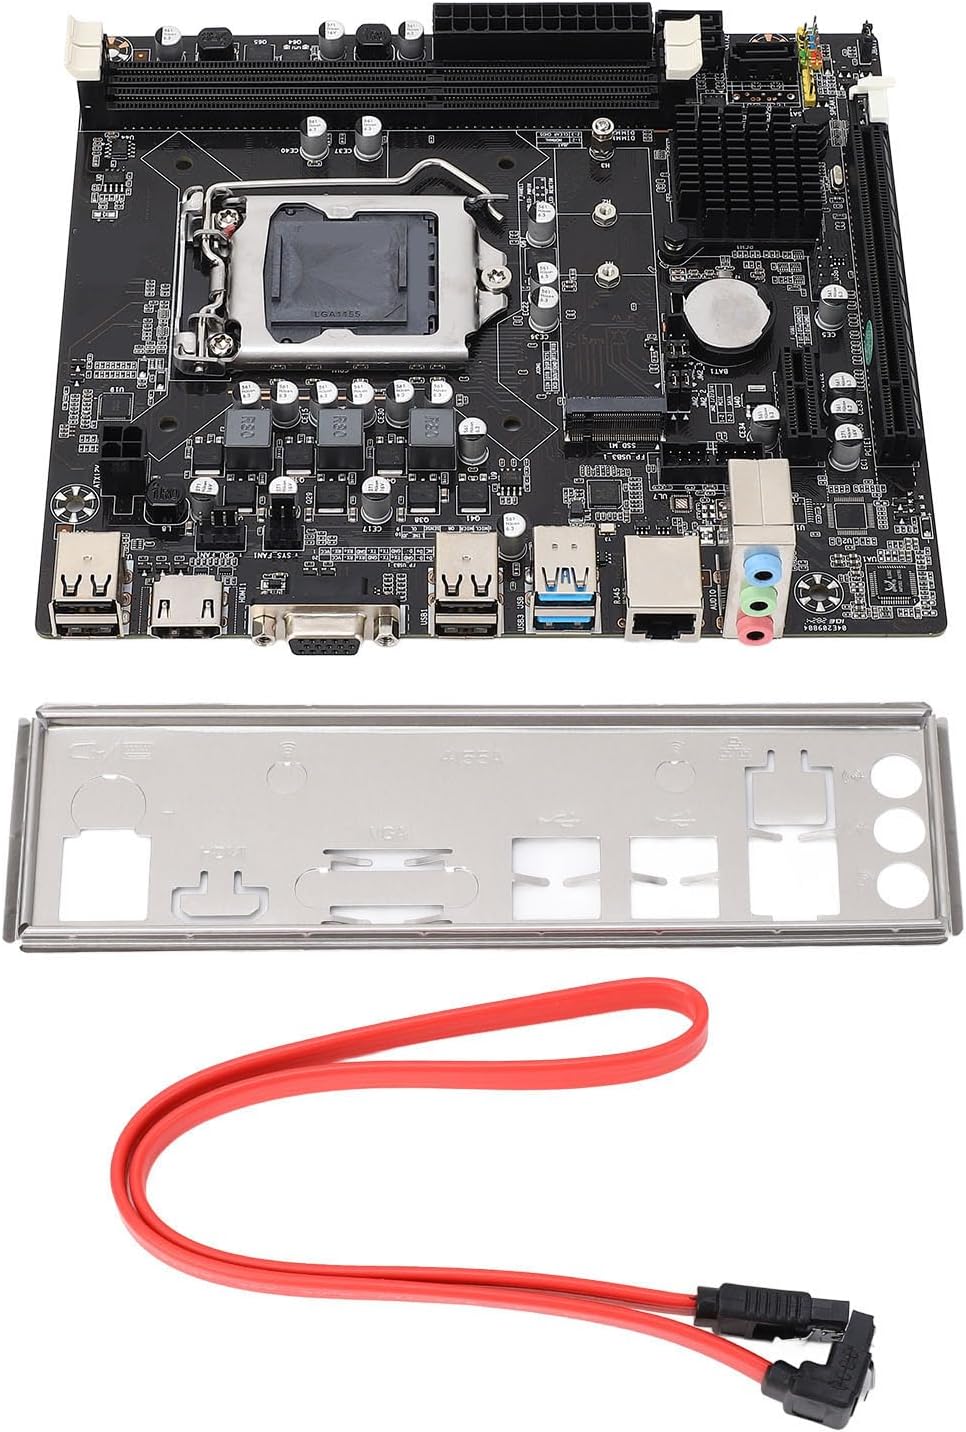
Image: The Diyeeni B75 MS Motherboard displayed alongside its included accessories, a red SATA data cable, and a silver I/O shield.
Especificacións
| Característica | Detalle |
|---|---|
| Modelo de placa base | B75 MS |
| Tipo de placa | ITX |
| Tipo de zócalo da CPU | LGA 1155 |
| Procesadores compatibles | Intel Pentium, Intel Core i3/i5 (2nd and 3rd Generation) |
| Tipo de chipset | Intel B75 Express |
| Slots de memoria | 2 memorias DIMM DDR3 |
| Memory Capacity Peak | 16 GB |
| Velocidade do reloxo da memoria | 1066/1333/1600/1866 MHz |
| Interface SATA | 1 SATA 3.0, 3 SATA 2.0 |
| Ranura para tarxeta gráfica | 1 x PCI E 16X |
| Interface USB | 4 x USB3.0 (2 rear, 2 via internal header), 6 x USB2.0 (2 rear, 4 via internal headers) |
| Saída de vídeo | 1 x VGA, 1 x HDMI |
| Interface de expansión | NVME M.2, M.2 (for WiFi/BT or additional M.2) |
| Tarxeta de rede | Ethernet de 100 Mbps |
| Tarxeta de son | Códec de audio Realtek ALC662 |
| Batería incorporada | 1 x CR2032 240mAh |
Guía de configuración
1. Instalación da CPU (LGA 1155)
- Localice o socket LGA 1155 na placa base.
- Gently push down the load lever and pull it away from the socket to open the CPU retention frame.
- Align the triangular mark on your Intel LGA 1155 CPU with the corresponding mark on the socket. Carefully place the CPU into the socket without forcing it.
- Peche o marco de retención e empurre a panca de carga de volta á súa posición bloqueada.
- Aplicar pasta térmica na CPU e instalar o refrigerador da CPU.

Imaxe: Unha detallada view of the LGA 1155 CPU socket on the motherboard, showing the retention mechanism.
2. Instalación da memoria (RAM)
- Localiza as dúas ranuras DIMM DDR3.
- Abra os clips nos dous extremos da ranura de memoria.
- Aliñe a muesca do módulo de memoria DDR3 coa chave da ranura DIMM.
- Insira o módulo de memoria firmemente na ranura ata que os clips encaixen no seu lugar.
3. Storage Device Installation (SATA & NVME M.2)
- Unidades SATA: Connect your SATA SSDs or HDDs to the SATA3.0 (1 port) or SATA2.0 (3 ports) connectors using SATA data cables. Connect the power cable from your power supply to the drive.
- NVME M.2 SSD: Locate the NVME M.2 slot. Insert the M.2 SSD at an angle into the slot and then gently push it down. Secure it with the provided screw.
4. Instalación da tarxeta gráfica
- Locate the PCI E 16X slot.
- Abra o clip de retención ao final da ranura.
- Align your graphics card with the slot and press it down firmly until it clicks into place and the retention clip closes.
- Secure the graphics card to your computer case with screws.
5. Conexión de periféricos e alimentación
- Conecta o conector de alimentación ATX de 24 pines e o conector de alimentación da CPU de 4 pines da fonte de alimentación á placa base.
- Connect USB devices to the available USB 3.0 and USB 2.0 ports.
- Connect your monitor to the VGA or HDMI port.
- Connect your Ethernet cable to the LAN port for network access.
- Connect front panel connectors (power button, reset button, USB, audio) according to your case manual and motherboard labels.
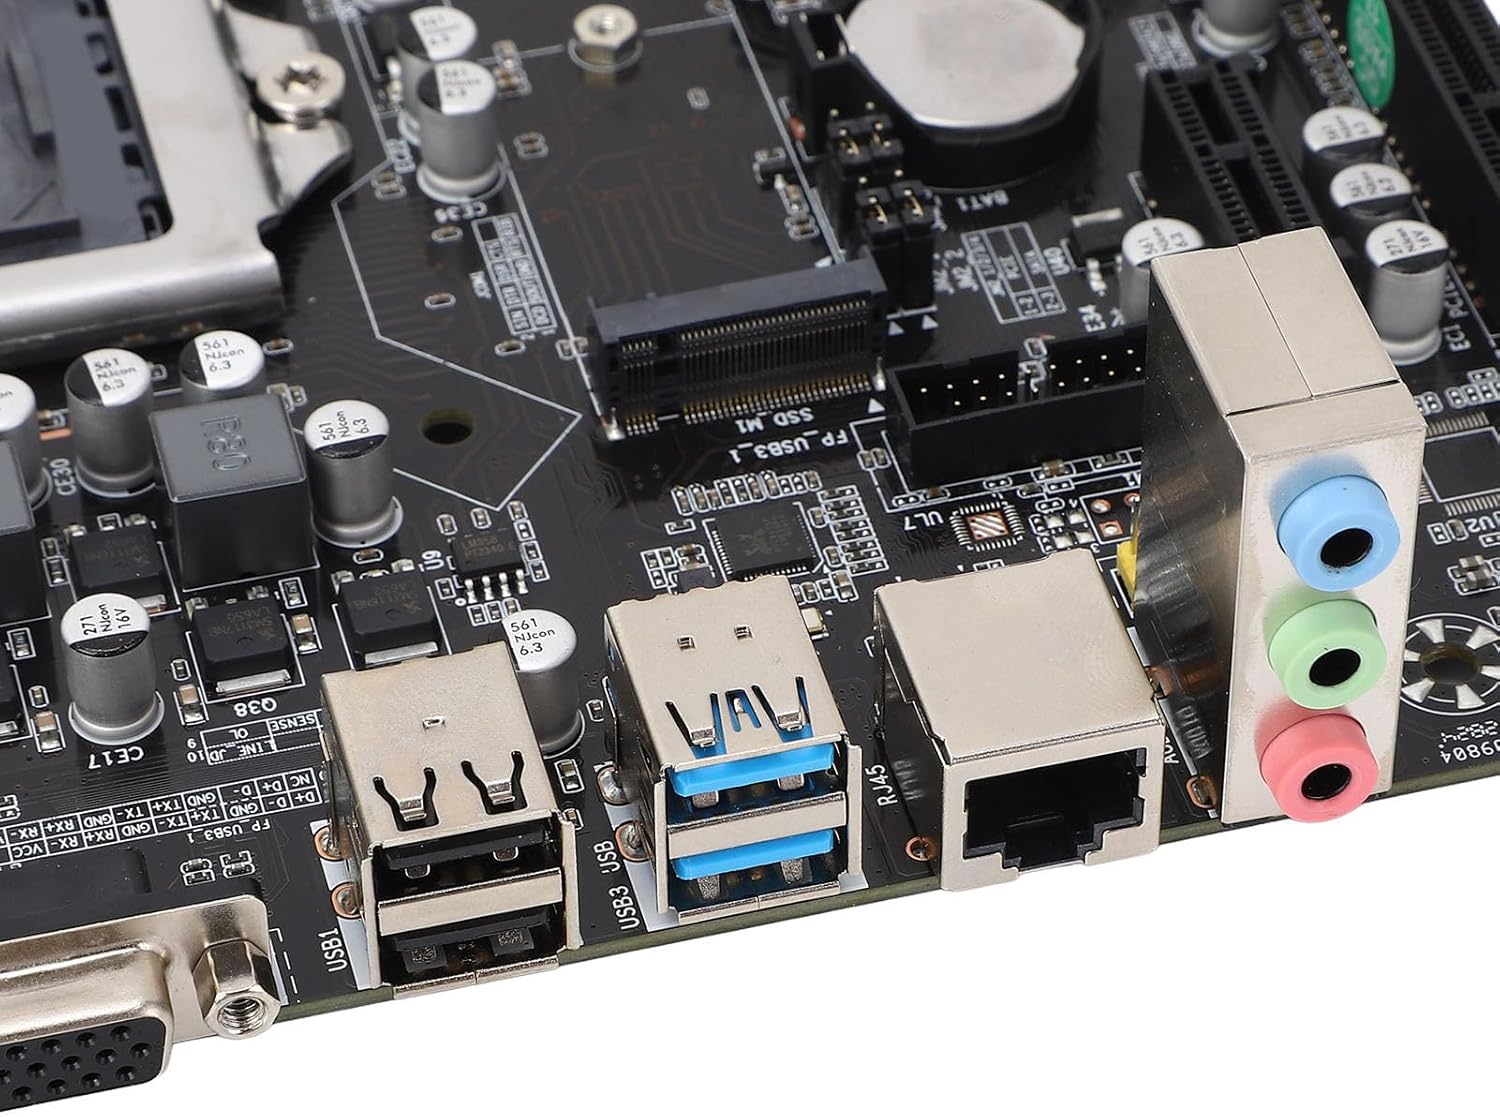
Image: A close-up of the motherboard's rear input/output panel, featuring USB 3.0, USB 2.0, VGA, HDMI, Ethernet, and audio ports.
Instrucións de funcionamento
- After all components are installed and connected, close your computer case.
- Conecta o cable de alimentación á fonte de alimentación e acende o interruptor de alimentación.
- Preme o botón de acendido da carcasa do teu ordenador.
- During startup, you can press the designated key (usually DEL or F2) to enter the BIOS/UEFI setup utility to configure system settings, boot order, and other advanced options.
- Instala o teu sistema operativo preferido (por exemplo, Windows, Linux) desde unha unidade USB ou DVD de arranque.
Mantemento
- Eliminación de po: Regularly clean dust from inside your computer case and motherboard components using compressed air. Ensure the system is powered off and unplugged before cleaning.
- Actualizacións da BIOS: Consulte o do fabricante website for BIOS updates. Only update the BIOS if necessary and follow the instructions carefully to avoid system instability.
- Comprobacións de compoñentes: Comprobe periodicamente todas as conexións dos cables (alimentación, datos) para asegurarse de que estean ben fixadas.
Resolución de problemas
- Sen enerxía: Ensure all power cables (24-pin ATX, 4-pin CPU) are securely connected. Check your power supply unit (PSU) and wall outlet.
- Sen visualización: Verify that your monitor is connected to the correct video output (VGA or HDMI) on the motherboard or dedicated graphics card. Reseat the graphics card and RAM modules.
- Inestabilidade/fallos do sistema: This can be caused by incompatible RAM, overheating, or faulty components. Check RAM compatibility and ensure CPU cooler is properly installed.
- Dispositivo de arranque non atopado: Check SATA/NVME cable connections. Verify boot order in BIOS/UEFI settings.
- Form Factor Note: While listed as ITX, some users have reported challenges with dual-slot video cards in certain mini-ITX cases. Always verify case compatibility with your chosen components before final assembly.
Garantía e Soporte
For warranty information and technical support, please refer to the documentation provided with your purchase or visit the official Diyeeni websitio. Garda o comprobante de compra para reclamacións de garantía.
You can visit the Diyeeni store for more products and support: Diyeeni Store