1. Introdución
Grazas pola compraasing the MODEBHD American Modern Pendant Light. This manual provides detailed instructions for the safe installation, operation, and maintenance of your new lighting fixture. Please read this manual thoroughly before installation and retain it for future reference.

Imaxe 1.1: Acabadoview of the MODEBHD American Modern Pendant Light (3-Pack). These elegant fixtures feature a black crystal lampshade and brass-colored ceiling mounts, designed to provide ambient lighting.
2. Instrucións de seguridade
To ensure safe installation and operation, please observe the following precautions:
- Always disconnect power at the main circuit breaker before installation, maintenance, or bulb replacement.
- Installation should be performed by a qualified electrician or a person with adequate knowledge of electrical wiring.
- Asegúrate de que a superficie de montaxe poida soportar o peso da luminaria.
- Non exceda a potencia especificadatage para a lámpada.
- Manexa os compoñentes de vidro con coidado para evitar que se rompan.
- Manteña os materiais inflamables lonxe da lámpada.
- Este dispositivo está deseñado só para uso en interiores.
3. Contido do paquete
Carefully unpack the box and ensure all components are present and undamaged. If any parts are missing or damaged, please contact customer support before proceeding with installation.
- Pendant Light Fixture (x3 for 3-Pack)
- Ferraxes de montaxe (parafusos, porcas para cables, etc.)
- Manual de instrucións
Note: G9 light bulbs are not included and must be purchased separately.
4. Especificacións
Consulte a táboa seguinte para obter especificacións detalladas do produto:
| Característica | Detalle |
|---|---|
| Marca | MODEBHD |
| Modelo | B0CDRXT6D4 (3-Pack) |
| Material | K9 Crystal, Brass |
| Cor | Black (Crystal), Brass (Accents) |
| LampDimensións da sombra | 11 cm (4.3 inches) diameter, 14 cm (5.5 inches) height |
| Lonxitude da corda | 200 cm (78.8 polgadas), axustable |
| Light Source Base | G9 (Bulb not included) |
| Number of Lights (per fixture) | 1 |
| Voltage | 110-240 V |
| Estilo | Moderno |
| Característica especial | Altura de suspensión axustable |

Image 4.1: Detailed dimensions of the pendant light, illustrating the 4.3-inch diameter, 5.5-inch height, and the 78.8-inch adjustable cord length. The diagram also indicates the G9 light source base and 10cm suction plate.
5. Configuración e instalación
Follow these steps for proper installation of your pendant light fixture:
- Preparación para a instalación:
- Turn off power at the main circuit breaker to the junction box where the fixture will be installed.
- Asegúrate de que a superficie de montaxe estea limpa, seca e estruturalmente sólida.
- Gather necessary tools: screwdriver, wire strippers, drill (if needed for mounting holes).
- Fixar o soporte de montaxe:
- Secure the mounting bracket (usually included with hardware) to the ceiling junction box using the provided screws. Ensure it is firmly attached.
- Axustar a lonxitude do cable:
- Determine the desired hanging height for your pendant light. The cord is adjustable up to 78.8 inches (200 cm).
- Adjust the cord length by pushing the cord through the cord grip in the canopy until the desired length is achieved. Secure the cord in place.
- Conexións de cable:
- Carefully connect the fixture's wires to the corresponding wires from the junction box using wire nuts:
- Conecta o negro (Live/Hot) wire from the fixture to the negro (Live/Hot) wire from the junction box.
- Conecta o branco (Neutral) wire from the fixture to the branco (Neutral) wire from the junction box.
- Conecta o verde or cobre espido (Ground) wire from the fixture to the verde or cobre espido (Ground) wire from the junction box.
- Asegúrate de que todas as conexións estean seguras e illadas con cinta illante se é necesario.
- Carefully connect the fixture's wires to the corresponding wires from the junction box using wire nuts:
- Montar o aparello:
- Meter coidadosamente todos os cables na caixa de conexión.
- Align the fixture's canopy with the mounting bracket and secure it using the canopy screws.
- Instalar lámpada:
- Insert a G9 base bulb (not included) into the socket. Do not overtighten.
- Restaurar enerxía:
- Volve a conectar o interruptor principal.
- Proba a lámpada para asegurarte de que funciona correctamente.

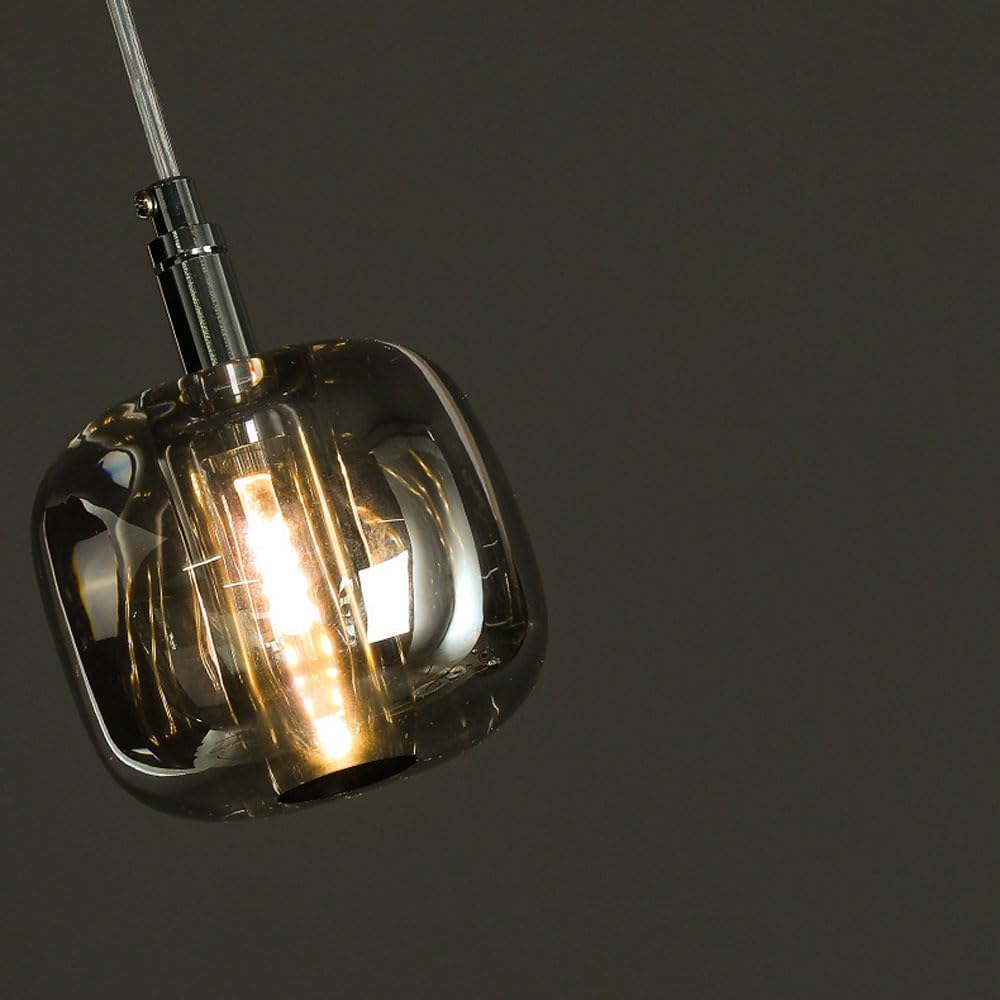
Image 5.1: Close-up of the G9 bulb socket within the crystal lampshade, illustrating where the bulb should be inserted during installation.
6. Instrucións de funcionamento
The MODEBHD American Modern Pendant Light operates via a standard wall switch connected to your home's electrical circuit. Simply toggle the wall switch to turn the light on or off.
- On/Off: Usa o interruptor de parede conectado para controlar a luz.
- Adormecer: If you wish to use a dimmable G9 bulb and a compatible dimmer switch (not included), ensure both are rated for dimming. Follow the dimmer switch manufacturer's instructions for installation and operation.

Image 6.1: The pendant lights in operation, showcasing their aesthetic appeal and the warm light they emit in a bedroom setting.
7. Mantemento
Regular maintenance will help preserve the appearance and functionality of your pendant light:
- Limpeza:
- Before cleaning, ensure the power is turned off at the circuit breaker and the fixture has cooled down.
- Wipe the crystal lampshade and metal parts with a soft, dry, or slightly damp pano.
- Non empregues produtos de limpeza abrasivos, solventes ou abrillantadores, xa que poden danar o acabado.
- Substitución da lámpada:
- Turn off power at the circuit breaker and allow the bulb to cool completely.
- Carefully remove the old G9 bulb by pulling it straight out.
- Insert a new G9 bulb, ensuring it is fully seated in the socket.
- Restaura a enerxía e proba a luz.
Imaxe 7.1: En ángulo view of the pendant light, highlighting the crystal and brass elements that require regular cleaning to maintain their luster.
8 Solución de problemas
If you encounter issues with your pendant light, refer to the following troubleshooting guide:
| Problema | Causa posible | Solución |
|---|---|---|
| A luz non acende. |
|
|
| Luz parpadea. |
|
|
| O aparello está quente ao tacto. |
|
|
Se o problema persiste despois de intentar estas solucións, póñase en contacto co servizo de atención ao cliente.
9. Garantía e soporte
MODEBHD is committed to providing high-quality products and customer satisfaction. While specific warranty details are not provided in this manual, we offer comprehensive after-sales service.
If you have any questions about our products or services, or if you receive any product with issues, please do not hesitate to contact us. We aim to respond within 24 hours to provide the best possible service and ensure your satisfaction.
For support, please refer to the contact information provided at your point of purchase or visit the official MODEBHD websitio.