
1. Introdución
This manual provides detailed instructions for the installation, operation, and maintenance of your EVGATSAUTO K2MRH3A Digital Programmable Thermostat. This device is designed for water heating systems, offering intelligent temperature control and energy-saving features. Please read this manual thoroughly before installation and use to ensure proper function and safety.
2. Contido do paquete
Ao desembalar, comprobe que todos os elementos enumerados a continuación estean presentes e en bo estado:
- 1 x Temperature Controller (Digital Thermostat)
- 1 x Manual de usuario (este documento)
- 2 x parafusos de montaxe

Figure 1: EVGATSAUTO K2MRH3A Digital Thermostat and included mounting screws.
3. Características do produto
- Control intelixente de temperatura: Allows precise temperature management for water heating systems.
- Aforro de enerxía: Features low consumption touch buttons and intelligent programming to optimize energy use.
- Múltiples modos de control: Supports intelligent timing, direct touch control, and programmable time control.
- Construción duradeira: Made from flame-retardant PC material with an IP20 rating for safety and longevity.
- Pantalla LCD clara: Features a dark black LCD screen for easy readability of current and set temperatures, time, and operating modes.
- Aplicación ampla: Suitable for various environments including homes, offices, hospitals, and commercial spaces.
4. Especificacións técnicas
| Parámetro | Valor |
|---|---|
| Tipo de elemento | Termostato dixital |
| Clasificación IP | IP20 |
| Material de carcasa | PC ignífugo |
| Sensor de temperatura | NTC |
| Precisión da temperatura | ± 1 ℃ |
| Tipo de visualización | LCD |
| Ambiente de traballo | -5 ~ 50 ℃ |
| Consumo de enerxía | <1 W |
| Rango de configuración de temperatura | 5 ~ 60 ℃ |
| Rango de visualización | 0 a 50 ℃ |
| Vol. De entradatage | CA 90-240 V |
| Carga máxima | 3A |
| Potencia máxima | 3500 W |
| Modo de control | Intelligent timing; Touch control; Programming time control |
| Cor | Negro |
5. Información de seguridade
Please observe the following safety precautions to prevent damage to the device or personal injury:
- Installation should only be performed by a qualified electrician in accordance with local electrical codes.
- Ensure the power supply is disconnected before installation, maintenance, or removal of the thermostat.
- Non expoñas o dispositivo á auga nin a humidade excesiva.
- Do not attempt to disassemble or repair the thermostat yourself. Contact qualified service personnel.
- Keep the device away from flammable materials and direct heat sources.
6. Configuración e instalación
This section outlines the general steps for installing your digital thermostat. For detailed wiring diagrams and specific installation requirements, consult a professional electrician.
6.1 Montaxe do termostato
- Escolla localización: Select an indoor wall location, away from direct sunlight, drafts, or heat sources that could affect temperature readings.
- Desconectar a enerxía: Turn off the main power supply to your heating system at the circuit breaker.
- Preparar o cableado: Follow the wiring diagram provided by your electrician or heating system manufacturer. Connect the AC 90-240V input and heating load wires to the appropriate terminals on the thermostat.
- Fixar á parede: Mount the thermostat base to the wall using the provided screws. Ensure it is level and securely fastened.
- Attach Display Unit: Carefully attach the display unit to the mounted base, ensuring all connections are secure.
- Restaurar enerxía: Once installation is complete and verified, restore power to the heating system.

Figura 2: Lateral view of the thermostat, illustrating its compact design for wall mounting.

Figura 3: Fronte view of the thermostat, showing the LCD display with current time and temperature settings.
7. Instrucións de funcionamento
The EVGATSAUTO K2MRH3A thermostat offers intuitive touch controls and programmable settings.
7.1 Mostrar máisview
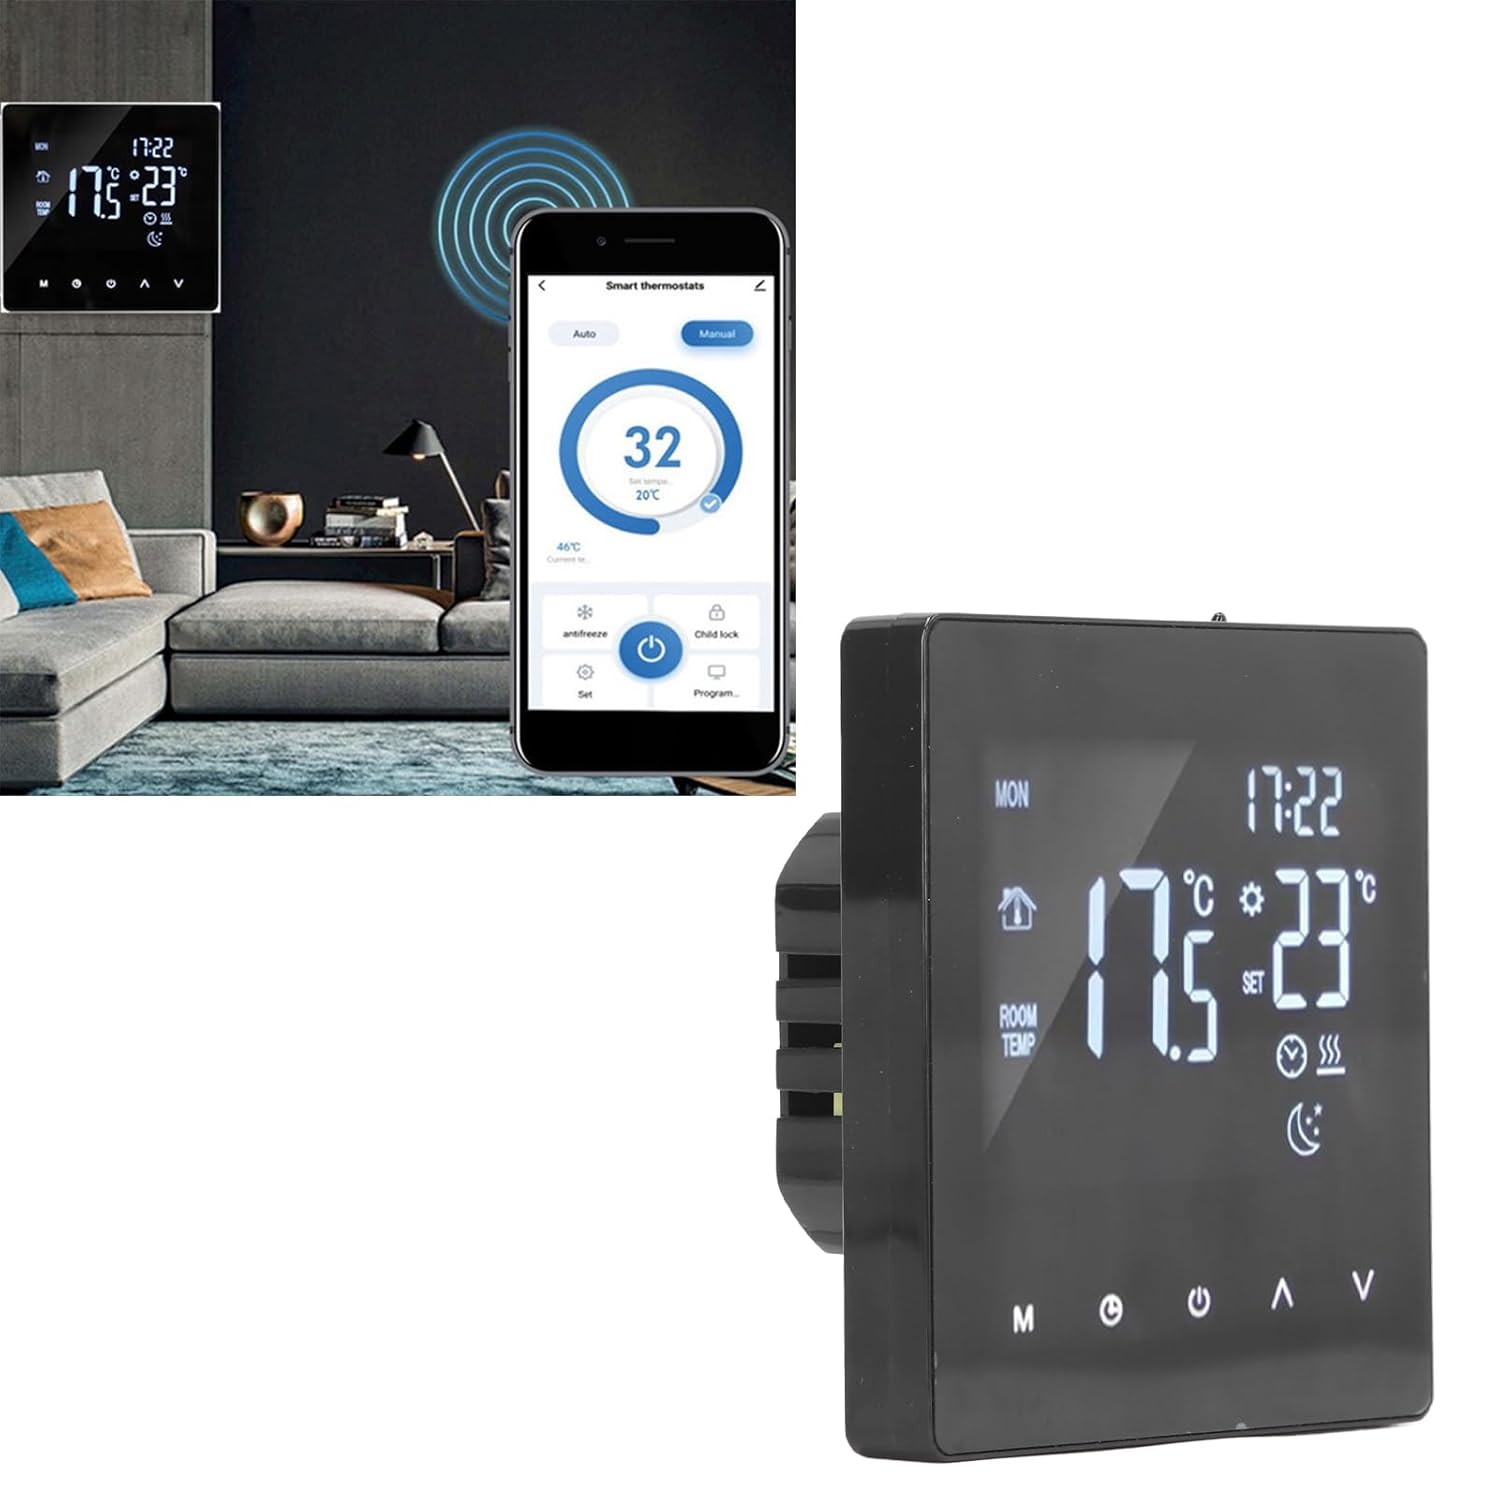
Figure 4: Close-up of the thermostat display, highlighting icons for mode, time, room temperature, set temperature, and heating status.
7.2 Funcionamento básico
- Encendido/apagado: Preme o Poder button (usually represented by a circle with a vertical line) to turn the thermostat on or off.
- Axustar a temperatura: Usa o Arriba (▲) e Abaixo (▼) arrows to increase or decrease the desired set temperature.
- Selección de modo: Preme o Modo (M) button to cycle through available operating modes (e.g., Manual, Auto, Program).
- Axuste do reloxo/hora: Preme o Reloxo button (often represented by a clock icon) to access time settings. Use the Up/Down arrows to adjust hours and minutes.
7.3 Horario de programación
The thermostat allows you to set a weekly heating schedule to optimize comfort and energy efficiency. Refer to the specific programming instructions in the full user manual for detailed steps on setting daily schedules, temperature points, and periods.

Figura 5: Pro lateralfile of the thermostat, highlighting its slim design when mounted.
7.4 Advanced Features (If Applicable)
- Bloqueo para nenos: Some models may feature a child lock function to prevent unauthorized changes to settings. Consult the full manual for activation.
- Modo anticongelante: This mode maintains a minimum temperature to prevent pipes from freezing.
- Integración do fogar intelixente: While this specific model is a standalone unit, some EVGATSAUTO thermostats may offer compatibility with smart home systems for remote control via an app.

Figure 6: The thermostat displayed alongside a smartphone showing a potential smart control application interface. Note: App control functionality may vary by model and region. Please refer to product specifications for confirmation.
8. Mantemento
The EVGATSAUTO K2MRH3A thermostat requires minimal maintenance to ensure optimal performance.
- Limpeza: Limpe con coidado a pantalla e casinLimpe cun pano suave e seco. Non empregue produtos de limpeza abrasivos nin disolventes, nin pulverice directamente sobre o dispositivo.
- Evitar obstáculos: Ensure that the thermostat's vents (if any) are not blocked by furniture or curtains, as this can affect temperature readings.
- Comprobacións periódicas: Periodically check the wiring connections for any signs of wear or looseness. (Only perform if qualified and power is off).
9 Solución de problemas
Se tes problemas co teu termostato, consulta os seguintes problemas e solucións comúns:
| Problema | Causa posible | Solución |
|---|---|---|
| A pantalla do termostato está en branco. | Sen fonte de alimentación. | Comprobe o disxuntor e as conexións do cableado. Asegúrese de que se restableza a electricidade. |
| O sistema de calefacción non responde. | Incorrect settings; Wiring issue; System fault. | Verify thermostat mode (e.g., not in 'Off' mode). Check set temperature. Inspect wiring (if qualified). Consult heating system manual. |
| Lectura de temperatura incorrecta. | A localización do termostato está afectada por correntes de aire/fontes de calor. | Asegúrate de que o termostato non estea exposto á luz solar directa, a correntes de aire nin a electrodomésticos que emitan calor. |
| Non se pode cambiar a configuración. | Bloqueo para nenos activado. | Refer to the full manual for instructions on deactivating the child lock feature. |
Se o problema persiste despois de intentar estas solucións, póñase en contacto co servizo de atención ao cliente ou cun técnico cualificado.
10. Garantía e atención ao cliente
EVGATSAUTO products are manufactured to high-quality standards. For specific warranty details, please refer to the warranty card included with your purchase or visit the official EVGATSAUTO website. For technical assistance, troubleshooting, or service inquiries, please contact EVGATSAUTO customer support through the contact information provided on our websitio web ou a documentación da súa compra.
Fabricante: EVGATSAUTO
Data de primeira dispoñibilidade: 10 de agosto de 2023