1. Introdución
This manual provides detailed instructions for the operation and maintenance of your Landtek Decibel Meter Sound Level Meter with Data Logging, Model B0CHYSJBK2. This device is designed for accurate measurement and recording of sound levels in various environments.
Características principais:
- 13-inch Large LCD Display for clear readings.
- Integrated Data Logging function with PC connectivity.
- 16.4 ft (5m) corded sound sensor for flexible placement.
- Audible and Visual Alarm with adjustable thresholds and external output.
- Multiple mounting options: desktop, wall mount, hanging, tripod attachment.
2. Contido do paquete
Verifica que todos os elementos estean presentes no paquete:
- Landtek Decibel Meter Main Unit
- Corded Sound Sensor (16.4 ft / 5m cable)
- Cable USB
- Adaptador de alimentación (DC 5V/1A)
- Mounting Hardware (screws, wall anchors, hanging hooks)
- Manual de instrucións

Image: Contents of the Landtek Decibel Meter package, including the main unit, sensor, cables, mounting hardware, and manual.
3. Produto rematadoview
The Landtek Decibel Meter features a large display and a remote sensor for versatile noise monitoring.

Imaxe: Fronte view of the Landtek Decibel Meter, displaying a sound level reading and showing the connected remote sound sensor.
Compoñentes:
- Pantalla LCD grande: 13-inch screen for clear visibility of decibel readings.
- Sensor de son: A 6mm condenser microphone sensor attached via a 16.4 ft (5m) cable for flexible placement away from the main unit.
- Botóns de control: Includes 'SEL' for selection, arrow buttons for adjustment, and a power button.
- Indicadores: REC (recording), USB (connection), and Alarm indicators.
- Portos: DC 5V/OUT for power and external alarm, USB for PC connection.

Image: Diagram illustrating the dimensions of the 13-inch display and the approximate 196-inch (16.4 ft) length of the sound probe cable.
4. Configuración
4.1 Acendido
- Connect the power adapter to the DC 5V/OUT port on the side of the decibel meter.
- Conecta o adaptador de corrente a unha toma de corrente estándar. O dispositivo acenderase automaticamente.
4.2 PC Software Installation and Synchronization
To utilize the data logging features and configure advanced settings, the device must be connected to a PC with the dedicated software. The software is compatible with Windows 7, 8, 10, and 11 (64-bit versions).

Image: Step-by-step instructions for downloading software via QR code, connecting the device to a PC, and synchronizing for data logging.
- Descarga de software: Scan the QR code provided in the physical manual or visit https://cd50.net/389/ para descargar o software de PC.
- Conectar dispositivo: Use the provided USB cable to connect the decibel meter to your PC.
- Software de inicio: Open the downloaded software on your PC. The software should display "Connected" once the device is recognized.
- Sincronizar: Press the "SYNC" button within the software to synchronize the device. Wait for the save confirmation.
Important Note: The device requires a continuous power supply to retain settings. If power is disconnected, settings may revert to default, requiring re-synchronization with the PC software.
5. Instrucións de funcionamento
5.1 Medición básica
Once powered on, the device will immediately begin measuring ambient sound levels and display the decibel (dB) value on the large LCD screen.
5.2 Comprensión da pantalla
The display shows the current decibel reading. An analog bar level indicator on the right side provides a quick visual reference of the noise level range.

Image: Close-up of the decibel meter display, accompanied by a chart explaining the color-coded analog bar level indicator and corresponding dB ranges.
5.3 Rexistro de datos
The device can record sound level data at 2-second intervals for up to one year. This data can be retrieved and analyzed using the PC software.
- Iniciar/Deter a gravación: Press the '▼' (down arrow) button for 2 seconds to start or stop recording. The 'REC' indicator light will flash when active.
- Recuperación de datos: Connect the device to your PC and use the software to view, export, and analyze recorded data.
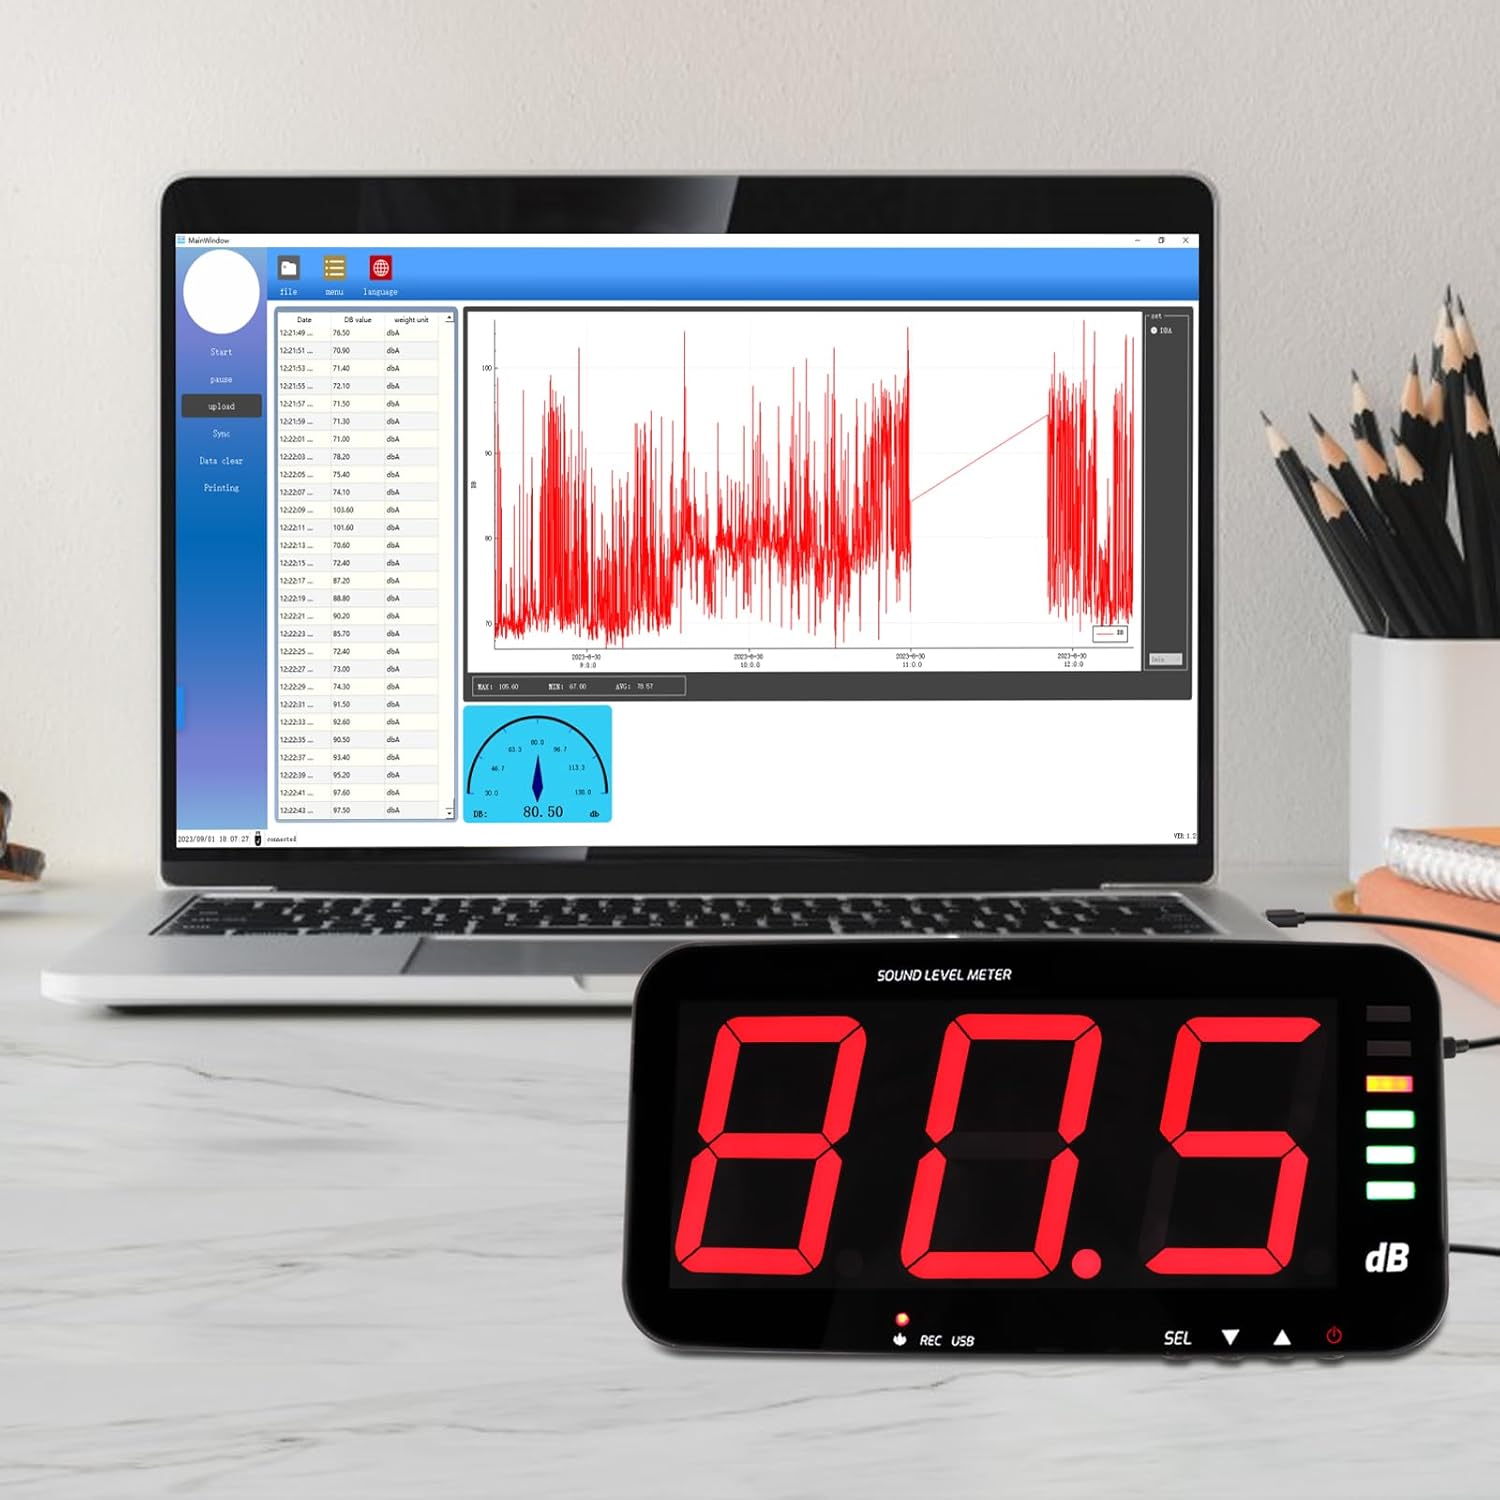
Image: The decibel meter connected to a laptop, displaying the data logging software interface with a graph of recorded sound levels.
5.4 Funcións de alarma
The meter features audible and visual alarms when a predefined decibel threshold is exceeded. The default alarm threshold is 120dB.
- Setting Thresholds: Long press the 'SEL' button to enter alarm settings. Use the arrow buttons to adjust the decibel threshold and alarm duration.
- Alarma visual: The alarm indicator light will illuminate or flash when the threshold is met.
- Alarma sonora: An internal buzzer will sound.
- External Alarm Output: The device includes a 3.5mm jack port for connecting an external 12V alarm speaker (not included).

Image: The decibel meter displaying a sound level with the alarm indicator light active, signifying an audio and visual alarm condition.

Imaxe: Lateral view of the decibel meter showing the DC 5V/OUT port connected to an external red alarm speaker, demonstrating the external alarm output interface.
6. Opcións de montaxe
The Landtek Decibel Meter offers several flexible mounting solutions to suit various environments.
- Colocación do escritorio: Use the integrated stand for discreet tabletop placement.
- Montaxe na parede: Utilize the provided mounting hardware to secure the unit to a wall.
- Colgado: The device can be hung using hooks or chains (not included) from a ceiling or overhead structure.
- Accesorio para trípode: A standard tripod screw hole allows for attachment to a camera tripod (tripod not included).

Image: A collage demonstrating four different ways to mount the decibel meter: wall mount, hanging, tabletop placement, and attachment to a tripod.
7. Especificacións
| Característica | Especificación |
|---|---|
| Rango de medición | 30 ~ 130 dB |
| Precisión | ±1.5 dB (at 94dB@1KHz) |
| Resolución | 0.1 dB (<100dB); 1 dB (>100dB) |
| Ponderación de frecuencia | Unha ponderación |
| Resposta en frecuencia | 31.5 Hz ~ 8.5 KHz |
| Samptaxa de ling | 2 veces / segundo |
| Ponderación do tempo | FAST, 0.5 seconds |
| Sensor | 6mm condenser microphone sensor |
| Test Probe Cable Length | 5 meters (approx. 16.4 ft) |
| Mostrar | LED digital tube, single character 4 inches |
| Saída de alarma | 12V high level |
| Alerta de alarma | Son e Luz |
| Fonte de alimentación | DC 5V / 1A |
| Dimensións | 323 x 173 x 40 mm (aprox. 12.7 x 6.8 x 1.6 polgadas) |
| Peso | Approx. 980 grams (2.16 lbs) |
8. Mantemento
To ensure the longevity and accuracy of your decibel meter, follow these maintenance guidelines:
- Limpeza: Limpar a pantalla e casinLimpe cun pano suave e seco. Non empregue produtos de limpeza abrasivos nin disolventes.
- Almacenamento: Garde o dispositivo nun lugar fresco e seco, lonxe da luz solar directa e de temperaturas extremas.
- Coidados do sensor: Keep the microphone sensor clean and free from dust or debris to maintain measurement accuracy.
- Fonte de alimentación: Always use the provided power adapter to prevent damage to the device.
9 Solución de problemas
- Device loses settings after power off: This device requires continuous power to retain custom settings. If the power supply is interrupted, settings may revert to default. Reconnect to PC and re-synchronize using the software to restore desired settings.
- A pantalla está en branco: Asegúrate de que o adaptador de corrente estea conectado correctamente tanto ao dispositivo como a unha toma de corrente que funcione.
- No data logging on PC: Verify that the USB cable is properly connected and the PC software is running. Ensure the device is synchronized with the software (refer to Section 4.2). Check that recording is active on the device (REC indicator flashing).
- Alarm not triggering: Check the alarm threshold settings via the PC software or by long-pressing the 'SEL' button. Ensure the threshold is set appropriately for the noise levels being monitored.
- Slow update intervals: The device updates approximately once per second. This is normal operation. For very short, transient sounds, the meter may not register the peak value instantly.