
EBTOOLS EBTOOLSpxvk7fmb38
EBTOOLS LGA 1155 Motherboard User Manual
Model: EBTOOLSpxvk7fmb38
Produto rematadoview
The EBTOOLS LGA 1155 Motherboard is designed for desktop PC systems, offering robust performance and extensive connectivity. It features a multiphase power chipset for stable CPU performance and supports 2nd/3rd generation LGA1155 Pin Series Processors. This Mini ITX motherboard provides a high-definition visual experience through its VGA and HD Multimedia Interface outputs.
As características principais inclúen:
- LGA 1155 CPU Slot: Designed for stable performance with compatible processors.
- Multiphase Power: Ensures stable and accurate power delivery to the CPU.
- HD Interfaces: Equipped with VGA and HD Multimedia Interface for digital HD video output.
- Channel DDR3: Features a DDR3 memory slot to enhance motherboard performance.
- Conectividade ampla: Includes 6 USB2.0 interfaces and 4 SATA2.0 interfaces for various peripherals and storage devices.
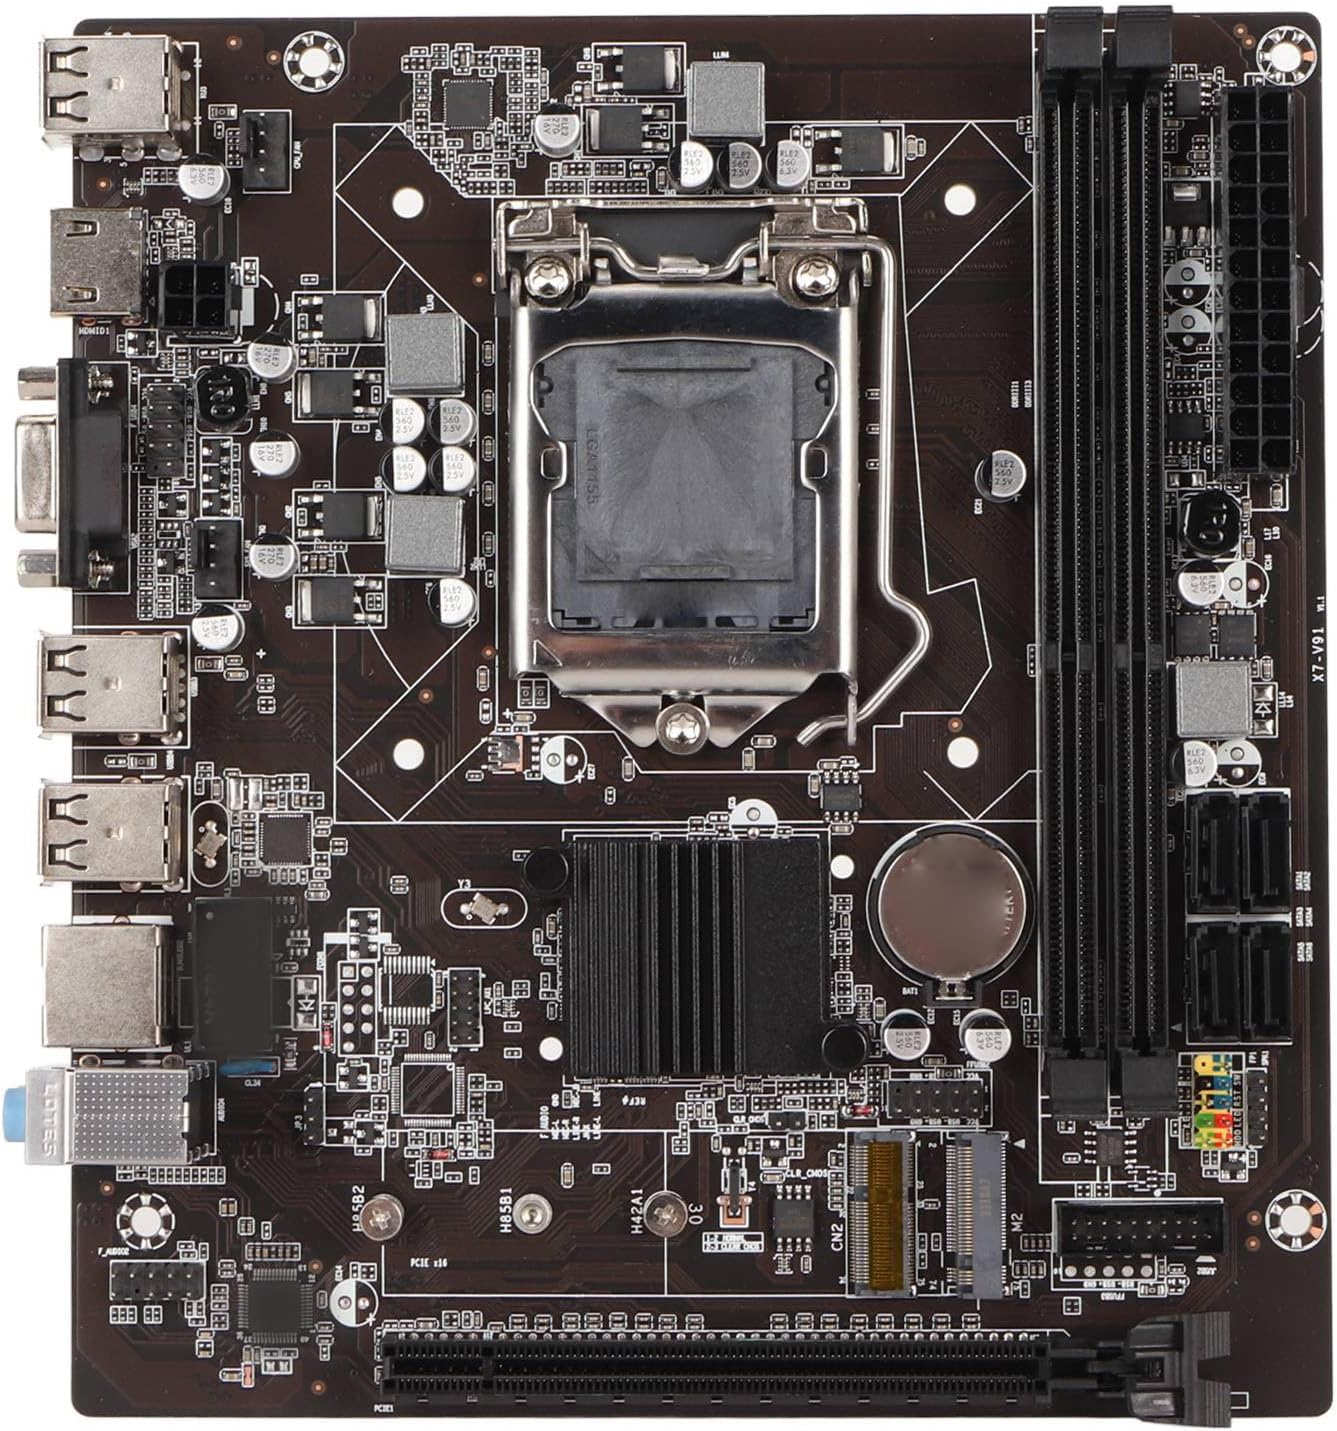
Figura 1: De arriba abaixo view of the EBTOOLS LGA 1155 Motherboard, showing the CPU socket, RAM slots, and various ports.
Configuración e instalación
This section provides instructions for installing your EBTOOLS LGA 1155 Motherboard into a compatible PC case and connecting essential components.
Contido do paquete
Before beginning installation, ensure all components listed below are present in your package:
- 1 x LGA 1155 Motherboard
- 1 x Metal I/O Plate
- 1 x Connecting Wire (likely SATA data cable)

Figure 2: The motherboard alongside its included metal I/O plate and a connecting wire, typically a SATA data cable.
Pasos de instalación
- Preparar o caso: Ensure your PC case is compatible with Mini ITX motherboards. Install the metal I/O plate into the designated slot at the rear of the case.
- Instalar a CPU: Carefully open the CPU socket retention arm. Align the triangular marker on your LGA 1155 processor with the corresponding marker on the motherboard's socket. Gently place the CPU into the socket, ensuring it sits flush. Close the retention arm to secure the CPU.
- Instalar o refrigerador da CPU: Apply thermal paste to the CPU (if not pre-applied on the cooler). Mount your compatible LGA 1155 CPU cooler according to its manufacturer's instructions.
- Instalar RAM: Open the clips on the DDR3 memory slots. Align the notch on your DDR3 RAM module with the key in the slot. Press firmly on both ends of the RAM module until the clips snap into place. This motherboard supports 2 x DDR3 slots.
- Montar a placa base: Carefully place the motherboard into the PC case, aligning the screw holes on the motherboard with the standoffs in the case. Secure the motherboard with screws.
- Conectar enerxía: Connect the 24-pin ATX power connector from your power supply to the motherboard. Connect the 4-pin or 8-pin CPU power connector (if applicable) to the motherboard.
- Conectar dispositivos de almacenamento: Use the provided connecting wire (SATA cable) to connect your SATA storage devices (HDD/SSD) to the SATA2.0 ports on the motherboard. This motherboard has 4 SATA2.0 interfaces.
- Conectar os cables do panel frontal: Connect the power button, reset button, USB ports, and audio jacks from your PC case's front panel to the corresponding headers on the motherboard. Refer to your case manual for specific pin layouts.
- Instalar tarxetas de expansión: If using a dedicated graphics card or other expansion cards, insert them into the PCIE X16 slot or other extended interfaces (1 x , 1 x M.2) as needed.
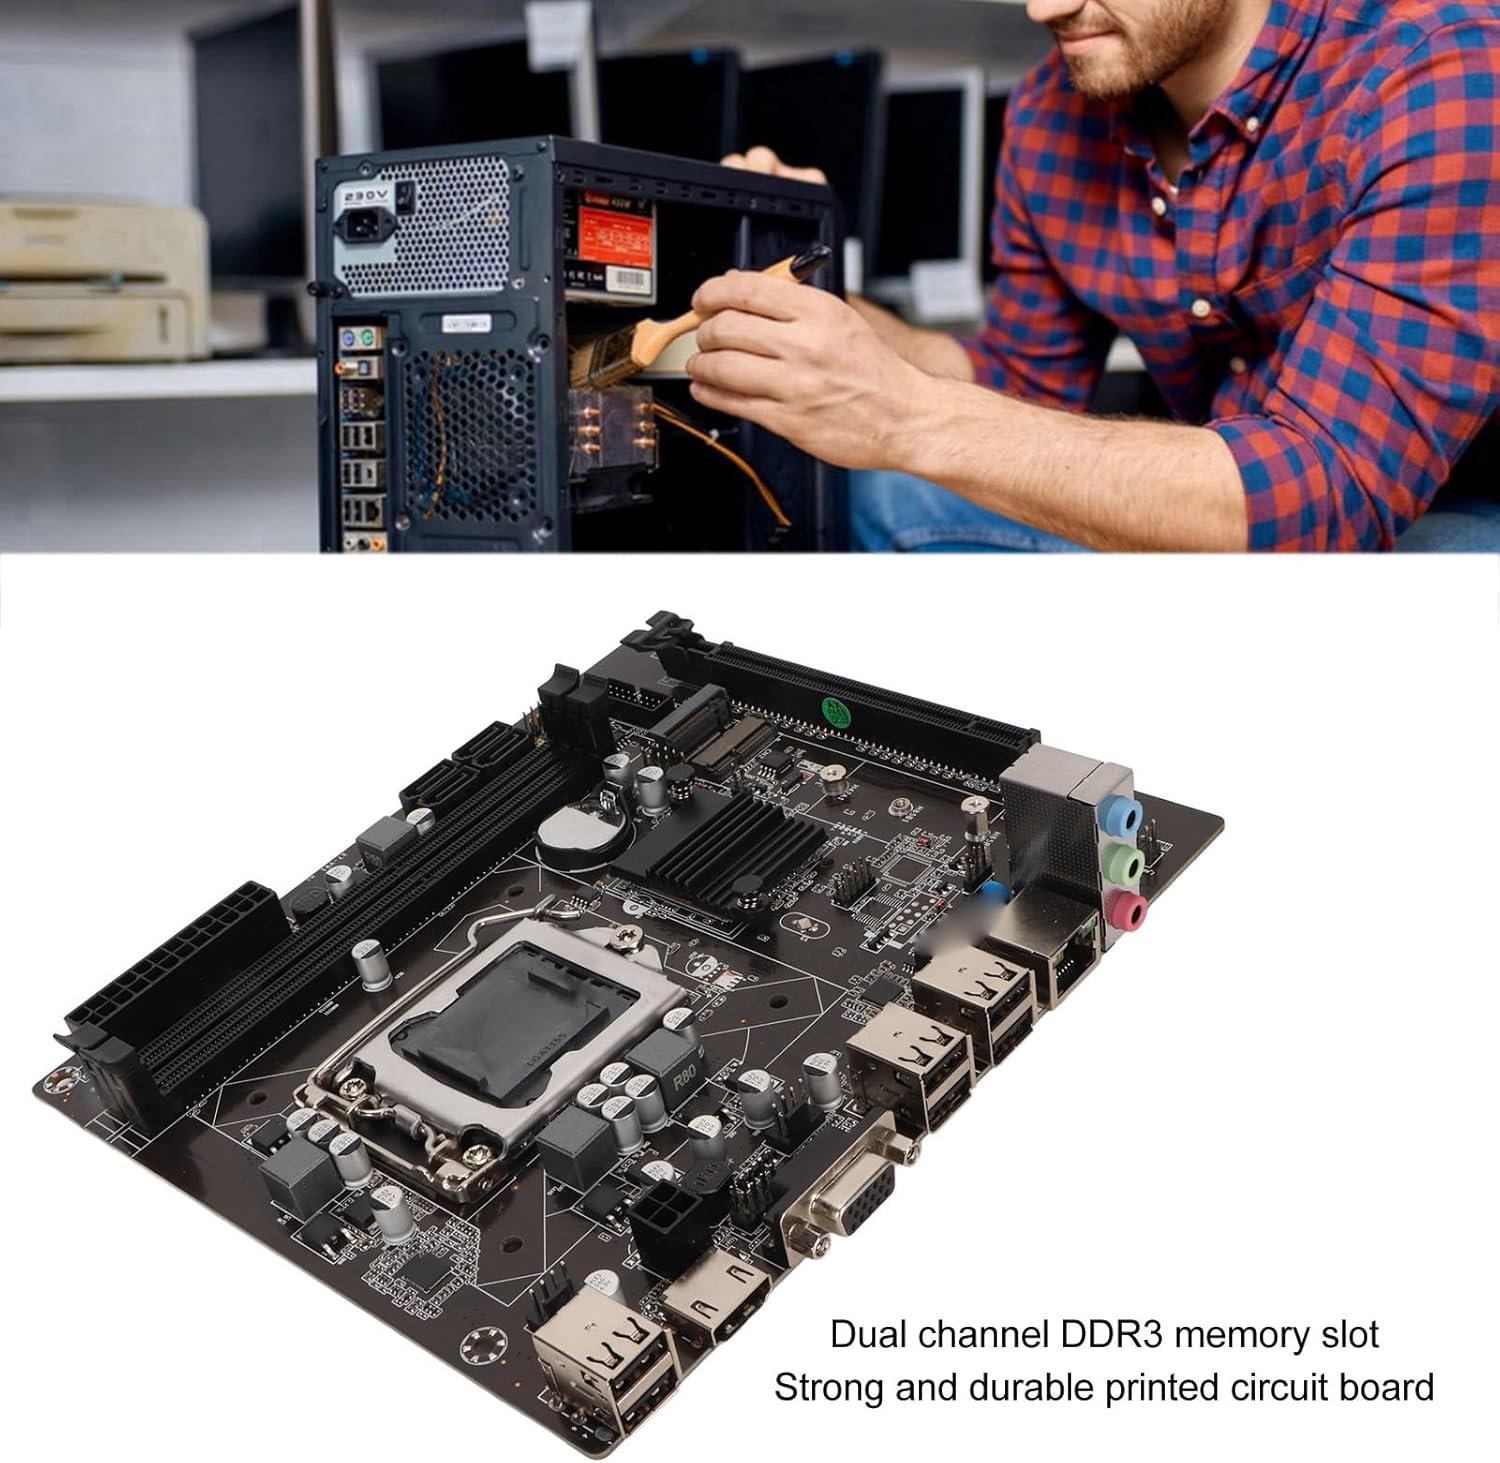
Figure 3: A user performing an installation within a PC case, demonstrating the typical environment for motherboard setup.

Figura 4: detallada view of the LGA 1155 CPU socket and adjacent DDR3 memory slots, crucial areas for component installation.
Pautas de funcionamento
Once the motherboard and other components are installed, the system is ready for operation. This motherboard supports various operating systems compatible with 2nd/3rd Gen LGA1155 processors.
Configuración da BIOS/UEFI
Upon first boot, you may need to enter the BIOS/UEFI setup to configure boot order, system time, and other settings. Typically, you can access the BIOS by pressing DEL or F2 during the initial boot screen.
Instalación de controladores
After installing your operating system, it is essential to install the necessary drivers for the motherboard's components, including chipset, network card, and integrated graphics (if used). These drivers are usually provided on a CD/DVD with the motherboard or can be downloaded from the manufacturer's websitio.
Conectividade
Utilize the available ports for your peripherals:
- Portos USB 2.0: For connecting keyboards, mice, external drives, and other USB devices.
- VGA/HD Multimedia Interface: For connecting displays.
- Porto Ethernet: For wired network connectivity (100M Netword Card).
- Conectores de son: Para altofalantes, auriculares e micrófonos.
Mantemento
Proper maintenance can extend the lifespan of your motherboard and ensure stable system performance.
- Mantéñase limpo: Regularly clean dust from inside your PC case, especially from the motherboard and CPU cooler fins, using compressed air. Dust accumulation can lead to overheating.
- Garantir un fluxo de aire adecuado: Make sure your PC case has adequate ventilation and that fans are functioning correctly to prevent heat buildup.
- Actualizacións da BIOS: Comprobe periodicamente o fabricante websitio para actualizacións da BIOS/UEFI. As actualizacións poden mellorar a compatibilidade, a estabilidade e o rendemento. Siga atentamente as instrucións de actualización.
- Actualizacións de controladores: Manteña os controladores do sistema actualizados para garantir un rendemento óptimo e a compatibilidade co novo software e hardware.
- Batería CMOS: The motherboard uses a CR2032 battery for CMOS settings. If your system consistently loses time or BIOS settings, the battery may need replacement.
Resolución de problemas
Esta sección aborda problemas comúns que podes atopar coa túa placa base.
- Sen alimentación/Sen arranque:
- Comprobe todas as conexións de alimentación (ATX de 24 pines, alimentación da CPU).
- Asegúrate de que a fonte de alimentación funciona e está activada.
- Verifique a conexión do botón de acendido do panel frontal á placa base.
- Sen visualización:
- Ensure the monitor is connected to the correct video output (VGA or HD Multimedia Interface).
- Reseat RAM modules. Try booting with one RAM stick if you have multiple.
- Reseat the CPU and check for bent pins (handle with extreme care).
- If using a dedicated graphics card, ensure it is properly seated and has power.
- Inestabilidade/fallos do sistema:
- Comproba as temperaturas da CPU e da GPU. Asegúrate dunha refrixeración axeitada.
- Executa ferramentas de diagnóstico de memoria para comprobar se hai defectos na RAM.
- Asegúrate de que todos os controladores estean instalados correctamente e actualizados.
- Check for loose connections or components.
- Dispositivos USB non recoñecidos:
- Asegúrate de que os controladores USB estean instalados.
- Proba con portos USB diferentes.
- Check BIOS settings for USB controller enablement.
Especificacións
Detailed technical specifications for the EBTOOLS LGA 1155 Motherboard:
| Característica | Especificación |
|---|---|
| Tipo de elemento | Placa base LGA 1155 |
| Material | Printed Circuit Board, Metal |
| Batería incorporada | CR2032 x 1 (240mAh) |
| Soporte CPU | 2nd/3rd Gen LGA1155 Pin Series Processors (for Celeron, for , for Core) |
| Chipset | H61 Chipset Series |
| Slot de memoria | 2 DDR3 |
| Capacidade máxima de memoria | 16 GB |
| Interface USB | 6 x USB2.0, USB Pin x 1 |
| Interface SATA | 4 x SATA 2.0 |
| Tarxeta de rede | 100M Network Card |
| Ranura para tarxeta gráfica | 1 x PCIE X16 |
| Interface estendida | 1 x , 1 x M.2 |
| Dimensións do paquete | 10.2 x 7.83 x 2.05 polgadas |
| Peso do elemento | 1.16 libras |
| Número de modelo | EBTOOLSpxvk7fmb38 |
| ASIN | B0CKVL89BD |

Figure 5: An angled perspective of the motherboard, showcasing its compact Mini ITX form factor and port layout.
Garantía e Soporte
For warranty information and technical support, please refer to the official EBTOOLS websitio web ou póñase en contacto co servizo de atención ao cliente. Garde o recibo da compra como proba de compra.
While specific warranty details are not provided in this manual, general product warranties typically cover manufacturing defects for a limited period from the date of purchase.
Para obter protección adicional, considere os plans de protección dispoñibles:
- Plan de protección a 3 anos
- Plan de protección a 4 anos
- Protección completa (plan mensual)
These plans are offered separately and provide extended coverage beyond the standard manufacturer's warranty.
Fabricante: EBTOOLS
Data de primeira dispoñibilidade: 11 de outubro de 2023
Vídeos oficiais de produtos
Neste momento non hai vídeos oficiais do vendedor dispoñibles para este produto.
Ask a question about this manual
Ask about setup, troubleshooting, compatibility, parts, safety, or missing instructions. Manuals+ will review the question and use this page’s manual context to help answer it.