1. Introdución
Thank you for choosing the Homra Removable Recessed Bin. This product is designed to provide an organized and discreet waste management solution for your kitchen, fitting conveniently under your sink. It features two removable 20-liter compartments, ideal for separating waste and recyclables. This manual provides essential information for safe installation, operation, and maintenance of your new recessed bin.
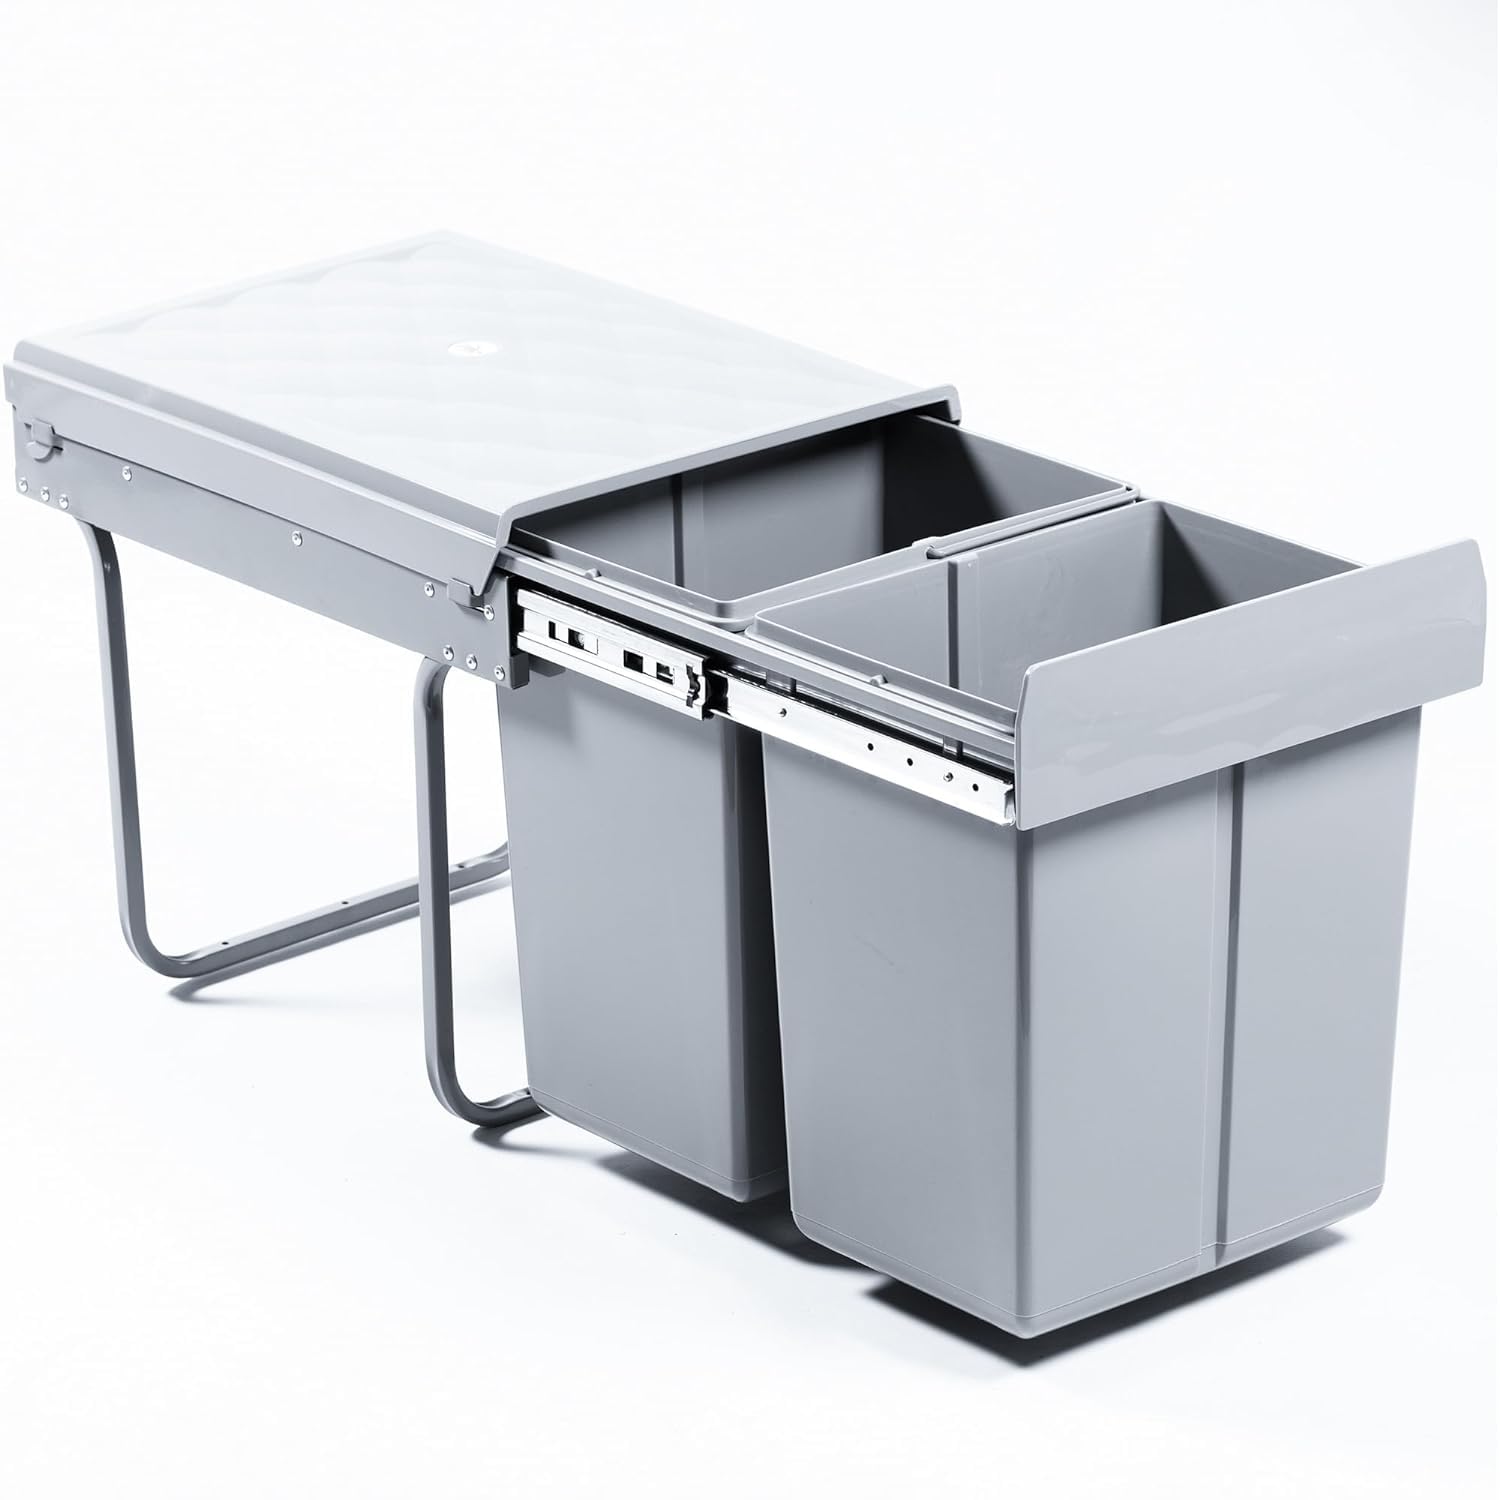
Figura 1: The Homra Removable Recessed Bin, showcasing its two compartments and under-sink installation.
2. Instrucións de seguridade
Lea atentamente todas as instrucións de seguridade antes da instalación e o uso. O incumprimento destas instrucións pode provocar lesións ou danos no produto.
- Ensure the installation area is clear of electrical wires, water pipes, and gas lines before drilling.
- Use sempre o equipo de seguridade axeitado, como luvas e protección ocular, durante a instalación.
- Do not overload the bins. The maximum capacity for each compartment is 20 liters.
- Manteña as mans e os dedos lonxe das pezas móbiles durante o funcionamento para evitar pellizcos.
- Este produto está pensado só para uso doméstico.
- Mantéñase fóra do alcance dos nenos para evitar accidentes.
3. Contido do paquete
Verifique que todos os compoñentes estean presentes e sen danos antes de continuar coa instalación.
- 1x Main frame/housing with pull-out mechanism
- 2x Removable 20-liter bins (grey)
- 1x Set of mounting hardware (screws, washers)
- 1 x manual de instrucións
4. Configuración e instalación
The Homra Recessed Bin is designed for base fixing within a kitchen cabinet, typically under the sink. Ensure your cabinet meets the minimum dimension requirements for proper fit and function.
4.1. Comprobacións previas á instalación
- Dimensións do armario: The bin requires a minimum cabinet width of 40 cm. Measure the internal width, depth, and height of your cabinet to ensure adequate space, especially considering any plumbing under the sink.
- Liquidación: Verify that no pipes, hoses, or other obstructions will interfere with the bin's movement or installation.
- Ferramentas necesarias: You will need a measuring tape, pencil, drill, screwdriver, and possibly a level.
4.2. Mounting the Frame
- Position the main frame of the bin inside your cabinet at the desired location. Ensure it is flush against the cabinet base and aligned correctly.
- Using a pencil, mark the positions for the mounting screws through the pre-drilled holes in the frame's base.
- Remove the frame and, if necessary, pre-drill pilot holes at the marked positions. Be careful not to drill through the cabinet base.
- Reposition the frame and secure it to the cabinet base using the provided screws and washers. Tighten securely, but do not overtighten.
Note: An image illustrating the frame being secured to the cabinet base would typically be included here, showing screw placement.
4.3. Inserting the Bins
- Once the frame is securely mounted, slide the two removable 20-liter bins into their designated slots within the frame.
- Ensure the bins sit firmly and are properly aligned.
Your Homra Recessed Bin is now installed and ready for use.
5. Instrucións de funcionamento
5.1. Apertura e peche
- To access the bins, gently pull the front of the bin assembly outwards from the cabinet. The pull-out mechanism will extend the bins.
- To close, push the bin assembly back into the cabinet until it is fully recessed.
5.2. Waste Separation
Utilize the two separate 20-liter compartments for efficient waste separation. For example, one bin can be used for general waste and the other for recyclables (plastic, paper, etc.).
5.3. Emptying the Bins
- Pull the bin assembly out of the cabinet.
- Lift each individual 20-liter bin upwards to remove it from the frame.
- Empty the contents into your main waste or recycling collection.
- Return the empty bins to their respective slots in the frame.
6. Mantemento
Regular cleaning and maintenance will ensure the longevity and hygienic operation of your Homra Recessed Bin.
6.1. Cleaning the Bins
- The removable plastic bins can be easily cleaned with warm water and mild detergent.
- Rinse thoroughly and allow to air dry completely before placing them back into the frame.
- Avoid using abrasive cleaners or harsh chemicals, as these may damage the plastic.
6.2. Cleaning the Frame and Mechanism
- Wipe down the metal frame and pull-out mechanism with a damp pano.
- For stubborn dirt, use a mild, non-abrasive cleaner.
- Ensure the mechanism is dry after cleaning to prevent rust.
- Comprobe periodicamente que os parafusos de montaxe estean ben axustados e aperteos de novo se é necesario.
7 Solución de problemas
If you encounter any issues with your Homra Recessed Bin, refer to the following common problems and solutions:
| Problema | Causa posible | Solución |
|---|---|---|
| Bin is difficult to pull out or push in. | New mechanism stiffness; obstruction; loose mounting screws. | Operate several times to break in; check for obstructions; tighten mounting screws. |
| Bins do not sit properly in the frame. | Incorrect placement; debris in slots. | Ensure bins are inserted correctly; clear any debris from the slots. |
| Bin assembly feels wobbly. | Parafusos de montaxe soltos. | Re-tighten all mounting screws securing the frame to the cabinet base. |
8. Especificacións
- Marca: Homra
- Modelo: 2x20L Recessed Bin (B0CLDKR783)
- Capacidade: 40 Liters (2 x 20L compartments)
- Cor: Gris
- Material: Plastic (bins), Metal (frame)
- Mecanismo de apertura: Manual Pull-out
- Tipo de instalación: Base Fixing (Under Sink)
- Ancho mínimo do armario: 40 cm
- Peso do artigo: Aproximadamente 5.3 quilogramos
- Característica especial: Removable Bins
9. Garantía e soporte
Homra products are manufactured to high-quality standards. For specific warranty information, please refer to the documentation provided at the time of purchase or contact your retailer. If you have any questions, require technical assistance, or need to report a defect, please contact Homra customer support through the retailer's platform or the official Homra websitio.