
1. Introdución
This manual provides detailed instructions for the setup, operation, and maintenance of your Bmax B6 Power Mini PC. This compact desktop computer is designed for various applications, from office tasks to multimedia consumption, offering a balance of performance and space efficiency.

Image 1.1: The Bmax B6 Power Mini PC, showcasing its compact design and front ports.
2. Que hai na caixa
Comprobe o contido do seu paquete para asegurarse de que estean presentes todos os elementos:
- 1 x Bmax B6 Power Mini PC (16GB+1TB configuration)
- 1 x cable HDMI
- 1 x Manual de usuario
- 1 x adaptador de alimentación estadounidense
- 1 soporte VESA con parafusos
3. Produto rematadoview
The Bmax B6 Power Mini PC is equipped with advanced components for efficient performance.

Imaxe 3.1: Acabadoview of key features including processor, memory, storage, and connectivity.
3.1 Características principais
- Procesador: Intel Core i7-1060NG7, 4 Cores/8 Threads, up to 3.8GHz.
- Memoria: 16 GB de memoria RAM LPDDR4.
- Almacenamento: 1TB NVMe SSD, with support for dual NVMe SSDs and expandable up to 2TB via 2.5" HDD (SATA cable included).
- Gráficos: Intel Iris Xe Graphics, supporting 4K@60Hz output.
- Saída de visualización: Supports three simultaneous displays via 2x HDMI 2.0 and 1x Full-Featured Type-C port.
- Conectividade sen fíos: Wi-Fi 6 (2.4G/5G 802.11a/b/g/n/ac) and Bluetooth 5.2.
- Conectividade por cable: 1x Gigabit Ethernet (RJ45).
- Portos: 3x USB 3.0, 1x Full-Featured Type-C, 2x HDMI 2.0, 1x Earphone/Microphone Jack, 1x DC Power Input.
- Características adicionais: VESA mount compatibility, Wake On LAN, PXE Boot, RTC Wake, Auto Power On, One-key Smart Recovery.

Image 3.2: Detailed diagram of the front and rear ports and their functions.
4. Guía de configuración
4.1 Conexión de periféricos
- Conectar a pantalla: Use the provided HDMI cable to connect your monitor or TV to one of the HDMI ports on the Mini PC. Alternatively, use a compatible USB-C to display cable for the Type-C port.
- Conectar o teclado e o rato: Plug your USB keyboard and mouse into the available USB 3.0 ports. For wireless devices, ensure Bluetooth is enabled and pair them as per their instructions.
- Conectar á rede (opcional): For a wired internet connection, connect an Ethernet cable from your router or modem to the RJ45 port on the Mini PC.
- Conectar enerxía: Plug the US Power Adapter into the DC power input port on the Mini PC, then plug the adapter into a power outlet.
4.2 Encendido inicial
- Ensure all peripherals are connected.
- Press the power button located on the front of the Mini PC.
- The system will boot up. Follow the on-screen instructions to complete the Windows setup process. It is recommended to keep the Ethernet cable unplugged during the first boot for faster setup if prompted.
5. Instrucións de funcionamento
5.1 Funcionamento básico
- Encendido/apagado: Press the power button to turn on the PC. To turn off, use the Windows Shut Down option or press and hold the power button for 5 seconds.
- Reiniciar: Use the Windows Restart option.
- Modo de suspensión: Use the Windows Sleep option or briefly press the power button.
5.2 Configuración da pantalla
The Bmax B6 Power supports up to three 4K@60Hz displays simultaneously.
- Connect your displays to the available HDMI 2.0 ports and the Full-Featured Type-C port.
- In Windows, right-click on the desktop and select "Display settings" to configure multiple displays (extend, duplicate, or show only on one).

Image 5.1: Illustration of the Mini PC connected to multiple displays, demonstrating its multi-tasking capabilities.
5.3 Conectividade de rede
- Wi-Fi: Para conectarse a unha rede sen fíos, faga clic na icona Wi-Fi da barra de tarefas, seleccione a súa rede e introduza o contrasinal.
- Ethernet: If an Ethernet cable is connected, the PC will automatically establish a wired network connection.
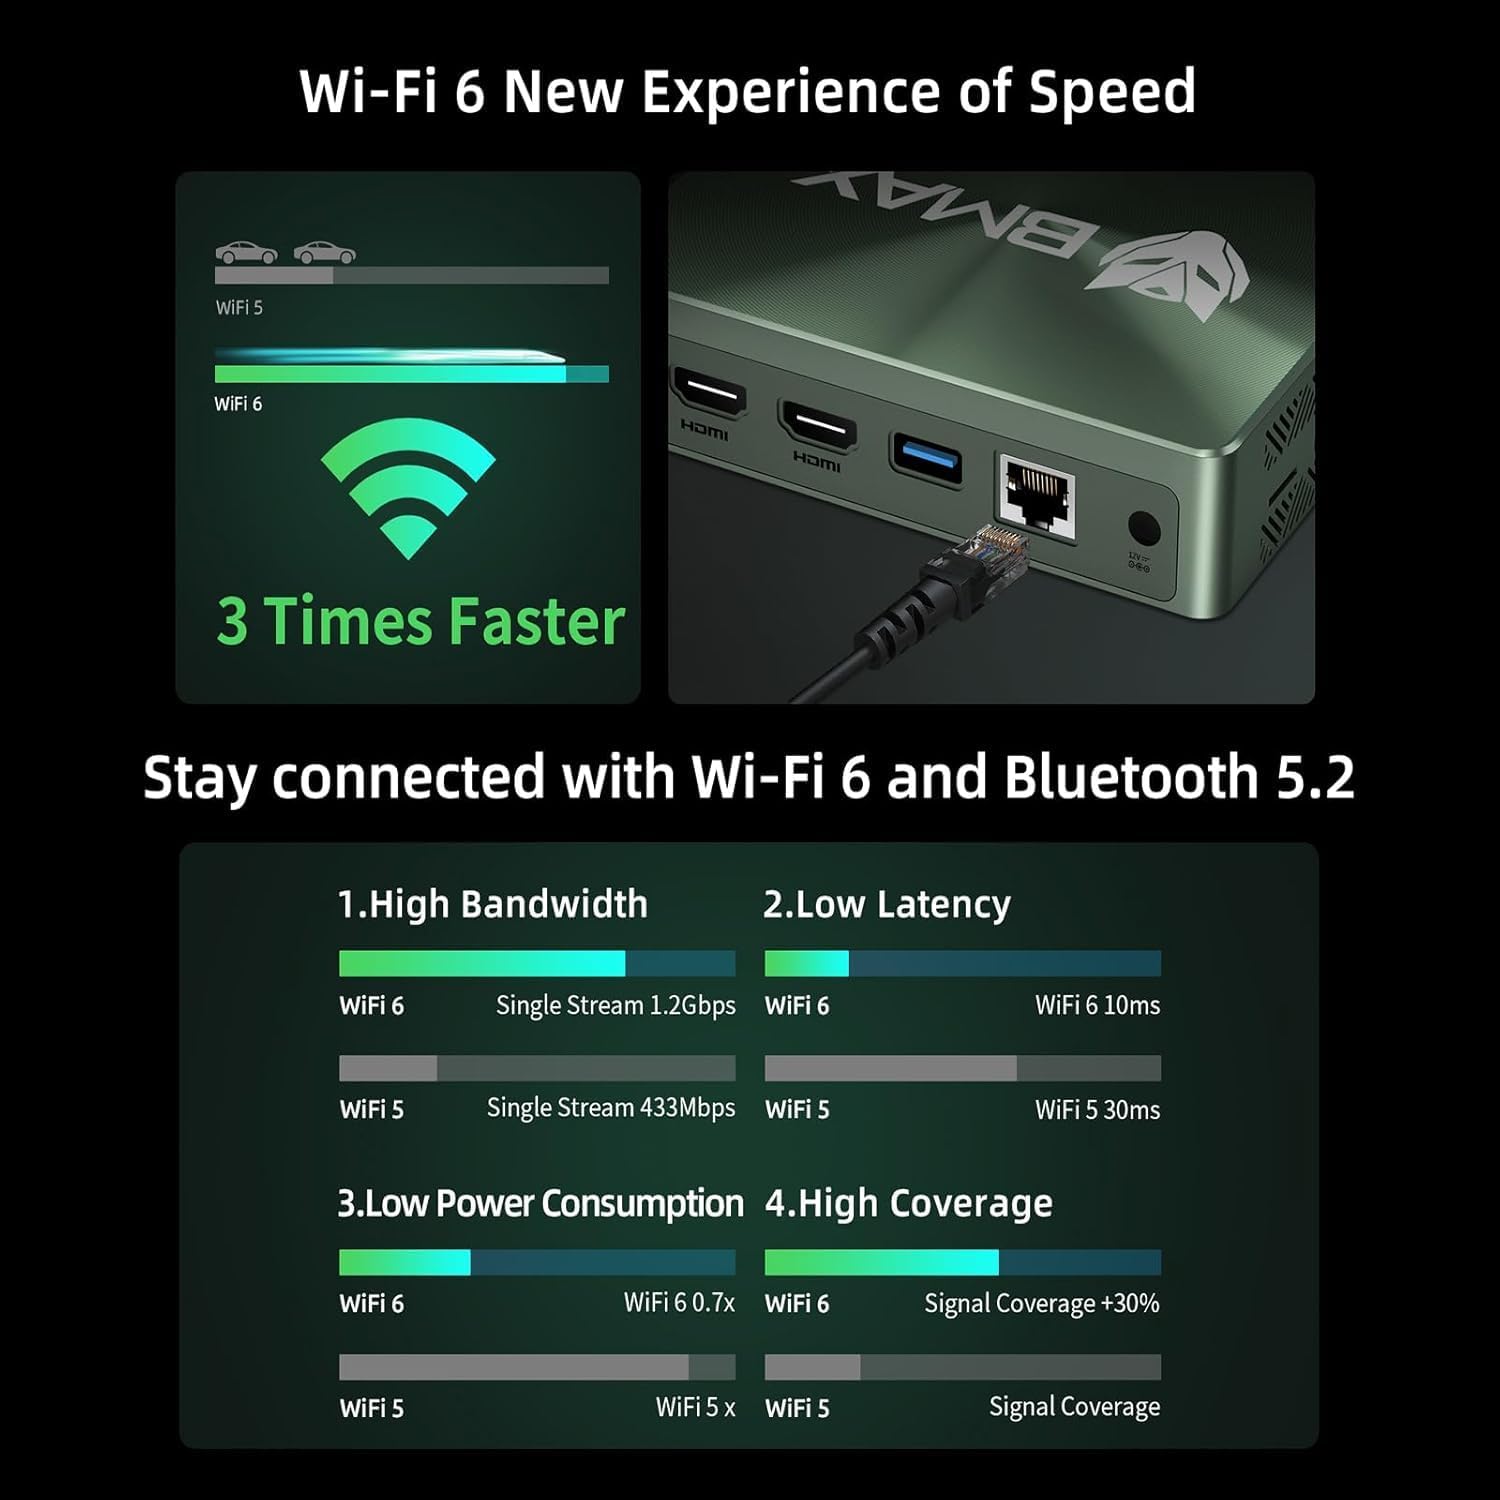
Image 5.2: Visual representation of Wi-Fi 6 and Bluetooth 5.2 capabilities, highlighting speed and connectivity benefits.
6. Mantemento
6.1 Limpeza
- Ensure the Mini PC is powered off and unplugged before cleaning.
- Use un pano suave e seco para limpar o exterior.
- For dust accumulation in vents, use compressed air. Do not insert objects into the vents.
6.2 Expansión do almacenamento
The Bmax B6 Power supports additional storage. You can install a second M.2 NVMe SSD or a 2.5-inch HDD/SSD.
- Refer to the detailed instructions in the included user manual for safe installation of additional storage devices.
- Ensure the device is powered off and unplugged before opening the chassis.

Image 6.1: Diagram illustrating the M.2 NVMe SSD slot and the option for expanded storage.
7 Solución de problemas
7.1 Sen enerxía
- Check if the power adapter is securely connected to both the Mini PC and the power outlet.
- Asegúrese de que a toma de corrente funcione.
- Proba cunha toma de corrente diferente.
7.2 Sen saída de pantalla
- Verify that the HDMI or USB-C cable is securely connected to both the Mini PC and the monitor.
- Asegúrate de que o monitor estea acendido e configurado na fonte de entrada correcta.
- Proba cun cable de pantalla ou monitor diferente se estás dispoñible.
7.3 System Recovery (One-key Smart Recovery)
If your Windows operating system encounters issues, the Bmax B6 Power features a "Smart Recovery" environment to restore factory settings.
- Step 1: Power On Mini PC.
- Step 2: Enter Recovery Mode. As soon as the screen lights up, immediately and repeatedly press the F9 key until the System Recovery menu appears.
- Step 3: Start the Recovery. Tes dúas opcións:
- Using Keyboard: Press the 'Y' key to begin the Factory Reset.
- Using Mouse: Click the [Restore System] button.
- Step 4: Set Up Windows Once Complete. You will be greeted by the initial Windows setup screen. Simply follow the on-screen instructions to set up your fresh system.

Image 7.1: Screenshot of the Bmax Smart Recovery environment, showing options for Factory Reset and Exit.
8. Especificacións
| Característica | Detalle |
|---|---|
| Marca | Bmáx |
| Número de modelo | B6 Potencia |
| Procesador | Intel Core i7-1060NG7 (4C/8T, up to 3.8 GHz) |
| RAM | 16 GB LPDDR4 |
| Almacenamento | 1 TB NVMe SSD (expandable up to 2 TB via 2.5" HDD/SSD) |
| Gráficos | Gráficos Intel Iris Xe (integrados) |
| Resolución máxima de pantalla | 3840 x 2160 píxeles (4K) |
| Mostrar saída | 2x HDMI 2.0, 1x Full-Featured Type-C (supports triple 4K@60Hz displays) |
| Conectividade sen fíos | Wi-Fi 6 (802.11a/b/g/n/ac), Bluetooth 5.2 |
| Conectividade por cable | 1x Gigabit Ethernet (RJ45) |
| Portos USB | 3x USB 3.0, 1x Full-Featured Type-C |
| Audio | 1x Earphone/Microphone Jack |
| Sistema Operativo | OS (Typically Windows, specific version may vary) |
| Peso do elemento | 1.61 libras |
| Cor | Negro |
| Características especiais | VESA Mount, Wake On LAN, PXE Boot, RTC Wake, Auto Power On, Smart Recovery |
9. Garantía e soporte
Bmax provides comprehensive support for your Mini PC.
- Garantía: Your Bmax Mini PC comes with a 12-month warranty.
- Devolucións: Hai dispoñible unha política de devolución de 30 días.
- Atención ao cliente: 7x24-hour customer service support is provided.
- Soporte técnico: Hai dispoñible soporte técnico de por vida.
9.1 How to Contact Support
For inquiries, system updates, or troubleshooting assistance, please contact customer service through your Amazon account:
- Log in to Amazon.
- Go to "Your Account".
- Vaia a "Os seus pedidos".
- Select the Bmax B6 Power Mini PC order and click "Ask Product Question".

Image 9.1: Information on contacting Bmax after-sales support via Amazon.