
Introdución
This manual provides comprehensive instructions for the installation, operation, and maintenance of your KLIMAIRE 12,000 BTU 23.1 SEER2 Hyper Heat Ductless Mini Split Air Conditioner & Heat Pump System, Model KSIH012-H222-S(W). Please read this manual thoroughly before installation and operation to ensure proper use, optimal performance, and safety. Keep this manual for future reference.
Información importante de seguridade
Always follow basic safety precautions when installing, operating, or maintaining this appliance. Failure to do so may result in electric shock, fire, or injury. This appliance must be installed by qualified personnel in accordance with national and local wiring regulations.
- Asegúrate de que a fonte de alimentación coincida coas especificacións da unidade (230 V).
- Non intente reparar nin modificar a unidade vostede mesmo. Póñase en contacto co persoal de servizo cualificado.
- Keep the area around the outdoor unit clear of debris and obstructions.
- Asegúrese de conectar a terra adecuada para evitar descargas eléctricas.
- Turn off the power supply before performing any maintenance or cleaning.
Contido do paquete
Comprobe que todos os compoñentes estean presentes antes de comezar a instalación:
- KLIMAIRE 12,000 BTU Indoor Fan Coil (KSIH012-H225-IW-2)
- KLIMAIRE Outdoor Smart DC Inverter Condenser (KSIH012-H225-O-2)
- Remote Control with Holder
- Maxwell 16’ – ¼ x 1/2 Maxwell Installation Kit (Pre-Flared)
- Soporte de montaxe en parede Maxwell
- Whip (Electrical Conduit)
- Interruptor de desconexión
- Wi-Fi Receiver Module (KPIMDWF)

Image: All components included in the KLIMAIRE 12,000 BTU Mini Split System package.
Configuración e instalación
Installation of this mini split system requires specialized tools and knowledge. It is highly recommended that installation be performed by a certified HVAC technician. Improper installation can lead to equipment damage, voided warranty, and safety hazards.
Instalación terminadaview Vídeo
Video: This official KLIMAIRE installation video provides a visual guide for setting up the U PRO series, which shares similar installation principles with the KSIH series. It covers mounting the indoor unit, connecting piping, and electrical wiring.
1. Indoor Unit Mounting
- Seleccionar localización: Choose a location on a sturdy wall, away from direct sunlight or heat sources, and ensuring proper air circulation. Maintain minimum clearances from walls and ceiling as specified in the template.
- Placa de montaxe: Use the provided mounting template to mark drill points for the indoor unit's mounting plate and the line set wall hole. Securely fasten the mounting plate to the wall using appropriate screws and anchors. Ensure the plate is perfectly level.
- Perforar a parede: Drill a hole (typically 2.5-3 inches in diameter) through the wall for the line set, drain hose, and electrical wiring. Angle the hole slightly downwards towards the exterior to ensure proper drainage.

Image: The indoor unit mounted on a wall, illustrating its compact design and integration into a living space.
2. Line Set and Drain Hose Connection
- Route Lines: Carefully route the pre-flared Maxwell 16’ line set, drain hose, and communication cable through the drilled wall hole to the exterior.
- Connect to Indoor Unit: Connect the line set and drain hose to the corresponding ports on the indoor unit. Ensure all connections are tight and leak-free.
- Insulate and Secure: Insulate the refrigerant lines and drain hose. Use the provided Maxwell Wall Mounting Bracket to secure the outdoor unit.
3. Cableado Eléctrico
- Apagado: Ensure the main power supply to the installation area is turned OFF at the circuit breaker before any electrical work.
- Connect Indoor Unit: Connect the communication cable from the indoor unit to the outdoor unit's electrical terminals, following the wiring diagram in the full instruction manual.
- Connect Outdoor Unit: Connect the main power supply (230V) to the outdoor condenser unit's electrical terminals. Use the provided Whip and Disconnect Switch for safe and compliant electrical connection.
- Módulo Wi-Fi: Install the Wi-Fi Receiver Module (KPIMDWF) into the designated port on the indoor unit for smart control capabilities.
4. Vacuuming the Line Set
This critical step removes air and moisture from the refrigerant lines, preventing system damage and ensuring efficient operation. A vacuum pump and manifold gauges are required.
Video: This video demonstrates the simple steps to pull a vacuum on a mini split system, a crucial process for removing air and moisture from the refrigerant lines before releasinrefrixerante g.
- Connect Gauges: Connect the manifold gauge set to the service ports on the outdoor unit and the vacuum pump.
- Evacúo: Turn on the vacuum pump and open the manifold gauge valves to evacuate the system. Monitor the vacuum level until it reaches the manufacturer's specified micron level (typically below 500 microns).
- Manter o baleiro: Close the manifold gauge valves and turn off the vacuum pump. Observe the gauge for at least 15-30 minutes to ensure the vacuum holds, indicating no leaks.
- Liberación de refrixerante: Once the vacuum holds, slowly open the service valves on the outdoor unit to release the refrigerant into the system.
Instrucións de funcionamento
Your KLIMAIRE mini split system offers various operating modes and features for personalized comfort.
Funcións de control remoto
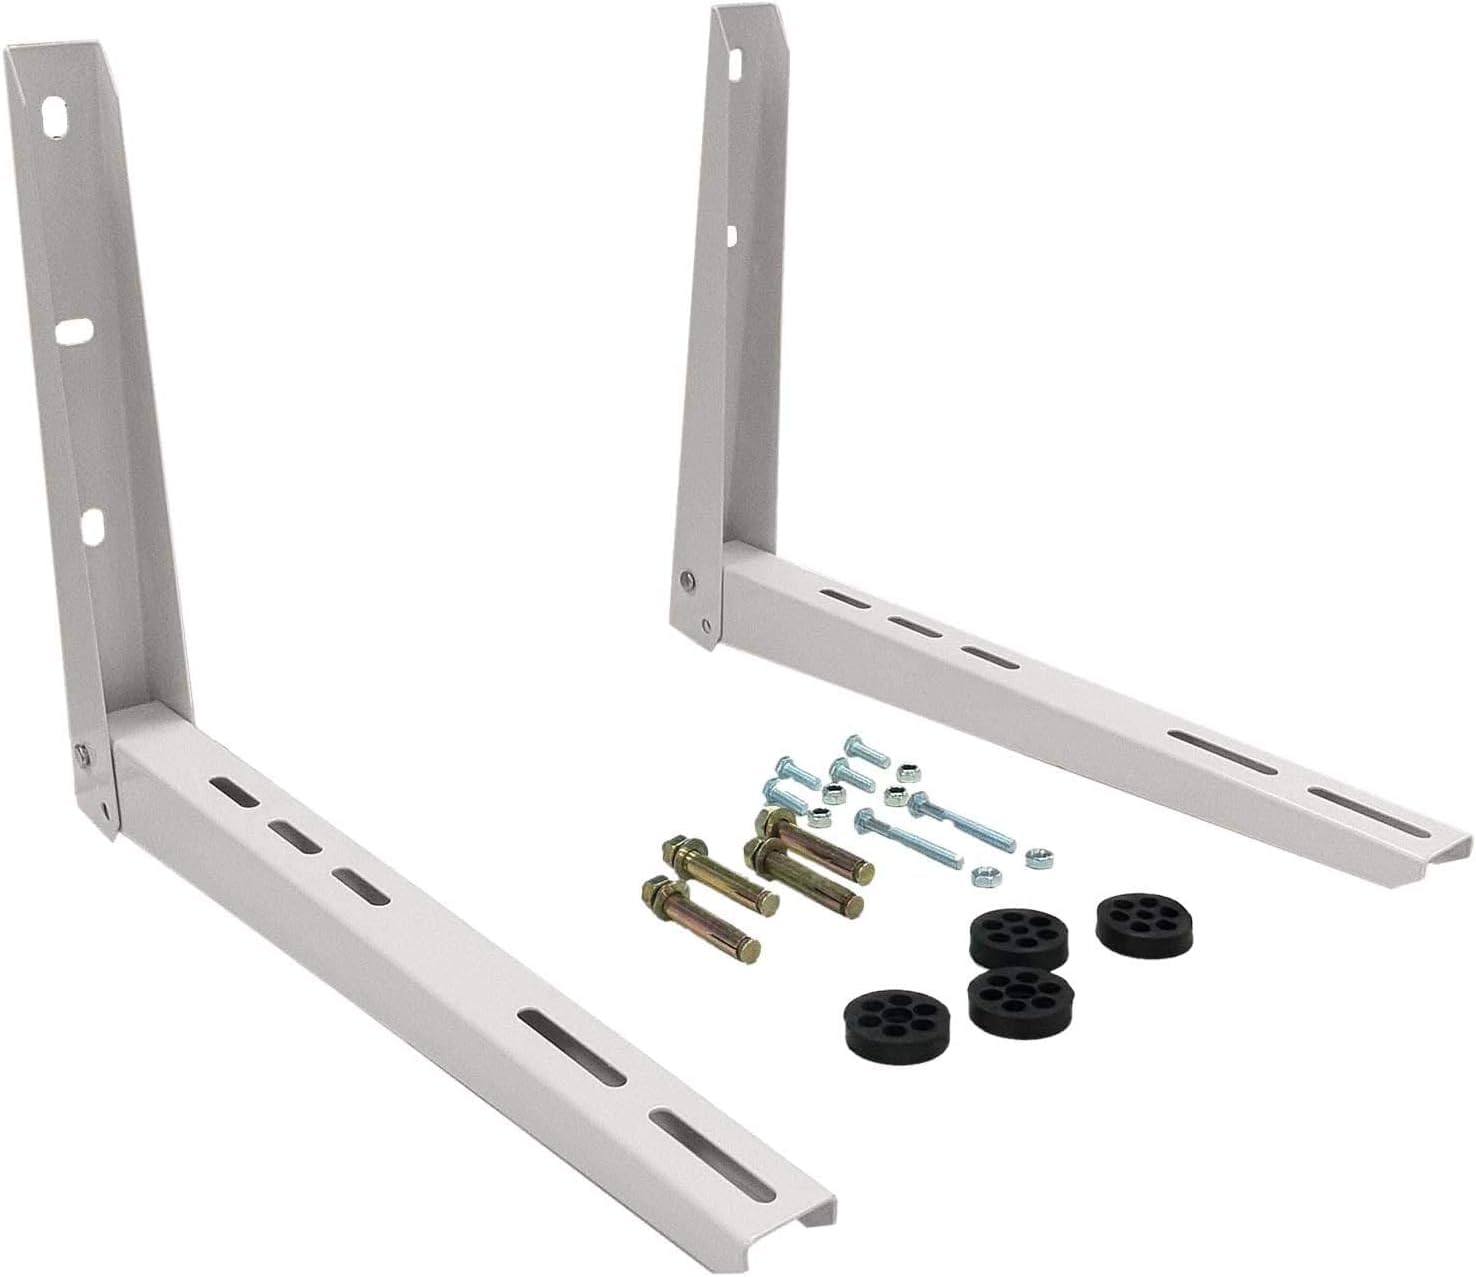
Image: The remote control for the KLIMAIRE mini split system, highlighting its intuitive button layout for various functions.
- ON/OFF: Acende ou apaga a unidade.
- MODO: Percorre ciclicamente os modos de funcionamento:
- FRÍO: Proporciona refrixeración.
- CALENTACIÓN: Provides heating, effective down to -22°F ambient temperature.
- SECO: Deshumidifica o aire.
- VENTILADOR: Fai circular o aire sen quentar nin arrefriar.
- AUTOMÁTICO: Automatically selects mode based on room temperature.
- TEMP ▲/▼: Axusta a temperatura desexada.
- VENTILADOR: Adjusts fan speed (12-grade indoor fan speed).
- DURMIR: Optimizes comfort and energy savings during sleep.
- TURBO: Activates maximum fan speed for rapid cooling or heating.
- SWING/DIRECT: Controls the direction of the airflow louvers.
- SÍGUEME: The remote control acts as a thermostat, sensing the temperature at its location.
- TEMPORIZADOR ON/OFF: Sets a timer for the unit to turn on or off.
Control Wi-Fi
The Wi-Fi enabled feature allows you to control your mini split system remotely via a smartphone app. Refer to the Wi-Fi module's specific instructions for pairing and app usage.

Image: A user interacting with the mini split system via a smartphone application, showcasing the convenience of Wi-Fi control.
Mantemento
Regular maintenance ensures efficient operation and extends the lifespan of your unit. Always disconnect power before performing maintenance.
- Limpeza do filtro de aire: The indoor unit features washable air filters. Clean them every 2-4 weeks, or more frequently if the unit is used heavily or in dusty environments. Remove filters, wash with mild soap and water, rinse thoroughly, and allow to dry completely before reinstallation.
- Función de autolimpeza: Utilize the unit's self-cleaning feature periodically to prevent mold and mildew buildup on the indoor coil. Refer to the remote control instructions for activation.
- Limpeza da unidade exterior: Periodically inspect and clean the outdoor condenser coil to remove dirt, leaves, and other debris that can obstruct airflow. Use a soft brush or vacuum cleaner.
- Inspección de drenaxe: Ensure the drain hose is clear of blockages and properly sloped to allow for continuous water drainage.

Image: Key features of the KLIMAIRE mini split, emphasizing ease of maintenance and the self-cleaning system.
Resolución de problemas
Antes de contactar co servizo de atención ao cliente, volva aview os seguintes problemas e solucións comúns:
- A unidade non se acende: Comprobe a fonte de alimentación, o disxuntor e asegúrese de que as pilas do mando a distancia funcionen.
- Refrixeración/calefacción insuficiente: Verify correct mode and temperature settings. Clean air filters. Check for obstructions around indoor/outdoor units. Ensure windows and doors are closed.
- Ruído inusual: Minor noises during operation are normal. If loud or unusual noises occur, check for loose parts or obstructions.
- Fuga de auga: Inspect the drain hose for kinks, blockages, or improper slope.
- Códigos de erro: The unit features self-diagnostic capabilities. If an error code appears on the display, consult the full instruction manual for specific code meanings and troubleshooting steps.
Especificacións
| Característica | Especificación |
|---|---|
| Marca | Klimaire |
| Número de modelo | KSIH012-H222-S(W) |
| Capacidade de refrixeración | 12,000 BTU (4,000 Min – 13,800 Max BTUs) |
| Capacidade de calefacción | 11,800 BTU (5,000 Min – 15,500 Max BTUs) |
| Clasificación SEER2 | 23.1 |
| HSPF Rating | 10.5 |
| EER2 Rating | 13 |
| Área de cobertura | Ata 550 pés cadrados. |
| Voltage | 230 voltios |
| Nivel de ruído (interior) | 36 decibeis |
| Temperatura de funcionamento (calefacción) | Down to -22°F |
| Temperatura de funcionamento (refrixeración) | Ata 122 °F |
| Dimensións da unidade interior (ancho x profundo x alto) | 32.87 x 7.80 x 11.02 polgadas |
| Dimensións da unidade exterior (ancho x profundo x alto) | 31.5 x 13.1 x 21.8 polgadas |
| Tipo de material | Cobre, plástico |
| Características especiais | Wi-Fi Enabled, Hyper Heat Operation, Self-Cleaning, Self-Diagnostic, Auto-Defrost, Auto-Restart, Follow Me Function, 12-Grade Indoor Fan Speed |
Información da garantía
The KLIMAIRE 12,000 BTU Mini Split System comes with a 7 ano de garantía do fabricante. This warranty covers defects in materials and workmanship under normal use and service. For detailed terms and conditions, please refer to the warranty card included with your product or contact Klimaire customer support.
Atención ao cliente
For technical assistance, troubleshooting beyond this manual, or warranty claims, please contact Klimaire customer support. Have your model number and purchase date ready when contacting support.
Klimaire Customer Service: Please refer to the official Klimaire website or your product documentation for the most current contact information.