
RAINPOINT ITV105
RAINPOINT Digital Sprinkler Timer
Model: ITV105 - User Manual
Introdución
Thank you for choosing the RAINPOINT Digital Sprinkler Timer, Model ITV105. This programmable 1-outlet automatic hose water timer is designed to provide convenient and precise control over your watering schedule, ensuring optimal moisture levels for your lawn and garden. This manual provides detailed instructions for setup, operation, maintenance, and troubleshooting to help you get the most out of your new device.
Produto rematadoview e Características clave
The RAINPOINT ITV105 Sprinkler Timer is engineered for durability and ease of use, offering a reliable solution for automated garden irrigation.
- Compatibilidade estándar: Features a 3/4" inlet and outlet thread, compatible with most standard garden hoses.
- Resistencia á intemperie: IP54 waterproof rating and heavy-duty weather-resistant ABS housing ensure durability for outdoor use.
- Programación personalizable: Easy-to-use interface allows customization of start time, watering frequency, and duration for automated irrigation.
- Filtro incorporado: Includes a built-in metal filter to improve water quality and protect plants from debris.
- Leakage Prevention: Upgraded strong and durable ABS material and water inlet thread, paired with Teflon tape and rubber washer to prevent water leakage.
- Pantalla LCD grande: Displays detailed information such as watering time, frequency, power, and battery life for easy readability.
- Notificación de batería baixa: Powered by 2 AAA batteries (not included), with a low battery notification and automatic valve shut-off to prevent water waste.
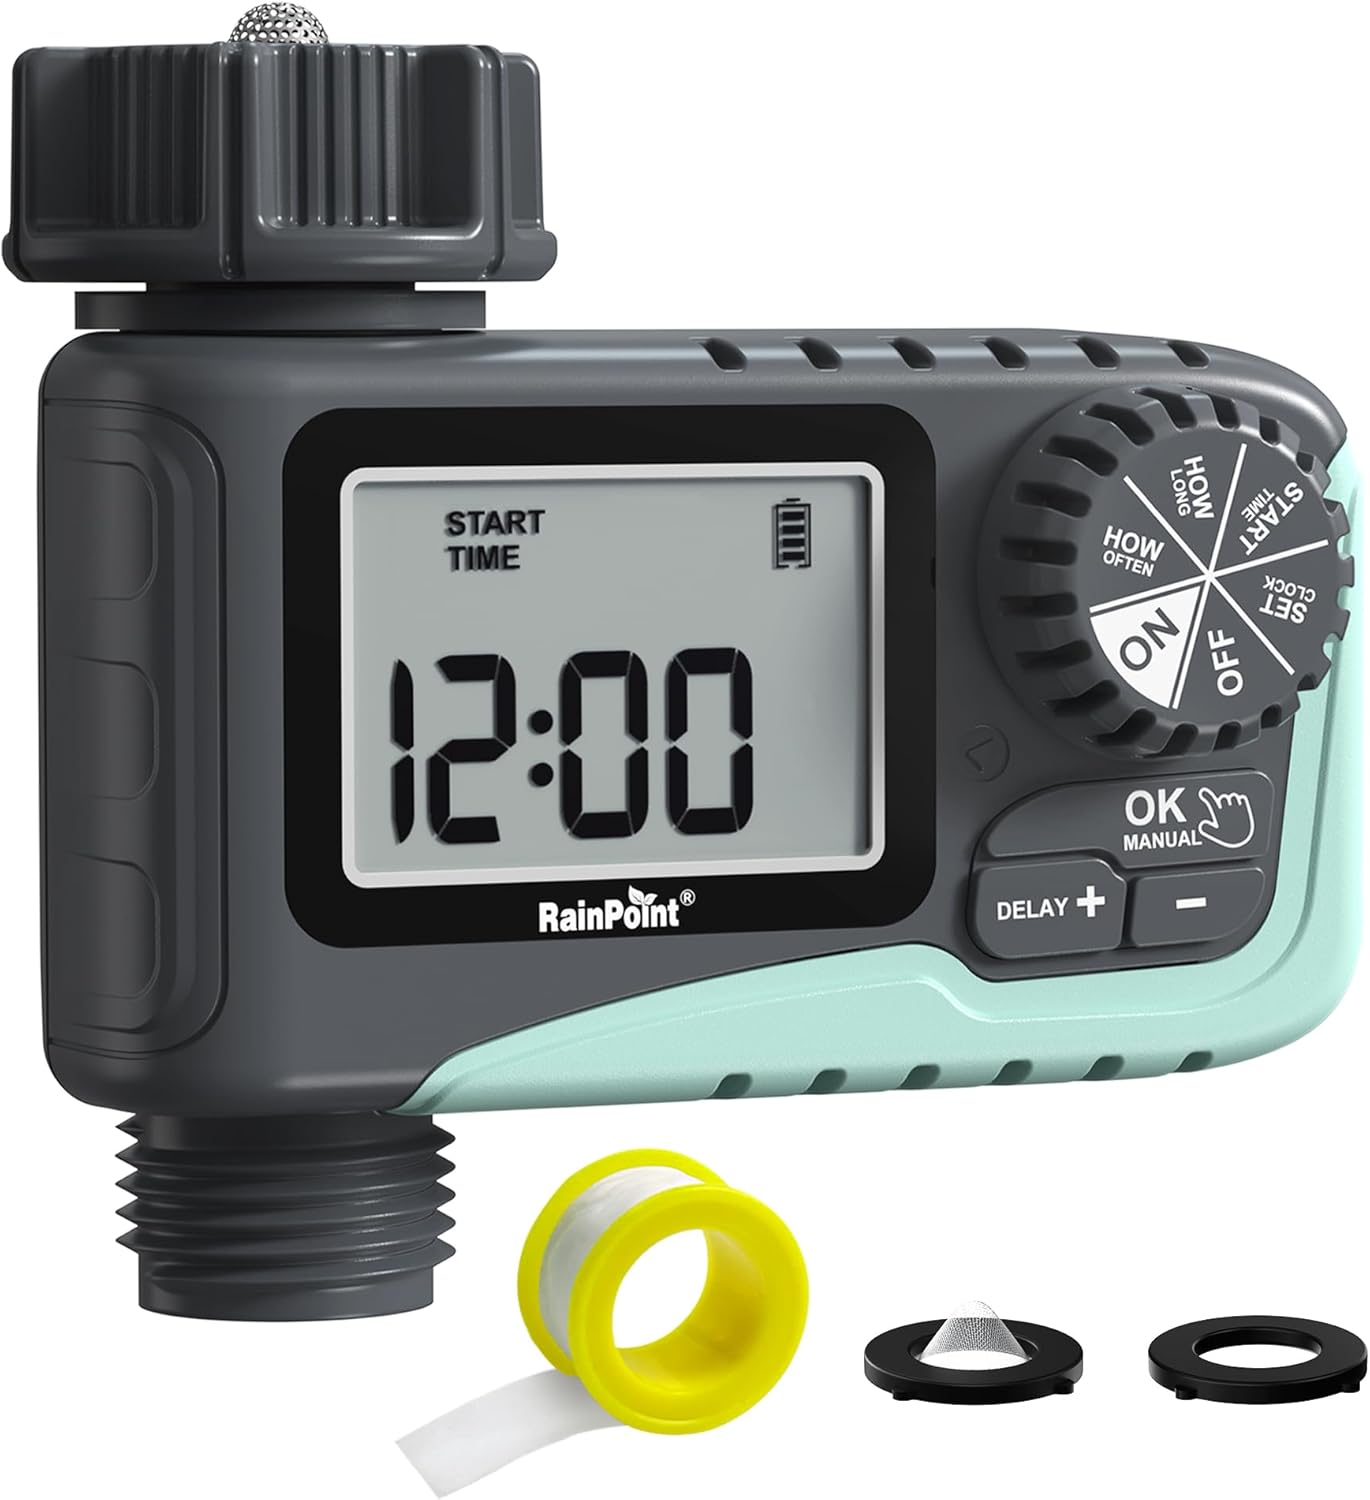
Figura 1: Fronte view of the RAINPOINT Digital Sprinkler Timer (ITV105) showing the large LCD screen, control dial, and buttons.
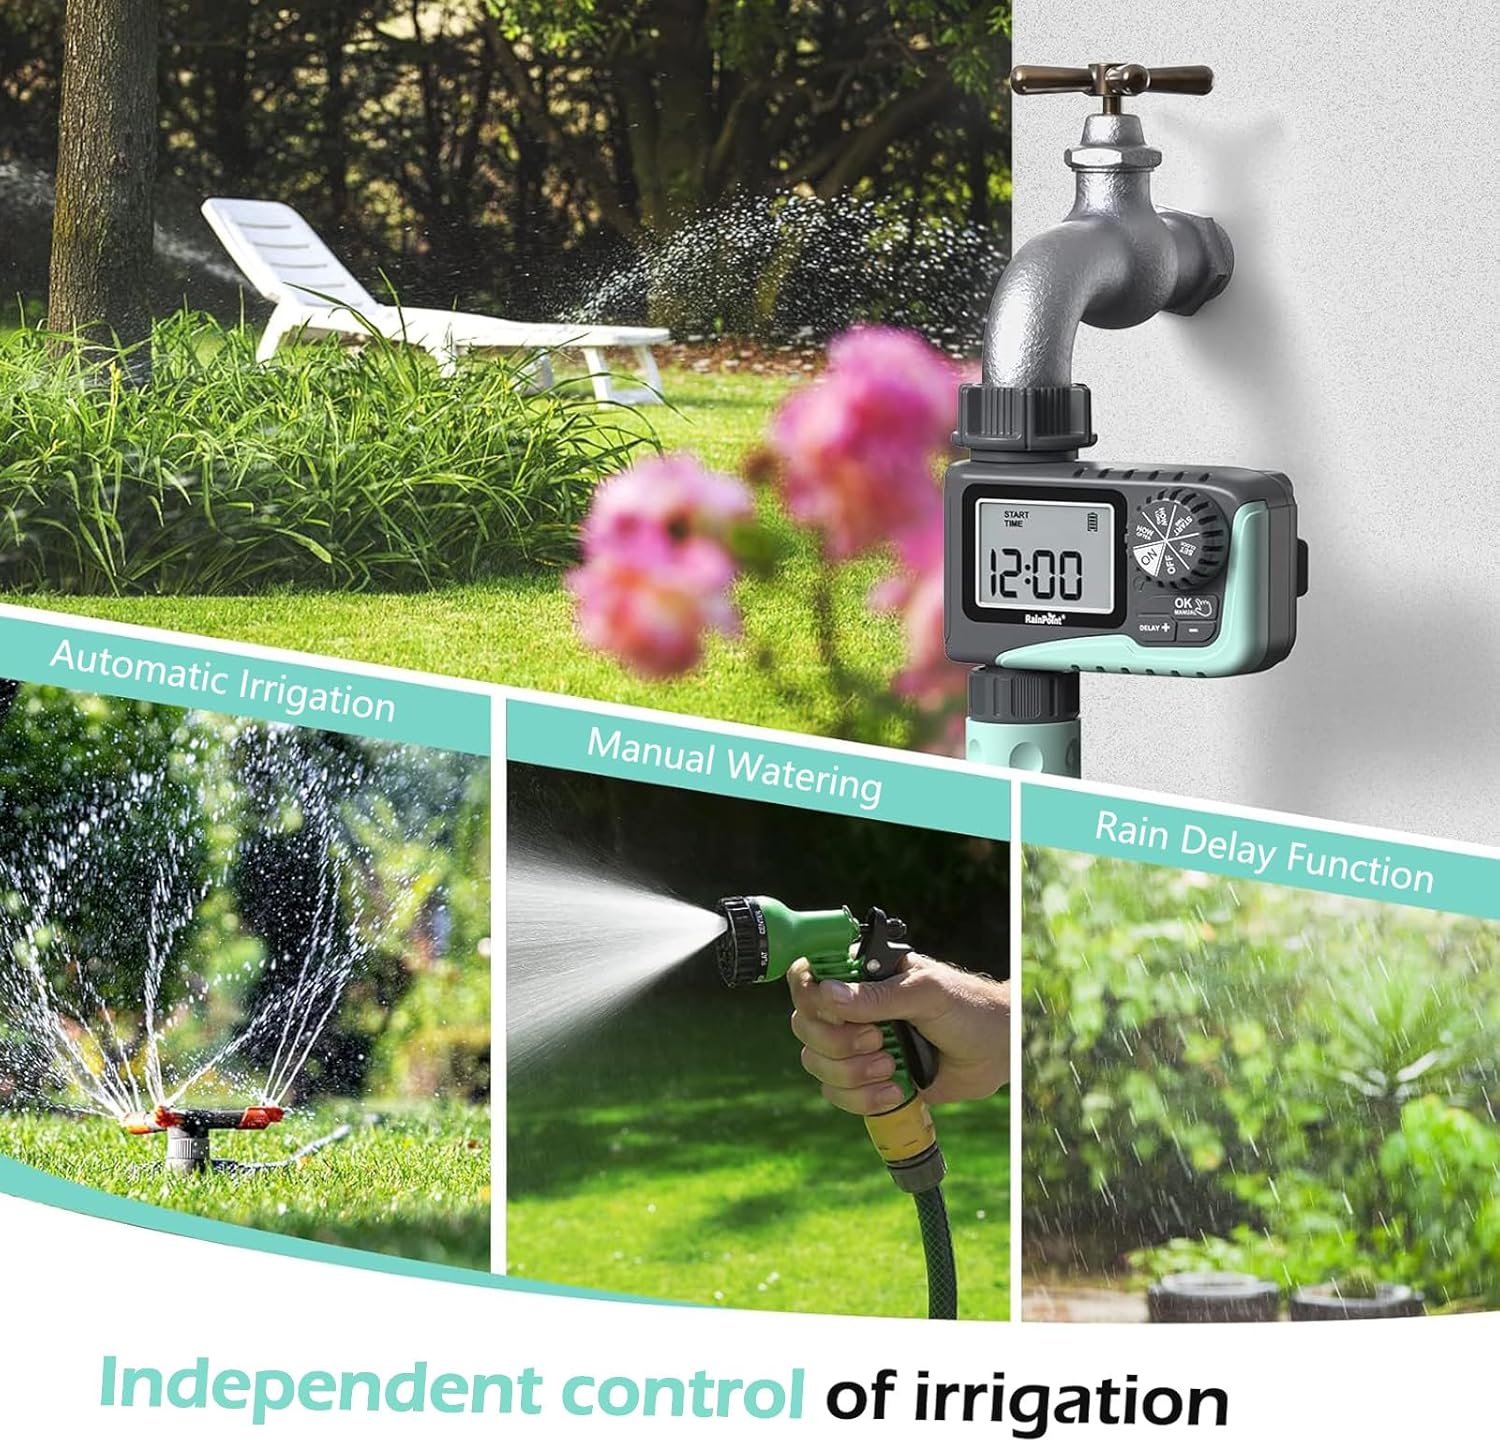
Figure 2: Illustration of the timer's three main functions: automatic irrigation, manual watering, and rain delay.
Contido do paquete
Comprobe o contido do paquete ao abrilo para asegurarse de que estea presente todos os elementos:
- 1 x RAINPOINT Digital Sprinkler Timer (ITV105)
- 1 x Manual de usuario (este documento)
- 1 x cinta de teflón
- 1 x Rubber washer
- 1 x Spare filter
Configuración e instalación
Follow these steps to properly set up your sprinkler timer:
- Instalar baterías:
Locate the battery compartment on the back of the timer. Insert 2 new AAA (1.5V) alkaline batteries, ensuring correct polarity. Close the battery compartment securely. The LCD screen will power on.
- Prepare Faucet:
Ensure your outdoor hose faucet is clean and free of debris. If necessary, apply the included Teflon tape to the faucet threads for a watertight seal.
- Attach Timer to Faucet:
Screw the timer's inlet (top connector) onto your 3/4" outdoor hose faucet. Hand-tighten firmly. Ensure the rubber washer is properly seated inside the timer's inlet to prevent leaks. The timer features a 360° rotating connector for easy positioning.
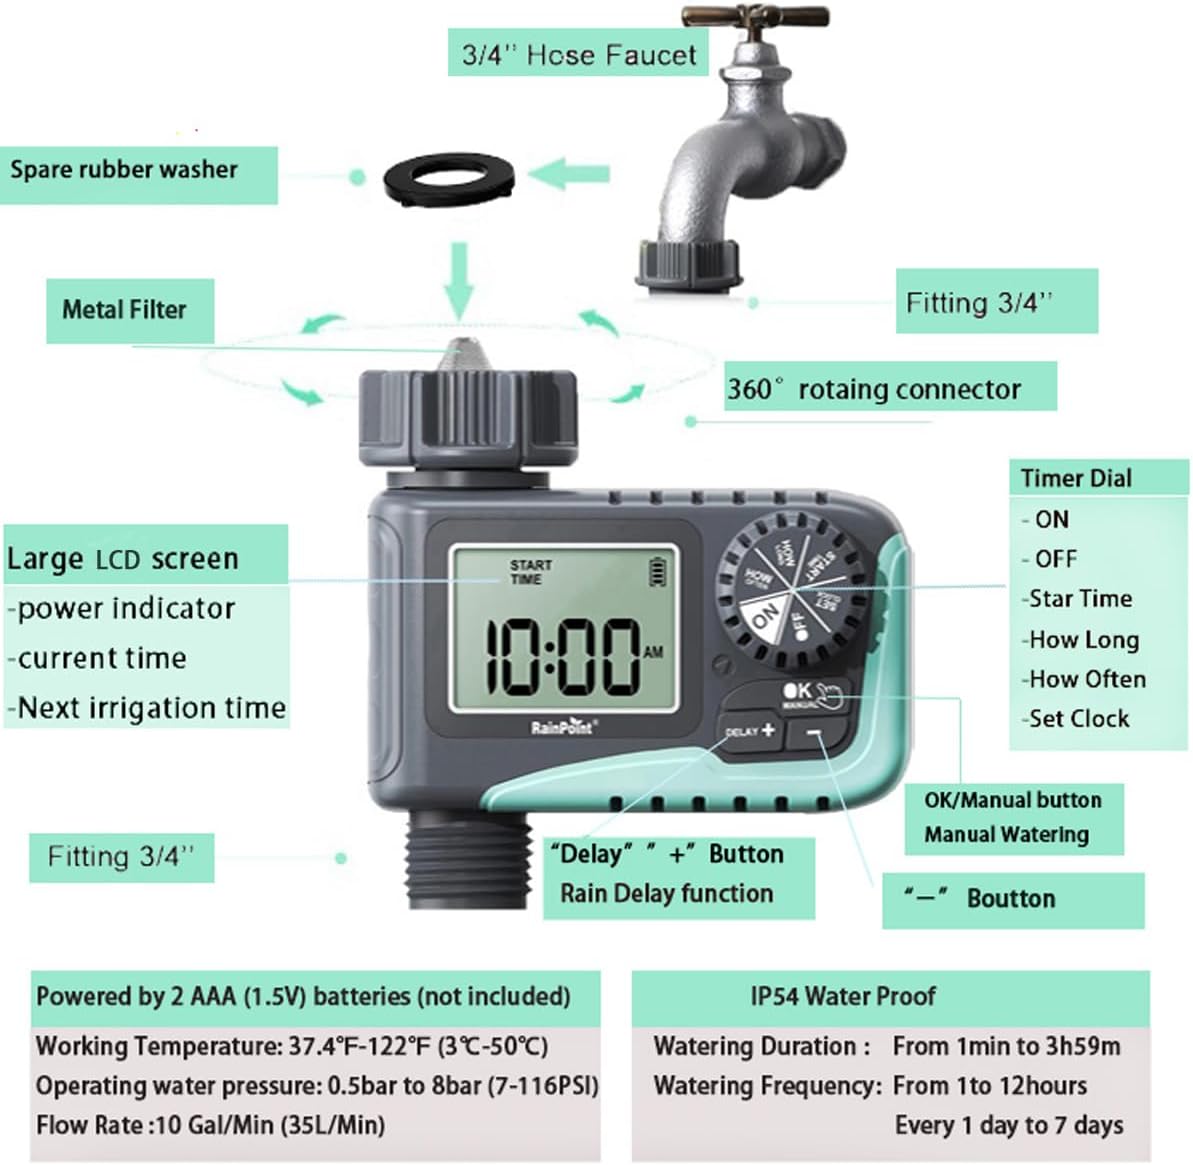
Figure 3: Diagram illustrating the components of the sprinkler timer, including the 3/4" hose faucet connection, metal filter, and LCD screen.
- Mangueira de conexión:
Attach your garden hose to the timer's outlet (bottom connector). Hand-tighten securely. Ensure a proper washer is in place at the hose connection point.
- Abrir billa:
Fully open your outdoor hose faucet. The timer is designed to withstand water pressure from 0.5 bar to 8 bar (7-116 PSI). The timer will control the water flow, not the faucet.
Instrucións de funcionamento
The RAINPOINT ITV105 timer features a large dial and intuitive buttons for easy programming.
Posicións do disco de control:
- ACTIVADO: Activates the timer for automatic watering.
- OFF: Deactivates the timer, stopping all watering.
- Axustar o reloxo: Establece a hora actual.
- HORA DE INICIO: Set the desired start time for watering cycles.
- CANTO TEMPO: Set the duration of each watering cycle.
- CON QUE FRECUENCIA: Set the frequency of watering cycles.
Botóns:
- OK/MANUAL: Confirms settings or initiates manual watering.
- DELAY +: Increases values during setting or activates/adjusts rain delay.
- -: Diminúe os valores durante a configuración.
Setting the Current Time (SET CLOCK):
- Xire o disco para Axustar o reloxo.
- Usa o + e - botóns para axustar a hora. Prema OK para confirmar.
- Usa o + e - botóns para axustar os minutos. Prema OK para confirmar.
- Xire o disco para ON to save the time and return to normal operation.
Setting Automatic Watering Program:
This timer allows you to set a start time, duration, and frequency for automated watering.
- Set Start Time (START TIME):
Xire o disco para HORA DE INICIO. Use + e - para axustar a hora e o minuto de inicio do rego desexados. Prema OK para confirmar cada configuración.
- Set Watering Duration (HOW LONG):
Xire o disco para CANTO TEMPO. Use + e - to set the watering duration from 1 minute to 3 hours and 59 minutes. Press OK para confirmar.

Figure 4: Screen showing settings for "HOW OFTEN" (frequency) and "HOW LONG" (duration) for automatic watering.
- Set Watering Frequency (HOW OFTEN):
Xire o disco para Cantas veces. Use + e - to set the frequency:
- Every 1 hour to 12 hours.
- Every 1 day to 7 days.
Preme OK para confirmar.
- Activar programa:
Xire o disco para ONO temporizador funcionará agora segundo a programación programada.
Rego manual:
Para regar inmediatamente sen afectar o horario programado:
- Ensure the dial is in the ON posición.
- Preme o OK/MANUAL button. The display will show the default manual watering duration (e.g., 10 minutes).
- Usa o + e - buttons to adjust the manual watering duration from 1 minute to 8 hours.
- Preme OK again to start manual watering. The timer will count down the set duration.
- To stop manual watering early, press OK/MANUAL de novo.

Figure 5: Display showing the manual watering duration setting, adjustable from 1 minute to 8 hours.
Función de retardo por choiva:
The rain delay function allows you to pause your watering schedule for a set period due to rain or other reasons, preventing overwatering.
- Ensure the dial is in the ON posición.
- Preme o DELAY + button. The display will show a default delay time (e.g., 24H).
- Preme DELAY + repeatedly to cycle through delay options (e.g., 24H, 48H, 72H).
- Once you select the desired delay, the timer will enter rain delay mode. The display will show the remaining delay time.
- After the delay period ends, the timer will automatically resume its programmed watering schedule.
- To cancel the rain delay, press the DELAY + button until the delay time disappears, or rotate the dial to OFF and then back to ON.

Figure 6: The timer displaying the rain delay countdown, highlighting its IP54 waterproof rating.
Mantemento
Proper maintenance ensures the longevity and optimal performance of your RAINPOINT Sprinkler Timer.
- Limpar o filtro: Periodically check and clean the metal filter located at the timer's inlet. Remove the timer from the faucet, unscrew the filter, rinse it under running water to remove any debris, and reinsert it.
- Substitución da batería: When the low battery indicator appears on the LCD screen, replace the 2 AAA batteries promptly. Always use new alkaline batteries.
- Invernización: Before the first frost, remove the timer from the faucet and store it indoors in a dry, frost-free location. Remove the batteries before storage.
- Comprobar fugas: Regularly inspect all connections (faucet to timer, timer to hose) for any signs of leakage. Ensure all connections are hand-tightened and that rubber washers are properly seated.

Figure 7: Visual representation of the built-in metal filter and durable plastic material designed for anti-leakage and longer service life.
Resolución de problemas
If you encounter issues with your RAINPOINT Sprinkler Timer, refer to the following common problems and solutions:
| Problema | Causa posible | Solución |
|---|---|---|
| Timer not turning on / LCD blank. | Baterías gastadas ou instaladas incorrectamente. | Substitúaas por 2 pilas alcalinas AAA novas, asegurándose de manter a polaridade correcta. |
| Sen fluxo de auga. |
|
|
| Fugas de auga polas conexións. |
|
|
| O temporizador non segue a programación. |
|
|
Especificacións
| Característica | Especificación |
|---|---|
| Modelo | ITV105 |
| Dimensións do produto | 10.5 x 10.3 x 5 cm (4 x 4 x 2 polgadas) |
| Material | Acrilonitrilo Butadieno Estireno (ABS) |
| Watering Duration (Automatic) | 1 minuto a 3 horas 59 minutos |
| Watering Frequency (Automatic) | Every 1 hour to 12 hours, or every 1 day to 7 days |
| Watering Duration (Manual) | 1 minute to 8 hours (Default: 10 minutes) |
| Caudal máximo | 10 Gal/Min (35 L/Min) |
| Rango de presión da auga | 0.5 bar to 8 bar (7-116 PSI) |
| Temperatura de traballo | 3℃-50℃ (37.4℉-122℉) |
| Fonte de enerxía | 2 x AAA (1.5V) batteries (not included) |
| Clasificación impermeable | IP54 |
Garantía e Soporte
RAINPOINT products are manufactured to high-quality standards. For specific warranty details, please refer to the warranty card included with your product or visit the official RAINPOINT website. If you encounter any issues or have questions not covered in this manual, please contact RAINPOINT customer support through their official websitio web ou o vendedor onde compraches o produto.
For more information and support, you may visit the RAINPOINT Store on Amazon.
Ask a question about this manual
Ask about setup, troubleshooting, compatibility, parts, safety, or missing instructions. Manuals+ will review the question and use this page’s manual context to help answer it.