
DELTACO Gaming GAM-149-T
Manual do usuario do mando Bluetooth para Nintendo Switch de DELTACO Gaming GAM-149-T
Model: GAM-149-T | Brand: DELTACO Gaming
Introdución
Grazas pola compraasing the DELTACO Gaming Nintendo Switch Bluetooth Controller (GAM-149-T). This manual provides detailed instructions on how to set up, operate, maintain, and troubleshoot your new controller. Please read this manual carefully before use and keep it for future reference.
Información de seguridade
- Non expoña o controlador a temperaturas extremas, humidade nin luz solar directa.
- Evite deixar caer o controlador nin someterlo a impactos fortes.
- Non intente desmontar nin modificar o controlador. Isto anulará a garantía.
- Manteña o controlador lonxe da auga e outros líquidos.
- Empregue só o cable de carga e a fonte de alimentación especificados.
- Manter fóra do alcance dos nenos pequenos.
Contido do paquete
Comprobe que todos os elementos estean presentes no paquete:
- DELTACO Gaming Nintendo Switch Bluetooth Controller (GAM-149-T)
- Cable de carga USB-C
- Manual de usuario (este documento)
Produto rematadoview
Familiarize yourself with the various parts of your DELTACO Gaming controller.
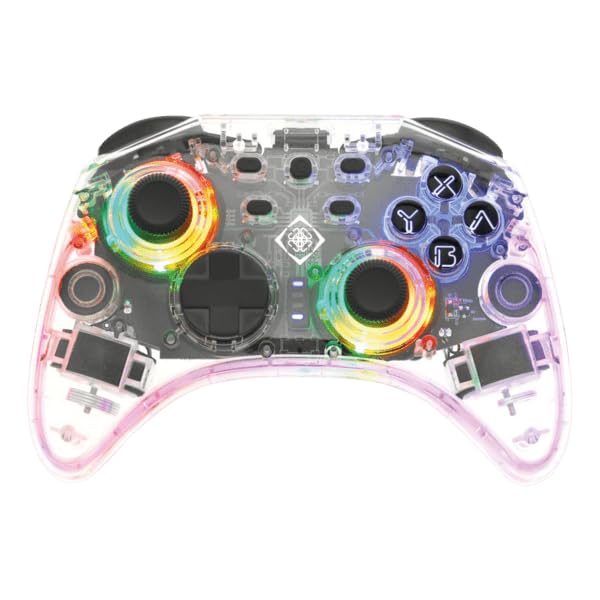
This image shows the front of the transparent controller, highlighting the joysticks, D-pad, action buttons (A, B, X, Y), and the vibrant LED lighting around the joysticks and buttons. The transparent casing allows a view of the internal circuitry.
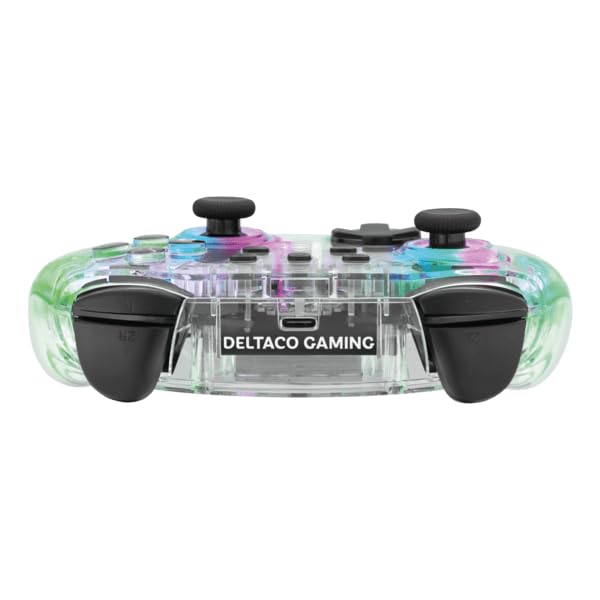
This image displays the top edge of the controller, featuring the L, R, ZL, and ZR shoulder buttons, as well as the central USB-C charging port. The transparent design is visible from this angle.
The controller features a transparent design with integrated LED lighting, dual analog sticks, a D-pad, action buttons (A, B, X, Y), shoulder buttons (L, R, ZL, ZR), and a USB-C port for charging.
Setup: Connecting to Nintendo Switch
Follow these steps to pair your DELTACO Gaming controller with your Nintendo Switch console:
- Asegúrate de que a túa consola Nintendo Switch estea acendida e actualizada co software do sistema máis recente.
- No menú HOME, seleccione "Controladores", entón "Cambiar agarre/orde".
- On the DELTACO Gaming controller, press and hold the Botón de emparejamento (usually a small button on the top or back of the controller, consult the physical product for exact location) for a few seconds until the LED indicators start flashing rapidly.
- The console will search for available controllers. Once the DELTACO Gaming controller appears on the screen, release the Pairing Button.
- Os indicadores LED do controlador acenderanse de forma fixa unha vez emparellados correctamente.
- You can now use your controller to navigate the Switch menu and play games.
Note: If the controller does not pair, ensure it is charged and try the pairing process again.
Instrucións de funcionamento
Controis básicos
- Manetas analóxicas: Úsase para o movemento e o control da cámara nos xogos.
- D-Pad: For directional input, often used in menus or for specific game actions.
- Botóns A/B/X/Y: Action buttons, functions vary by game.
- Botóns L/R/ZL/ZR: Shoulder and trigger buttons, commonly used for attacking, aiming, or special abilities.
- Botón HOME: Volve ao menú INICIO da Nintendo Switch.
- Botón de captura de pantalla: Captures a screenshot of the current game screen.
- Botóns máis (+) / menos (-): Often used for in-game menus or pausing.
LED Lighting Control (if applicable)
Some controllers feature adjustable LED lighting. Refer to the specific button combinations or dedicated buttons on your controller for changing light modes or turning them off. This information is typically found on the product packaging or a small insert.
Cargando o controlador
To charge your DELTACO Gaming controller:
- Conecta o cable de carga USB-C subministrado ao porto USB-C da parte superior do controlador.
- Connect the other end of the USB-C cable to a USB power source (e.g., Nintendo Switch dock, USB wall adapter, computer USB port).
- The LED indicators on the controller will typically show charging status (e.g., blinking while charging, solid when fully charged, or turning off).
- Unha carga completa adoita tardar aproximadamente de 2 a 3 horas.
Note: Do not use damaged cables or chargers.
Mantemento
Limpeza
- Wipe the controller with a soft, dry, lint-free cloth.
- Para a sucidade persistente, d lixeiramenteampEnxágüe o pano con auga. Non empregue produtos químicos agresivos nin produtos de limpeza abrasivos.
- Ensure no liquid enters the openings or ports of the controller.
Almacenamento
- Garde o controlador nun lugar fresco e seco, lonxe da luz solar directa e de temperaturas extremas.
- If storing for an extended period, ensure the controller is fully charged before storage and recharge it every few months to maintain battery health.
Resolución de problemas
| Problema | Posible Solución |
|---|---|
| O controlador non se acende. |
|
| Controller does not pair with Switch. |
|
| Os botóns ou os joysticks non responden. |
|
| Batería de curta duración. |
|
Especificacións
| Modelo: | GAM-149-T |
| Conectividade: | Bluetooth |
| Compatibilidade: | Nintendo Switch |
| Dimensións: | 25 x 20 x 10 cm (aproximadamente) |
| Peso: | 300 Grams (approximate) |
| Porto de carga: | USB-C |
Nota: as especificacións están suxeitas a cambios sen previo aviso.
Garantía e Soporte
This DELTACO Gaming product is covered by a limited warranty. For detailed warranty terms, technical support, or service inquiries, please visit the official DELTACO Gaming websitio web ou póñase en contacto directamente co servizo de atención ao cliente.
Websitio: www.deltacogaming.com
Please have your product model (GAM-149-T) and purchase information ready when contacting support.
Ask a question about this manual
Ask about setup, troubleshooting, compatibility, parts, safety, or missing instructions. Manuals+ will review the question and use this page’s manual context to help answer it.