1. Introdución
This manual provides essential information for the safe and efficient operation, maintenance, and troubleshooting of your DayPlus 18V Cordless Impact Wrench. Please read these instructions carefully before using the tool and retain them for future reference.
The DayPlus Cordless Impact Wrench is designed for tightening and loosening nuts, bolts, and screws, offering high torque and versatility for various applications, including automotive work and construction projects.
2. Instrucións de seguridade
ADVERTENCIA: Lea todas as advertencias de seguridade, instrucións, ilustracións e especificacións proporcionadas con esta ferramenta eléctrica. O incumprimento de todas as instrucións que se indican a continuación pode producir descargas eléctricas, incendios e/ou lesións graves.
- Seguridade na zona de traballo: Manteña a súa área de traballo limpa e ben iluminada. As zonas desordenadas ou escuras invitan aos accidentes. Non manexe ferramentas eléctricas en atmosferas explosivas, como en presenza de líquidos, gases ou po inflamables.
- Seguridade eléctrica: Evite o contacto corporal con superficies conectadas a terra, como tubos, radiadores, cociñas e frigoríficos. Hai un maior risco de descarga eléctrica se o seu corpo está conectado a terra ou a terra.
- Seguridade persoal: Always wear eye protection. Use appropriate safety equipment such as dust masks, non-skid safety shoes, hard hats, or hearing protection when necessary. Dress properly. Do not wear loose clothing or jewelry. Keep your hair and clothing away from moving parts.
- Uso e coidado da ferramenta: Non force a ferramenta eléctrica. Empregue a ferramenta eléctrica axeitada para a súa aplicación. Fará o traballo mellor e con maior seguridade á velocidade para a que foi deseñada. Desconecte a batería da ferramenta eléctrica antes de facer axustes, cambiar accesorios ou gardar ferramentas eléctricas.
- Uso e coidado da batería: Recarga só co cargador especificado polo fabricante. Un cargador axeitado para un tipo de batería pode xerar un risco de incendio cando se usa con outro paquete de batería. Use ferramentas eléctricas só con baterías especificamente designadas.
3. Compoñentes do produto
Familiarize yourself with the parts of your DayPlus Cordless Impact Wrench for proper operation and maintenance.

Imaxe 3.1: Acabadoview of the DayPlus Cordless Impact Wrench components. Key parts include the sleeve, brushless motor, heat dissipation vent, forward and reverse switch, stepless speed regulation button, soft rubber coated handle, mode adjustment and power quantity display, battery removal button, and large capacity battery.
- Manga: The attachment point for sockets and other accessories.
- Motor sen escobillas: Provides efficient power and longer tool life.
- Heat Dissipation Vent: Asegura un arrefriamento adecuado durante o funcionamento.
- Interruptor de avance e retroceso: Controla o sentido de rotación.
- Stepless Speed Regulation Button: Permite o control de velocidade variable en función da presión do gatillo.
- Soft Rubber Coated Handle: Ofrece un agarre cómodo e seguro.
- Mode Adjustment and Power Quantity Display: Shows current power level and allows selection of operating modes.
- Botón de extracción da batería: Libera a batería da ferramenta.
- Batería de gran capacidade: Proporciona enerxía á ferramenta.
4. Especificacións
| Característica | Especificación |
|---|---|
| Eixo de saída | 1/2" Square Drive |
| Par nominal | 420 Nm |
| Velocidade sen carga | 0-3200 rpm |
| Tipo de batería | Ión de litio 6000 mAh (18 V) |
| Tempo de carga | 1.5 - 2 hours for full charge |
| Frecuencia de impacto | 0-4400 IPM |
| Enchufes incluídos | 14 mm, 17 mm, 19 mm, 22 mm |
| Material | Acrilonitrilo Butadieno Estireno (ABS) |
| Cor | Azul |
5. Configuración
5.1. Carga da batería
- Ensure the battery pack is securely inserted into the charger.
- Conecte o cargador a unha toma de corrente estándar.
- Allow 1.5 to 2 hours for a full charge. The charger's indicator light will typically change color or turn off when charging is complete.
- Unha vez cargada, desconecte o cargador da toma de corrente e retire a batería.
Note: Always use the original DayPlus charger provided with the tool. Do not attempt to charge damaged batteries.
5.2. Colocación/retirada da batería
- Para xuntar: Align the battery pack with the base of the impact wrench and slide it in until it clicks securely into place.
- Para eliminar: Press the battery removal button (refer to Image 3.1) and slide the battery pack out.
5.3. Attaching Sockets and Accessories
- Asegúrese de que a ferramenta estea apagada e de que a batería estea retirada antes de colocar ou retirar accesorios.
- Align the square drive of the socket with the 1/2" square drive shaft of the impact wrench.
- Push the socket firmly onto the shaft until it locks into place.
- To remove, pull the socket off the shaft. Some sockets may require a slight twist or a release pin mechanism if present.
6. Instrucións de funcionamento
6.1. Acendido/apagado e control de velocidade
The tool is powered on by pressing the trigger switch. The speed of the impact wrench is controlled by the pressure applied to the trigger. Pressing gently results in lower speed, while pressing harder increases the speed up to the maximum 3200 rpm.
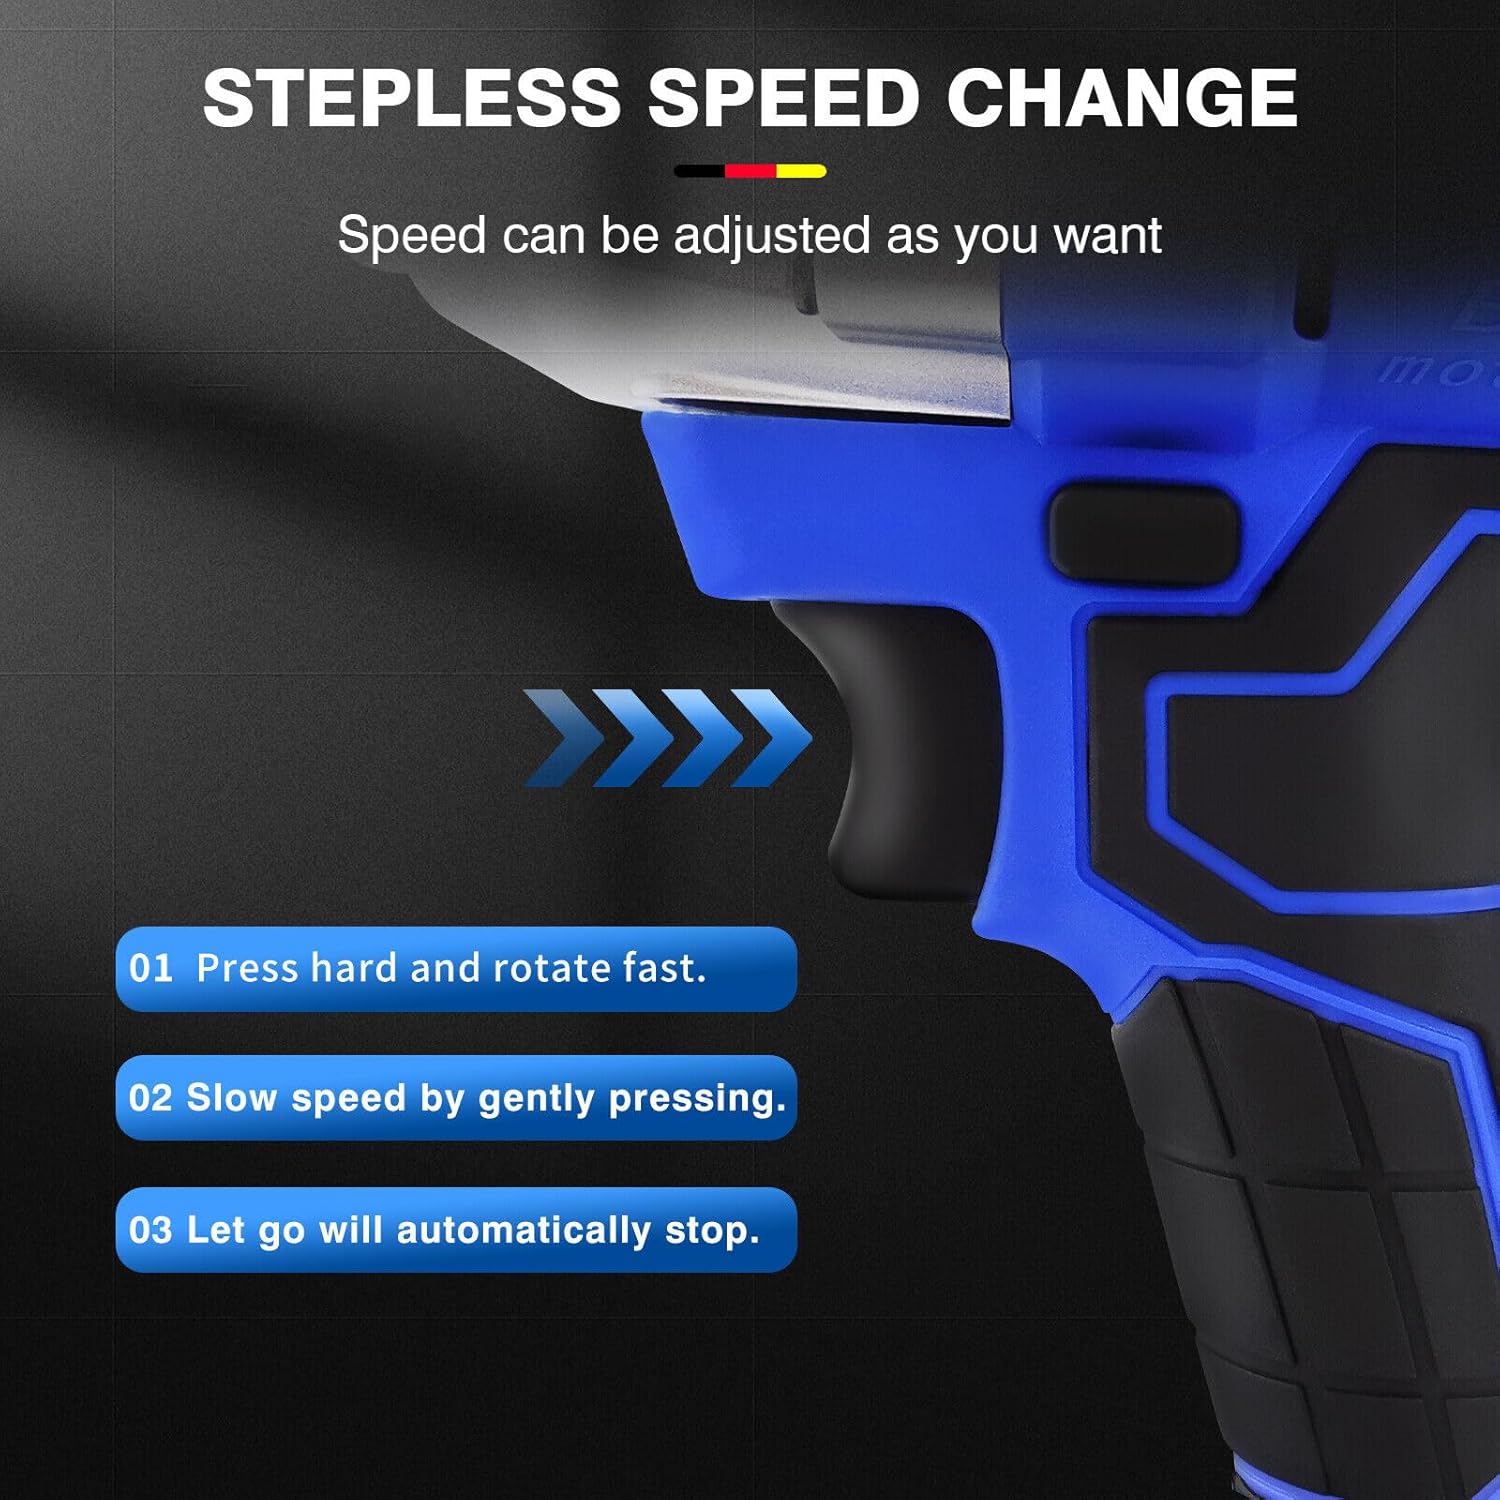
Imaxe 6.1: Illustration of the stepless speed change. Pressing hard rotates fast, pressing gently slows speed, and releasing the trigger stops the tool.
- Press hard: For fast rotation and maximum torque.
- Press gently: For slower speed and controlled operation.
- Let go: The tool will automatically stop.
6.2. Cambio de adiante e inverso
The forward/reverse switch controls the direction of rotation, allowing for both tightening and loosening applications.

Imaxe 6.2: The forward button is used for screwing (tightening), and the reverse button is used for removing screws (loosening).
- Botón de avance: Push the switch to the left for clockwise rotation (tightening).
- Botón de marcha atrás: Push the switch to the right for counter-clockwise rotation (loosening).
- Ensure the switch is in the central (locked) position when not in use to prevent accidental starting.
6.3. Mode Adjustment and Power Display
The tool features a display for real-time power indication and mode adjustment.

Imaxe 6.3: Close-up of the mode adjustment and power quantity display. This allows users to monitor battery life and select appropriate torque settings.
- The display shows the remaining battery charge, allowing you to plan your work effectively.
- Use the mode adjustment button (if present, typically integrated with the display) to select between different torque settings or operating modes for various tasks.
6.4. Integrated Work Light
The impact wrench is equipped with a scattering light feature to illuminate the work area, especially useful in low-light conditions.

Imaxe 6.4: The integrated work light provides illumination for dark corners, enabling one-hand operation without an additional flashlight.
- The light typically activates when the trigger is pressed and remains on for a short period after release.
- This feature enhances visibility and safety during operation in dimly lit environments.
6.5. Versatile Applications (Drill/Wrench)
The DayPlus impact wrench can be adapted for various tasks, functioning as both an electric drill and an electric wrench with appropriate accessories.
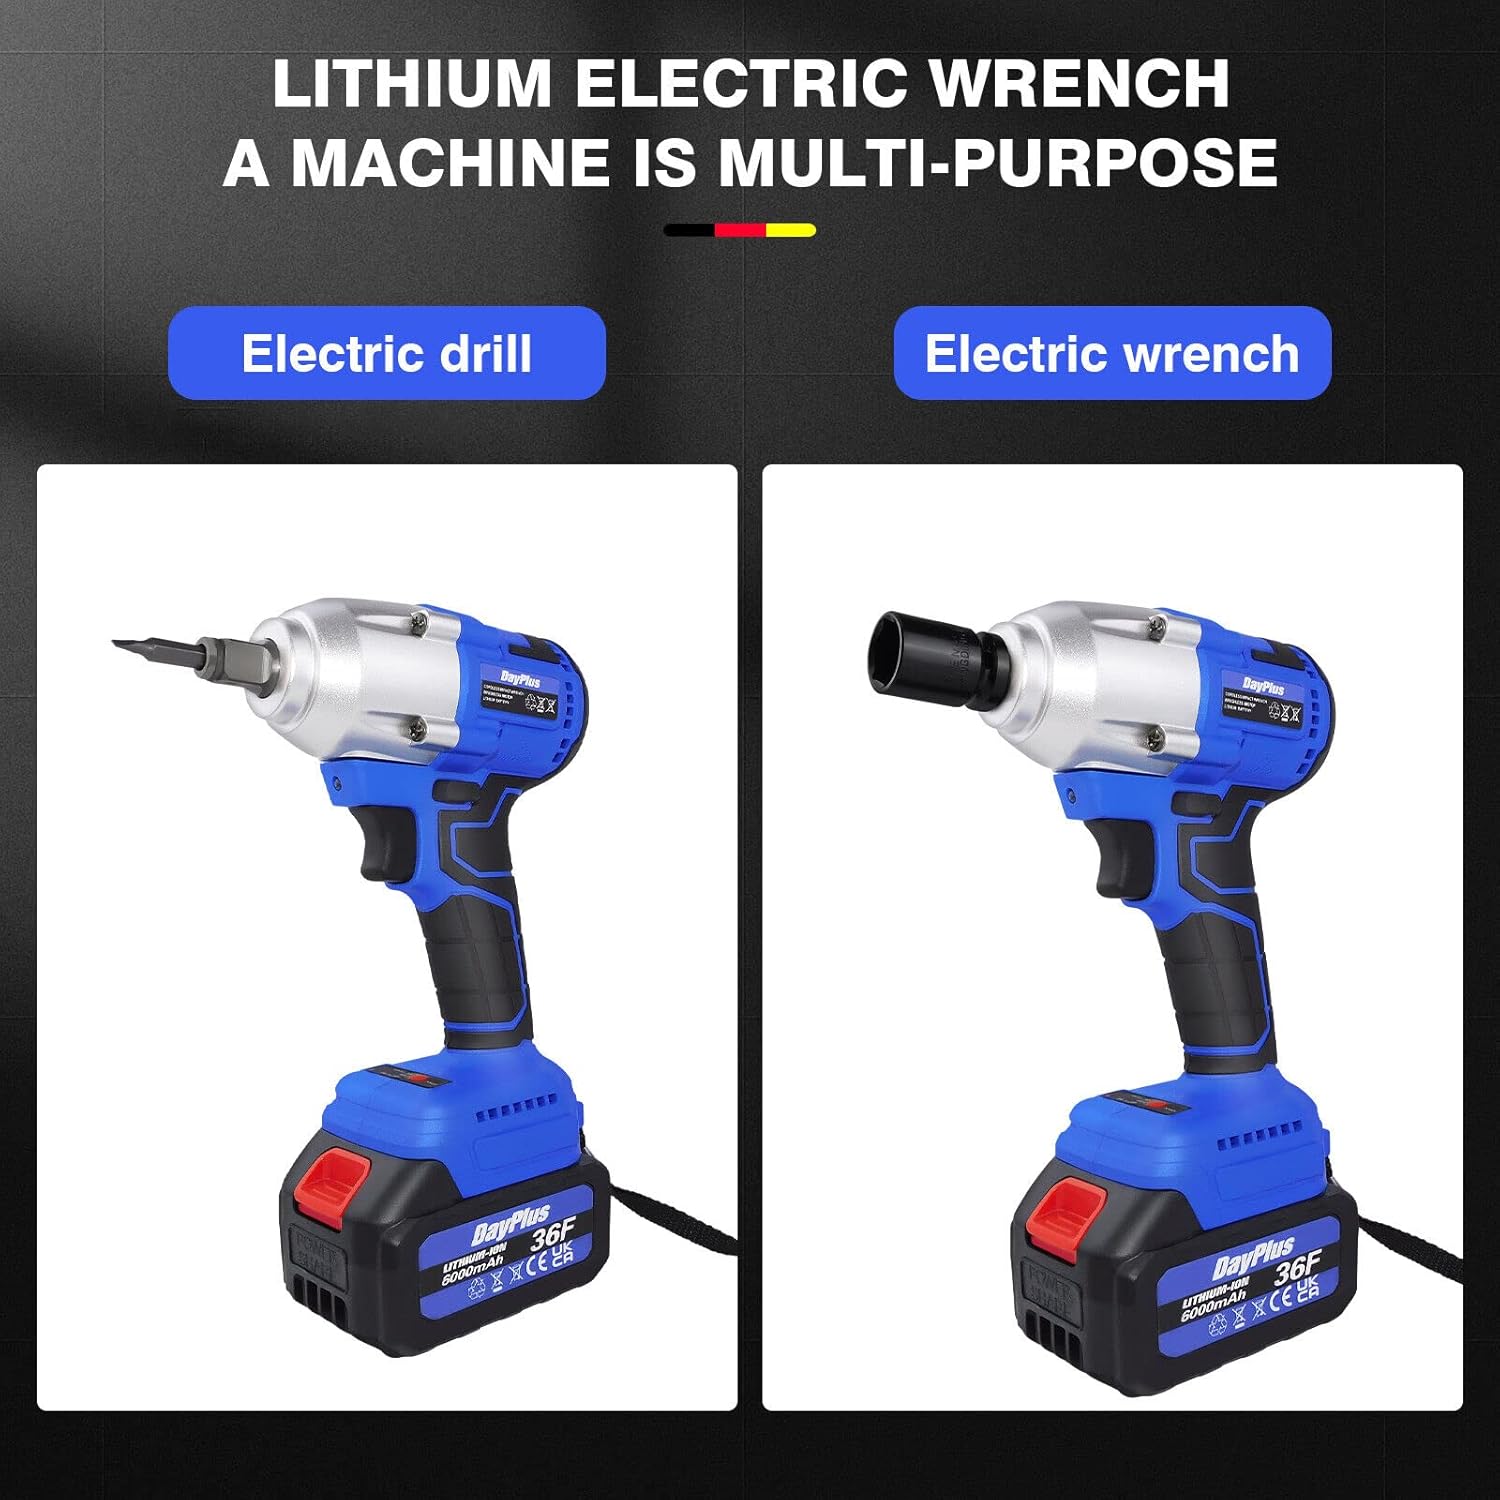
Imaxe 6.5: The tool's versatility allows it to be used as an electric drill with a drill bit adapter or as an electric wrench with sockets.
- Electric Wrench: Use with square drive sockets for tightening and loosening nuts and bolts.
- Taladro eléctrico: Attach a drill chuck adapter (sold separately) and drill bits for drilling applications.
7. Mantemento
Un mantemento regular garante a lonxevidade e o rendemento óptimo da súa chave de impacto.
- Limpeza: Manteña limpas as aberturas de ventilación da ferramenta para evitar o sobrequecemento. Use un pano suave eamp cloth to clean the housing. Do not use solvents or abrasive cleaners.
- Ventilacións de disipación de calor: Regularly check and clear the heat dissipation vents to ensure effective cooling during continuous operation.
- Coidado da batería: Garda as baterías nun lugar fresco e seco, lonxe da luz solar directa. Non gardes as baterías completamente descargadas durante períodos prolongados.
- Almacenamento: When not in use, store the impact wrench and its accessories in a dry, secure location out of reach of children.
- Inspección: Inspeccione periodicamente a ferramenta para detectar calquera signo de danos, parafusos soltos ou pezas desgastadas. Non empregue unha ferramenta danada.

Imaxe 7.1: The air outlet design facilitates effective heat dissipation, crucial for continuous work without overheating the machine.
8 Solución de problemas
| Problema | Causa posible | Solución |
|---|---|---|
| A ferramenta non comeza | Battery not charged or improperly inserted. Forward/reverse switch in central (locked) position. | Charge battery fully and ensure it is securely inserted. Move the forward/reverse switch to either forward or reverse position. |
| Potencia ou velocidade reducidas | Carga baixa da batería. Protección contra sobrecarga activada. | Recharge the battery. Reduce the load on the tool; allow it to cool down if it has been used continuously. |
| Exceso de calor durante o funcionamento | Blocked ventilation vents. Continuous heavy use. | Clean ventilation vents. Allow the tool to cool down periodically during heavy use. |
| O enchufe non está conectado correctamente | Incorrect socket size. Debris on the square drive. | Ensure the socket is 1/2" square drive. Clean the square drive and the socket. |
9. Garantía e soporte
DayPlus products are manufactured to high-quality standards. For information regarding warranty coverage, please refer to the warranty card included with your purchase or contact DayPlus customer support.
For technical assistance, spare parts, or service, please contact your retailer or the DayPlus customer service department. Keep your purchase receipt as proof of purchase.