
1. Información de seguridade
Lea atentamente todas as instrucións antes da instalación e o funcionamento. O incumprimento destas instrucións pode provocar danos no produto, no vehículo ou lesións persoais. Garde este manual para futuras consultas.
- Ensure the vehicle's ignition is off and the negative battery terminal is disconnected before installation to prevent electrical shorts.
- Se tes dúbidas sobre algún paso, consulta cun profesional para a instalación.
- Non manexes o dispositivo dun xeito que te distraia da condución. Prioriza sempre a seguridade viaria.
- Evite expoñer a unidade a temperaturas extremas, luz solar directa ou humidade.
- Use only specified power cables and accessories.
2. Contido do paquete
Verifique que todos os elementos estean presentes no paquete antes de continuar coa instalación.

Image: Components included in the UNITOPSCI A3612A3 package, including the main unit, wiring harnesses, and accessories.
- UNITOPSCI A3612A3 Car Stereo Unit
- Power Cable & Speaker Cable Harnesses
- Steering Wheel Control Remote
- Micrófono
- 12LED Rear Camera
- Antena
- Manual de usuario (este documento)
- Soportes de montaxe
3. Instalación
Proper installation is crucial for optimal performance. Refer to the wiring diagram and consult a professional if needed.
3.1 Diagrama de cableado

Image: Detailed wiring connections for the car stereo unit.
Connect the power and speaker cables according to the diagram. Ensure all connections are secure to prevent malfunctions.
- Vermello (ACC): Connect to ignition switch +12V.
- Yellow (BATTERY+): Connect to constant +12V.
- Negro (GND): Connect to vehicle ground.
- Blue (ANT): Connect to antenna power.
- Orange (ILLUMINATION): Connect to vehicle illumination wire.
- Pink (REVERSE): Connect to reverse light signal for backup camera activation.
- Brown (KEY): Connect to steering wheel control wire.
- Speaker wires (White, Gray, Green, Purple) should be connected to corresponding vehicle speakers (Front Left, Front Right, Rear Left, Rear Right).
3.2 Montaxe da unidade
Use the provided mounting brackets to secure the double din unit into your vehicle's dashboard opening. Ensure a snug fit to prevent vibrations.
3.3 Backup Camera Installation
Mount the backup camera at the rear of your vehicle. Connect its video output to the 'CAM IN' input on the stereo and its power to the reverse light circuit.
4. Configuración
4.1 Encendido inicial
After installation, reconnect the vehicle battery. Turn on the ignition. The unit should power on and display the main interface.
4.2 Configuración básica
Navigate to the 'Settings' menu to configure basic parameters such as language, time, and date.
4.3 Axuste da retroiluminación da pantalla
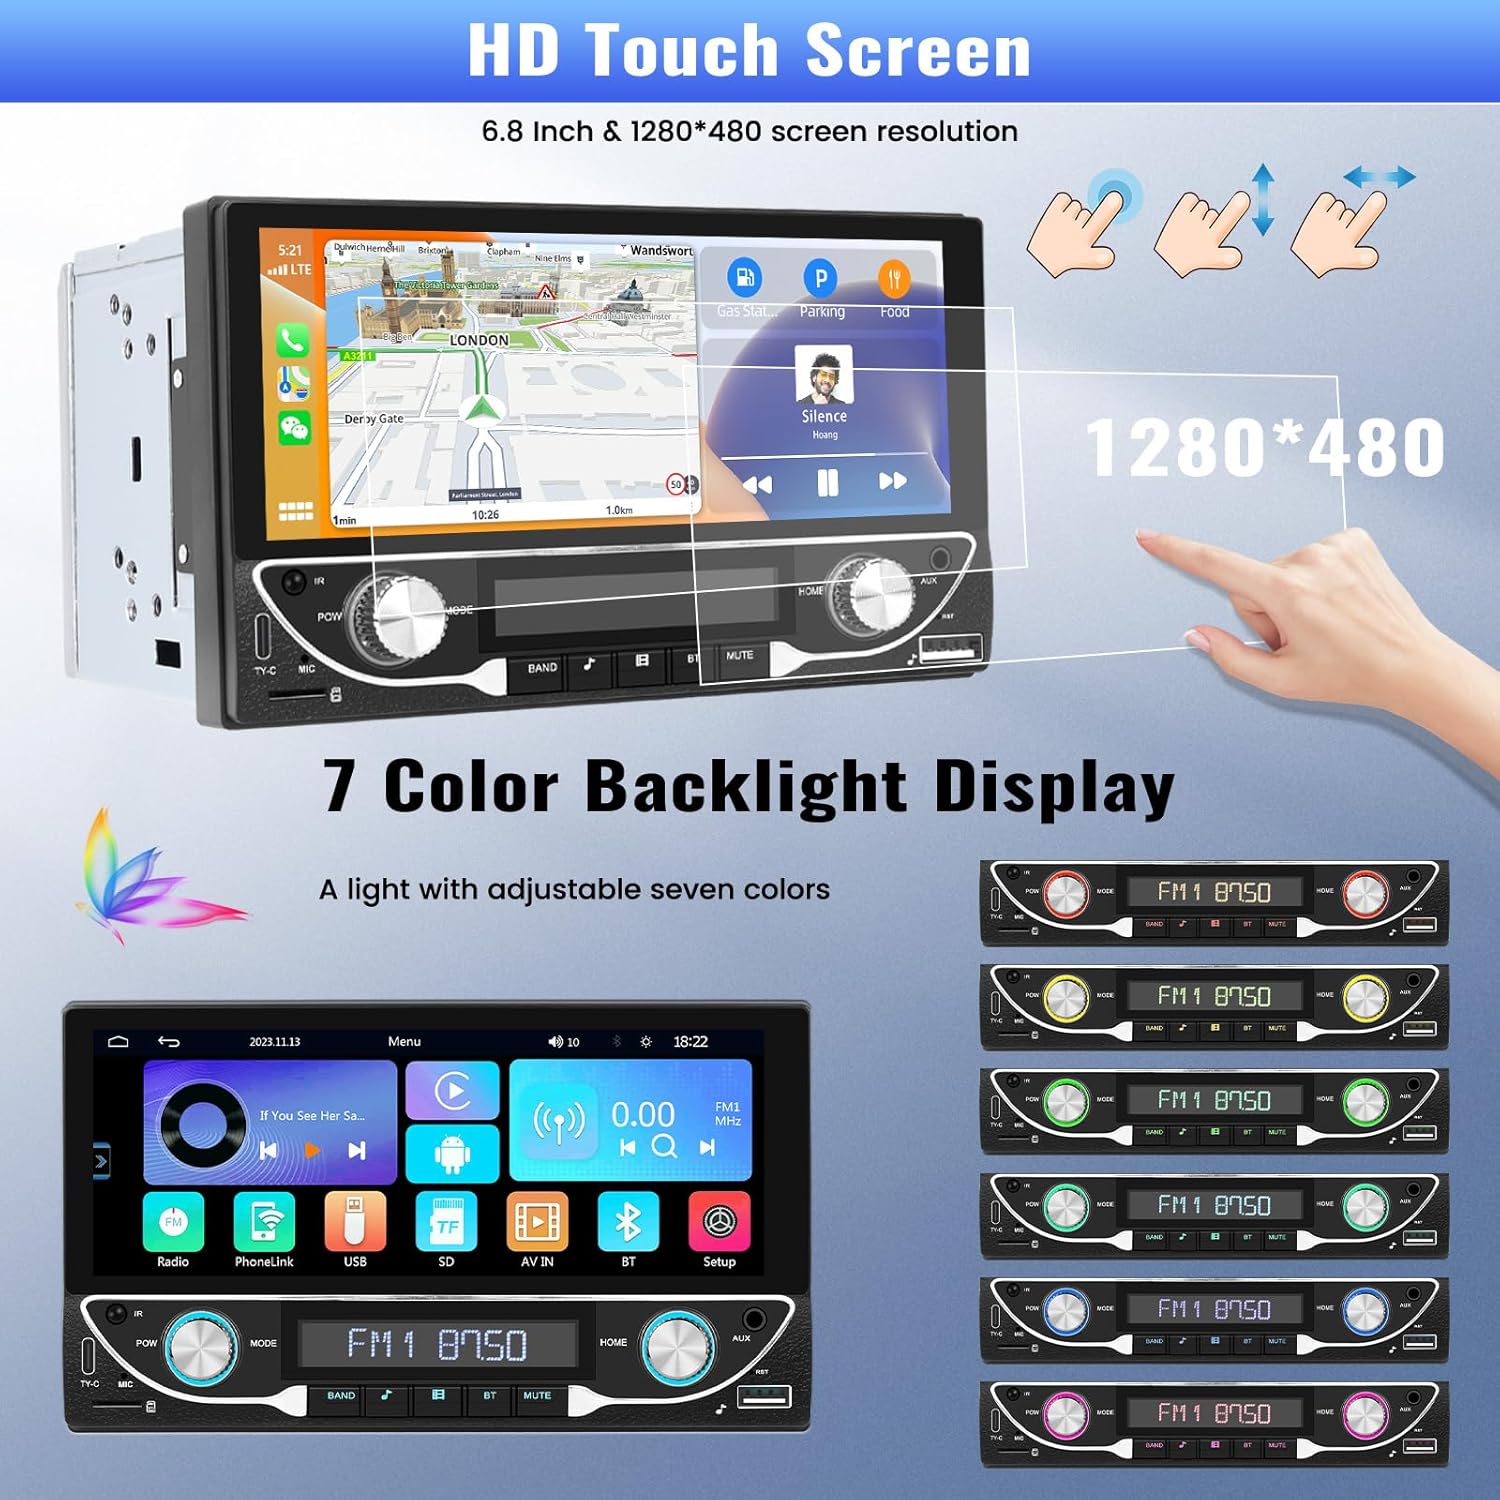
Image: The HD touchscreen and customizable 7-color backlight display options.
Access the display settings to adjust brightness and select from 7 available backlight colors for the physical buttons.
5. Instrucións de funcionamento
Apple CarPlay e Android Auto sen fíos 5.1
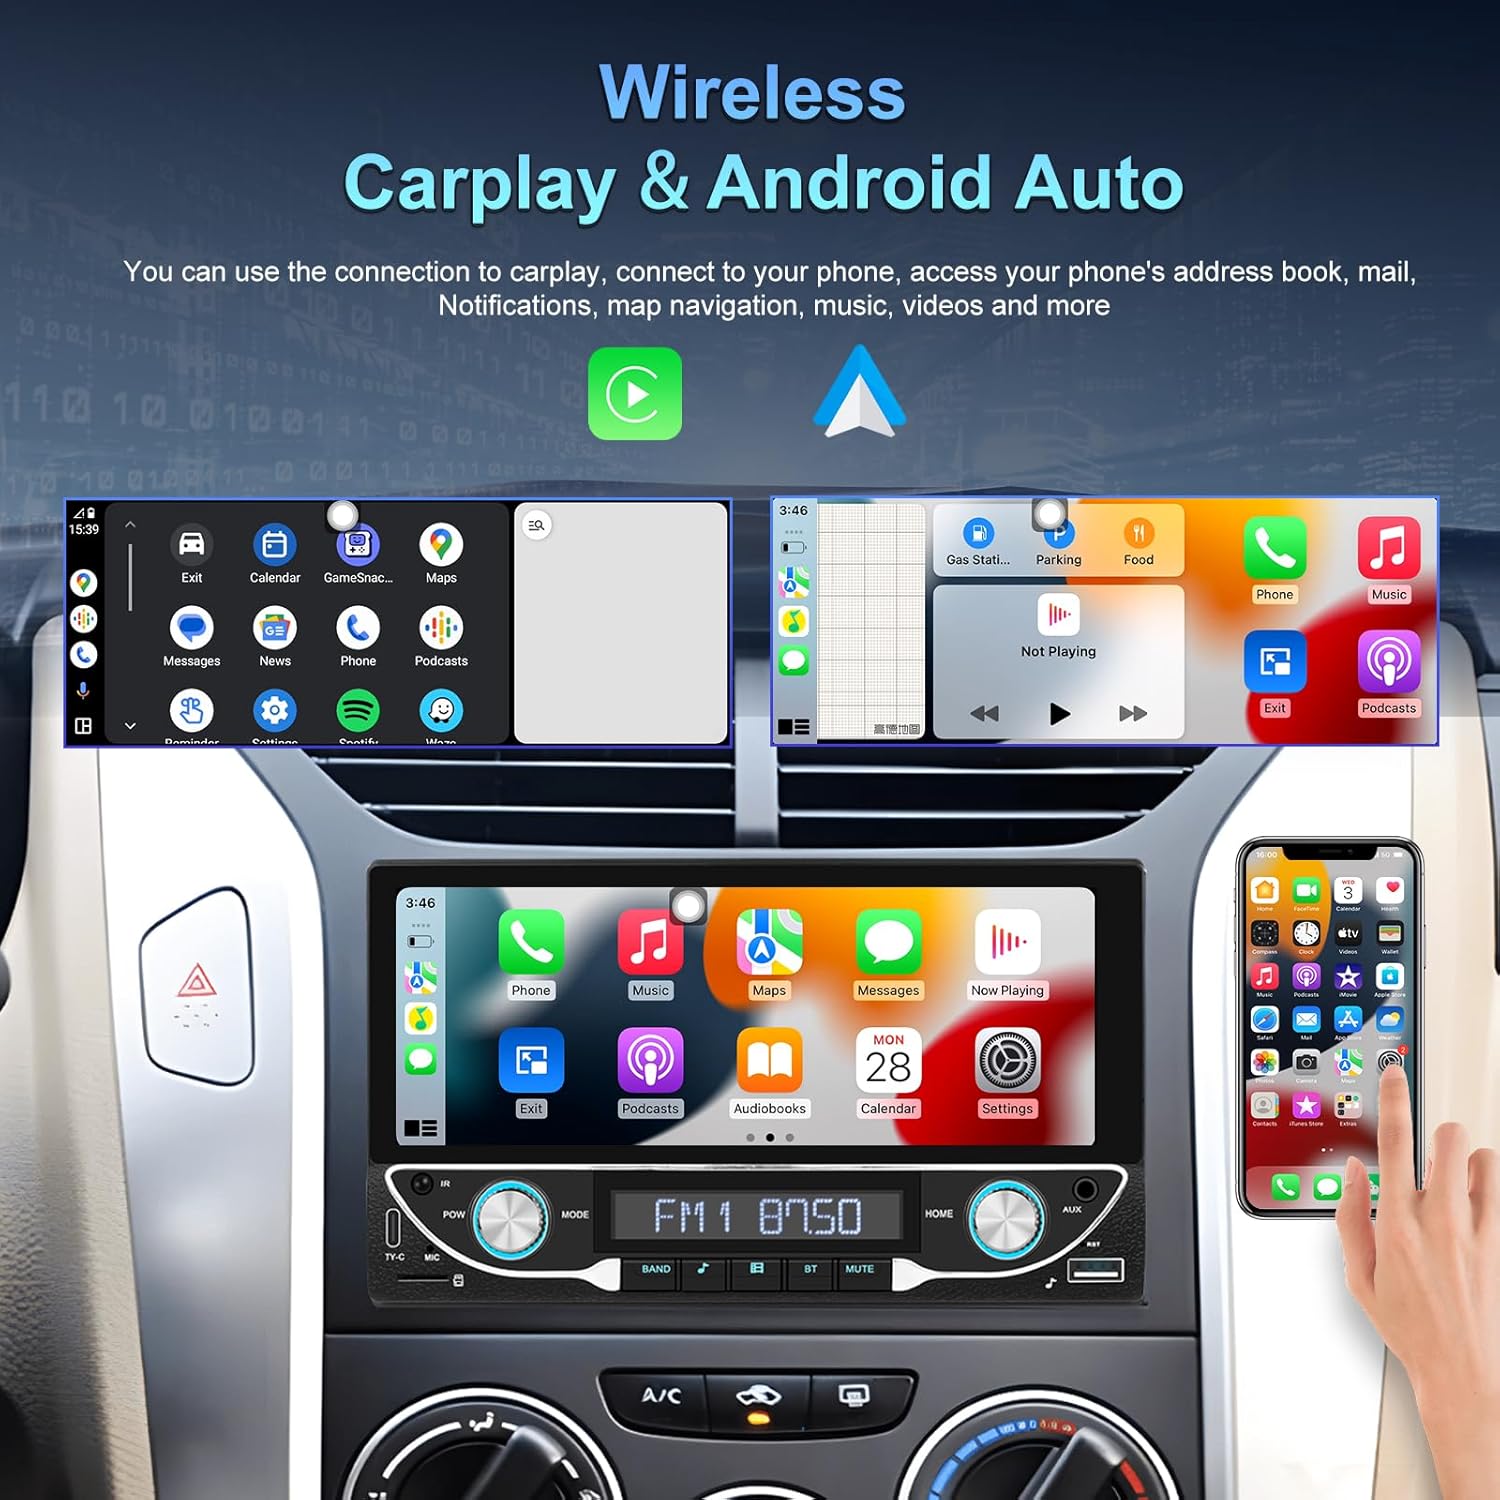
Image: The car stereo displaying both Apple CarPlay and Android Auto interfaces.
Connect your smartphone wirelessly to access Apple CarPlay or Android Auto. This allows for navigation, music, calls, and messages directly from the car stereo display.
- Asegúrate de que Bluetooth e Wi-Fi estean activados no teu smartphone.
- On the car stereo, select the CarPlay or Android Auto icon.
- Follow the on-screen prompts to pair your device.
Conectividade Bluetooth 5.2 5.1
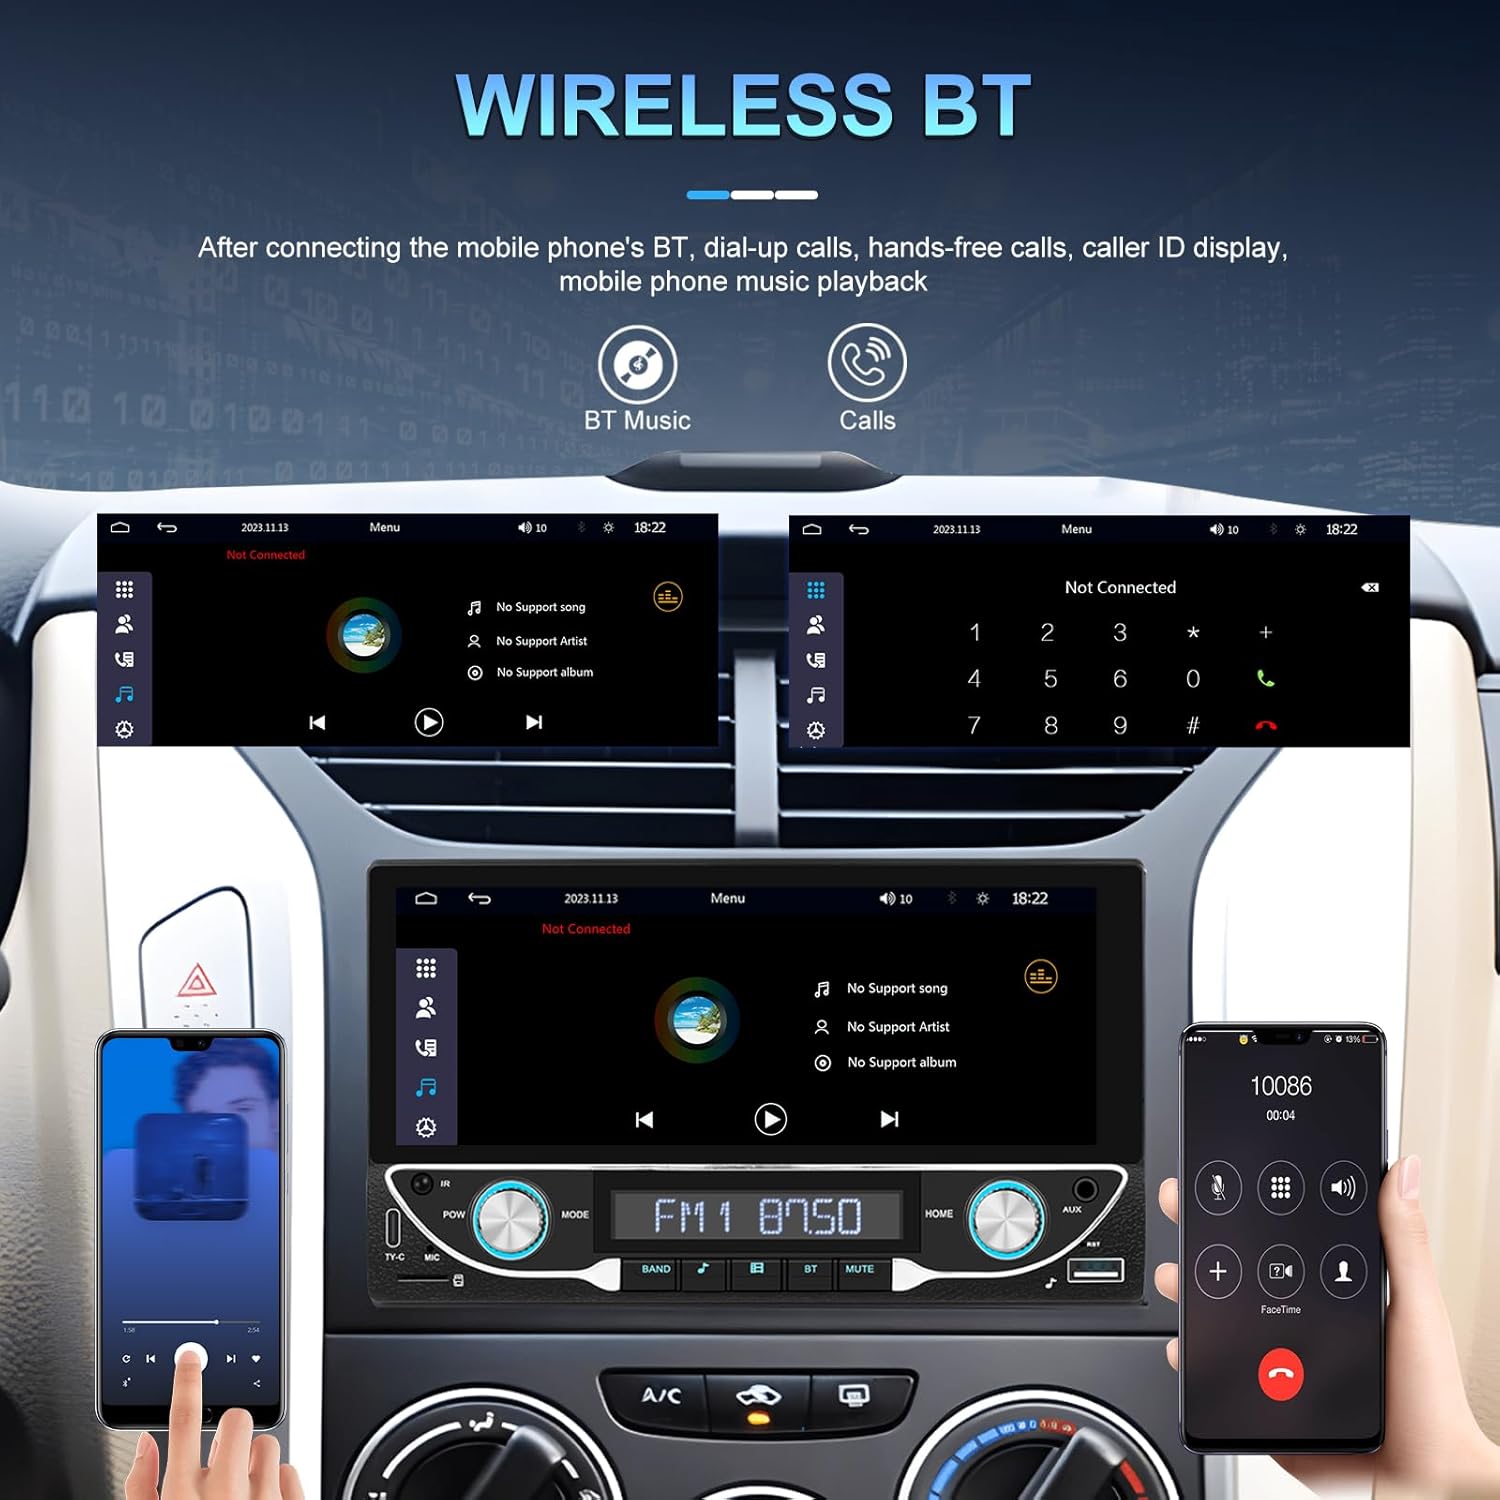
Image: Bluetooth interface for hands-free calling and music streaming.
Pair your phone via Bluetooth for hands-free calling and wireless audio streaming.
- Go to the 'Bluetooth' menu on the stereo.
- Activa o Bluetooth no teu teléfono e busca os dispositivos dispoñibles.
- Select 'UNITOPSCI A3612A3' (or similar name) from your phone's list and confirm pairing.
- Use the built-in microphone for calls and stream music from your phone.
5.3 Funcionamento da radio FM

Image: FM radio interface with frequency display and sound quality DSP/EQ settings.
Select the 'FM' icon to access the radio tuner. Use the on-screen controls or physical buttons to scan for stations, save presets, and adjust frequency.
5.4 Audio & Video Playback (USB/TF/AUX/Type-C)

Image: Available input options for audio and video playback: USB, TF Card, Type-C, and AUX-in.
The unit supports various media inputs for audio and video playback:
- Entrada USB: Connect a USB drive with media files.
- Ranura para tarxetas TF: Insert a TF (MicroSD) card with media files.
- Entrada AUX: Connect external audio devices using a 3.5mm audio cable.
- Porto tipo C: For charging compatible devices and potentially data transfer.
Select the corresponding input source from the main menu to access your media.
5.5 Control do volante

Image: Steering wheel control setup interface on the car stereo.
If your vehicle supports steering wheel controls, connect the 'KEY' wire during installation. Access the 'Steering Wheel Control' settings to program the buttons for functions like volume, track change, and mode selection.
5.6 Traseira View Camera / HD Reversing Video
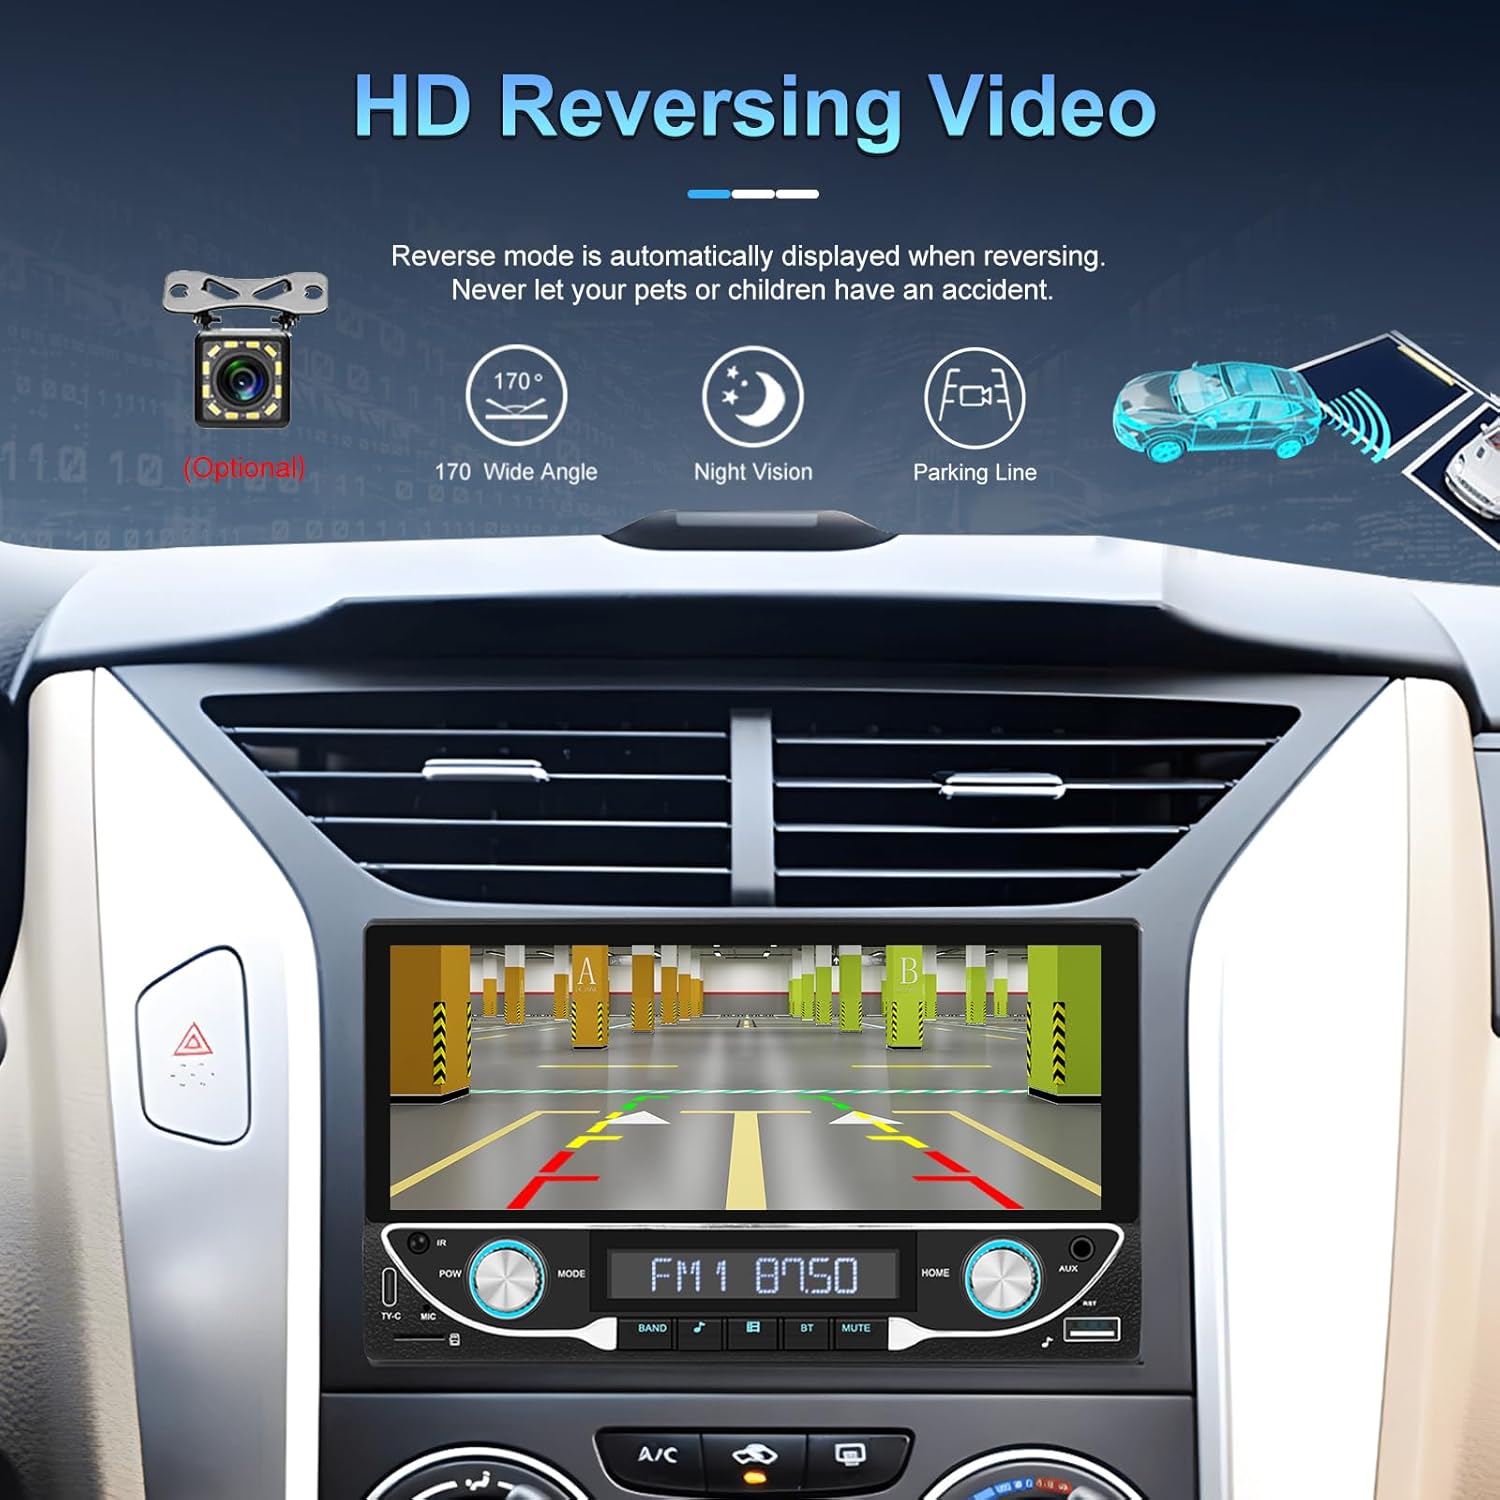
Image: High-definition reversing video display with parking guidelines.
When the vehicle is shifted into reverse, the stereo automatically displays the rear view camera feed. The included camera offers a 170-degree wide angle and night vision capabilities, along with parking lines for assistance.
5.7 DVR Function Support
The unit supports an optional DVR (Digital Video Recorder) function. Connect a compatible USB DVR camera to the dedicated USB input on the rear of the car radio to record driving footage.
5.8 Función de ligazón de espello
Use the Mirror Link function to display your smartphone's screen directly on the car stereo. This feature is compatible with both Android and iOS devices, allowing you to view apps and content from your phone on the larger display.
5.9 Voice Control & GPS Navigation
When connected via Apple CarPlay or Android Auto, you can utilize voice commands (e.g., Siri, Google Assistant) for navigation, making calls, sending messages, and controlling music, enhancing driving safety and convenience.
5.10 Sound Quality (DSP & EQ)
The built-in Digital Sound Processor (DSP) and Equalizer (EQ) allow for precise audio customization. Access the 'EQ Setup' menu to adjust bass, treble, and other frequency bands to match your audio preferences. Pre-set EQ modes (e.g., Jazz, Rock, Pop) are also available.
6. Mantemento
Para garantir a lonxevidade e o rendemento óptimo do equipo de son do teu coche, segue estas pautas de mantemento:
- Limpeza da pantalla: Use a soft, lint-free cloth to gently wipe the touchscreen. Avoid abrasive cleaners or solvents that could damage the display.
- Limpeza xeral: Keep the unit free from dust and debris. Use a soft brush or compressed air for hard-to-reach areas.
- Actualizacións de software: Comprobe periodicamente as instrucións do fabricante websitio para ver se hai actualizacións de firmware dispoñibles para mellorar o rendemento e engadir novas funcións.
- Evitar líquidos: Do not spill liquids on the unit. If accidental spillage occurs, power off the unit immediately and allow it to dry completely before use.
7 Solución de problemas
If you encounter issues with your UNITOPSCI A3612A3 car stereo, refer to the following common problems and solutions:
| Problema | Causa posible | Solución |
|---|---|---|
| Sen Poder | Cableado incorrecto; fusible fundido; conexión solta. | Check power cable connections (ACC, BATTERY+, GND). Verify vehicle fuse and unit's fuse. Ensure all wires are securely connected. |
| Sen son | Speaker wires disconnected; Volume too low; Mute function active; Incorrect audio source. | Check speaker wire connections. Increase volume. Deactivate mute. Select correct audio source (FM, USB, BT, etc.). |
| Bluetooth non se conecta | Bluetooth desactivado no teléfono/estéreo; dispositivo non en modo de emparellamento; interferencias. | Ensure Bluetooth is enabled on both devices. Put stereo in pairing mode. Delete previous pairings and try again. Move closer to the unit. |
| CarPlay/Android Auto Not Working | Wi-Fi/Bluetooth off; Phone not compatible; App issues. | Ensure Wi-Fi and Bluetooth are active on your phone. Restart phone and stereo. Check phone's settings for CarPlay/Android Auto permissions. |
| Rear Camera Not Displaying | Cámara sen alimentación; cable de vídeo solto; cable do disparador inverso non conectado. | Check camera power connection. Ensure video cable is securely connected to 'CAM IN'. Verify Pink (REVERSE) wire connection. |
| Pantalla táctil non responde | System freeze; Dirt on screen. | Restart the unit (if possible, by briefly disconnecting power). Clean the screen. |
If the problem persists after trying these solutions, please contact UNITOPSCI customer support for further assistance.
8. Especificacións
Key technical specifications for the UNITOPSCI A3612A3 car stereo:
- Número de modelo: A3612A3
- Tamaño de visualización: 6.86 polgadas
- Resolución de visualización: 1280 x 480 píxeles
- Potencia de saídatage: 180 Watts (4 channels)
- Versión Bluetooth: 5.1
- Servizos de Internet compatibles: Maps (via CarPlay/Android Auto)
- Tipo de saída de audio: interno
- Formatos multimedia admitidos: AVI, WAV, WMA
- Entradas: USB, TF Card, AUX, Type-C
- Características: Wireless Apple CarPlay, Wireless Android Auto, FM Radio, Mirror Link, DSP, EQ, Steering Wheel Control, Backup Camera Input, DVR Function Support, 7-Color Backlight.
Image: Front, rear, and side dimensions of the UNITOPSCI A3612A3 car stereo.
Dimensións (aproximadas):
- Front Panel: 17.8cm (7.0in) width x 10.3cm (4.0in) height
- Chassis: 17.8cm (7.0in) width x 10.0cm (3.9in) height x 11cm (4.3in) depth
9. Garantía e soporte
UNITOPSCI products are designed for reliability and performance. For warranty information and technical support, please refer to the warranty card included in your package or visit the official UNITOPSCI websitio.
When contacting support, please have your product model number (A3612A3) and purchase details ready.


