1. Introdución
This manual provides essential information for the installation, operation, and maintenance of your Diyeeni LGA 1155 DDR3 Motherboard. Please read these instructions carefully before proceeding with installation to ensure proper functionality and to prevent damage.
Contido do paquete
- 1 x Diyeeni DDR3 Motherboard
- 1 x I/O Bracket
- 1 x cable SATA
- 1 x Manual de usuario

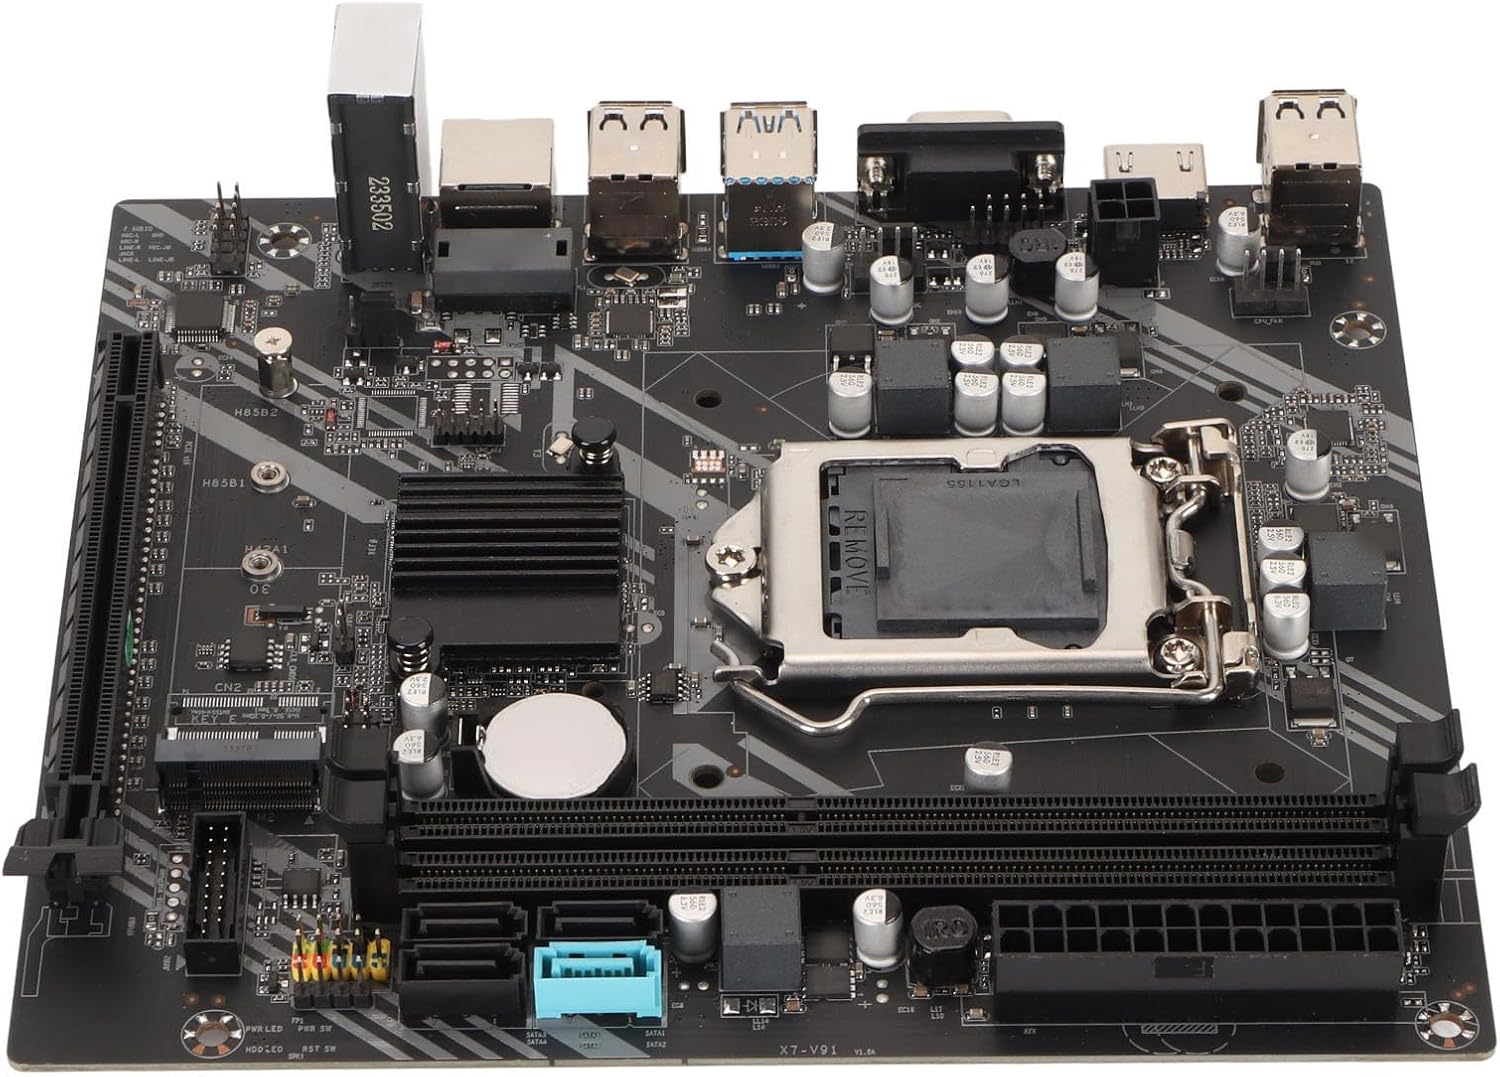
Figura 1.1: De arriba abaixo view of the Diyeeni LGA 1155 DDR3 Motherboard.
2. Configuración e instalación
Proper installation is crucial for the stability and performance of your computer system. Always handle the motherboard by its edges and avoid touching components directly to prevent electrostatic discharge (ESD) damage. It is recommended to wear an anti-static wrist strap during installation.
2.1 Instalación da CPU
- Localiza o socket da CPU LGA 1155 na placa base.
- Gently push down the load lever and pull it to the side to open the CPU socket cover.
- Carefully align the CPU with the socket, ensuring the gold triangle on the CPU matches the indicator on the socket. Do not force the CPU into the socket.
- Lower the load plate and secure it with the load lever.
Importante: Incorrect CPU installation can bend pins, rendering the motherboard unusable. Verify CPU compatibility and alignment carefully.
Imaxe 2.1: Primeiro plano view of the LGA 1155 CPU socket and DDR3 memory slots.
2.2 Instalación da memoria (RAM)
- Abra os clips en ambos extremos das ranuras de memoria DDR3.
- Aliña a muesca do módulo de memoria DDR3 coa chave da ranura de memoria.
- Prema firmemente os dous extremos do módulo de memoria ata que os clips encaixen no seu lugar.
2.3 Instalación do dispositivo de almacenamento
- Unidades SATA: Connect SATA data cables from your storage devices (HDDs/SSDs) to the SATA 2.0 or SATA 3.0 interfaces on the motherboard. Connect SATA power cables from your power supply to the drives.
- Unidade de estado sólido (SSD) M.2 NVMe: Insert the M.2 NVMe SSD into the dedicated M.2 slot (PCIe channel) and secure it with the provided screw.
2.4 Graphics Card Installation (PCIe X16)
- Locate the PCIe X16 graphics card slot.
- Retire a tapa da ranura de expansión correspondente da caixa do seu PC.
- Align your graphics card with the slot and press down firmly until it is seated correctly and the retention clip locks.
- Fixa a tarxeta gráfica á carcasa cun parafuso.
2.5 Conexións de enerxía
- Connect the 24-pin ATX power connector from your power supply to the 24-pin power interface on the motherboard.
- Connect the 4-pin CPU power connector from your power supply to the 4-pin power socket near the CPU.
2.6 Panel frontal e conexións de E/S
Connect the front panel headers (power button, reset button, HDD LED, power LED) and USB 2.0/3.0 headers to their respective pins on the motherboard. Refer to the motherboard's silkscreen labels for correct pin assignments.

Figura 2.2: En ángulo view of the motherboard, highlighting expansion slots and connectors.
3. Funcionamento da placa base
Once all components are installed and connected, you can power on your system. The Diyeeni LGA 1155 DDR3 Motherboard provides a stable platform for your computing needs.
3.1 Integrated Graphics and Audio
This motherboard features an integrated graphics card and a 6-channel audio chip. For video output, connect your display to the VGA or HD Multimedia Interface (HDMI) port on the I/O panel. For audio, use the integrated audio jacks.

Figura 3.1: detallada view of the I/O panel, including audio, LAN, and USB ports.
3.2 Conectividade
- Portos USB: Utilize the 4 x USB 2.0 and 2 x USB 3.0 ports for connecting peripherals.
- Rede: The integrated RJ45 port provides reliable high-speed internet connectivity.
3.3 Configuración da BIOS/UEFI
To access the BIOS/UEFI setup utility, press the designated key (usually DEL or F2) during system startup. Here you can configure boot order, system time, and other advanced settings.
4. Mantemento
Para garantir a lonxevidade e o rendemento óptimo da súa placa base, teña en conta os seguintes consellos de mantemento:
- Mantéñase limpo: Regularly clean dust from inside your PC case, especially around the motherboard and CPU cooler, using compressed air. Dust accumulation can lead to overheating.
- Ventilación adecuada: Ensure your PC case has adequate airflow to dissipate heat generated by components.
- Actualizacións da BIOS: Comprobe periodicamente o fabricante website for BIOS/UEFI updates. Updates can improve compatibility, stability, and performance.
- Substitución da batería: The motherboard uses a CR2032 button battery for the CMOS. If you experience issues with system time or BIOS settings resetting, the battery may need replacement.
5 Solución de problemas
Se tes problemas coa túa placa base, consulta os seguintes pasos comúns para a resolución de problemas:
- Sen alimentación/Sen arranque:
- Comprobe que todas as conexións de alimentación (ATX de 24 pines, CPU de 4 pines) estean ben asentadas.
- Asegúrate de que a fonte de alimentación funciona e está activada.
- Verifique a conexión do botón de acendido do panel frontal á placa base.
- Sen visualización:
- Ensure your monitor is connected to the correct video output (either integrated graphics or a dedicated graphics card).
- Reinstala a tarxeta gráfica e os módulos de RAM.
- Tenta arrincar cunha soa memoria RAM.
- Inestabilidade/fallos do sistema:
- Comprobe a correcta instalación do refrigerador da CPU e a aplicación da pasta térmica.
- Ensure RAM modules are correctly seated and compatible.
- Update drivers for your components (chipset, graphics, audio).
- Danos nos pines da CPU: As noted by some users, incorrect CPU installation can lead to bent pins. Always align the CPU carefully with the socket's orientation marks and avoid applying excessive force. If pins are bent, professional repair may be required.
6. Especificacións
Below are the detailed technical specifications for the Diyeeni LGA 1155 DDR3 Motherboard:
| Característica | Especificación |
|---|---|
| Tipo de elemento | Placa base DDR3 |
| Material | Placa de circuíto impreso |
| Plataforma CPU | For Core 2nd and 3rd Gen |
| Socket CPU | LGA 1155 |
| Tipo de chipset | Intel H77 Express (Compatible with B75) |
| Tipo de memoria | DDR3 1600/1333/1066 MHz |
| Slots de memoria | 2 DDR3 |
| Ranura para tarxeta gráfica | 1 x PCIe X16 |
| M.2 Ranura | 1 x M.2 NVMe (PCIe Channel) |
| Interfaces SATA | 3 SATA 2.0, 1 SATA 3.0 |
| Portos USB 2.0 | 4 (Rear I/O) + 1 x USB 2.0 Pin (Internal) |
| Portos USB 3.0 | 2 (Rear I/O) + 1 x USB 3.0 Pin (Internal) |
| Saída de vídeo | 1 x VGA Port, 1 x HD Multimedia Interface (HDMI) |
| Porto LAN | 1 porto RJ45 |
| Chip de audio | Integrated 6 Channel Sound Chip |
| Tomas de corrente | 1 x 4-Pin, 1 x 24-Pin |
| Fase de alimentación | Fuente de alimentación trifásica |
| Batería CMOS | 1 x CR2032 Button Battery (240mAh) |
| Dimensións (aprox.) | 27 x 21 x 5 cm |
| Peso (aprox.) | 528 g |
7. Garantía e soporte
For warranty information, technical support, and further assistance, please refer to the retailer where you purchased this product or visit the official Diyeeni brand store.
Diyeeni Store: https://www.amazon.ca/stores/Diyeeni/page/1195A89A-7EEE-4D74-A4F7-05DAA074380B