
1. Introdución
This manual provides comprehensive instructions for the installation, operation, and maintenance of your Juno 2-Inch Flat Trim Canless Wafer LED Downlight. This innovative lighting solution is designed for quick and easy installation in various ceiling spaces, eliminating the need for traditional recessed housings. It features an all-in-one design with switchable white color temperature and adjustable lumen output, offering versatile lighting for accent, task, or general illumination.

Figure 1: Juno 2-Inch Flat Trim Canless Wafer LED Downlight with its remote driver box.
2. Información de seguridade
Please read all instructions carefully before installation and retain this manual for future reference. Failure to follow these instructions may result in electric shock, fire, or other hazards.
- Desconecte sempre a alimentación no disyuntor antes de comezar a instalación ou realizar calquera mantemento.
- Todas as conexións eléctricas deben cumprir as normas locais e do Código Eléctrico Nacional (NEC). Se non está familiarizado coas conexións de cableado eléctrico correctas, consulte cun electricista cualificado.
- Non modifique nin altere o produto de ningún xeito.
- Asegurar a subministración voltage é compatible coa luminaria (120 voltios).
- This product is suitable for wet locations and is IC Rated for direct contact with insulation.
- Do not install damaged products. Inspect the product upon receipt.
3. Contido do paquete
Verifique que todos os compoñentes estean presentes e estean intactos antes de continuar coa instalación:
- LED Lens (Integrated with Downlight Fixture)
- Mounting Hardware (Spring clips, remote driver box)
Note: The downlight fixture and remote driver box are typically pre-assembled or connected.
4. Características
The Juno 2-Inch Flat Trim Canless Wafer LED Downlight offers advanced features for optimal lighting performance and ease of use:
- Deseño sen envase: No housing required, allowing installation directly into ceiling drywall.
- Switchable White Color Temperature (SWW5): Easily select from five color temperature options:
- Branco suave 2700K
- 3000K Branco Cálido
- 3500K branco neutro
- 4000K branco frío
- 5000K de luz do día
- Adjustable Lumen Output (ALO25): Choose from three brightness levels (Low, Medium, High) to suit your needs.
- Regulable: Compatible with most standard TRIAC dimmers, dimming down to 10 percent.
- Eficiencia enerxética: Long-life LEDs and a high-efficiency driver ensure superior illumination and extended service life.
- Clasificación IC: Approved for direct contact with insulation, simplifying installation in insulated ceilings.
- Wet Location Certified: Suitable for use in bathrooms, showers, and outdoor covered areas.

Figure 2: Switches on the remote driver box allow selection of color temperature and lumen output.

Figure 3: Visual guide to the different color temperatures available.
5. Configuración e instalación
The canless design simplifies installation. Follow these steps for a secure and proper setup:
- Apagar a enerxía: Antes de comezar, asegúrese de que a alimentación da zona de instalación estea cortada no disyuntor.
- Preparar a apertura: Cut a 2-inch diameter hole in the ceiling drywall at the desired location. Ensure there are no obstructions (joists, pipes, wires) within the ceiling space.
- Conectar cableado:
- Open the remote driver box.
- Connect the building's supply wires (hot, neutral, ground) to the corresponding wires in the driver box using appropriate wire connectors.
- Asegúrese de que todas as conexións estean seguras e debidamente illadas.
- Close the driver box cover.
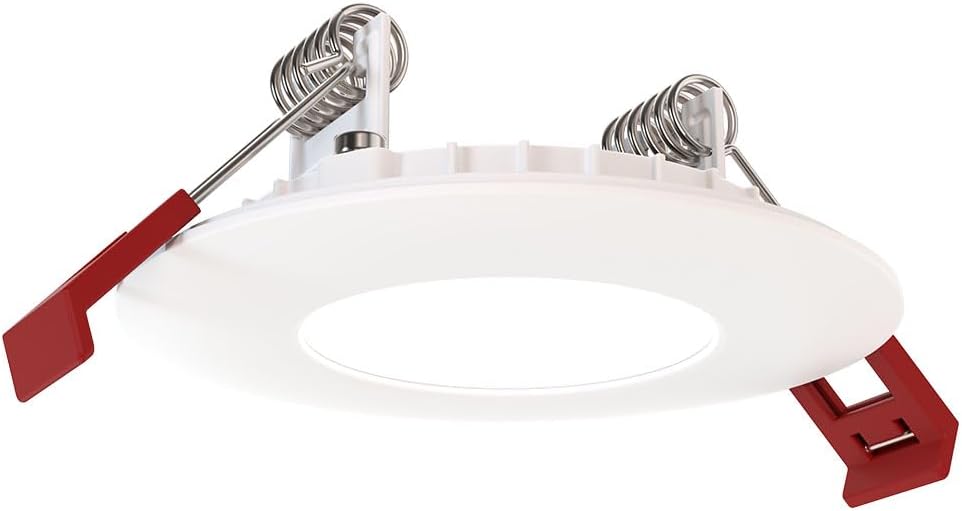
Figure 4: The remote driver box houses the electrical connections and adjustment switches.
- Select Settings (Pre-Installation): Before inserting the downlight into the ceiling, use the switches on the remote driver box to select your desired color temperature (2700K-5000K) and lumen output (Low, Medium, High). These settings can be adjusted later if needed, but it's easier before final installation.
- Insert Driver Box: Place the remote driver box into the ceiling opening. Its slim design allows it to fit into tight spaces.
- Install Downlight:
- Gently push the spring-loaded clips on the sides of the downlight upwards.
- Insert the downlight into the ceiling opening.
- Once the downlight is fully inserted, release the clips. The clips will spring back down and firmly secure the fixture against the ceiling.

Figure 5: Dimensions of the downlight and driver box for installation planning.
- Restaurar enerxía: Turn the power back on at the circuit breaker. Test the downlight's functionality.
6. Instrucións de funcionamento
Your Juno LED Downlight is designed for simple operation once installed.
- Encendido/apagado: Controla a luz cun interruptor de parede estándar conectado ao circuíto.
- Adormecer: If connected to a compatible TRIAC dimmer switch, adjust the brightness by manipulating the dimmer control. The light can be dimmed down to 10% of its maximum output.
- Adjusting Color Temperature and Lumen Output:
The color temperature and lumen output are set via switches located on the remote driver box (refer to Figure 2). To change these settings after installation, you will need to access the driver box, which may require temporarily removing the fixture from the ceiling or accessing the box through an attic/access panel if it was placed there. It is recommended to set these preferences during installation.
- Interruptor de temperatura de cor: Select from 2700K, 3000K, 3500K, 4000K, or 5000K.
- Lumen Output Switch: Choose Low, Medium, or High brightness.
7. Mantemento
The Juno LED Downlight requires minimal maintenance due to its durable design and long-life LEDs.
- Limpeza: Asegúrese de que a electricidade estea desconectada antes de limpala. Limpe a luminaria cun pano suave, seco ou lixeiramente húmido.amp pano. Non empregue produtos de limpeza abrasivos nin disolventes, xa que poden danar o acabado ou os compoñentes eléctricos.
- Duración da vida do LED: The integrated LEDs are designed for extended operation and do not require replacement under normal use.
8 Solución de problemas
If you encounter issues with your downlight, refer to the following common problems and solutions:
| Problema | Causa posible | Solución |
|---|---|---|
| A luz non acende. | Non hai potencia para o dispositivo. Conexión de cableado solta. Interruptor ou disyuntor avariado. | Comprobe o disxuntor e o interruptor de parede. Turn off power, check all wire connections in the driver box. Test switch or breaker; replace if necessary. |
| A luz parpadea ou se atenúa de forma inadecuada. | Interruptor regulador de intensidade incompatible. Cableado solto. Circuito sobrecargado. | Ensure dimmer is TRIAC compatible and designed for LED lighting. Desconecte a corrente, comprobe todas as conexións dos cables. Reduce load on the circuit or consult an electrician. |
| Incorrect color temperature or brightness. | Switches on driver box set incorrectly. | Access the remote driver box and adjust the color temperature and lumen output switches to desired settings. |
Se o problema persiste despois de probar estas solucións, póñase en contacto co servizo de atención ao cliente.
9. Especificacións
| Atributo | Detalle |
|---|---|
| Marca | Xuño |
| Nome do modelo | WF2 RD ALO25 SWW5 90CRI 120 MW M6 (Round LED) |
| Tamaño | 2-Inch Flat Trim |
| Cor | Branco Mate |
| Material | Aluminio, Policarbonato |
| Tipo de fonte de luz | LED |
| Voltage | 120 voltios |
| Wattage | 9.2 vatios |
| Características especiais | Adjustable Color Temperature (2700K-5000K), Dimmable (Triac), Energy Efficient, Waterproof |
| Tipo de instalación | Flush Mount (Canless) |
| Uso interior/exterior | Indoor, Outdoor (Wet Location Certified) |
| Dimensións do produto | 3.2"L x 3.2"W x 1.3"H (Fixture) |
| Peso do elemento | 13.2 onzas |
| Certificacións | CSA certified, Title 24, Energy Star, IC Rated |
10. Garantía e soporte
Garantía: This product comes with a Limited Warranty. Please refer to the product packaging or the manufacturer's official website for specific terms and conditions of the warranty.
Atención ao cliente: For technical assistance, troubleshooting beyond this manual, or warranty claims, please contact Juno customer support. Contact information can typically be found on the product packaging or the official Juno websitio.
Recursos en liña: For additional information, product updates, or FAQs, visit the official Juno websitio: www.acuitybrands.com/brands/juno