1. Introdución
The SNAKOL SK216 is a versatile 2-in-1 pen-type digital multimeter designed for electrical equipment testing and maintenance. It features True RMS measurement capabilities for AC voltage, resistance, diodes, and continuity. Additionally, it includes functions such as Non-Contact Voltage (NCV) detection, live/null wire identification, and a clear LCD backlit screen for easy readings in various lighting conditions. Its compact and portable design makes it an essential tool for both professional electricians and home users.
2. Información de seguridade
Always observe safety precautions when using electrical testing equipment. Failure to do so may result in injury or damage to the device. Read all instructions carefully before use.
- Do not exceed the maximum input values specified for each measurement function.
- Ensure the test leads are in good condition and properly connected before making any measurements.
- Non empregues o dispositivo se parece estar danado ou non funciona correctamente.
- Extreme as precaucións ao traballar con circuítos con tensión.
- Desconecte sempre a alimentación do circuíto antes de medir resistencia, continuidade ou díodos.
- Keep hands and fingers behind the probe barriers during measurements.
- Replace batteries promptly when the low-battery indicator appears to ensure accurate readings.
3. Contido do paquete
Verifica que todos os elementos estean presentes no teu paquete:
- 1 x SNAKOL SK216 Pen-type Multimeter
- 1 x Probe (removable multimeter lead)
- 1 x Manual de usuario (este documento)
- 2 pilas AAA de 1.5 V
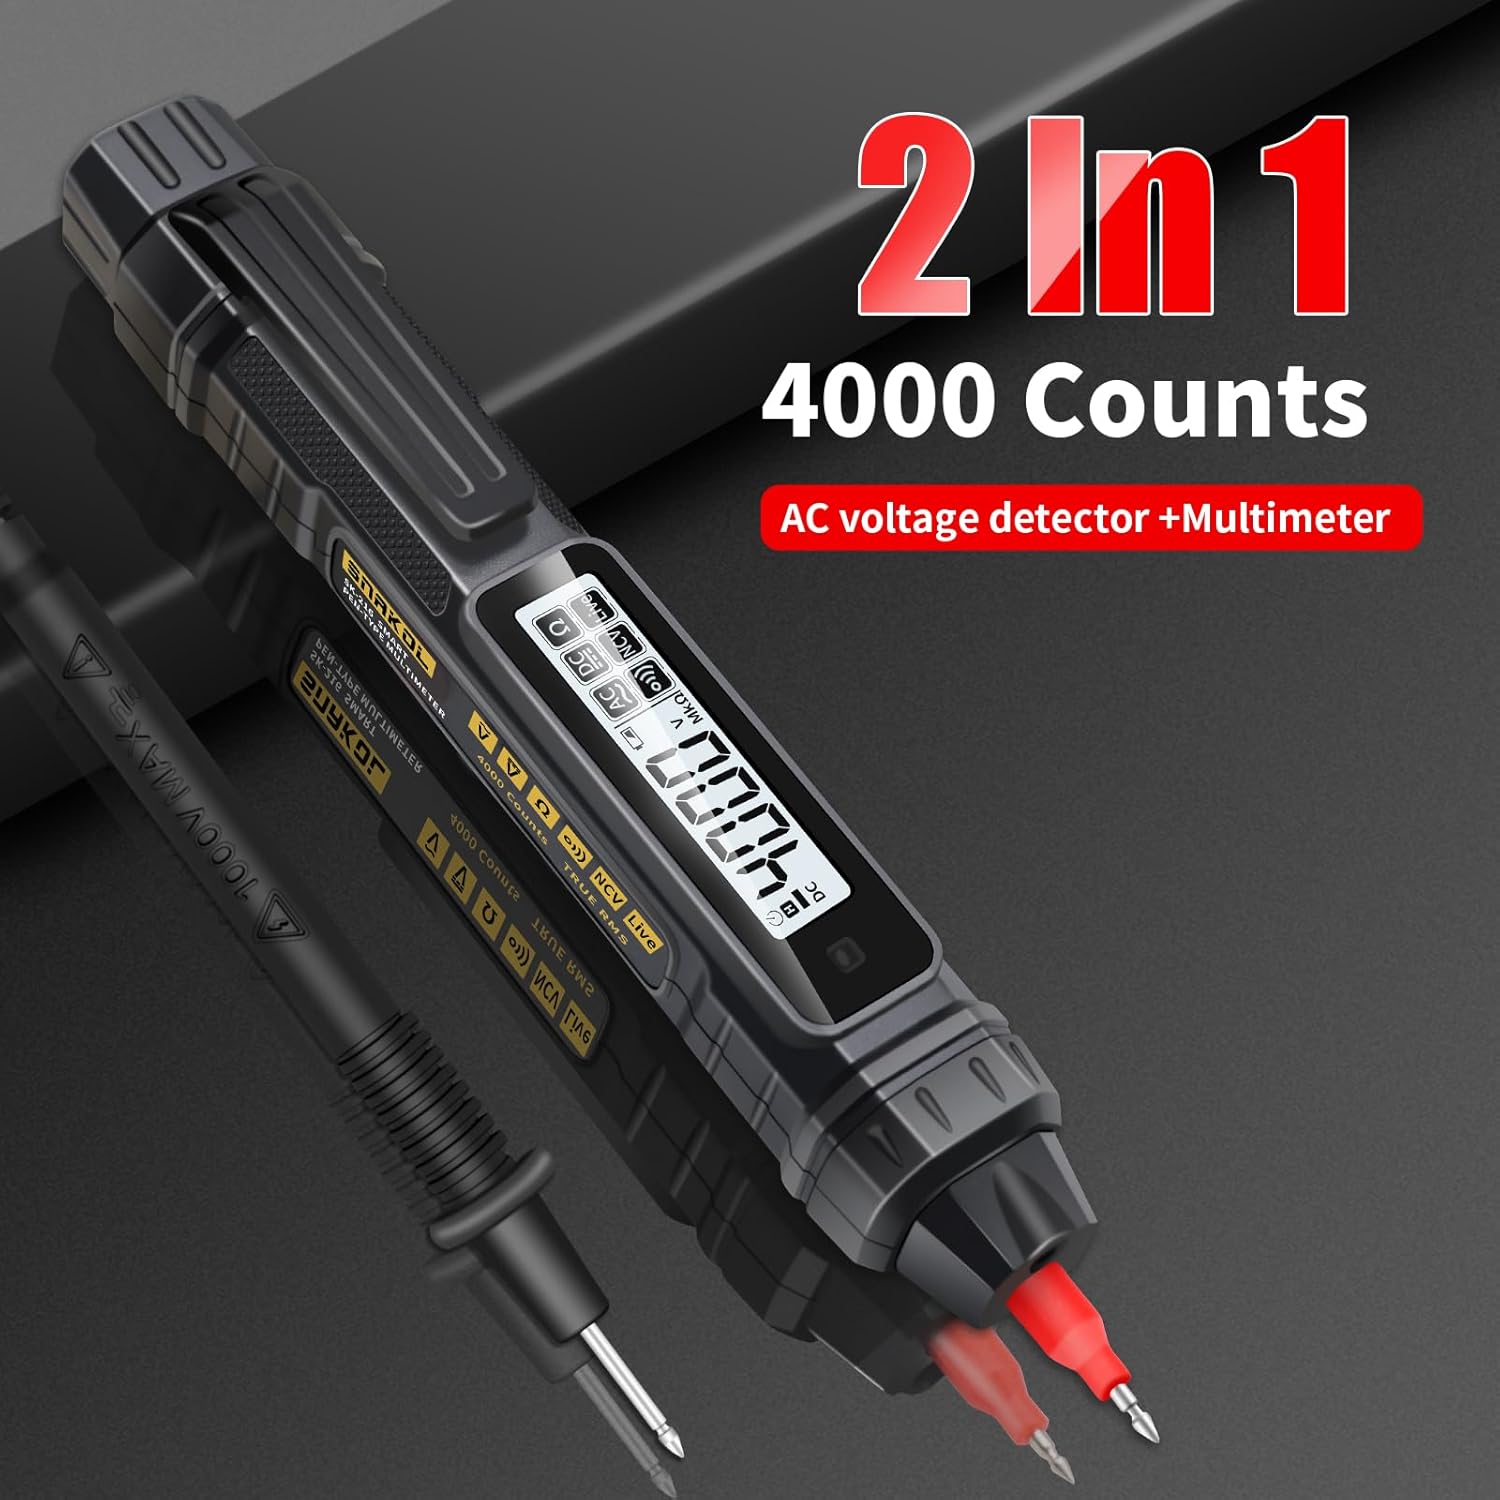
Image: Contents of the SNAKOL SK216 package, including the multimeter, probe, and batteries.
4. Configuración
4.1 Instalación da batería
The SNAKOL SK216 requires two 1.5V AAA batteries. These are included in the package.
- Localiza a tapa do compartimento da batería na parte traseira do multímetro.
- Deslice ou solte a tapa para abrir o compartimento.
- Introduza dúas pilas AAA, asegurándose de manter a polaridade correcta (+ e -).
- Pecha a tapa do compartimento da batería de forma segura.
Video: Demonstrates the battery installation process for the SNAKOL SK216 multimeter.

Image: Close-up of the SNAKOL SK216 multimeter with the battery compartment open, showing two AAA batteries inserted.
4.2 Conectando a sonda
The included probe can be connected to the multimeter for various measurements.
- Identify the input jack on the top of the multimeter.
- Insert the plug end of the probe cable firmly into the input jack.
- The probe tip can be removed or attached as needed for different measurement scenarios.
Video: Demonstrates how to connect the removable multimeter leads and probes to the device.
5. Instrucións de funcionamento
The SNAKOL SK216 features automatic ranging and function switching for ease of use. Press the power button to turn the device on or off. The device will typically start in auto-ranging mode.
5.1 Function Switching and Auto-Range
The multimeter automatically detects the measurement type (AC/DC voltage, resistance, continuity) when powered on. You can cycle through different measurement modes by pressing the function button (often labeled 'FUNC' or similar, or indicated by a specific icon).
Video: Shows the function switching and auto-ranging capabilities of the multimeter.

Image: Illustrates the one-touch measurement capabilities for resistance, AC voltage, DC voltage, and continuity (on-off test).
5.2 DC Voltage Medición
Para medir DC voltage:
- Ensure the multimeter is powered on and in DC voltage mode (often auto-detected).
- Connect the black probe to the negative terminal and the red probe to the positive terminal of the DC source.
- Le o voltago valor mostrado na pantalla LCD.
Video: Shows the process of measuring DC voltage using the multimeter on a battery.
5.3 AC Voltage Medición
Para medir AC voltage:
- Ensure the multimeter is powered on and in AC voltage mode (often auto-detected).
- Carefully touch the probes to the live and neutral terminals of the AC source.
- Le o voltago valor mostrado na pantalla LCD.
Video: Demonstrates measuring AC voltage on a circuit breaker.
5.4 Medición de resistencia
Para medir a resistencia:
- Asegúrese de que o circuíto ou compoñente estea desconectado antes de medir a resistencia.
- Select resistance mode (Ω) or allow auto-detection.
- Connect the probes across the component to be measured.
- Lea o valor de resistencia na pantalla.
Video: Illustrates how to measure resistance on a circuit board component.
5.5 Proba de continuidade
The continuity test checks for an unbroken path in a circuit. A buzzer will sound if resistance is below approximately 50Ω.
- Asegúrate de que o circuíto estea desenergizado.
- Select continuity mode (often indicated by a speaker icon) or allow auto-detection.
- Toca as sondas nos dous puntos nos que queres comprobar a continuidade.
- A beep indicates continuity.
Video: Demonstrates the continuity test with an audible beep.
5.6 Vol. sen contactotagDetección e (NCV).
A función NCV permite a detección do volume de CAtage sen contacto directo, o que mellora a seguridade.
- Select NCV mode (often indicated by a wave icon).
- Bring the tip of the multimeter close to the conductor or electrical outlet.
- An analog bar on the LCD screen, accompanied by beeps of varying rhythms, indicates the presence and strength of the electric field.

Image: Shows the multimeter performing NCV detection, with the screen displaying an analog bar and an indicator light.
Video: Demonstrates NCV AC Voltage Test in an electrical panel.
5.7 Live/Null Wire Identification (Firewire/Zero Line)
This function helps distinguish between live (fire) and neutral (zero) wires.
- Touch the multimeter's tip to the wire.
- For a live wire (firewire), the indicator light will illuminate, the screen will display "----", and a "beep beep beep" sound will be emitted.
- For a neutral wire (zero line), the indicator light will not illuminate, the screen will display "L iUE", and no sound will be emitted.
Image: Illustrates the multimeter detecting a live (firewire) and neutral (zero line) wire, showing distinct screen indicators and sounds.
Video: Demonstrates Zero Fire Wire Identification in an electrical panel.
5.8 Breakpoint Finder
The breakpoint finder function helps locate breaks in a cable.
- Apply the multimeter tip along the length of the cable.
- The device will indicate the presence of voltage up to the point of the break. The signal will cease or change significantly past the break.
Video: Shows the breakpoint finder function being used on a cable.
5.9 Función de retención de datos
Prema o botón "HOLD" para conxelar a lectura actual na pantalla. Prémao de novo para desactivar a función de retención.
5.10 Lanterna
The built-in flashlight can be activated to illuminate dimly lit work areas. Refer to the device's buttons for flashlight activation (often a long press on a specific button or a dedicated button).
Video: Demonstrates the flashlight lighting feature of the multimeter.
6. Mantemento
6.1 Coidados xerais
- Manteña o dispositivo limpo e seco. Limpe cun pano suave e seco.amp un pano se é necesario. Non empregue produtos de limpeza abrasivos nin disolventes.
- Garde o multímetro nun lugar fresco e seco, lonxe da luz solar directa e de temperaturas extremas.
- Evite deixar caer o dispositivo ou sometelo a fortes impactos.
6.2 Substitución da batería
When the low-battery indicator appears on the display, replace the batteries immediately to ensure accurate measurements and proper device function. Follow the steps outlined in Section 4.1 Battery Installation.
7 Solución de problemas
| Problema | Causa posible | Solución |
|---|---|---|
| O dispositivo non se acende. | Baterías gastadas ou instaladas incorrectamente. | Comprobe a polaridade das baterías e substitúaas se é necesario. |
| Lecturas inexactas. | Low battery, incorrect mode selection, or damaged probes. | Replace batteries, ensure correct measurement mode, inspect and replace probes if damaged. |
| NCV function gives false positives/negatives. | Environmental interference or proximity to other electrical fields. | Test in a different location or use direct contact measurement for verification. |
| Continuity buzzer does not sound. | Open circuit or resistance too high. | Verify the circuit path; the resistance might be above the continuity threshold. |
8. Especificacións
| Característica | Detalle |
|---|---|
| Modelo | SK216 |
| Fabricante | SNAKOL |
| Peso do elemento | 109 g |
| Dimensións do produto | 18.49 x 2.54 x 3.05 cm |
| Baterías | 2 pilas AAA necesarias (incluídas) |
| Precisión de medición | +/-1.2 % |
| Min. Vol. Operativotage | 2 voltios |
| Funcións | AC / DC Voltage, Resistance, Diode, Continuity, NCV, Null/Live Wire Detection, Auto-Ranging, Backlit Display, Flashlight |
| Vol. Máxtage | 600 V |
9. Garantía e soporte
SNAKOL products are designed for reliability and performance. For warranty information or technical support, please refer to the contact details provided with your purchase or visit the official SNAKOL website. Customer services are always our top priority. If there are any concerns, please feel free to contact us for quick assistance.