
1. Introdución
The MUSE M-179 P Alarm Clock Radio is designed to provide reliable timekeeping and audio entertainment. This device features an FM PLL radio with the capacity to store 20 preset stations. It includes a time projection function, allowing you to adjust both the angle and rotation of the projected image for optimal viewing. As an alarm clock, it offers a dual alarm system, enabling you to wake up to either your preferred radio station or a standard buzzer. Additional functions include a snooze feature for extra sleep and a sleep timer for falling asleep to music.
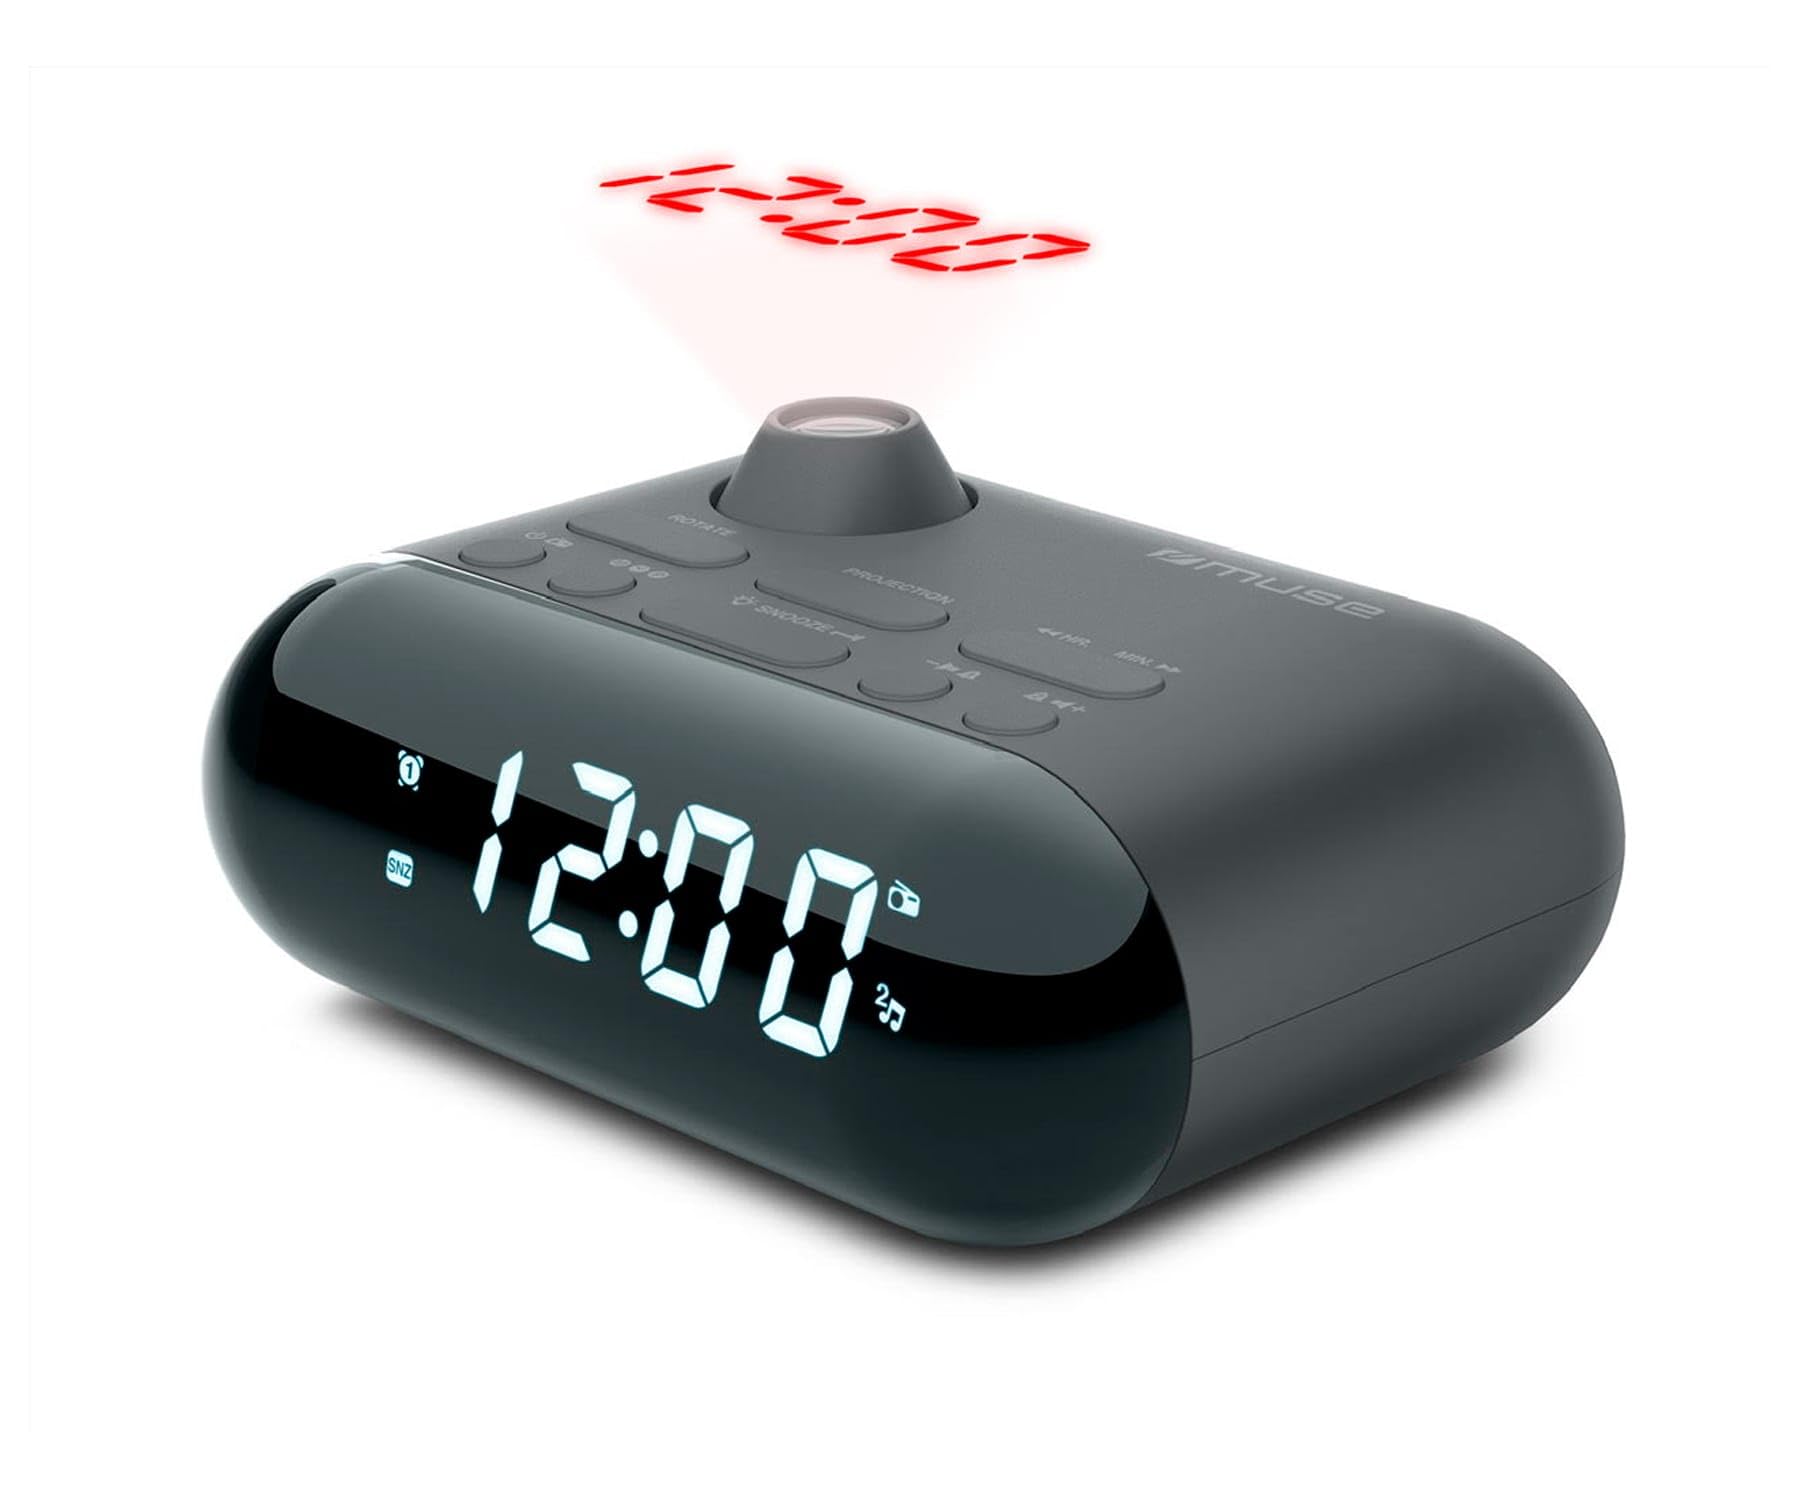
Image showing the front of the MUSE M-179 P Alarm Clock Radio, featuring the LED display and control buttons.
2. Instrucións de seguridade
- Lea atentamente todas as instrucións antes de utilizar o dispositivo.
- Conserve este manual para futuras consultas.
- Non expoña a unidade a goteos ou salpicaduras de auga.
- Asegúrese de que haxa unha ventilación axeitada; non obstrua ningunha das aberturas de ventilación.
- Non coloque a unidade preto de fontes de calor como radiadores, rexistros de calor, estufas ou outros aparellos (incluídos amplificadores) que producen calor.
- Use só accesorios/accesorios especificados polo fabricante.
- Elimina as baterías usadas de forma responsable segundo a normativa local.
- Non intente desmontar nin modificar a unidade. Encomende calquera tarefa de mantemento a persoal de servizo cualificado.
3. Contido do paquete
Comprobe que o seu paquete inclúe os seguintes elementos:
- MUSE M-179 P Alarm Clock Radio Unit
- 1 x AA Battery (for backup or primary power, depending on model)
- Manual de usuario (este documento)
4. Características do produto
- Alarm Clock Radio: Integrated alarm and radio functions.
- Proxección do tempo: Projects the current time onto a wall or ceiling.
- Alarma dual: Establece dúas alarmas independentes.
- Wake-up Options: Choose to wake up to FM radio or a buzzer sound.
- PLL FM Radio: Digital tuning for stable radio reception.
- 20 FM Presets: Store up to 20 of your favorite FM radio stations.
- Función de Snooze: Temporarily pause the alarm.
- Temporizador de sono: Fall asleep to radio with automatic shut-off.
- Reloxo incorporado: Cronometraxe precisa.
- Deseño portátil: Compact and easy to move.
5. Controles e pantalla
The MUSE M-179 P features an intuitive layout for easy operation. While specific button labels may vary, common controls include:
- Pantalla LED: Shows current time, alarm status, and radio frequency.
- Botón de axuste de tempo: For adjusting hours and minutes.
- Alarm 1/Alarm 2 Buttons: To set and activate individual alarms.
- Snooze/Sleep Button: Activates snooze or sets the sleep timer.
- Radio/Tuning Buttons: For scanning and selecting radio stations.
- Control de volume: Axusta a saída de son.
- Projector On/Off & Adjustment: Controls the time projection feature.
6. Configuración
6.1. Conexión de alimentación
- Open the battery compartment, usually located on the bottom or back of the unit.
- Insert 1 AA battery, ensuring correct polarity (+/-). This battery powers the unit.
- Pecha o compartimento da batería de forma segura.
6.2. Axuste da hora inicial
- When the unit is first powered on, the display may flash or show a default time.
- Manteña premido o HORARIO button (or similar) until the hour digits begin to flash.
- Usa o HORA e MINUTO buttons (or tuning buttons) to adjust the hour. Pay attention to AM/PM indicators if present.
- Preme HORARIO de novo para confirmar a hora e pasar ao axuste dos minutos.
- Adjust the minutes using the appropriate buttons.
- Preme HORARIO one last time to save the current time.
7. Instrucións de funcionamento
7.1. Configuración de alarmas
The M-179 P features two independent alarms (Alarm 1 and Alarm 2).
- Manteña premido o ALARMA 1 botón ata que os díxitos da hora da alarma parpadeen.
- Usa o HORA e MINUTO botóns para axustar a hora de alarma desexada.
- Preme ALARMA 1 again to confirm the time and select the wake-up source (radio or buzzer). Use the tuning buttons to toggle between options.
- Preme ALARMA 1 once more to save the settings. The alarm indicator will light up on the display.
- Repita o proceso para ALARMA 2 usando o ALARMA 2 botón.
7.2. Using the FM Radio
- Preme o RADIO ON/OFF botón para acender a radio.
- Usa o TUNE +/- botóns para axustar manualmente a frecuencia.
- Para buscar emisoras automaticamente, manteña premido o botón TUNE +/- button. The radio will stop at the next strong signal.
- To save a preset station: Tune to the desired station, then press and hold the PRESET botón (o MEM). The preset number will flash. Use TUNE +/- para seleccionar un número predefinido (1-20) e, a seguir, prema PRESET de novo para gardar.
- To recall a preset station: Press the PRESET botón repetidamente para percorrer as emisoras gardadas.
- Axuste o volume empregando o VOLUME +/- botóns.
7.3. Proxección temporal
- Localiza o PROXECTOR ON/OFF switch or button. Turn it on to activate the time projection.
- Adjust the projection angle by physically rotating the projector lens housing.
- Se está dispoñible, use o ROTACIÓN DA IMAXE button or dial to flip the projected time display 180 degrees for optimal viewing on a ceiling or wall.
- Adjust the focus of the projected image by rotating the focus ring around the projector lens.
7.4. Función de repetición da alarma
Cando soe unha alarma, prema o botón AMORTAR button. The alarm will temporarily stop and sound again after a few minutes (typically 5-9 minutes, depending on the model's default setting).
7.5. Temporizador de sono
- Mentres soa a radio, prema o botón DURMIR botón.
- Prema repetidamente o DURMIR button to cycle through available sleep timer durations (e.g., 90, 60, 30, 15 minutes, or OFF).
- A radio apagarase automaticamente despois da duración seleccionada.
8. Mantemento
8.1. Limpeza
- Limpe a unidade cun pano suave e seco.
- Non empregue produtos de limpeza abrasivos, ceras nin solventes.
8.2. Substitución da batería
- When the display dims or the unit malfunctions, it may be time to replace the battery.
- Open the battery compartment and replace the old AA battery with a new one, observing correct polarity.
- Dispose of the old battery according to local environmental regulations.
9 Solución de problemas
| Problema | Causa posible | Solución |
|---|---|---|
| A unidade non se acende. | A batería está descargada ou inserida incorrectamente. | Substitúa a batería ou comprobe a polaridade. |
| Mala recepción de radio. | Antena non estendida ou sinal deficiente na zona. | Extend the FM antenna fully. Reposition the unit for better reception. |
| Non soa a alarma. | A alarma non está activada ou está configurada incorrectamente. | Ensure alarm is set and activated (alarm indicator visible). Check alarm volume. |
| A proxección temporal é borrosa. | Enfoque non axustado. | Rotate the focus ring on the projector lens until the image is clear. |
| Projected time is upside down. | Image rotation needs adjustment. | Press the IMAGE ROTATION button or adjust the dial to flip the display. |
10. Especificacións
- Marca: MUSA
- Número de modelo: M-179 P
- Fonte de enerxía: Battery powered (1 AA battery required)
- Tipo de visualización: LED
- Tecnoloxía de conectividade: Auxiliary (3.5 mm Audio Interface)
- Tipo de sintonizador: FM
- Bandas de radio admitidas: FM
- Características especiais: Built-in clock, Portable
- Dimensións do produto (L x W x H): 15 cm x 12.4 cm x 6.8 cm
- Nivel de resistencia á auga: Waterproof (Note: This specification should be interpreted with caution for electronic devices. Avoid direct exposure to water.)
- Material interno: Plástico
- Usos recomendados: Para uso en interiores
- Compatible Devices (Auxiliary): Headphones, Speaker, MP3 player, Laptop
11. Garantía e soporte
This product is covered by a standard manufacturer's warranty. For detailed warranty information, please refer to the warranty card included in your product packaging or visit the official MUSE website. For technical support, troubleshooting assistance, or to inquire about spare parts, please contact MUSE customer service through their official channels.
Conserve o comprobante de compra para calquera reclamación de garantía.