
PEAKMETER PM8231
Manual do usuario do multímetro dixital PEAKMETER PM8231
Modelo: PM8231
1. Introdución
The PEAKMETER PM8231 is a compact, portable digital multimeter designed for various electrical measurements. It features automatic range selection, ensuring ease of use and preventing damage from incorrect settings. This instrument is ideal for both professional and home use, offering stable performance, high precision, and low power consumption.
Pode medir DC voltage, vol. ACtage, and resistance, and includes a continuity test function. A key safety feature is the Non-Contact Voltage (NCV) detection, which alerts the user to the presence of AC voltage without direct contact, enhancing operational safety.
Información de seguridade: Before using the instrument, please read this manual carefully, paying close attention to all warnings and precautions. Ensure test leads are removed before opening the case for any maintenance. This device conforms to safety standards EN61010-1, EN61010-2-033, EN61326, and is rated CAT. III 600V.
2. Características clave
- Smart Auto-Ranging: Automatically selects the correct measurement range, simplifying operation.
- AC / DC Voltage Medición: Capable of measuring both alternating and direct current voltages.
- Medición de resistencia: Measures electrical resistance in Ohms.
- Vol. Sen contactotagDetección de e (NCV): Detecta con seguridade a presenza de CA voltage sen contacto físico.
- Proba de continuidade: Checks for electrical continuity in circuits with an audible indicator.
- Retención de datos: Freezes the displayed measurement for easy reading.
- Work Light & Backlight: Integrated flashlight for working in low-light conditions and a backlit display for improved visibility.
- Visualización: Pantalla dixital de 2000 contaxes.
- Deseño compacto: Mini size for portability and ease of handling.
3. Produto rematadoview e Compoñentes

Figura 1: Fronte view of the PEAKMETER PM8231 Digital Multimeter, showing the display, function buttons, and connected test leads (red and black). The display shows "1.8.8.8" and various measurement units.
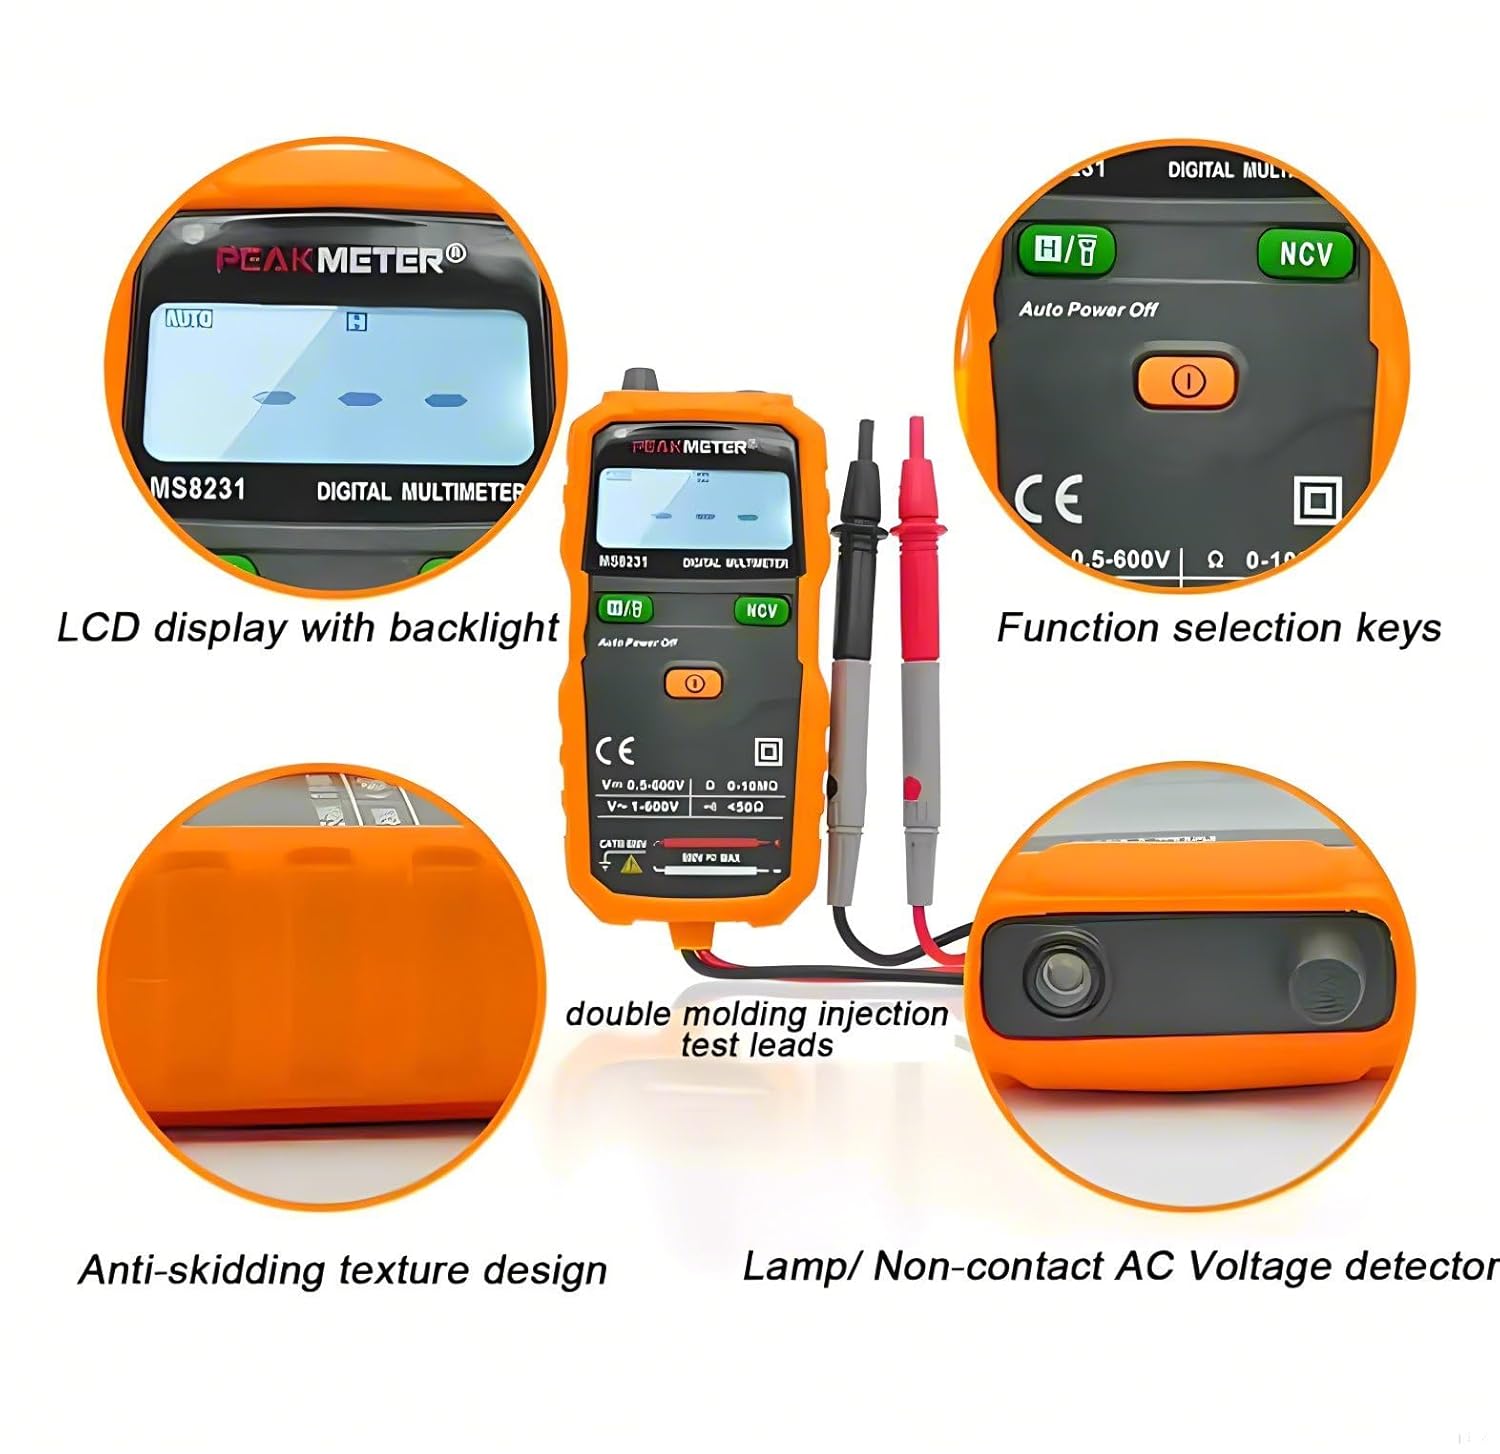
Figura 2: Detallado view highlighting key features: LCD display with backlight, function selection keys, double molding injection test leads, anti-skidding texture design, and the lamp/non-contact AC voltage detector.

Figura 3: Traseira view of the PEAKMETER PM8231, displaying the battery compartment cover with a warning to remove test leads before opening, and safety compliance markings (CE, IEC61010-1, CAT. III 600V).

Figura 4: Ilustración do volume sen contactotage (NCV) detection feature. The multimeter is shown near an electrical outlet, indicating the detection of voltage with a red light and wavy lines.

Figura 5: The PEAKMETER PM8231 in use, demonstrating its integrated flashlight illuminating a dark area and the clear, backlit LCD display for easy reading in low-light conditions.

Figura 6: Diagram illustrating the physical dimensions of the PEAKMETER PM8231, showing its length (130mm) and width (62mm), providing a clear understanding of its compact size.
4. Configuración
4.1 Instalación da batería
The PEAKMETER PM8231 requires 2 x 1.5V AAA batteries for operation. The battery compartment is located on the back of the device.
- Asegúrese de que o multímetro estea apagado e desconecte todos os cables de proba do dispositivo e de calquera circuíto.
- Locate the battery compartment cover on the rear of the multimeter (refer to Figure 3).
- Use un desaparafusador para abrir a tapa do compartimento da batería.
- Introduza dúas pilas AAA de 1.5 V, respectando a polaridade correcta (+/-) tal como se indica no interior do compartimento.
- Coloque a tapa do compartimento da batería e fíxaa co parafuso.
4.2 Conexión dos cables de proba
Connect the red test lead to the "VΩ" input jack and the black test lead to the "COM" (common) input jack. Ensure a secure connection before performing any measurements.
5. Instrucións de funcionamento
The PM8231 is a full automatic portable multi-meter. When powered on, it can directly measure, avoiding complexity and gear shifting errors.
5.1 Encendido/apagado
Press the power button (usually marked with a circle and a vertical line) to turn the multimeter on. The device features an "Auto Power Off" function to conserve battery life.
5.2 DC Voltage Medición
- Turn on the multimeter. The device will automatically enter auto-ranging mode.
- Connect the red test lead to the positive (+) side of the DC voltage source and the black test lead to the negative (-) side.
- Lea DC voltago valor que aparece na pantalla.
5.3 AC Voltage Medición
- Acende o multímetro.
- Conecte os cables de proba a través da tensión de CAtage source. Polarity is not critical for AC measurements.
- Ler o AC voltago valor que aparece na pantalla.
5.4 Medición de resistencia
- Asegúrese de que o circuíto ou compoñente que se vai medir estea desenergizado.
- Conecte os cables de proba ao compoñente cuxa resistencia desexe medir.
- Read the resistance value displayed on the screen in Ohms (Ω), kilo-Ohms (kΩ), or Mega-Ohms (MΩ).
5.5 Proba de continuidade
- Asegúrese de que o circuíto ou compoñente estea desconectado.
- Conecte os cables de proba a través do circuíto ou compoñente.
- If the resistance is below approximately 50Ω, the multimeter will emit an audible beep, indicating continuity.
5.6 Vol. sen contactotagDetección e (NCV).
A función NCV permite a detección segura do volume de CAtage sen contacto directo con cables en tensión.
- Press and hold the "NCV" button (refer to Figure 4).
- Move the top end of the multimeter (where the NCV sensor is located) close to the suspected AC voltage source (e.g., a wall outlet or insulated wire).
- O multímetro indicará a presenza de CA voltage through visual (LED light) and/or audible (beeping) signals. The intensity of the signal may vary with voltage forza e proximidade.
5.7 Función de retención de datos
Prema o botón "HOLD" para conxelar a lectura actual na pantalla. Prémao de novo para soltar a retención e retomar as medicións en directo.
5.8 Work Light and Backlight
The multimeter includes a work light (flashlight) for illuminating the measurement area and a display backlight for improved visibility in dim conditions (refer to Figure 5). These functions are typically activated via dedicated buttons or by holding certain function keys.
6. Mantemento
6.1 Limpeza
Para limpar o multímetro, limpe a carcasa con sprayamp un pano e un deterxente suave. Non empregue abrasivos nin disolventes. Asegúrese de que o dispositivo estea completamente seco antes de usalo.
6.2 Substitución da batería
Replace batteries when the low battery indicator appears on the display. Refer to section 4.1 for battery installation instructions. Always use new 1.5V AAA batteries.
6.3 Almacenamento
If the multimeter is not to be used for an extended period, remove the batteries to prevent leakage and damage to the device. Store the multimeter in a cool, dry place, away from direct sunlight and extreme temperatures.
7 Solución de problemas
| Problema | Causa posible | Solución |
|---|---|---|
| Sen pantalla ou pantalla escura | Pilas baixas ou gastadas; instalación incorrecta da pila. | Substitúa as pilas; asegúrese de que a polaridade sexa correcta. |
| Lecturas incorrectas | Poor test lead connection; measuring outside specified range; external interference. | Ensure leads are securely connected; verify measurement range (though auto-ranging helps); move away from strong electromagnetic fields. |
| A proba de continuidade non emite pitidos | Circuit not continuous; resistance too high. | Check the circuit for breaks; ensure resistance is below 50Ω for an audible beep. |
| NCV non detecta volumetage | Not close enough to source; source not live; NCV function not activated. | Ensure sensor is very close to the source; verify the source is live; press and hold the NCV button. |
8. Especificacións
| Parámetro | Rango | Precisión |
|---|---|---|
| DC Voltage | 2 V/20 V/200 V | ±(0.5 %+3) |
| 600 V | ±(0.8 %+5) | |
| Vol. ACtage | 2 V/20 V/200 V | ±(0.8 %+3) |
| 600 V | ±(1.0 %+5) | |
| Resistencia | 2kΩ/20kΩ/200kΩ/2MΩ | ±(1.0 %+3) |
| 10 MΩ | ±(1.2 %+15) |
- Visualización: 2000 contas
- Fonte de alimentación: 2 * 1.5V AAA batteries
- Peso neto: 158g (incluídas baterías)
- Peso bruto: 189 g
- Dimensións: 132mm * 61mm * 26mm (approx. 15 x 10 x 18 cm product dimensions from spec)
- Clasificación de seguridade: EN61010-1, EN61010-2-033, EN61326, CAT. III 600V
- Temperatura de funcionamento: Ata 60 graos centígrados
- País de orixe: China
9. Garantía e soporte
For warranty information and technical support, please refer to the official PEAKMETER website or contact your local distributor. The product is designed for reliability and comes with standard manufacturer support.
Duración da dispoñibilidade de pezas de reposto na UE: 1 anos.
For further assistance, please contact the seller or manufacturer directly. Keep your purchase receipt for warranty claims.
Ask a question about this manual
Ask about setup, troubleshooting, compatibility, parts, safety, or missing instructions. Manuals+ will review the question and use this page’s manual context to help answer it.