
Visiofire B0D7T9877L
Visiofire Tool-Free Laser Bore Sight Kit Instruction Manual
Model: B0D7T9877L | Brand: Visiofire
Introdución
The Visiofire Tool-Free Laser Bore Sight Kit is designed to assist in the accurate zeroing of firearms. This kit includes a red laser bore sighter and 64 adapters, providing compatibility with a wide range of calibers from .17 to 12 GA. This manual provides instructions for the proper setup, operation, and maintenance of your laser bore sight to ensure optimal performance and accuracy.
O que hai na caixa
Verifique que estean presentes todos os compoñentes antes de continuar coa configuración.
- 1 x Red Laser Bore Sighter
- 64 x Adapters (for various calibers)
- 64 x Updated Screws
- 1 x Arbor
- 1 x Upgraded Suit Case
- 2 x Enhanced High-Capacity CR2 Batteries
- 1 x Adjustment Hexagonal Key
- 1 x Desaparafusador

Instrucións de configuración
- Instalar baterías: Unscrew the rear cap of the laser bore sighter. Insert the two provided CR2 batteries with the positive (+) end facing forward (towards the laser emitter). Screw the cap back on securely.

Figure 2: Battery Installation and Adapter Attachment. This image illustrates the process of inserting CR2 batteries into the bore sighter and attaching an adapter to the front. - Seleccionar adaptador: Identify the correct adapter for your firearm's caliber. Each adapter is marked with a serial number corresponding to a specific caliber range.
- Conectar o adaptador: Insert the selected adapter onto the front of the laser bore sighter. The tool-free design allows for quick attachment by hand. Ensure the adapter is firmly seated.
- Insert into Barrel: Carefully insert the bore sighter, with the attached adapter, into the muzzle of your unloaded firearm. Ensure the bore sighter is centered and stable within the barrel. The arbor can be used for added stability in larger calibers (5.56-12GA).
- Activar o láser: Press the button on the side of the bore sighter to activate the red laser beam.
Instrucións de funcionamento
The laser bore sight provides a visual reference for initial zeroing of your firearm's optics or iron sights.
- Secure Firearm: Place your unloaded firearm in a stable rest or vise, pointed towards a target at your desired zeroing distance (e.g., 25 yards for initial setup).
- Activar o láser: Insert the bore sighter into the barrel and activate the laser. A red dot will project onto your target.
- Adjust Sights/Optics: Adjust your firearm's scope, red dot sight, or iron sights until their reticle or aiming point aligns with the projected red laser dot on the target.
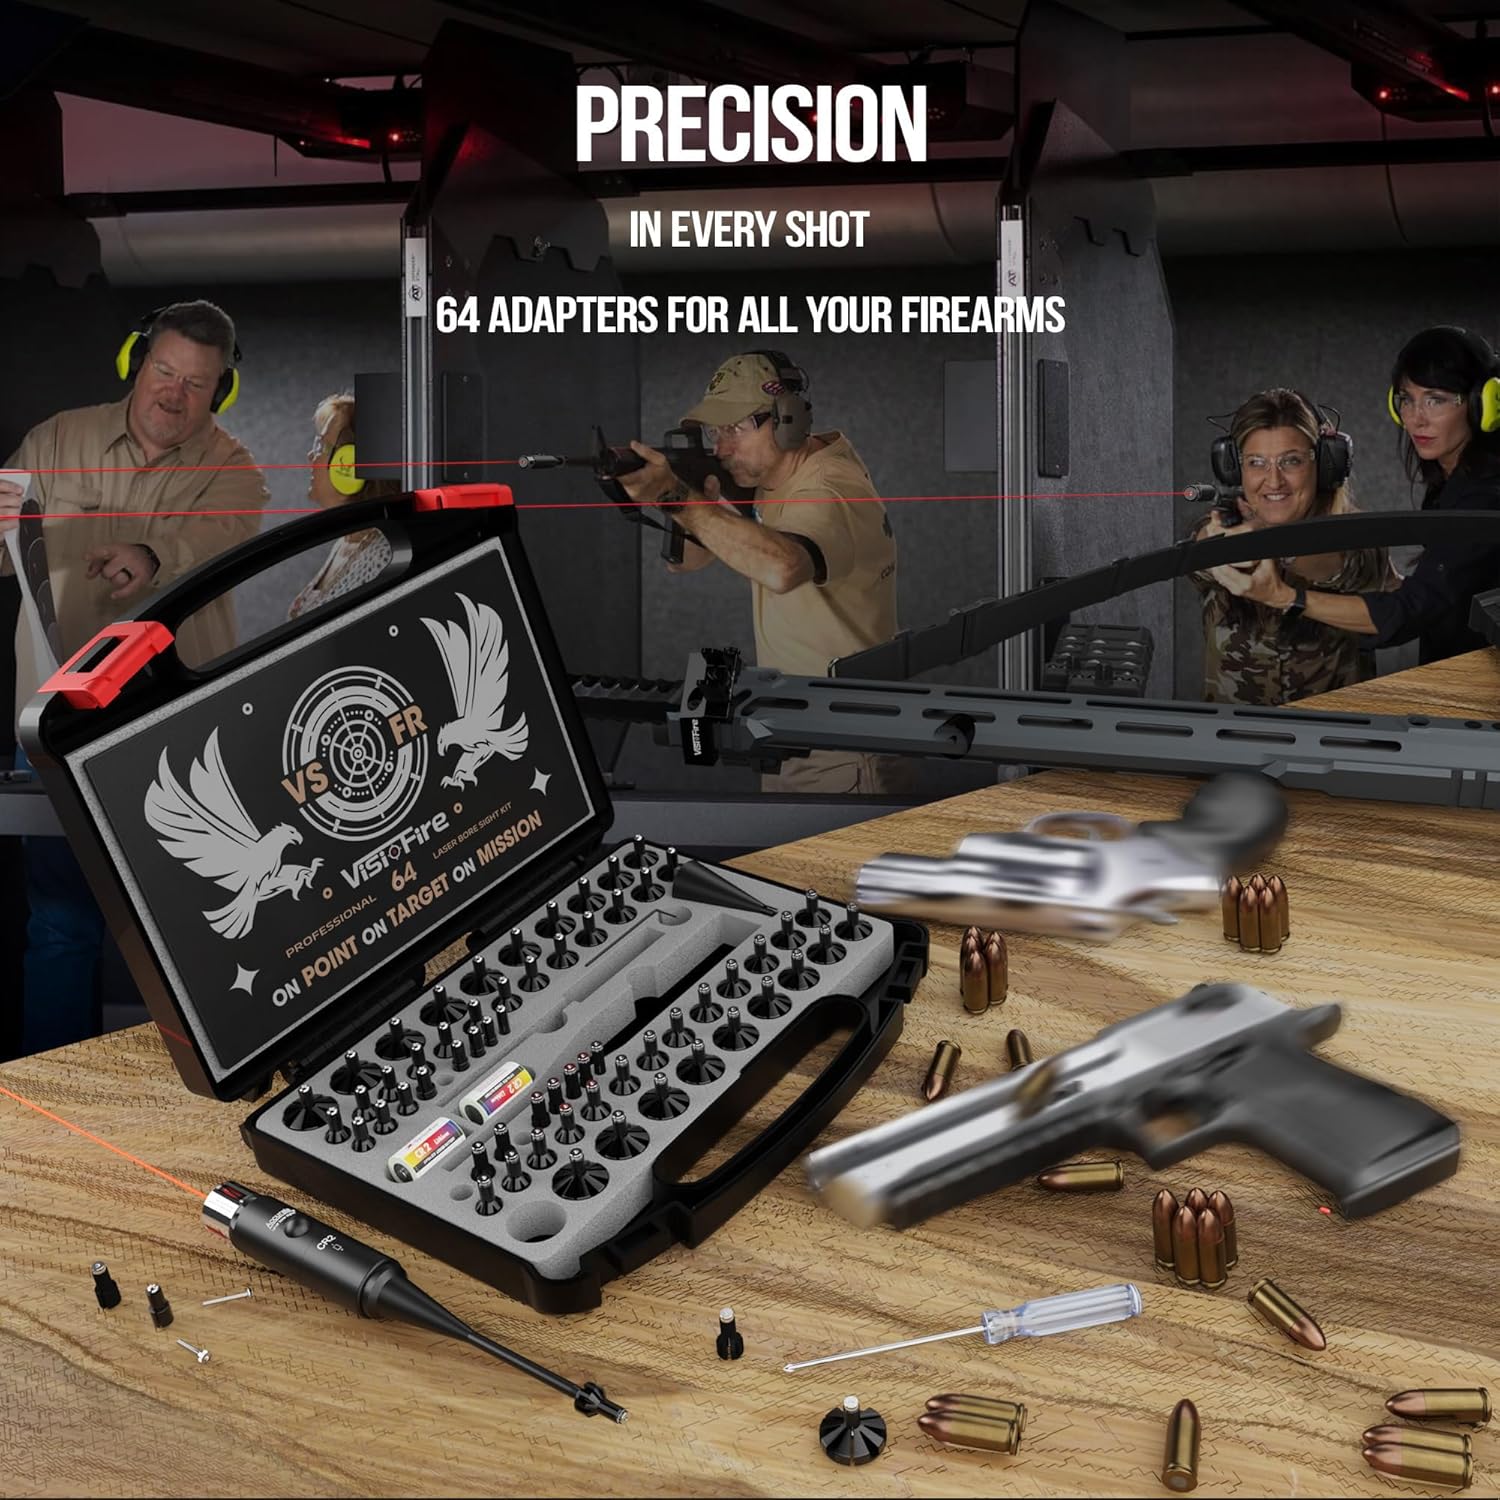
Figure 3: Bore Sighting in Use. This image shows individuals at a shooting range utilizing the laser bore sight to precisely align their firearm's aiming system. - Verificar o aliñamento: Once aligned, carefully remove the bore sighter from the barrel. It is recommended to perform live-fire adjustments at a shooting range to confirm and fine-tune your zero. The laser bore sight provides a starting point to get "on paper" quickly, saving ammunition.
Video 1: Laser Bore Sight Kit Overview. This video provides a brief demonstration of the Visiofire Laser Bore Sight Kit, showcasing its components and basic operation.
Mantemento
- Limpeza: After each use, gently wipe the laser bore sighter and adapters with a clean, dry cloth to remove any residue or debris. Do not use harsh chemicals or abrasive materials.
- Almacenamento da batería: For extended storage, remove the CR2 batteries from the bore sighter to prevent leakage and damage. Store batteries in a cool, dry place.
- Almacenamento: Store the bore sight kit in its protective case in a dry environment, away from extreme temperatures and direct sunlight.
Resolución de problemas
| Problema | Causa posible | Solución |
|---|---|---|
| O láser non se acende. |
|
|
| Laser dot is dim or flickers. |
|
|
| Bore sighter wobbles in barrel. |
|
|
Especificacións
- Marca: Visiofire
- Nome do modelo: Laser Bore Sight Kit
- Cor: Láser vermello
- Material: Aluminio
- Dispositivos compatibles: Shotgun, Handgun, Rifle
- Tipo de montaxe: Inserción
- Reticle Type: Punto
- Clase láser: IIIA (less than 5mW)
- Tipo de batería: CR2 (2 incluídos)
- Duración da batería: Ata 72 horas de uso continuo
- Compatibilidade de calibres: .17 to 12 GA (with 64 included adapters)
- GTIN: 735812336695
- ASIN: B0D7T9877L
Garantía e Soporte
The Visiofire Laser Bore Sight Kit comes with a 2 ano de garantía do fabricante. For warranty claims, technical support, or inquiries regarding product operation, please contact Visiofire customer service through the retailer's platform or the official Visiofire websitio. Garde o comprobante de compra para validar a garantía.
sen documentos relevantes
Ask a question about this manual
Ask about setup, troubleshooting, compatibility, parts, safety, or missing instructions. Manuals+ will review the question and use this page’s manual context to help answer it.