1. Introdución e información de seguridade
This manual provides essential instructions for the safe assembly, operation, and maintenance of your Shintenchi 45 Inch Outdoor Propane Fire Pit Table. Please read all instructions carefully before use and retain this manual for future reference.
1.1 Avisos de seguridade importantes
- Só para uso exterior: Never use this appliance indoors or in an enclosed area.
- Autorización para combustibles: Maintain a minimum of 24 inches (61 cm) clearance from combustible materials to the sides and rear of the appliance.
- Tipo de combustible: Use only Liquefied Petroleum Gas (LPG).
- Ventilación: Asegurar unha ventilación adecuada durante o funcionamento.
- Nenos e animais: Manteña os nenos e as mascotas lonxe da fogueira durante o funcionamento e mentres se arrefría.
- Superficies quentes: The fire pit and surrounding surfaces will be hot during and after use. Do not touch hot surfaces.
- Nunca deixes sen vixilancia: Do not leave the fire pit unattended while in operation.
- Fugas de gas: Check for gas leaks before each use. Refer to the troubleshooting section for leak detection.
- Certificado CSA: This product is CSA certified, ensuring it meets safety and quality standards.
2. Produto rematadoview e Compoñentes
The Shintenchi 45 Inch Outdoor Propane Fire Pit Table is designed to provide warmth and ambiance to your outdoor living space. It features a durable construction and a versatile design that allows it to function as both a fire pit and a table.
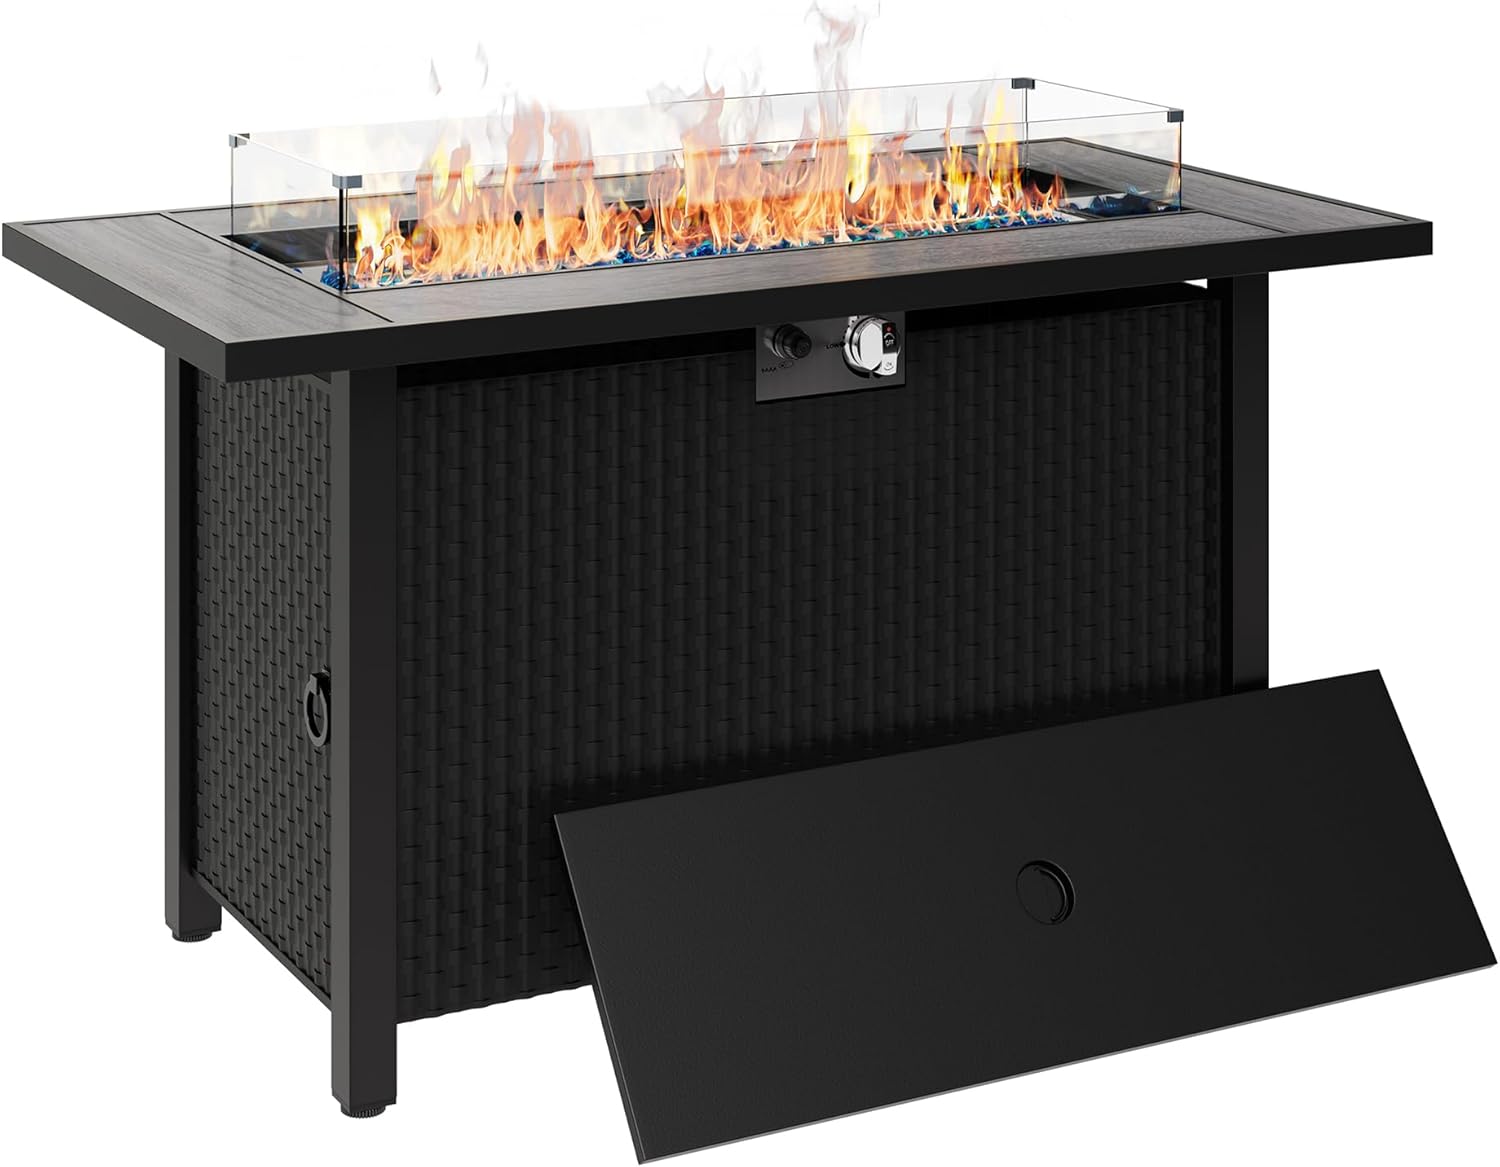
Figura 2.1: global view of the Shintenchi 45 Inch Outdoor Propane Fire Pit Table.
2.1 Características principais
- Deseño 2 en 1: Functions as a fire pit table or a dining/coffee table with the included lid.
- 50,000 BTU Heat Output: Provides substantial warmth for outdoor comfort.
- Protector de vento de vidro: Enhances safety and flame stability.
- Construción duradeira: Built with solid steel and an all-weather tabletop.
- Encendido electrónico: For easy and quick lighting.
- Chama axustable: Control knob allows adjustment from low to high flame.
- Almacenamento de tanques de propano: Integrated compartment for a standard 20lb propane tank (not included).
- Accesorios incluídos: Crystal clear glass stones, glass wind guard, lid, and waterproof cover.

Figure 2.2: The fire pit table can be used with the glass wind guard for ambiance, without the lid as a fire pit, or with the lid as a functional table.
3. Instrucións de configuración
Follow these steps to properly set up your fire pit table.
3.1 Desembalaxe e inspección
- Retire coidadosamente todos os compoñentes da embalaxe.
- Inspect all parts for any damage. Do not assemble if any parts are damaged. Contact customer support for replacements.
- Asegúrate de que estean presentes todos os compoñentes listados.
3.2 Asemblea
Assembly typically involves attaching the legs, placing the burner assembly, and adding the decorative glass stones. Refer to the detailed assembly diagram provided in your product packaging for specific steps.
3.3 Conexión do depósito de propano
- Open the access door on the side of the fire pit table.
- Place a standard 20lb propane tank (not included) into the designated compartment.
- Connect the regulator hose from the fire pit to the propane tank valve. Hand-tighten securely.
- Ensure the tank is upright and secured using the tank fixing device.
- Pecha a porta de acceso.

Figure 3.1: Propane tank connection and control panel location.
3.4 Glass Wind Guard Installation
The glass wind guard consists of several glass panels and metal brackets. Assemble the panels using the provided brackets and place the assembled wind guard around the burner area. This helps to protect the flames from wind and adds a layer of safety.

Figure 3.2: The glass windscreen helps maintain flame stability.
4. Instrucións de funcionamento
Follow these steps to safely light and operate your fire pit table.
4.1 Lighting the Fire Pit
- Asegúrate de que a válvula da bombona de propano estea completamente aberta.
- Locate the control panel on the side of the fire pit table.
- Push and hold the electronic ignition button (labeled 'Electronic Ignition').
- While holding the ignition button, turn the control knob counter-clockwise to the 'LOW' position.
- The burner should ignite within a few seconds. If it does not, release the ignition button and control knob, wait 5 minutes, and repeat the process.
- Once lit, continue to hold the ignition button for 10-15 seconds to ensure the flame is stable, then release.
4.2 Adjusting the Flame
To adjust the flame height, rotate the control knob between the 'LOW' and 'HIGH' settings. Turn clockwise to decrease the flame and counter-clockwise to increase it.
4.3 Turning Off the Fire Pit
- Turn the control knob clockwise to the 'OFF' position.
- Peche a válvula do depósito de propano.
- Allow the fire pit to cool completely before covering or storing.
5. Mantemento
Regular maintenance ensures the longevity and safe operation of your fire pit table.
5.1 Limpeza
- Protector de vento de vidro: After use, soot may accumulate on the glass. Allow the glass to cool completely, then wipe with a soft cloth and glass cleaner.
- Burner and Pan: Periodically inspect the burner and gas orifices for debris or blockages. Clean with a soft brush if necessary.
- Superficies exteriores: Wipe down the tabletop and base with a damp un pano e xabón suave. Evite produtos de limpeza abrasivos.
5.2 Almacenamento
When not in use, especially during inclement weather or extended periods, cover the fire pit table with the provided waterproof cover to protect it from the elements.
6 Solución de problemas
If you encounter issues with your fire pit, refer to the following common problems and solutions.
| Problema | Causa posible | Solución |
|---|---|---|
| O queimador non se acende |
|
|
| Low flame or inconsistent flame |
|
|
| Detectouse un cheiro a gas |
|
|
7. Especificacións
Detailed specifications for your Shintenchi 45 Inch Outdoor Propane Fire Pit Table.

Figura 7.1: Características e especificacións principais.
- Número de modelo: STC-R9016S
- Dimensións (D x W x H): 22" x 45" x 24"
- Material: Ceramic, Metal (Powder Coated Finish)
- Saída de calor: 50,000 BTU
- Tipo de combustible: Gas Licuado de Petróleo (GLP)
- Peso do artigo: 9.07 quilogramos
- Forma: Rectangular
- Cor: Gris
- Certificación: Certificado CSA
8. Garantía e soporte
For warranty information or technical support, please refer to the documentation included with your purchase or contact Shintenchi customer service directly. Keep your purchase receipt for warranty claims.
Información de contacto: Consulte o do fabricante website or original packaging for the most current contact details.