
1. Introdución
This manual provides detailed instructions for the installation, operation, and maintenance of your Mcezdy M7C-2-5-Pin Ebike LCD Display. This display is designed to enhance your electric bike experience by providing essential riding data and control functions. Please read this manual thoroughly before using the product to ensure correct operation and to prevent damage.
2. Información de seguridade
- Always ensure your ebike controller is compatible with the UART No. 2 protocol and the 5-pin connector of this display. Incompatibility can lead to malfunction.
- Non intente desmontar nin modificar a pantalla. Isto podería anular a garantía e causar danos.
- Ensure all connections are secure and waterproof before riding, especially in wet conditions. The display has an IPX65 waterproof rating, but proper connection is crucial.
- Regularly check the display and its mounting for any signs of damage or looseness.
- Evite expoñer a pantalla a temperaturas extremas ou á luz solar directa durante períodos prolongados.
- Always prioritize road safety. Do not operate display functions that distract you from riding.

Figure 1: Compatibility Reminder. This image highlights the critical need to verify your ebike's compatibility with the UART No. 2 protocol before installation.
3. Contido do paquete
Ao abrir o paquete, comproba que inclúa todos os seguintes elementos:
- Mcezdy M7C-2-5-Pin Ebike LCD Display
- Manual do usuario (este documento)
- Fault Code Description sheet
4. Características do produto
The Mcezdy M7C-2-5-Pin Ebike LCD Display offers a range of features designed for an optimized riding experience:
- Advanced Color LCD Display: Provides clear, vibrant visuals of riding data.
- Construción robusta: Crafted with ABS+PC housing, tempered glass screen, and a durable nylon bracket for longevity and scratch resistance.
- Clasificación de impermeabilidade IPX65: Offers protection against water splashes and rain.
- UART No. 2 Protocol: Ensures seamless communication with compatible ebike controllers.
- Ancho Voltage Compatibilidade: Supports 24V, 36V, 48V, and 60V ebike battery systems.
- Porto de carga USB integrado: Features a 5V/500mA USB port for charging mobile devices.
- Universal Handlebar Fit: Compatible with handlebar diameters of 22.2mm, 25.4mm, and 31.8mm.
- Visualización completa de datos: Shows speed, PAS level, battery status, odometer (ODO), trip distance (TRIP), voltage (VOL), current (CUR), and error codes.
- Customizable Parameters: Allows modification of wheel diameter and speed limit settings.
- Modos adicionais: Includes walk-assist mode and cruise control.

Figure 2: Display Features. This image illustrates the advanced color LCD, the control keypad, and the various cable connector types available for the display.
5. Configuración e instalación
5.1 Comprobación de compatibilidade
Before installation, confirm that your ebike controller uses the Protocolo UART nº 2 and has a compatible Conector de 5 pines. This display is specifically designed for this protocol and connector type. Refer to your ebike's controller manual for verification.
5.2 Montaxe da pantalla
- Choose a suitable position on your ebike's handlebar. The display's flexible bracket is compatible with handlebar diameters of 22.2mm, 25.4mm, and 31.8mm.
- Loosen the screws on the display bracket.
- Position the display on the handlebar and tighten the screws securely. Ensure the display is stable and does not rotate freely.

Figure 3: Handlebar Mounting. This image demonstrates the display mounted on a handlebar, highlighting its adjustable bracket for different handlebar diameters.
5.3 Conexión dos cables
- Locate the 5-pin waterproof cable (JL-F-Z509AG) extending from the display. The exposed cable length is approximately 150mm.
- Connect this cable to the corresponding 5-pin connector on your ebike's controller. Ensure the connectors are aligned correctly before pushing them together.
- Secure the connection firmly. If it is a waterproof connector, ensure the seal is properly engaged.
- Route the cable neatly along the ebike frame, securing it with cable ties if necessary, to prevent it from interfering with moving parts or getting damaged.
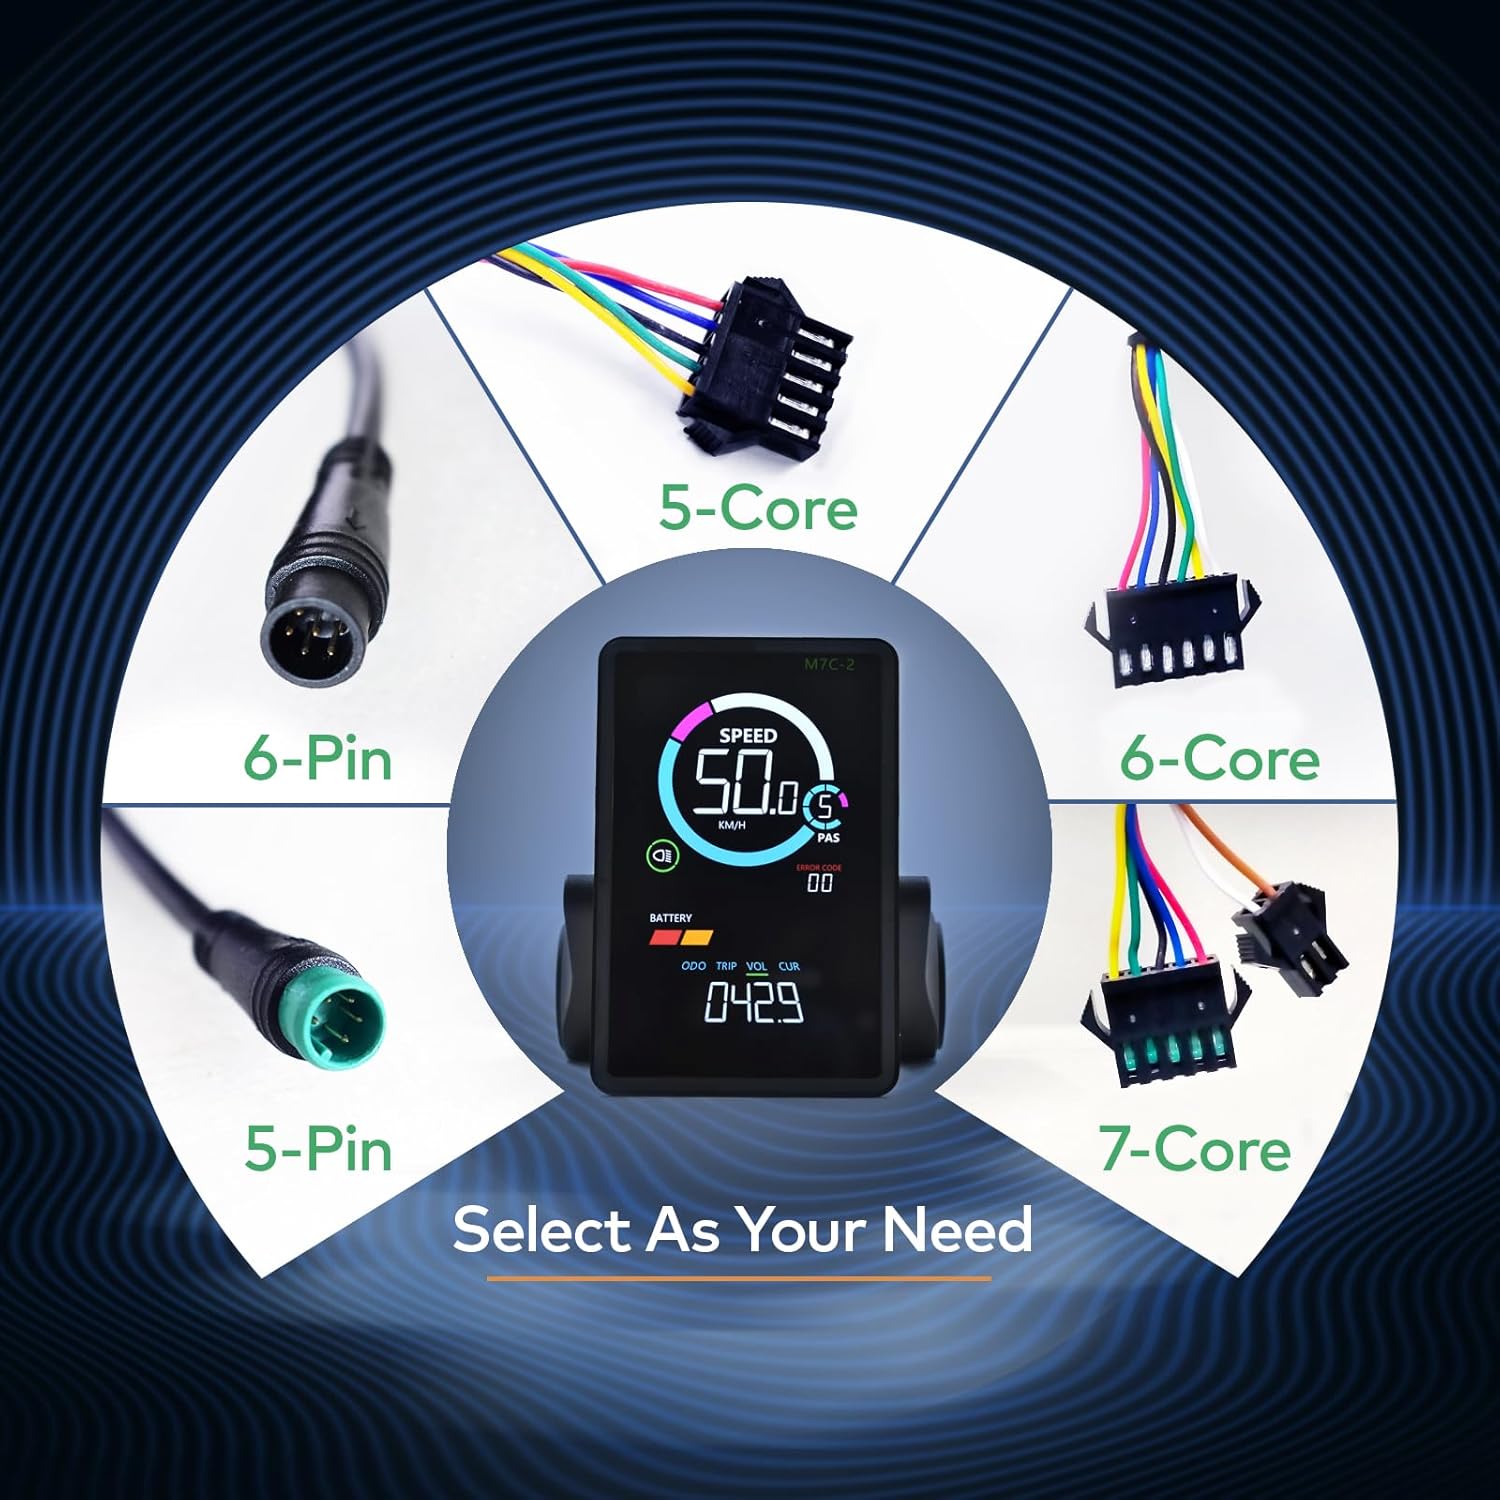
Figure 4: Cable Selection. This image displays different cable types, emphasizing the importance of selecting the correct 5-pin connector for this specific display model.
6. Instrucións de funcionamento
6.1 Acendido/Apagado
To power on the display, press and hold the power button on the keypad. To power off, press and hold the power button again.
6.2 Interface de visualizaciónview

Figure 5: Display Metrics. This image labels the various metrics shown on the display, including speed, PAS level, battery indicator, headlight indicator, error code, odometer, trip distance, voltage e actual.
A pantalla ofrece información en tempo real sobre a túa viaxe:
- Velocidade: Velocidade actual de condución (km/h ou mph).
- PAS (Sistema de asistencia ao pedaleo): Current pedal assist level.
- Batería: Remaining battery charge level.
- Indicador de faro: Shows if the ebike's headlight is active.
- Código de erro: Displays numerical codes for system faults. Refer to the included "Fault Code Description" sheet for details.
- Área de visualización multifuncional: Cycles through Odometer (ODO), Trip Distance (TRIP), Battery Voltage (VOL), and Motor Current (CUR).
6.3 Navigating Settings
Use the keypad buttons (typically +, -, and power/mode) to navigate through display modes and adjust settings. Specific button functions may vary; refer to the detailed instructions in the included User's Manual for precise navigation.
6.4 Modificación de parámetros
The display allows you to modify key parameters to optimize your ebike's performance:
- Diámetro da roda: Adjust this setting to match your ebike's wheel size for accurate speed and distance readings.
- Límite de velocidade: Set the maximum assisted speed according to local regulations or personal preference.
Accessing and modifying these parameters typically involves entering a settings menu by holding specific buttons. Consult the included User's Manual for the exact procedure.
6.5 Modos especiais
- Modo de asistencia para camiñar: Provides low-speed assistance for pushing the ebike when walking.
- Control de crucero: Maintains a set speed without continuous throttle or pedal input.
Activation of these modes is usually done via specific button combinations. Refer to the comprehensive User's Manual for detailed instructions.
6.6 porto de carga USB
The display includes a 5V/500mA USB port on its side, allowing you to charge mobile devices while riding. Ensure the port cover is securely closed when not in use to maintain its waterproof integrity.
7. Mantemento
- Limpeza: Limpe a pantalla e o corpo cun pano suave eamp cloth. Do not use abrasive cleaners or solvents, as these can damage the screen or housing.
- Protección da auga: While the display is IPX65 waterproof, avoid submerging it in water. Ensure the USB port cover is always closed when not in use to prevent water ingress.
- Almacenamento: Cando non a use durante períodos prolongados, garde a bicicleta eléctrica e a súa exposición nun lugar seco e fresco, lonxe da luz solar directa.
- Comprobación de conexión: Periodically inspect the cable connections for any signs of wear, corrosion, or looseness.
8 Solución de problemas
If you encounter issues with your Mcezdy Ebike LCD Display, consider the following common troubleshooting steps:
- A pantalla non se acende:
- Comprobe se a batería da bicicleta eléctrica está cargada e conectada correctamente.
- Ensure all display cables are securely connected to the controller.
- Verify that the display's power button is being pressed and held correctly.
- Lecturas incorrectas de velocidade/distancia:
- Check the wheel diameter setting in the display's parameters. Adjust it to match your ebike's actual wheel size.
- Ensure the speed sensor on your ebike is clean and properly aligned.
- Códigos de erro mostrados:
If an error code appears on the display, refer to the dedicated "Fault Code Description" sheet included with your product. This sheet provides specific meanings for each code and recommended actions.
- A carga por USB non funciona:
- Ensure the ebike is powered on.
- Check the USB cable and the device being charged for proper connection.
Se estes pasos non resolven o problema, póñase en contacto co servizo de atención ao cliente para obter máis axuda.
9. Especificacións
| Número de modelo | M7C-2-5-Pin |
| Marca | Mcezdy |
| Tipo de visualización | LCD (Color) |
| Tecnoloxía de conectividade | UART NO.2 (Wired, 5-Pin Connector) |
| Traballo Voltage | CC 24 V, 36 V, 48 V, 60 V |
| Clasificación de protección internacional | IPX65 |
| Tipo de montaxe | Handlebar Mount (22.2mm, 25.4mm, 31.8mm) |
| Porto de carga USB | 5V/500mA |
| Cable Length Exposed | 150mm (Waterproof Cable) |
| Material | Carcasa de ABS+PC, pantalla de vidro temperado, soporte de nailon |
| Peso do elemento | 249 g |

Figure 6: Product Dimensions and Electrical Specifications. This image provides key physical dimensions, cable length, compatible product models, and operating voltage range for the display.
10. Garantía e soporte
For warranty information and customer support, please refer to the specific warranty card or documentation included with your purchase. You may also contact the retailer or manufacturer directly for assistance with product inquiries, technical support, or warranty claims.
Conserve o comprobante de compra para calquera servizo relacionado coa garantía.