
Introdución
Thank you for choosing the Yoidesu Cordless Phone System. This system combines a corded base unit with a cordless handset, offering advanced features such as a digital answering machine, photo dialing, smart call blocking, and an expandable design. This manual will guide you through the setup, operation, and maintenance of your new phone system to ensure optimal performance.
Contido do paquete
Verifique que todos os artigos que se indican a continuación estean incluídos no seu paquete. Se falta algún artigo ou está danado, póñase en contacto co servizo de atención ao cliente.
- Corded Base Unit with Handset
- Auricular sen fíos
- Cordless Handset Charging Base
- AC Power Adapters (2)
- Cable de Liña Telefónica
- Batería recargable para teléfono inalámbrico
- Manual de usuario (este documento)
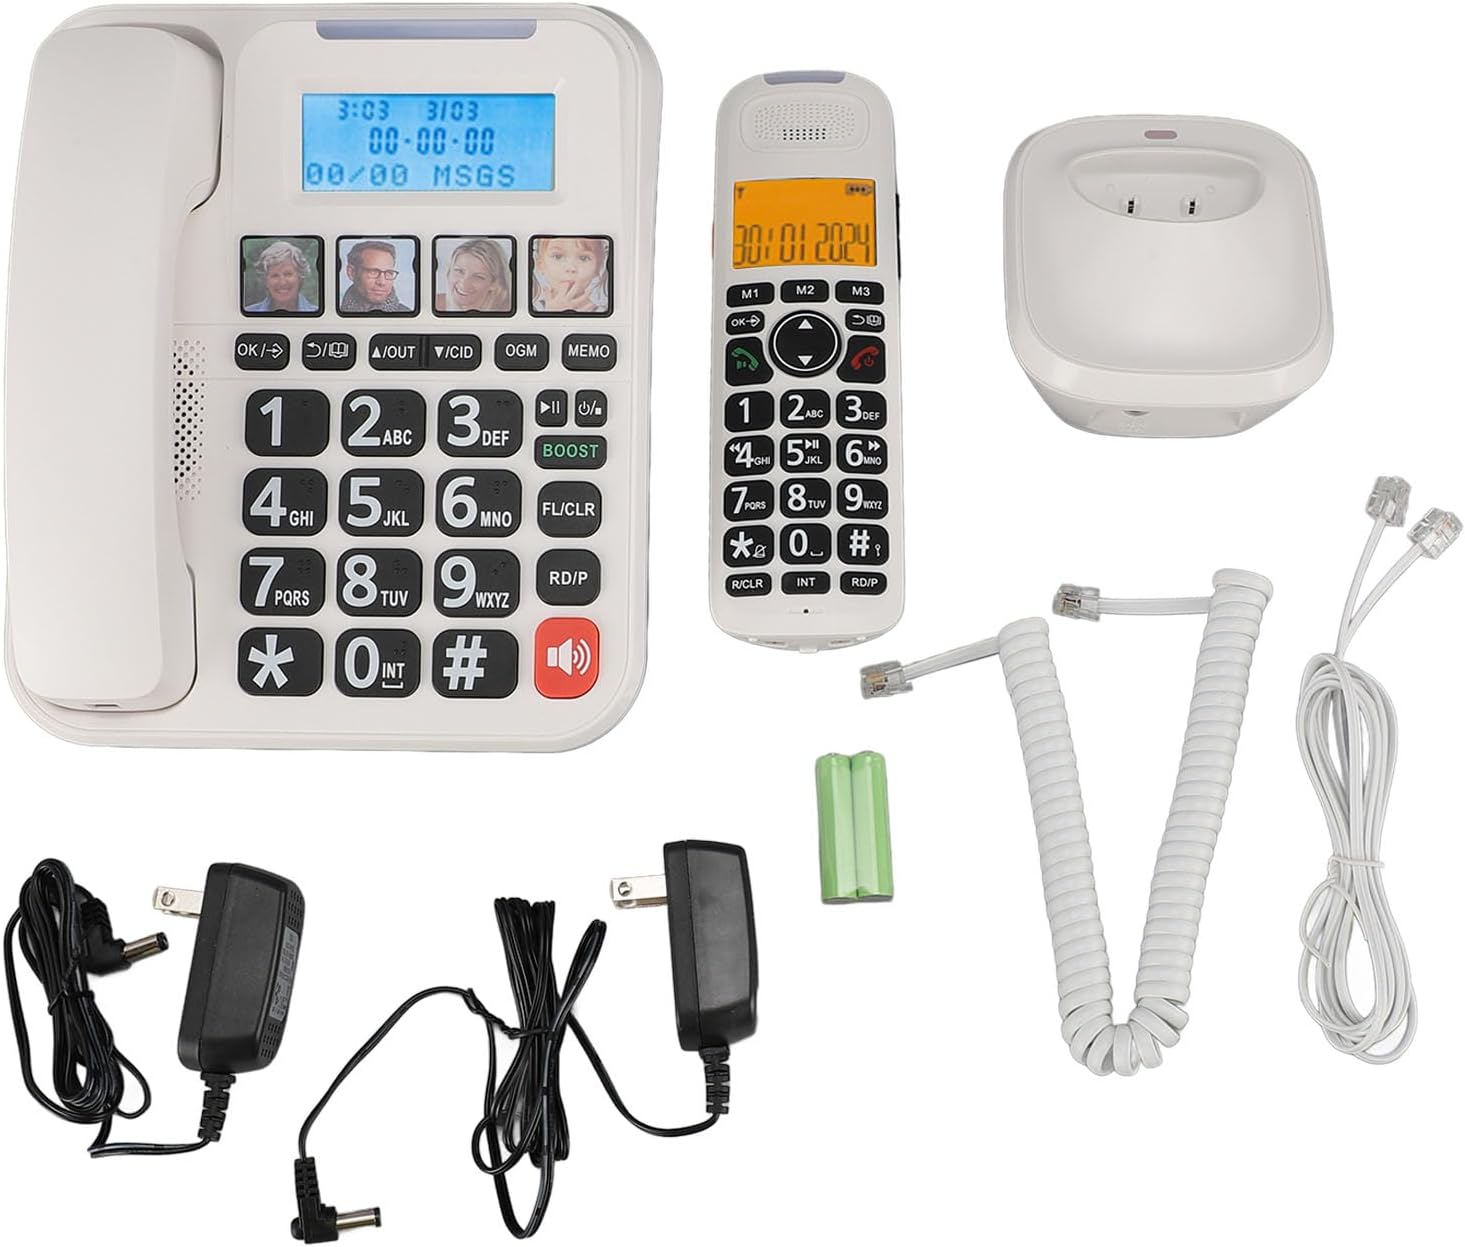
Figura 1: Complete package contents of the Yoidesu Cordless Phone System.
Produto rematadoview
Corded Base Unit
The base unit serves as the central hub for your phone system, featuring a large display, keypad, and dedicated buttons for answering machine functions and photo dialing.
- Pantalla grande de 2 polgadas: Displays caller ID, call history, and answering machine status with high-contrast text.
- Teclado grande: Oversized buttons for easy dialing, especially in low-light conditions.
- Photo Dialing Buttons: Four customizable buttons for quick access to frequently dialed numbers with associated photos.
- AMP Botón: Enhances call volume by up to 28dB for improved clarity.
- Answering Machine Controls: Play/Stop, Skip, Record, and Memo functions.

Figura 2: Fronte view of the Corded Base Unit.
Auricular sen fíos
The cordless handset provides mobility and convenience, allowing you to make and receive calls away from the base unit.
- Pantalla de visualización: Shows caller information, menu options, and battery status.
- Botóns de navegación: For menu navigation and volume adjustment.
- Talk/End Buttons: To initiate and terminate calls.
- Intercom (INT) Button: For internal calls between handsets or base unit.

Figura 3: Fronte view of the Cordless Handset.
Configuración
1. Conexión da unidade base
- Connect one end of the telephone line cord to the TEL LINE jack on the back of the base unit.
- Conecte o outro extremo do cable da liña telefónica á toma de teléfono da parede.
- Plug one AC power adapter into the DC IN 6V jack on the back of the base unit.
- Conecte o outro extremo do adaptador de corrente alterna a unha toma de corrente estándar.

Figura 4: Rear connections of the Base Unit.
2. Instalación da batería do teléfono
- Abra a tapa do compartimento da batería na parte traseira do teléfono sen fíos.
- Insert the supplied rechargeable battery, ensuring correct polarity (+/-).
- Pecha a tapa do compartimento da batería.
3. Cargando o auricular
- Plug the second AC power adapter into the DC IN 6V jack on the cordless handset charging base.
- Conecte o outro extremo do adaptador de corrente alterna a unha toma de corrente estándar.
- Place the cordless handset onto its charging base. The charging indicator on the handset should illuminate.
- Deixe que o teléfono se cargue durante polo menos 12 horas antes do primeiro uso para garantir que a batería teña a capacidade completa.

Figura 5: Cordless Handset on Charging Base.
4. Registering Additional Handsets (Optional)
The system supports up to five handsets. Refer to the specific instructions provided with additional handsets for registration procedures. Typically, this involves placing the base unit in registration mode and then initiating registration from the new handset.
Instrucións de funcionamento
Realización e recepción de chamadas
- Para facer unha chamada: Levante o auricular con cable ou prema a tecla FALAR button on the cordless handset, then dial the number.
- Para recibir unha chamada: Levante o auricular con cable ou prema a tecla FALAR button on the cordless handset when the phone rings.
- Para finalizar unha chamada: Place the corded handset back on the base or press the FIN botón no auricular sen fíos.
Axustar o volume da chamada
Durante unha chamada, prema o botón AMP button on the base unit to increase the volume by 28dB. On the cordless handset, use the navigation buttons to adjust the earpiece volume.
Using the Digital Answering Machine
The integrated answering machine can record up to 60 minutes of messages, outgoing announcements, and memos.
- Reproducir mensaxes: Preme o REPRODUCIR/PARAR botón na unidade base.
- Rexistrar mensaxe de saída (OGM): Preme o OGM button and follow the voice prompts.
- Record Memo: Preme o Memo button and speak after the tone.
Photo Dialing
Set up four frequently dialed numbers with associated photos for quick access.
- Para programar: Select an empty photo slot on the base unit. Follow the on-screen prompts to enter the contact's name and phone number. You can then insert a printed photo into the designated slot.
- Para marcar: Simply press the desired photo button on the base unit.

Figura 6: Using the Photo Dialing feature.
Smart Call Blocker and Caller ID
The system can store up to 30 incoming call numbers on handsets and 29 on the base unit. The call block function helps prevent unwanted calls.
- Identificador de chamada: Incoming call numbers are displayed on both the base unit and handset screens.
- Bloqueo de chamadas: Access the call block menu to add numbers manually or block numbers from the caller ID history. You can set it to manual or automatic mode, allowing only calls from saved contacts.
Phonebook and Call History
Store up to 50 phonebook entries. Review 10 outgoing call numbers and incoming call numbers (30 on handset, 29 on base).
- Engadir contacto: Navigate to the phonebook menu and enter the name and number.
- Review Historia: Use the navigation buttons to scroll through incoming and outgoing call lists.
Intercom and 3-Way Calling
The expandable system allows for internal communication and conference calls.
- Intercomunicador: Preme o INT button on a handset or base unit to call another registered handset or the base unit.
- Chamadas de 3 vías: Supports conference calls between a landline, a sub-phone (handset), and a third-party phone. Refer to the system menu for initiating this feature.
Mantemento
Limpeza
Wipe the phone system with a soft, damp pano. Non empregue produtos químicos agresivos nin produtos de limpeza abrasivos. Asegúrese de que a unidade estea desconectada antes de limpala.
Coidado da batería
To prolong battery life, always return the cordless handset to its charging base when not in use. If the phone will be unused for an extended period, remove the battery from the handset.
Resolución de problemas
| Problema | Causa posible | Solución |
|---|---|---|
| Sen ton de marcación | O cable da liña telefónica está desconectado ou avariado. | Ensure the telephone line cord is securely connected to both the base unit and the wall jack. Test with another phone if possible. |
| O teléfono non carga | Handset not properly seated on charging base; charging base not powered; faulty battery. | Ensure the handset is correctly placed on the charging base. Check that the charging base's power adapter is plugged in. Replace battery if necessary. |
| O contestador automático non grava | O contestador automático está apagado; a memoria está chea. | Ensure the answering machine is turned on. Delete old messages to free up memory. |
| Mala calidade de chamada/estática | Interference from other electronic devices; handset too far from base unit. | Move the base unit away from other electronics. Ensure the handset is within range of the base unit. |
Especificacións
- Número de modelo: Yoidesuav12iq6wt4-14
- Tempo de gravación do contestador automático: Ata 60 minutos
- Handset Expansion: Up to 5 handsets per base unit
- Volume do ton de chamada: Ata 90 dB (axustable)
- Call Volume Boost: +28dB via AMP botón
- Tamaño da pantalla: 2 inches (handset and base unit)
- Caller ID Storage: 30 incoming calls (handset), 29 incoming calls (base unit)
- Phonebook Entries: 50
- Almacenamento de chamadas saíntes: 10
- Dimensións do paquete: 12.99 x 9.06 x 3.94 polgadas
- Peso do artigo: 2.84 libras
Garantía e Soporte
For warranty information or technical assistance, please contact Yoidesu customer support. Keep your purchase receipt as proof of purchase for any warranty claims.
Fabricante: Yoidesu
Data de primeira dispoñibilidade: 5 de setembro de 2024