YOFE YOFE-RS64N
YOFE Outdoor Resin Storage Shed 6x4.4FT (Model YOFE-RS64N)
Manual de instrucións
1. Introdución
This manual provides detailed instructions for the assembly, operation, and maintenance of your YOFE Outdoor Resin Storage Shed 6x4.4FT (Model YOFE-RS64N). Please read all instructions carefully before beginning assembly and retain this manual for future reference.
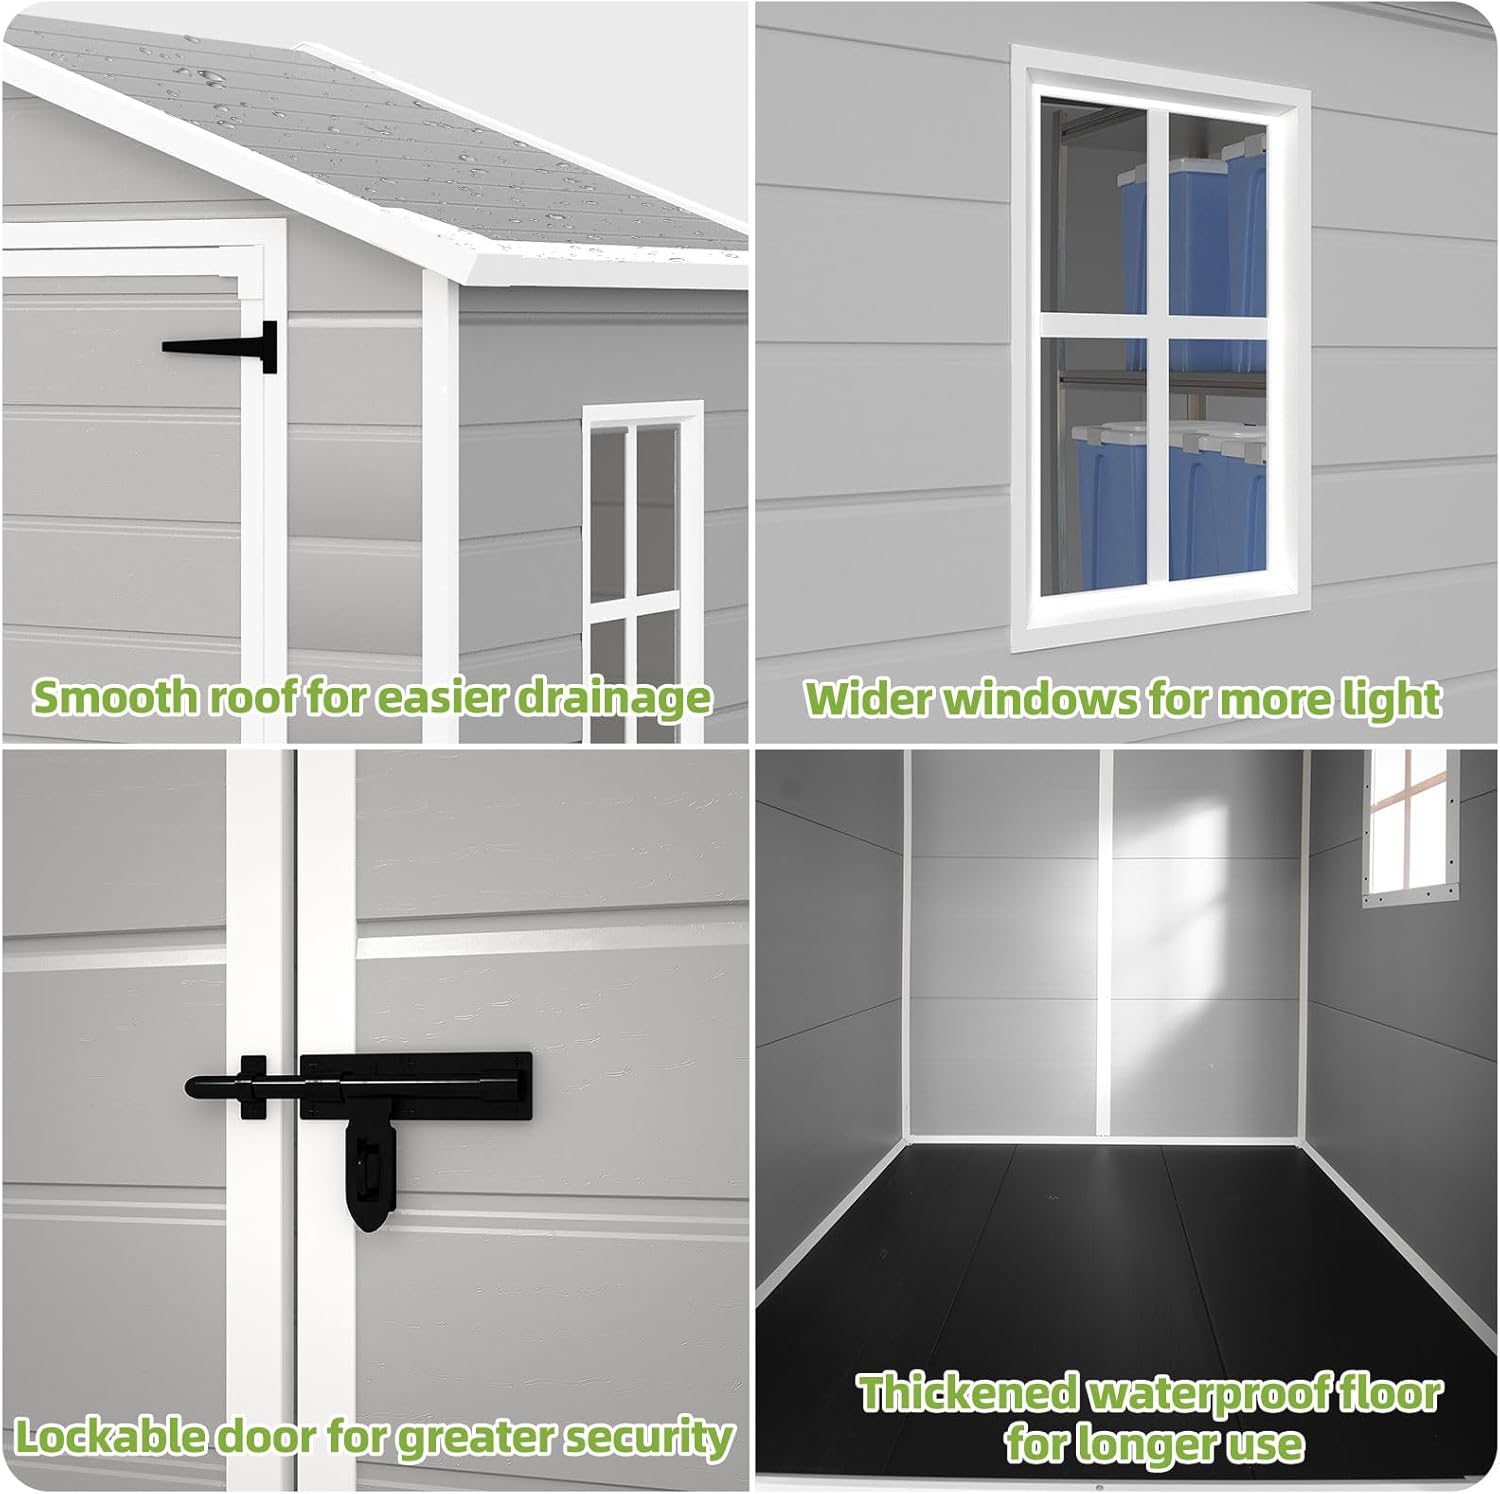
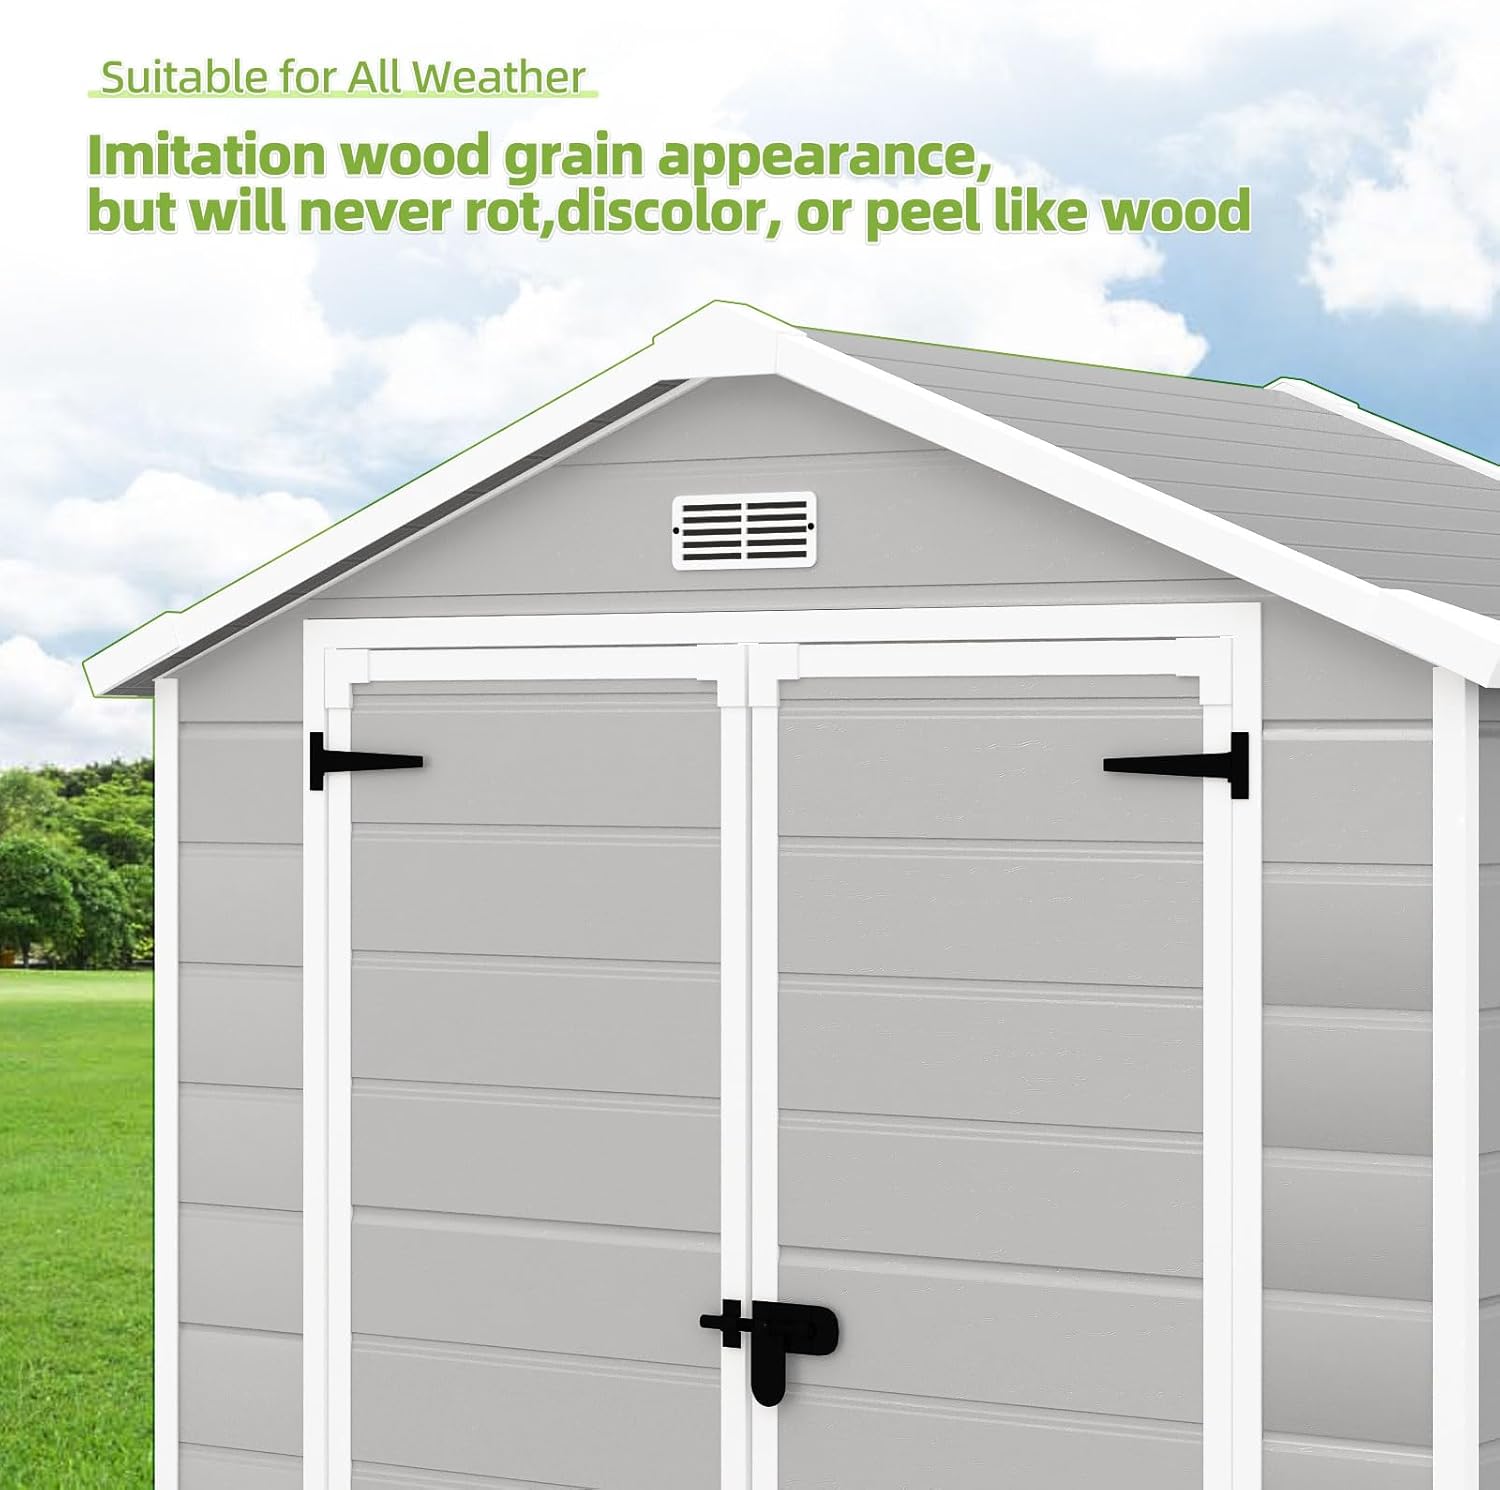
The YOFE Outdoor Resin Storage Shed is designed for outdoor storage of gardening tools, lawn equipment, and other outdoor essentials. It features a durable resin construction, waterproof and UV-resistant properties, and lockable double doors for security.
Instrucións xerais de seguridade
- Asegúrese de que todas as pezas estean presentes e non danadas antes da montaxe.
- A montaxe require polo menos dúas persoas.
- Use o equipo de seguridade axeitado, incluíndo luvas e protección ocular.
- Móntase sobre unha superficie plana e nivelada.
- Do not climb on the shed or roof.
- Manteña os nenos e as mascotas lonxe da zona de reunión.
- Fixa o galpón ao chan despois da montaxe para evitar danos causados polo vento.
2. Configuración e montaxe
The YOFE Outdoor Resin Storage Shed is designed for straightforward assembly. Follow these steps carefully. Two people can typically complete assembly in approximately 5-6 hours.
2.1. Preparación
- Desembalar todos os compoñentes: Carefully remove all parts from the packaging. Verify that all components listed in the parts list (not included in this manual, refer to your product packaging) are present.
- Escolla un lugar axeitado: Select a flat, level surface for installation. A concrete pad or sturdy wooden foundation is recommended for optimal stability and longevity.
- Ferramentas necesarias: Power drill, screwdriver, measuring tape, rubber mallet (recommended).
2.2. Pasos de montaxe
Paso 1: Montaxe da base
Begin by assembling the base panels. Ensure they are correctly aligned and interlocked. Use the provided screws to secure the base frame components. Measure diagonals to ensure the base is square (AB=CD).

Description: A close-up view of the shed's base panels being connected, with frame pieces being attached. This image illustrates the initial steps of laying out the floor and securing its perimeter.
Additional image: A diagram showing the base panels and frame pieces with labels (CP1, CP2, SG6, SG7-1, SG7-2, CP3, CP4, CF1-1, CF1-2) and a measurement check (AB=CD).
Description: This image provides a detailed diagram of the shed's base assembly, highlighting the various components and the crucial step of measuring diagonals (AB=CD) to ensure the base is perfectly square before proceeding.
Referencia de vídeo: For a visual guide on base assembly, please refer to the official installation video below, starting from 0:10.
Description: Official YOFE installation video demonstrating the step-by-step assembly of the shed's base, including connecting floor panels and securing the perimeter frame.
Paso 2: Instalación do panel de parede
Attach the wall panels to the assembled base. The panels interlock and are secured with vertical support beams (CP5). Ensure each panel is firmly seated before proceeding to the next.
Description: Two individuals are shown installing the side wall panels of the shed, interlocking them into the base and connecting them with vertical support beams. This highlights the modular nature of the wall construction.
Referencia de vídeo: See the official installation video from 1:10 for wall panel installation.
Step 3: Front and Rear Wall Assembly
Continue by installing the front and rear wall sections, including the window panel. Secure these panels using the designated screws and ensure all connections are tight.
Description: The partially assembled shed with front and rear wall sections being put into place. The window opening is visible, indicating progress in the structural build.
Referencia de vídeo: Refer to the official installation video from 2:30 for front and rear wall assembly.
Step 4: Roof Frame and Window Installation
Install the roof frame components and the window. Ensure the window is properly sealed and secured to prevent water ingress. The sloped roof design aids in water drainage.

Description: The shed's roof frame being installed, with one person securing the top beams while another works on the window. The structure is nearing completion, with the roof and window elements being added.
Referencia de vídeo: Consult the official installation video from 4:00 for roof frame and window installation.
Paso 5: instalación do panel do tellado
Carefully place and secure the roof panels onto the roof frame. Ensure a tight fit to maintain the shed's waterproof integrity. The roof panels are designed to interlock.
Description: Two individuals are shown carefully lifting and placing the roof panels onto the shed's frame. This step is crucial for weatherproofing and completing the shed's enclosure.
Referencia de vídeo: Watch the official installation video from 5:50 for roof panel installation.
Step 6: Door Installation and Final Touches
Install the double doors, ensuring they open and close smoothly. Attach the lockable latches for security. Perform a final check of all screws and connections to ensure the shed is stable and secure.

Description: The fully assembled YOFE Outdoor Resin Storage Shed is shown with its double doors open, revealing the spacious interior. The shed is ready for use, demonstrating its completed structure and functionality.
Referencia de vídeo: The official installation video from 7:30 demonstrates door installation and final checks.
Official Installation Video
For a comprehensive visual guide, please watch the full installation video provided by YOFE DIRECT:
Description: This video, titled "YOFE Resin Shed 6*4FT Installation Steps," provides a complete, step-by-step visual guide for assembling the YOFE Outdoor Resin Storage Shed. It covers all stages from base preparation to final door installation.
3. Instrucións de funcionamento
3.1. Apertura e peche de portas
- To open, unlatch the door bolts and pull the doors outwards.
- To close, push the doors firmly until they meet, then engage the door bolts to secure.
- For added security, use a padlock (not included) with the integrated lockable doors.
3.2. Ventilación
The shed includes built-in vents to ensure proper air circulation and reduce condensation. Ensure these vents are not obstructed by stored items.
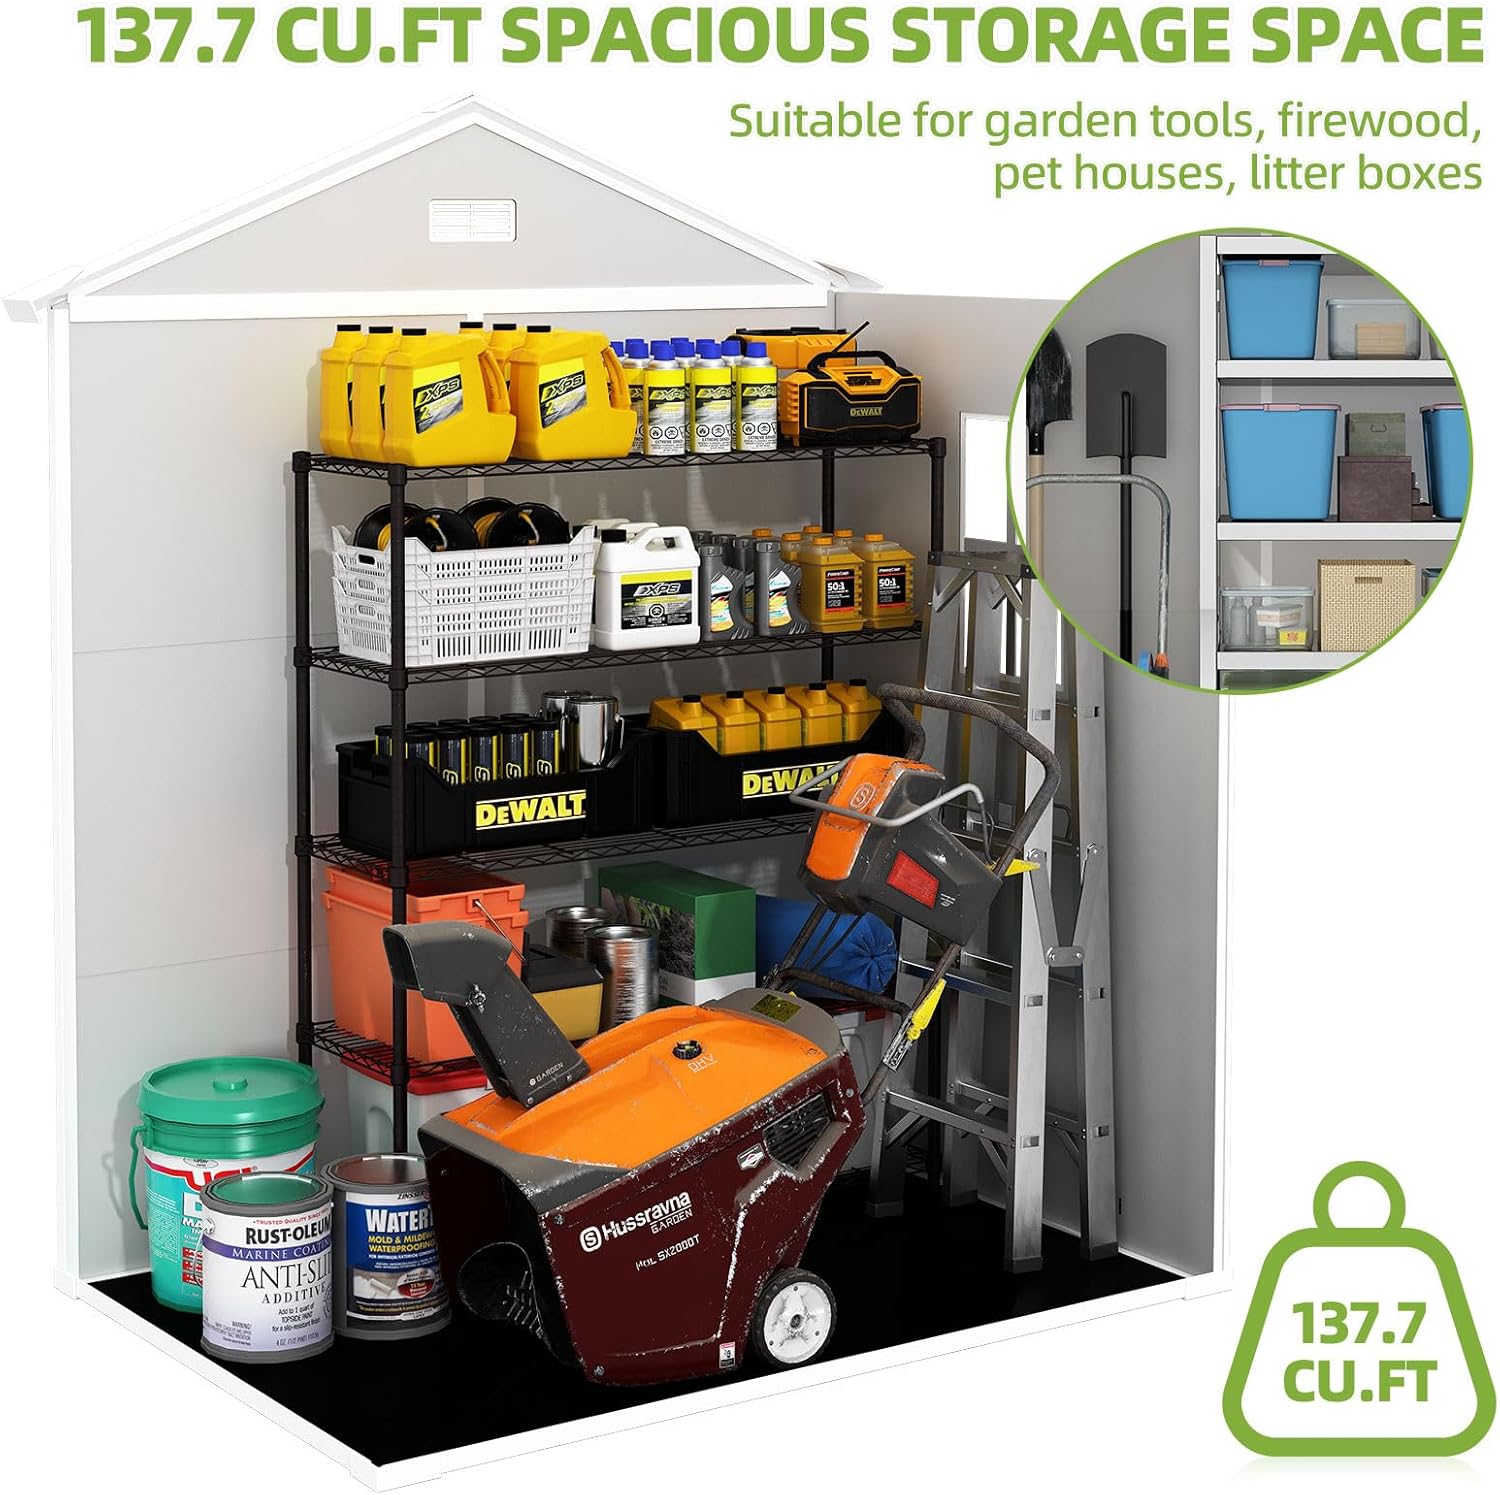
3.3. Capacidade de almacenamento
The shed offers 137.7 cubic feet of storage space. While shelves are not included, the design allows for easy integration of shelving units to maximize organization. The floor is thickened and waterproof to keep contents dry.
Description: The interior of the shed is displayed, showcasing its spaciousness and potential for organizing garden tools, lawn equipment, and other items. This image illustrates the practical storage capabilities.
4. Mantemento
Regular maintenance will ensure the longevity and optimal performance of your YOFE Outdoor Resin Storage Shed.
- Limpeza: Clean the shed periodically with mild soap and water. Avoid abrasive cleaners or harsh chemicals that could damage the resin material.
- Inspección: Annually inspect all screws, bolts, and connections for tightness. Re-tighten as necessary. Check for any signs of wear or damage to the panels or roof.
- Drenaxe: Ensure the sloped roof and surrounding area are clear of debris to allow for proper water drainage.
- Protección UV: The resin material is UV-resistant, but prolonged exposure to extreme sunlight can still cause minor fading over many years. No special treatment is required.
5 Solución de problemas
| Problema | Causa posible | Solución |
|---|---|---|
| Difficulty assembling panels. | Panels not aligned correctly; base not square. | Ensure the base is perfectly level and square before installing walls. Use a rubber mallet to gently tap panels into place. Verify correct panel orientation. |
| O galpón séntese inestable. | Loose connections; uneven ground; inadequate anchoring. | Check and tighten all screws and connections. Ensure the shed is on a firm, level foundation. Anchor the shed to the ground using appropriate hardware (not included). |
| Fuga de auga. | Improperly sealed joints; damaged panels; obstructed drainage. | Inspect all panel joints and roof seams for gaps. Apply silicone sealant if necessary. Clear any debris from the roof and surrounding area. Check for damaged panels and contact support if replacement is needed. |
| As portas non pechan correctamente. | Shed not square; hinges misaligned; obstructions. | Verify the shed's base is square. Adjust door hinges if possible. Remove any debris or obstructions from the door frame. |
If you encounter issues not covered here, please contact YOFE customer support.
6. Especificacións
- Marca: YOFE
- Número de modelo: YOFE-RS64N
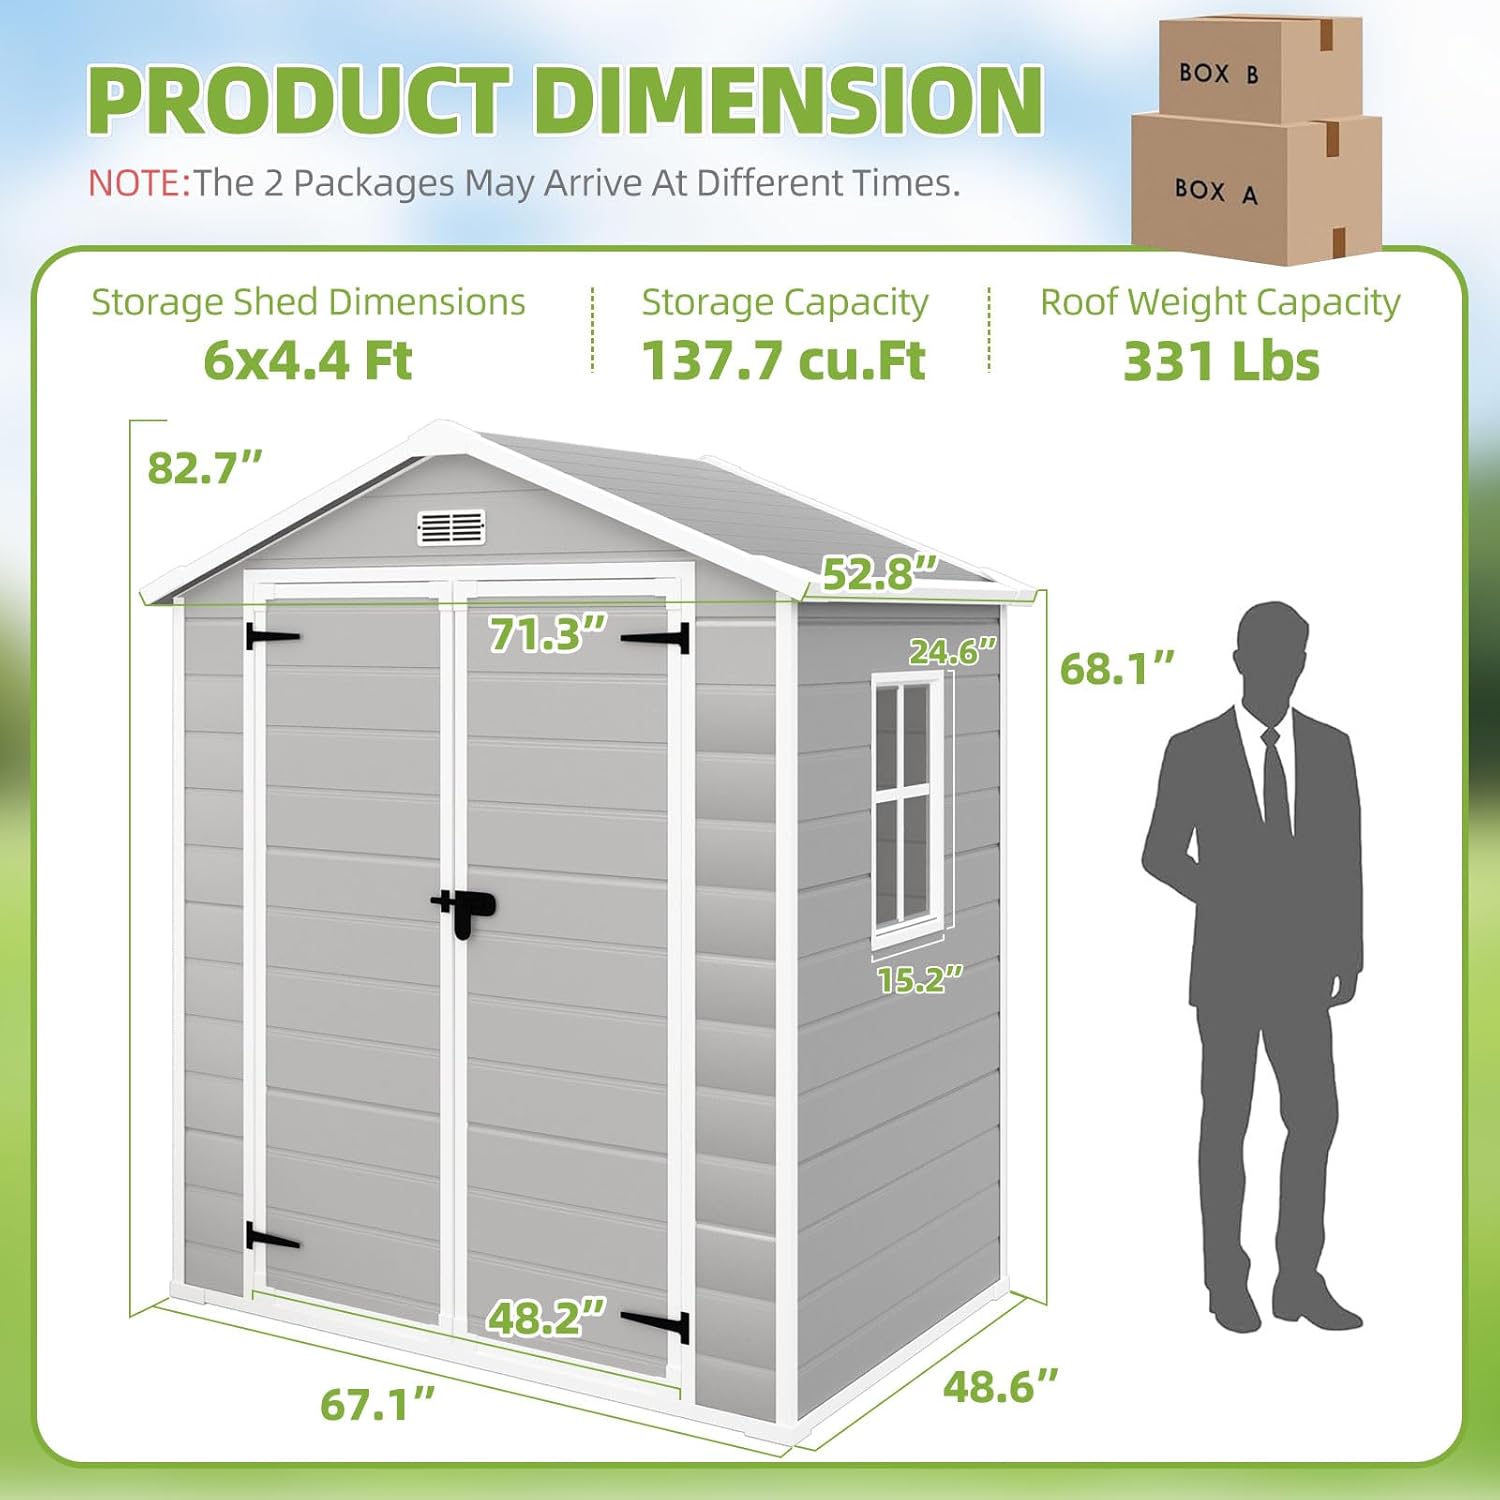
- Dimensións do produto: 48.62"D x 67.13"W x 82.68"H (approximately 6x4.4FT)
- Material: Polypropylene (Resin)
- Cor: LightGray
- Peso do artigo: 128 libras
- Capacidade de almacenamento: 137.7 cu.Ft
- Nivel de resistencia á auga: Impermeable
- Estilo de porta: Portas Dobres
- Montaxe necesaria: Si
- Características: UV-resistant, windproof, sloped roof for drainage, enlarged windows for light and ventilation, lockable doors.
7. Información da garantía
For specific warranty details regarding your YOFE Outdoor Resin Storage Shed, please refer to the warranty card included with your product packaging or contact YOFE customer support directly. The manufacturer warrants this product against defects in materials and workmanship under normal use and service.
8. Atención ao cliente
If you have any questions, require assistance with assembly, or need to report missing/damaged parts, please contact YOFE customer support. Contact information can typically be found on the product packaging or the official YOFE websitio.
Para consultas xerais, tamén podes visitar o YOFE Store on Amazon.