
1. Introdución
This manual provides detailed instructions for the installation, operation, and maintenance of your Ailgely Motorcycle LED Display Gauge. This multi-functional instrument integrates a speedometer, odometer, tachometer, and fuel gauge, designed to provide essential riding information with enhanced visibility and customizable settings.
Características principais:
- Configuración personalizable: Easily adjust speed, RPM, and fuel capacity with a button press for a personalized driving experience.
- Pantalla multifuncional: Integrates speedometer, odometer, tachometer, and fuel gauge for comprehensive monitoring.
- Fácil instalación: Designed for quick and hassle-free setup, enhancing rider convenience.
- Visibilidade mellorada: Features a white backlight and large LCD display for clear readability day and night, reducing eye strain.
- Accurate Fuel Gauge: Displays fuel level in 5 segments, providing precise and reliable information for efficient fuel management.
2. Información de seguridade
Lea atentamente todos os avisos e instrucións de seguridade antes da instalación e o funcionamento. O incumprimento destas instrucións pode provocar danos ao produto, danos materiais ou lesións persoais.
- Ensure the motorcycle's power is off before beginning installation.
- Consult a qualified technician if you are unsure about any installation steps.
- Do not modify the product or its wiring in any way not described in this manual.
- Manteña o produto lonxe de temperaturas e humidade extremas.
3. Contido do paquete
Verifica que todos os elementos estean presentes no paquete:
- Ailgely Motorcycle LED Display Gauge (Model Aiafz5gcgpun-2)
- Cableado
- Speed Sensor (if included with your specific variant)
- Ferraxes de montaxe (parafusos, porcas, arandelas)
- Manual de usuario (este documento)

Imaxe 1: Fronte view of the Ailgely Motorcycle LED Display Gauge with its wiring harness.

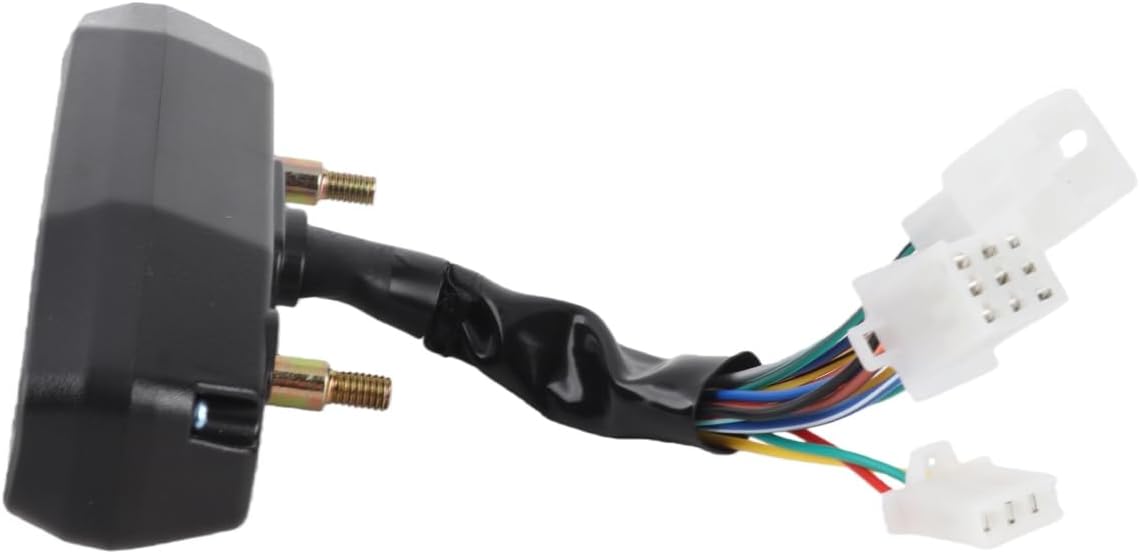
Imaxe 2: Traseira view of the gauge, highlighting the mounting bolts and electrical connectors.
4. Configuración e instalación
This section details the steps for installing your new LED display gauge. Professional installation is recommended if you are unfamiliar with motorcycle electrical systems.
4.1 Diagrama de cableado
Refer to the following general wiring guide. Specific wire colors may vary, but the functions are standard. Always cross-reference with your motorcycle's wiring diagram.
Imaxe 3: Ex.ample wiring diagram showing connections for power, ground, speed sensor, tachometer, and indicator lights.
- Fío vermello: +12V (Ignition Switched Power)
- Fío negro: Terra (-)
- Fío verde: Speed Sensor Signal
- Yellow/Black Wire: Tachometer Signal (Connect to ignition coil positive or ECU tach output)
- Fío azul: High Beam Indicator (+)
- Fío laranxa: Left Turn Signal Indicator (+)
- Light Blue Wire: Right Turn Signal Indicator (+)
- Fío marrón: Entrada do sensor de nivel de combustible
- Fío branco: Neutral Gear Indicator (+)
- Other Wires (if present): Refer to specific product documentation or consult a professional.
Note: Some reviews indicate that the turn signal indicators might not be separated for left/right. If your motorcycle uses separate left/right signals and the gauge only has one input, you may need to use diodes to combine the signals before connecting to the gauge.
4.2 Mounting the Gauge
- Choose a suitable location on your motorcycle's dashboard or handlebars.
- Use the provided mounting hardware to securely attach the gauge. Ensure it is stable and visible to the rider.

Imaxe 4: Lateral view showing the compact design and mounting points of the gauge.
4.3 Instalación do sensor de velocidade
- Install the speed sensor near a rotating part of the wheel (e.g., brake rotor bolts).
- Attach the magnet(s) to the rotating part, ensuring they pass close to the sensor head with each rotation.
- Connect the speed sensor wire to the corresponding input on the gauge's wiring harness.
4.4 Initial Configuration (Speed and RPM)
To enter the setup mode for speed and RPM calibration:
- With the motorcycle's ignition OFF, press and hold the button on the gauge.
- While holding the button, turn the ignition ON.
- The display will enter configuration mode. Follow the on-screen prompts or refer to the specific instructions provided with your unit for detailed calibration steps.
- Calibración de velocidade: Set the tire circumference (diameter x π). This value is crucial for accurate speed and odometer readings.
- RPM Calibration: Adjust the RPM setting according to your engine's cylinder count and ignition type. This typically involves setting the pulse ratio.
5. Instrucións de funcionamento
Once installed and configured, the gauge will display various parameters:
- Velocidade: Velocidade actual de condución.
- RPM: Revolucións do motor por minuto.
- Odómetro: Distancia total percorrida.
- Indicador de combustible: Displays current fuel level in 5 segments. If not connected, it may display battery voltage.
- Luces indicadoras: High beam, turn signals (left/right), and neutral gear.
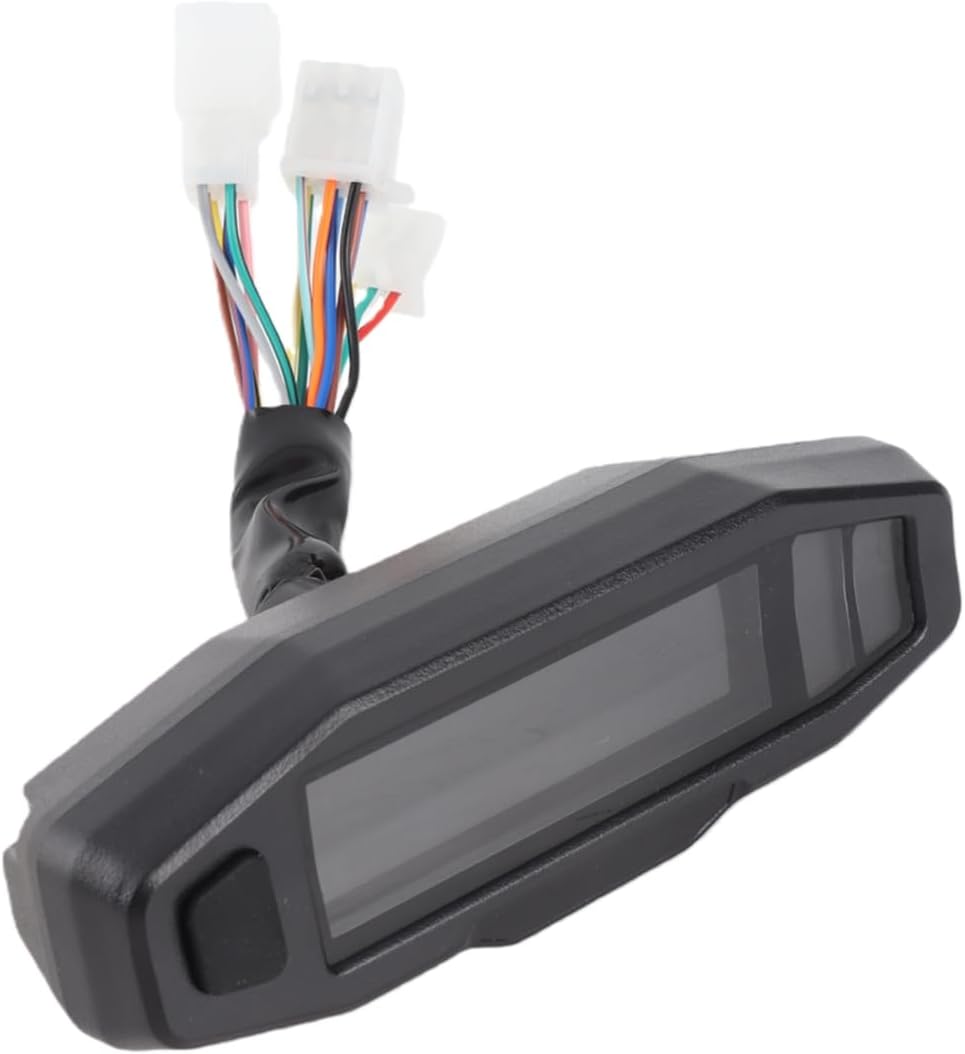
Imaxe 5: Fronte view of the gauge, illustrating the display screen and control button.
5.1 Funcións dos botóns
The single button on the gauge typically serves multiple functions:
- Prensa curta: Cycle through display modes (e.g., Odometer, Trip A, Trip B).
- Prensa longa: Reset trip meters or enter/exit settings mode (as described in Section 4.4).
6. Mantemento
To ensure the longevity and optimal performance of your Ailgely LED Display Gauge, follow these maintenance guidelines:
- Limpeza: Limpe a pantalla cun pano suaveamp cloth. Avoid abrasive cleaners or solvents that could damage the screen.
- Inspección de cableado: Periodically check all wiring connections for looseness or corrosion. Ensure wires are securely routed and protected from heat and moving parts.
- Comprobación do sensor: Verify that the speed sensor and its magnet(s) are clean and properly aligned.
- Exposición á auga: While designed to be water-resistant, avoid direct high-pressure water jets on the unit.
7 Solución de problemas
If you encounter issues with your gauge, refer to the following common problems and solutions:
| Problema | Causa posible | Solución |
|---|---|---|
| Sen alimentación/Pantalla apagada | Loose wiring connection, blown fuse, faulty power supply. | Check all power and ground connections. Inspect motorcycle fuses. Ensure 12V power is reaching the red wire. |
| Speed/Odometer Inaccurate or Not Working | Incorrect speed calibration, faulty speed sensor, misaligned magnet. | Recalibrate speed setting (tire circumference). Check speed sensor wiring. Ensure magnet passes close to the sensor. |
| Tachometer Not Working | Incorrect RPM calibration, incorrect wiring to ignition coil/ECU, weak signal. | Recalibrate RPM setting. Verify tachometer signal wire connection. Try connecting to a different signal source if available (e.g., negative side of ignition coil if connected to positive). |
| Fuel Gauge Inaccurate or Not Working | Incorrect fuel sensor wiring, incompatible fuel sensor, faulty sensor. | Check fuel sensor wiring. Ensure the fuel sensor type is compatible with the gauge. If no fuel sensor is connected, the gauge may display battery voltage. |
| Indicator Lights Not Functioning | Incorrect wiring, faulty bulb/LED in motorcycle, diode required for combined signals. | Verify wiring for each indicator. If turn signals are combined, ensure diodes are used if necessary. |
If the problem persists after attempting these solutions, contact customer support or a qualified motorcycle technician.
8. Especificacións
| Característica | Detalle |
|---|---|
| Nome da marca | Ailgely |
| Número de modelo | Aiafz5gcgpun-2 |
| Número de modelo do fabricante | Aiafz5gcgpun-2 |
| Orixe | China |
| Tipo de produto | Car Monitor Accessory (Motorcycle Instrument Cluster) |
| Tipo de visualización | LED LCD with White Backlight |
| Funcións | Speedometer, Odometer, Tachometer, Fuel Gauge, Indicator Lights |
| Material | Black Plastic + Metal |
9. Garantía e soporte
Garantía: Este produto vén cun 1 ano de garantía desde a data de compra, cubrindo defectos de fabricación. Conserve o comprobante de compra para reclamacións de garantía.
Exclusións: The warranty does not cover damage caused by improper installation, misuse, accidents, unauthorized modifications, or normal wear and tear.
Atención ao cliente: For technical assistance, warranty claims, or any questions regarding your Ailgely Motorcycle LED Display Gauge, please contact your retailer or the manufacturer directly. Refer to your purchase documentation for contact details.