
1. Introdución
This manual provides detailed instructions for the installation, operation, and maintenance of your SEBSON Outdoor Motion Detector IP65. Please read this manual carefully before installation and use to ensure proper function and safety. Keep this manual for future reference.
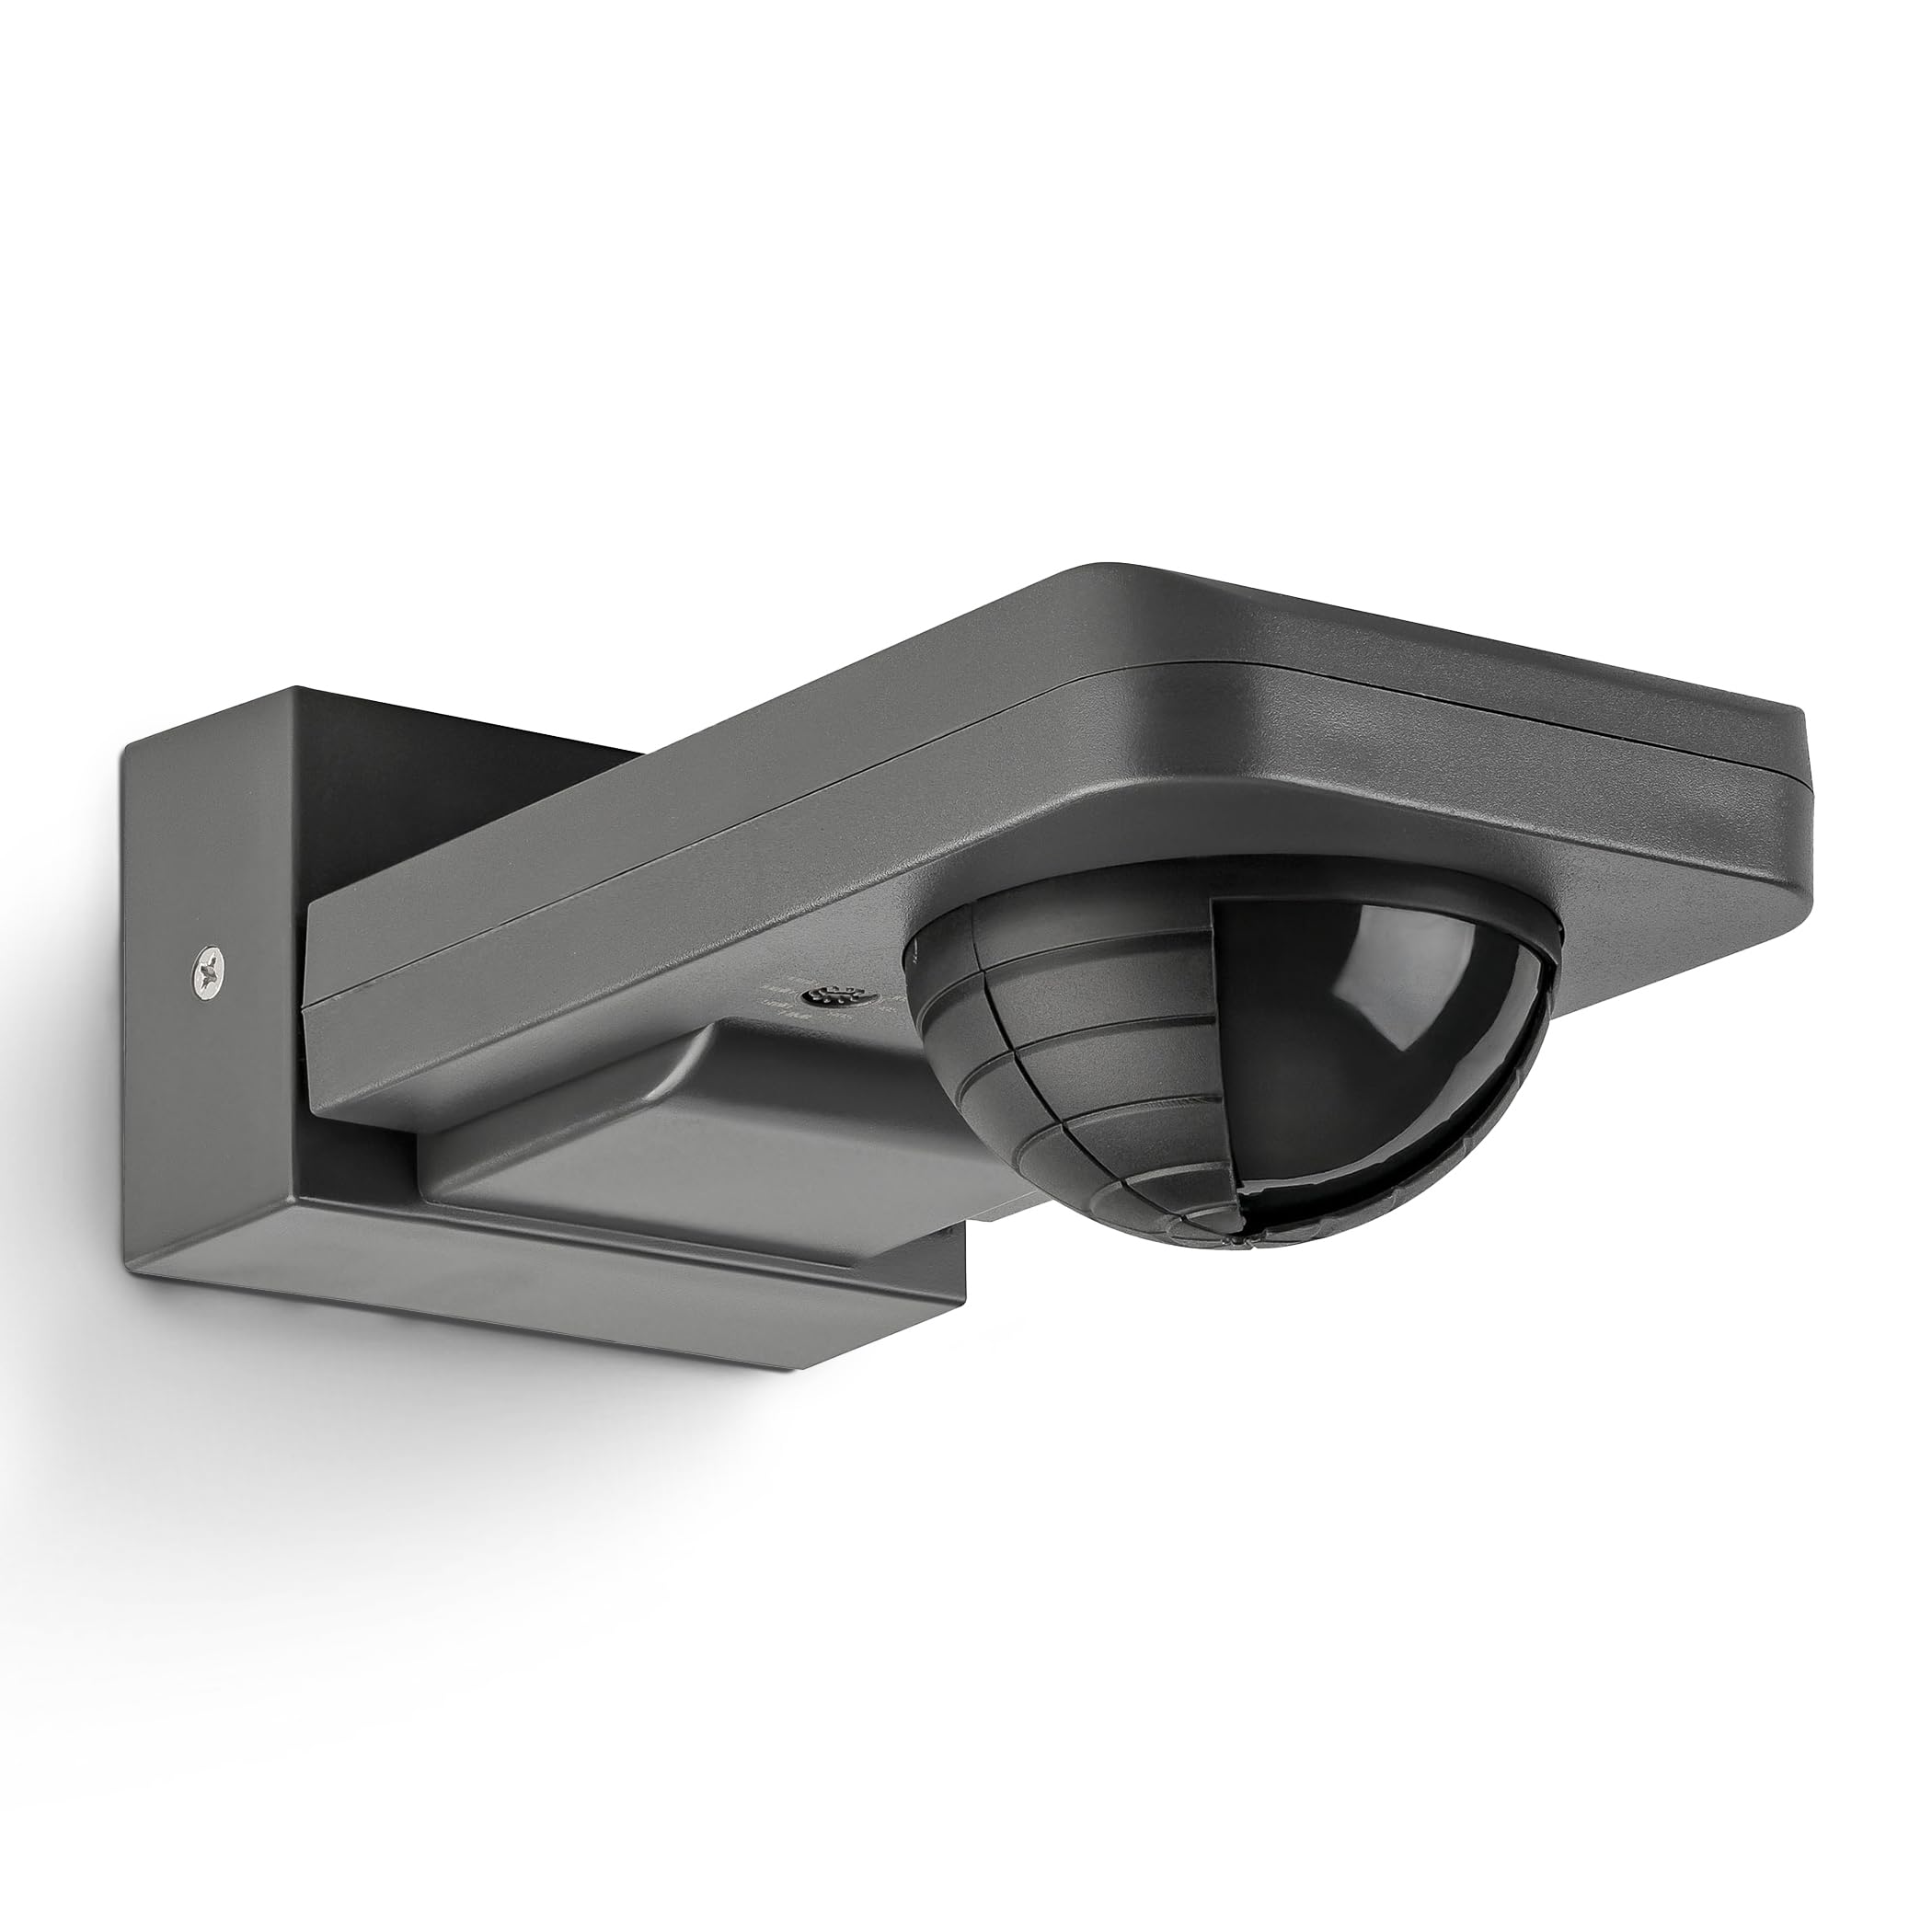
Image 1: SEBSON Outdoor Motion Detector IP65 in anthracite.
2. Instrucións de seguridade
- A instalación debe ser realizada por un electricista cualificado de acordo coa normativa local de cableado.
- Asegúrese de que a fonte de alimentación estea desconectada antes da instalación ou mantemento.
- Non exceda a capacidade de carga máxima especificada para o dispositivo.
- This product is designed for outdoor use with an IP65 rating, protecting against dust and low-pressure water jets.
- Avoid installing near heat sources, air conditioning units, or objects that may cause false triggers (e.g., swaying trees, reflective surfaces).
3. Características do produto
- Integrated with 3 sensors for precise detection of people, large animals, and vehicles.
- IP65 protection rating for outdoor use.
- Suitable for surface mounting on walls or ceilings.
- Maximum load capacity: 2,000W for incandescent lamps, 1,000 W para LED ou lámpadas de aforro de enerxíaamps.
- Detection area: 20 meters at 360°.
- Vertical orientation adjustable by 180°.
- Adjustable activation duration: 10 seconds to 30 minutes, or permanent ON/OFF.
- Adjustable ambient brightness sensor: 3-2,000 LUX.

Imaxe 2: Acabadoview of key product specifications and features.
4. Configuración e instalación
4.1 Localización de montaxe
Choose a stable surface for mounting, either a wall or a ceiling. Ensure the chosen location allows for the desired detection area and is free from obstructions. The detector can be vertically oriented by 180° after installation.

Image 3: Vertical adjustment range of the motion detector.
4.2 Cableado
Connect the motion detector to the AC power supply (230V) and the light fixture according to the wiring diagram provided by a qualified electrician. Ensure all connections are secure and insulated.
4.3 Adjusting Detection Area
The detection range is 20m at 360°. To reduce the detection range or exclude specific areas, use the provided modified cover. Cut the cover according to the desired pattern and place it over the sensor lens.
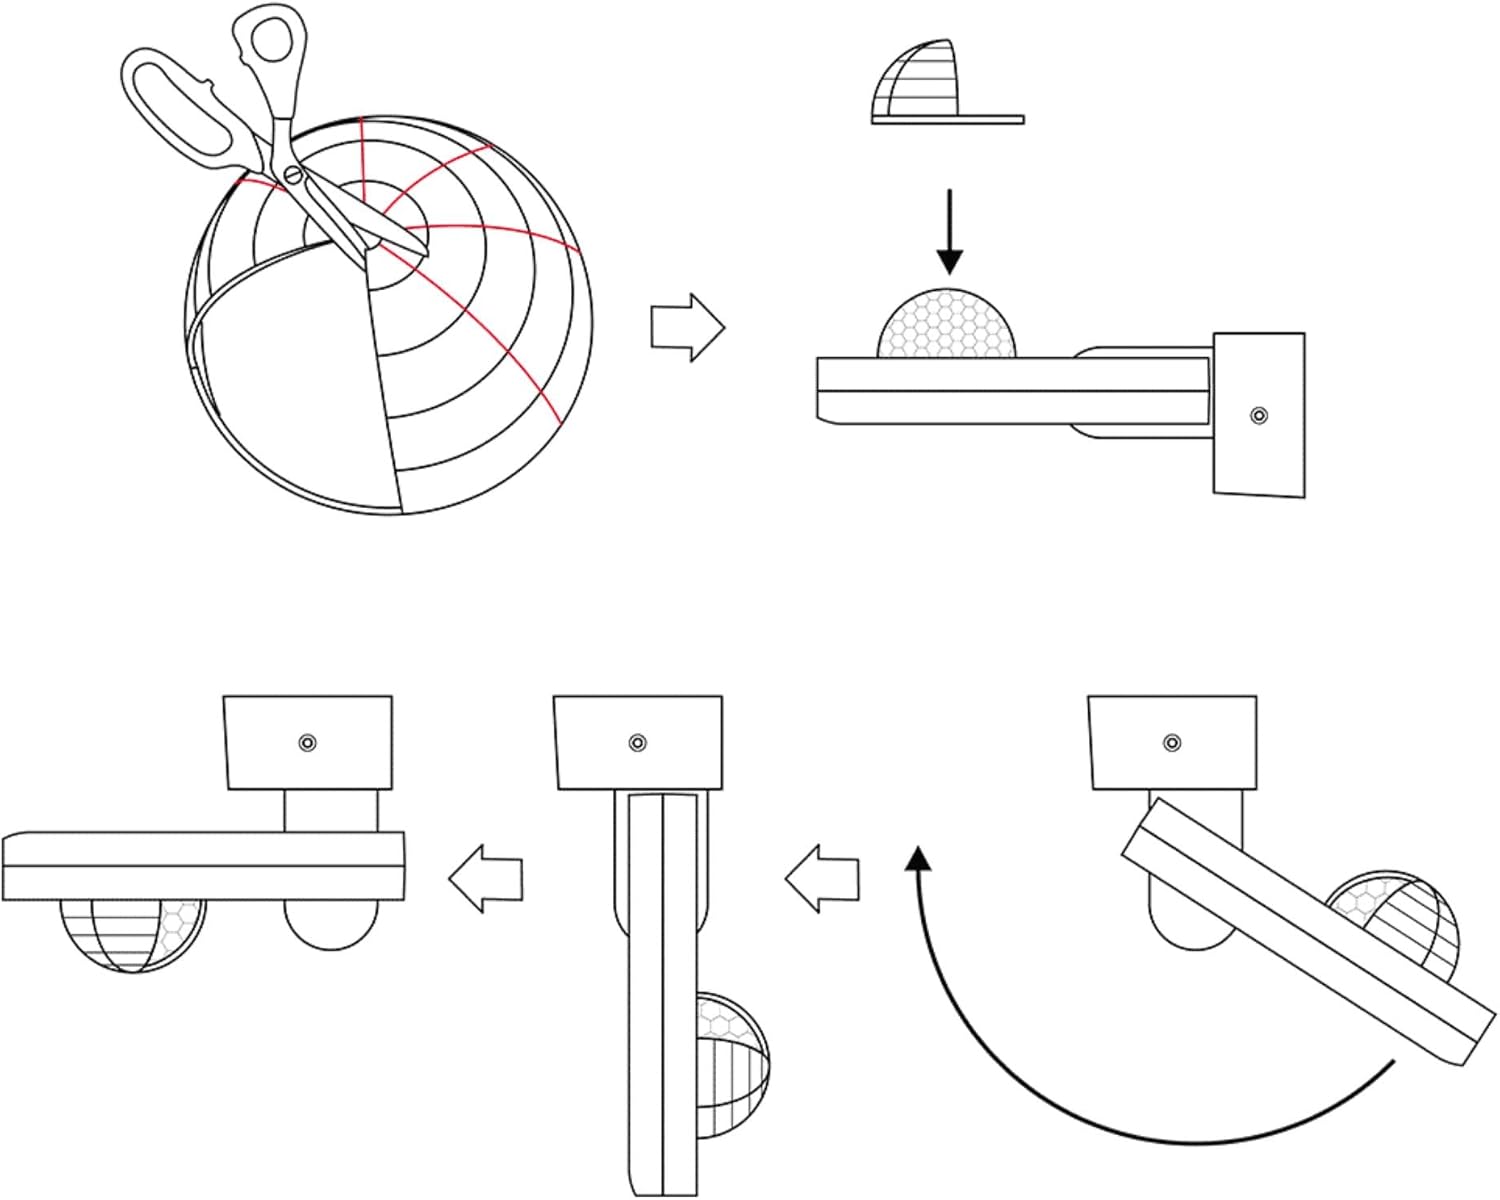
Image 4: Method for adjusting the detection area using a cover.

Image 5: Detection area diagrams for wall and ceiling mounting.
5. Instrucións de funcionamento
5.1 Time Setting (TIME)
Use the 'TIME' knob to set the duration the light remains on after motion is detected. Settings range from 10 seconds to 30 minutes. You can also set it to permanent ON or OFF.
5.2 Light Sensitivity Setting (LUX)
Use the 'LUX' knob to adjust the ambient brightness threshold at which the motion detector activates the light. Settings range from 3 LUX (darkness) to 2,000 LUX (daylight). This allows the light to only turn on when it's dark enough.

Imaxe 6: Detallada view of TIME and LUX adjustment controls.
6. Mantemento
- Regularly clean the sensor lens with a soft, dry cloth to ensure optimal detection performance.
- Non empregues produtos de limpeza abrasivos nin solventes, xa que poden danar o dispositivo.
- Comprobe periodicamente todas as conexións eléctricas para comprobar se están ben apertadas e se presentan signos de desgaste.
- No user-serviceable parts inside. For repairs, contact qualified personnel.
7 Solución de problemas
| Problema | Causa posible | Solución |
|---|---|---|
| A luz non se acende cando se detecta movemento. | 1. Incorrect LUX setting (too high). 2. Sen fonte de alimentación. 3. Lámpada defectuosa. | 1. Adjust LUX setting to a lower value. 2. Check power connections. 3. Substitúe a lámpada. |
| A luz permanece acesa continuamente. | 1. TIME setting too long or set to permanent ON. 2. Movemento constante na área de detección. 3. Sensor obstructed or dirty. | 1. Adjust TIME setting. 2. Reposition detector or adjust detection area with cover. 3. Clean sensor lens. |
| A luz acéndese sen movemento aparente. | 1. Environmental factors (wind, heat, small animals). 2. Sensor too sensitive. | 1. Reposition detector or adjust detection area with cover. 2. Ensure no objects are causing false triggers. |
8. Especificacións
- Marca: SEBSON
- Número de modelo: IR_OUT_CA
- Cor: Antracita
- Fonte de enerxía: AC (corrente alterna)
- Peso do artigo: 222 gramos
- Rango máximo de detección: 20 metros
- Ángulo de detección: 360°
- Tipo de montaxe: Surface mount (wall and ceiling)
- Descrición da batería: Batería non incluída
- Rango de temperatura: 20 Degrees Celsius (Operating)
- Dispositivos compatibles: Smart Home Hub, Light
- Usos recomendados: Residential security, commercial sector, automation, energy management
- Dimensións: 85x55x170mm (approximate, refer to diagram for exact measurements)

Imaxe 7: Dimensións do produto.
9. Garantía e soporte
SEBSON products are designed for durability and performance. For warranty information or technical support, please refer to the official SEBSON websitio web ou póñase en contacto co seu vendedor. Garde o recibo da compra como proba de compra.
Para obter máis axuda, pode visitar o SEBSON Brand Store.