
1. Produto rematadoview
The Rosewill Helium NAS Black ATX Mid Tower Computer Case is engineered for optimal performance and extensive storage capabilities, making it suitable for DIY NAS, media servers, and small business applications. Its design prioritizes airflow, efficient cooling, and versatile component compatibility.
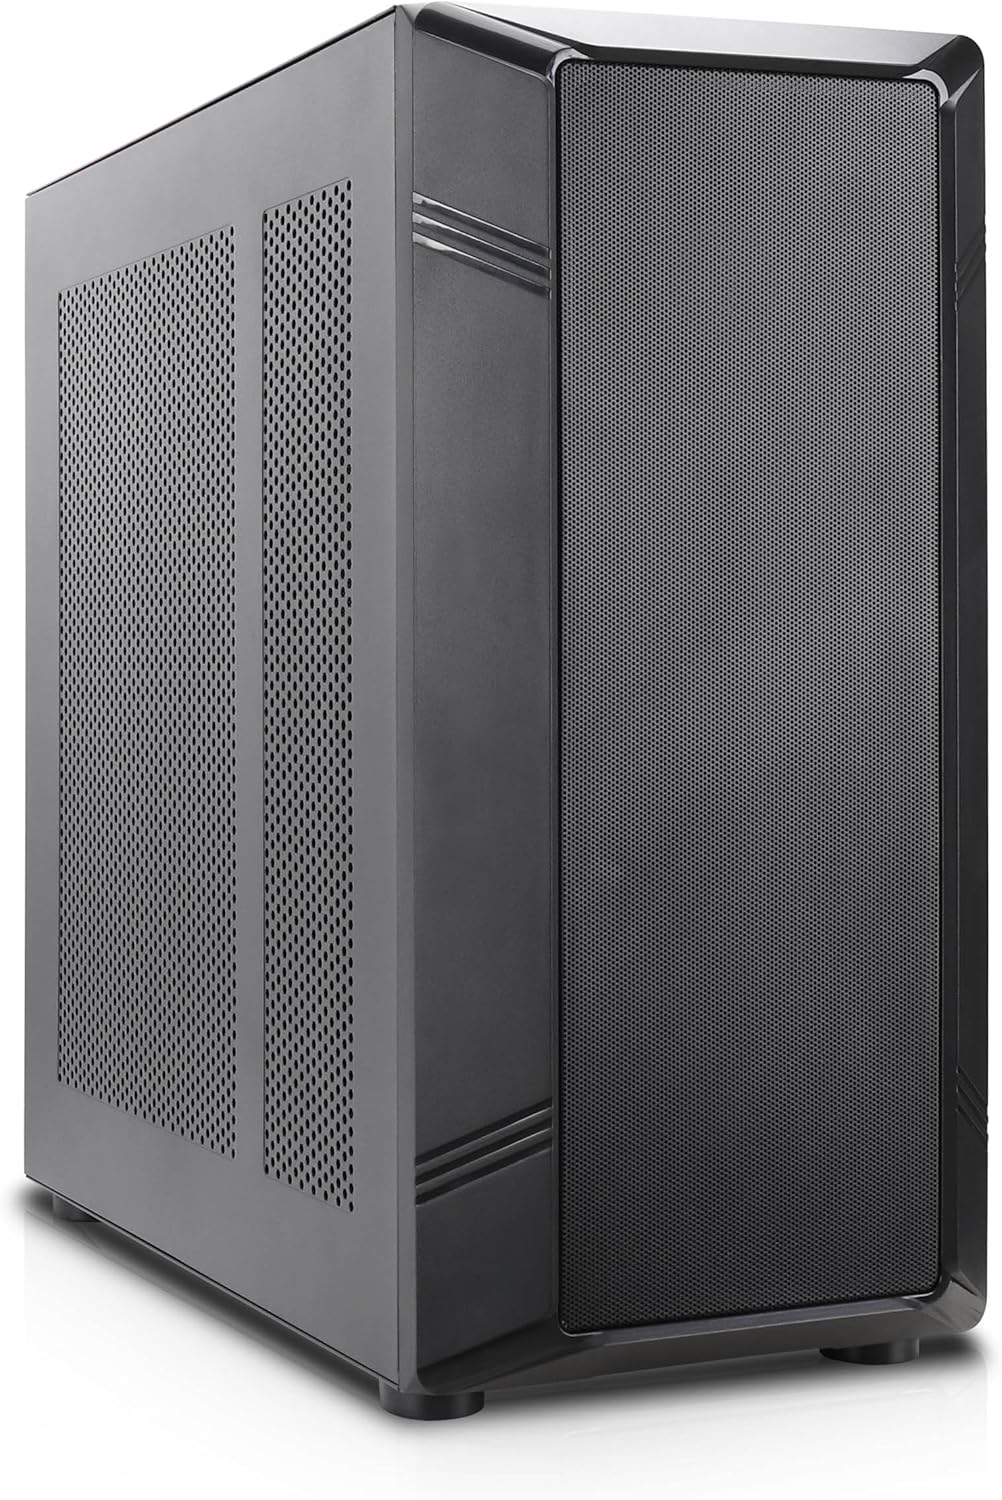
Figura 1: Fronte angulada view of the Rosewill Helium NAS Black ATX Mid Tower Computer Case.
Características principais:
- Maximized Airflow: All-mesh side panels ensure unrestricted airflow for optimal cooling and prevention of thermal throttling.
- Quiet, Efficient Cooling: Four pre-installed 140mm PWM fans provide silent and efficient cooling, maintaining system stability under heavy workloads.
- Capacidade de almacenamento masiva: Supports up to 10 x 3.5" HDDs and 3 x 2.5" SSDs, ideal for large media libraries, virtual machines, and data-intensive applications.
- Compatibilidade versátil: Supports ATX motherboards and 360 AIO Radiators, offering flexibility for various system configurations and high-performance cooling solutions.
2. Configuración e instalación
Follow these steps for proper installation of your computer components.
2.1 Preparación do caso
- Coloque a caixa sobre unha superficie estable e plana.
- Retire os paneis laterais desenroscando os parafusos de cabeza moleteada da parte traseira e deslizando os paneis para retiralos.

Figure 2: Interior layout of the Rosewill Helium NAS case, showing component mounting areas.
2.2 Instalación da placa base
- Install the I/O shield into the motherboard tray opening.
- Align your ATX motherboard with the standoffs inside the case.
- Fixe a placa base cos parafusos proporcionados.
2.3 Instalación da unidade de almacenamento
The case supports up to 10 x 3.5" HDDs and 3 x 2.5" SSDs. Utilize the dedicated drive cages for secure mounting.
Video 1: Demonstration of hard drive cage installation and cabling. This video illustrates the process of securing and connecting multiple hard drives within a PC case, which is applicable to the Rosewill Helium NAS case's storage capabilities.
- For 3.5" HDDs, slide the drives into the designated bays within the drive cages and secure them with screws.
- For 2.5" SSDs, mount them in the dedicated SSD trays, typically located behind the motherboard tray or on top of the HDD cages, and secure with screws.
- Conecte os cables de alimentación e datos SATA a cada unidade instalada.
2.4 Instalación da fonte de alimentación
- Mount the power supply unit (PSU) in the bottom rear compartment of the case.
- Fixe a fonte de alimentación con parafusos na parte traseira da caixa.
- Route the necessary power cables to your motherboard and other components.
2.5 Instalación da tarxeta gráfica e da tarxeta de expansión
- Retire as tapas das ranuras PCIe necesarias da parte traseira da caixa.
- Insira a súa tarxeta gráfica ou outras tarxetas de expansión nas ranuras PCIe correspondentes da placa base.
- Fixa as tarxetas con parafusos.
2.6 Xestión de cables
Utilize the cable routing cutouts and tie-down points behind the motherboard tray to organize cables. This improves airflow and aesthetics. Zip ties are included for assistance.
3. Instrucións de funcionamento
3.1 E/S do panel frontal

Figure 3: Front panel I/O ports located on the top of the case.
- Botón de encendido: Press to power on/off the system.
- Botón de reinicio: Prema para reiniciar o sistema.
- Porto USB 3.1 tipo C: Para a transferencia de datos a alta velocidade.
- Portos USB 3.0: Para conectar dispositivos compatibles con USB 3.0.
- Portos USB 2.0: Para conectar dispositivos compatibles con USB 2.0.
- Conectores de audio HD: Para conectar auriculares e micrófonos.
3.2 Encendido inicial
- Ensure all components are securely installed and cables are properly connected.
- Conecta o cable de alimentación á fonte de alimentación e a unha toma de corrente.
- Press the power button on the front panel to start your system.
4. Mantemento
Regular maintenance ensures optimal performance and longevity of your computer case and components.
4.1 Limpeza dos filtros de po
The Rosewill Helium NAS case features removable dust filters on the top and bottom for easy cleaning.
- Gently pull out the bottom dust filter.
- The top mesh panel is magnetic and can be easily lifted off.
- Clean the filters using compressed air or a soft brush to remove accumulated dust.
- Reinstall the filters once clean.
4.2 Limpeza xeral
- Use a soft, dry cloth to wipe down the exterior surfaces of the case.
- For interior cleaning, use compressed air to remove dust from fans and components. Ensure the system is powered off and unplugged before cleaning.
5 Solución de problemas
Esta sección ofrece solucións para problemas comúns cos que podes atoparte.
- O sistema non se acende:
- Check all power connections, including the PSU, motherboard, and front panel power switch cables.
- Asegúrese de que o interruptor da fonte de alimentación estea na posición "ON".
- Compoñentes de sobrequecemento:
- Verifique que todos os ventiladores da caixa xiren correctamente.
- Limpar os filtros de po e os compoñentes internos para mellorar o fluxo de aire.
- Ensure CPU cooler and GPU fans are functioning.
- Ruído excesivo do ventilador:
- Check for loose cables or obstructions hitting fan blades.
- Ensure fans are securely mounted.
- Adjust fan speeds through motherboard BIOS or software if supported.
- E/S do panel frontal non funciona:
- Verify that all front panel cables (USB, Audio, Power, Reset) are correctly connected to the motherboard headers.
6. Especificacións
| Característica | Especificación |
|---|---|
| Marca | Rosewill |
| Serie | Helium NAS |
| Nome do modelo | Helium NAS |
| Número de modelo do artigo | B0DP3PQFKW |
| Tipo de caso | Torre media |
| Compatibilidade da placa base | ATX |
| Cor | Negro |
| Material | Aluminio, aceiro inoxidable |
| Peso do elemento | 19.71 libras |
| Dimensións do produto (LxWxH) | 25 x 24.41 x 12.68 polgadas |
| 3.5" HDD Support | Ata 10 |
| 2.5" SSD Support | Ata 3 |
| Ventiladores preinstalados | 4 x 140mm PWM Fans |
| Método de arrefriamento | Air, Water (360 AIO Radiator Support) |
| Front Panel USB 2.0 Ports | 2 |
| Front Panel USB 3.0 Ports | 2 |
| Usos recomendados | AI Server, Media Server, NAS, Workstation |
7. Garantía e soporte
For warranty information, technical support, or further assistance, please refer to the official Rosewill websitio web ou póñase en contacto co seu departamento de atención ao cliente. Garde o recibo de compra para reclamacións de garantía.