
1. Introdución
This manual provides essential information for the safe and efficient operation, installation, and maintenance of your Durastar DRTHC122XNA1 Through-the-Wall Air Conditioner. Please read these instructions thoroughly before installation and use, and retain them for future reference.
2. Información de seguridade
Instrucións de seguridade importantes:
- Always connect the unit to a properly grounded electrical outlet with the correct voltage (208V / 230V).
- Do not operate the unit with a damaged power cord or plug. If the cord is damaged, it must be replaced by qualified service personnel.
- Ensure the unit is installed securely in a wall opening according to local electrical and building codes.
- Do not block air intake or exhaust vents. Maintain clear space around the unit for proper airflow.
- Turn off and unplug the unit before performing any maintenance or cleaning.
- Manteña os nenos e as mascotas lonxe da unidade durante o funcionamento.
- Non intente reparar nin modificar a unidade vostede mesmo. Encargue todo o mantemento a persoal cualificado.
3. Produto rematadoview
The Durastar DRTHC122XNA1 is a 12,000 BTU through-the-wall air conditioner designed for cooling and supplemental heating. It features a remote control for convenient operation.
Compoñentes clave:
- Unidade de aire acondicionado
- Control remoto
- Air Filter (internal)
Características:
- 12,000 BTU Cooling Capacity
- 10,600 BTU Supplemental Heating Capacity
- Covers areas of approximately 450-550 sq. ft.
- Multiple operating modes: Cool, Heat, Fan, Dry, Auto
- Velocidades do ventilador axustables
- Temporizador programable
- Modo de suspensión
- Operación de control remoto
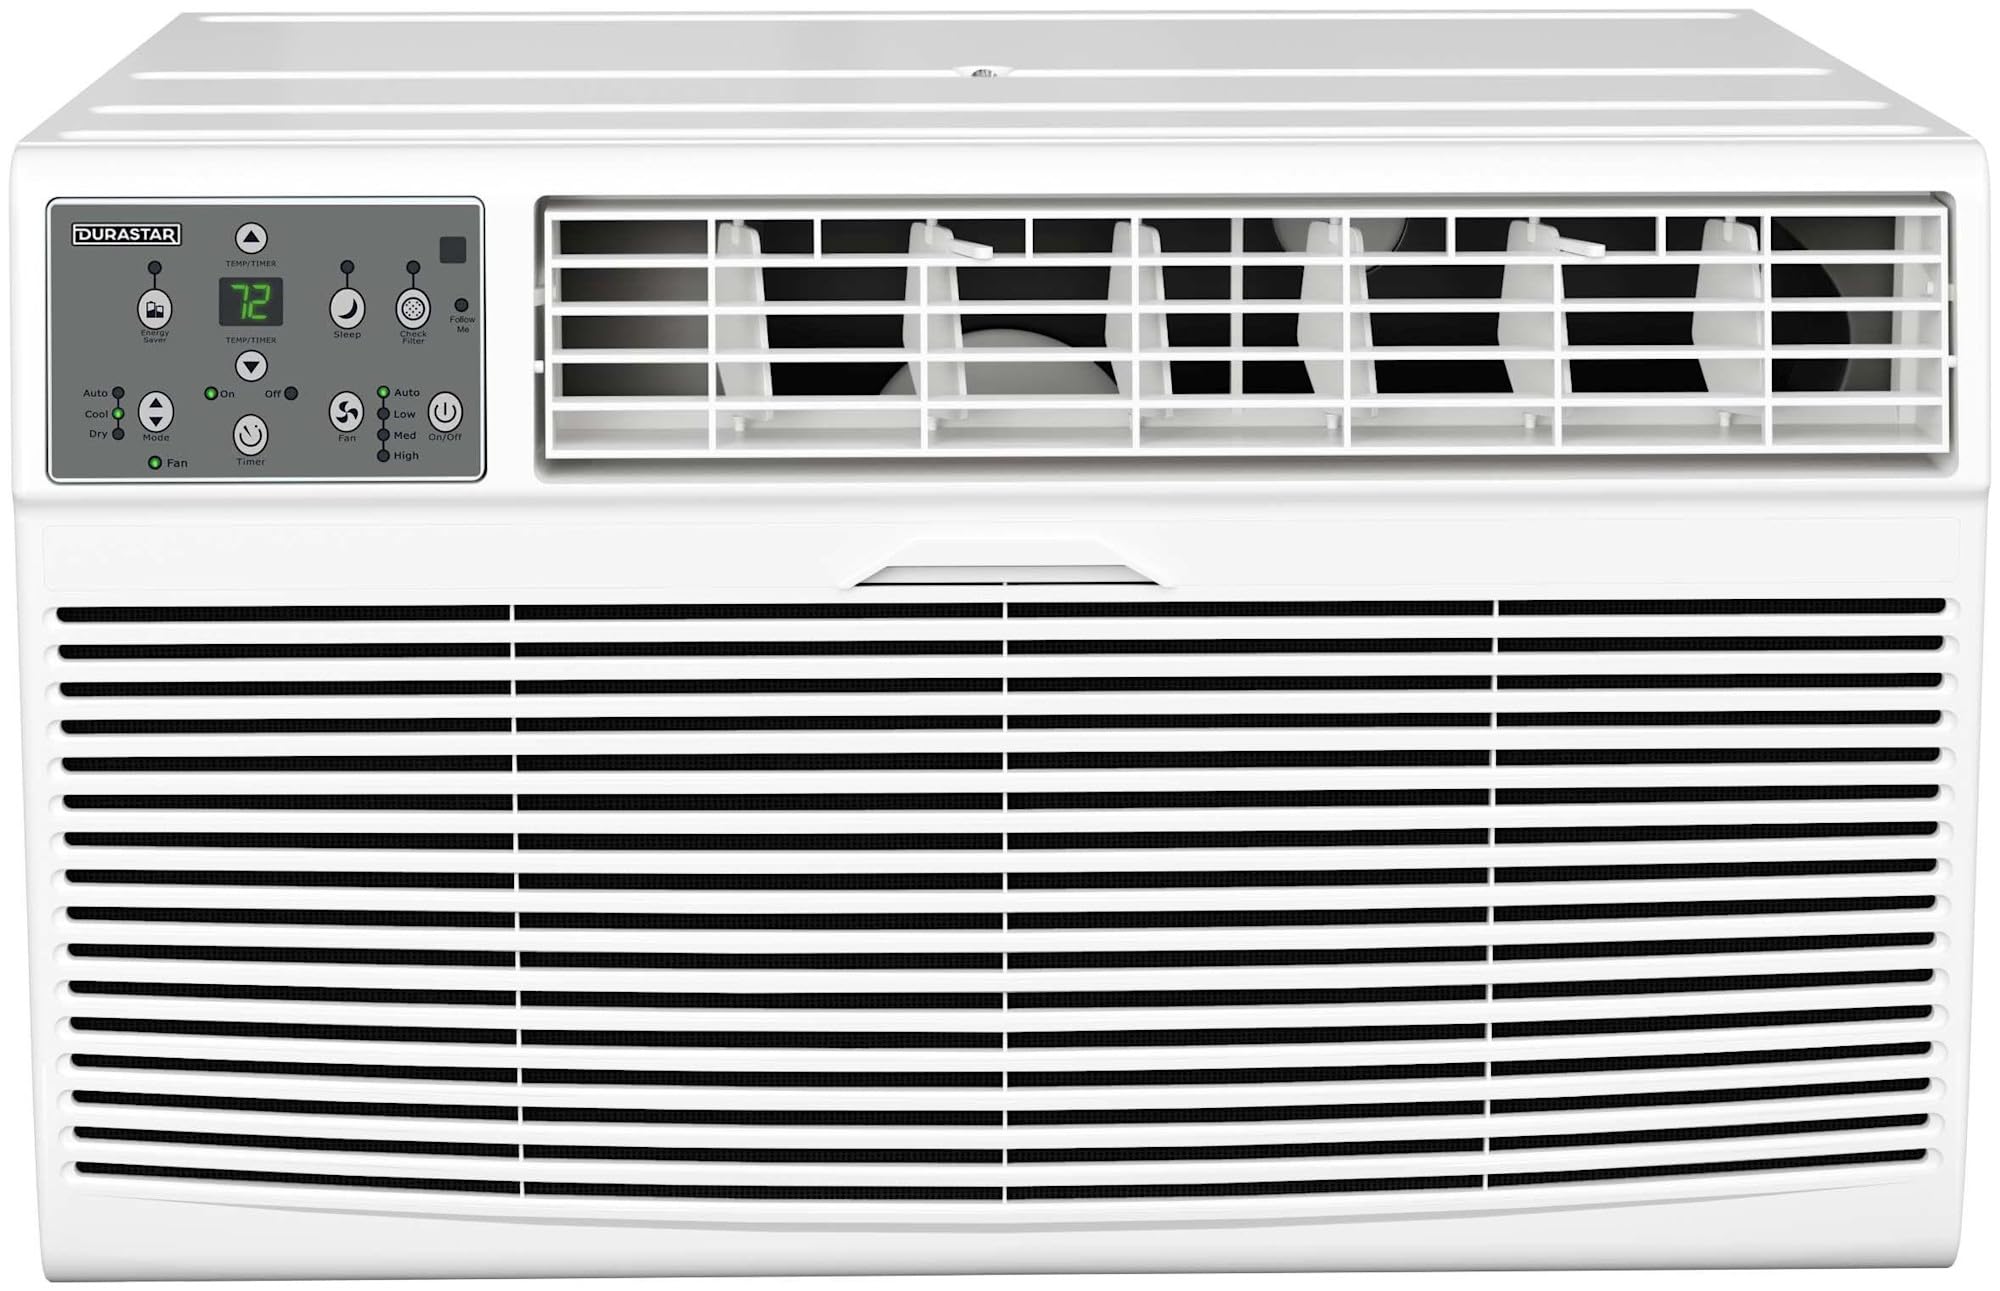
Imaxe 3.1: Fronte view of the Durastar DRTHC122XNA1 Through-the-Wall Air Conditioner unit.

Image 3.2: The remote control for the Durastar DRTHC122XNA1 Air Conditioner, showing various function buttons and the display.
4. Configuración e instalación
The DRTHC122XNA1 is designed for through-the-wall installation. A wall sleeve (Durastar DRWTCSLV) is required and sold separately for proper installation. Professional installation is recommended.
4.1 Selección do sitio
- Choose a wall location that can support the unit's weight (approximately 75 lbs).
- Ensure there are no obstructions to airflow both inside and outside the room.
- The unit requires a dedicated 208V / 230V electrical outlet with a NEMA 6-20P plug type. Ensure the outlet is within reach of the power cord.

Image 4.1: The air conditioner installed in a wall, showing the required NEMA 6-20P electrical plug type and unit dimensions.
4.2 Wall Opening Dimensions
The unit dimensions are approximately 20.25 inches (Depth) x 24.25 inches (Width) x 14.5 inches (Height). The wall opening should accommodate these dimensions, along with the wall sleeve if used, ensuring a snug fit and proper sealing to prevent air leakage.

Imaxe 4.2: Exterior view of the air conditioner installed through a wall, demonstrating proper outdoor clearance.
4.3 Conexión eléctrica
This unit operates on 208V / 230V AC power. It comes with a NEMA 6-20P plug. Ensure your electrical circuit and outlet are compatible and properly grounded. Do not use extension cords or adapter plugs.
5. Instrucións de funcionamento
The unit can be operated using the control panel on the unit or the included remote control.
5.1 Funcións de control remoto
- ON/OFF: Acende ou apaga a unidade.
- MODO: Cambia ciclicamente polos modos de funcionamento: Automático, Refrixeración, Secado, Quecemento e Ventilador.
- TEMP ▲/▼: Axusta a configuración de temperatura desexada.
- VELOCIDADE DO FAN: Selects fan speed: High, Medium, Low, Auto.
- TEMPORIZADOR ON/OFF: Sets the unit to turn on or off automatically after a set period.
- DURMIR: Activa o modo de repouso para un funcionamento silencioso e aforro de enerxía durante o sono.
- SÍGUEME: Allows the remote control to act as a thermostat, sensing the temperature at its location.
- ℃/℉: Alterna a visualización da temperatura entre graos Celsius e Fahrenheit.
- DISPLAY LED: Turns the unit's LED display on or off.
- AFORRO DE ENERXÍA: Activates energy-saving features.
5.2 Modos de funcionamento
- Modo COOL: Provides cooling. Set desired temperature and fan speed.
- HEAT Mode: Provides supplemental heating. Set desired temperature and fan speed.
- Modo FAN: Fai circular o aire sen arrefriar nin quentar. Selecciona a velocidade desexada do ventilador.
- Modo DRY: Reduce a humidade na habitación. A velocidade do ventilador contrólase automaticamente.
- Modo AUTOMÁTICO: The unit automatically selects cooling, heating, or fan-only operation based on the room temperature and your set temperature.
6. Mantemento
Regular maintenance ensures optimal performance and extends the lifespan of your air conditioner. Always unplug the unit before cleaning or servicing.
6.1 Limpeza do filtro de aire
O filtro de aire debe limparse cada dúas semanas ou con máis frecuencia dependendo do uso e da calidade do aire.
- Abra o panel frontal da unidade.
- Retire con coidado o filtro de aire.
- Lava o filtro con auga morna e xabón. Enxáguao ben.
- Deixa que o filtro seque completamente ao aire antes de volvelo instalar. Non o expoñas á luz solar directa nin á calor.
- Volva colocar o filtro seco e peche o panel frontal.
6.2 Limpeza exterior
Limpe o exterior da unidade cun suave, damp cloth. Do not use harsh cleaners, waxes, or polishes that could damage the finish or internal components.
6.3 Almacenamento estacional
If the unit will not be used for an extended period, clean the air filter and ensure the unit is dry. Store the unit in a dry, protected area.
7 Solución de problemas
Antes de contactar co servizo de atención ao cliente, volva aview os seguintes problemas e solucións comúns.
| Problema | Causa posible | Solución |
|---|---|---|
| A unidade non se acende | No power; Power cord unplugged; Circuit breaker tripped | Check power connection; Ensure plug is fully inserted; Reset circuit breaker |
| Refrixeración/quecemento insuficiente | Dirty air filter; Temperature setting too high/low; Blocked air vents; Room size exceeds capacity | Clean air filter; Adjust temperature setting; Clear obstructions; Ensure unit matches room size |
| Ruído insólito | Pezas soltas; Unidade non nivelada; Residuos no ventilador | Check for loose components; Ensure unit is level; Inspect for debris (unplug first) |
| O control remoto non funciona | Dead batteries; Obstruction between remote and unit | Replace batteries; Remove obstructions; Ensure remote is pointed at the unit |
8. Especificacións
| Especificación | Detalle |
|---|---|
| Número de modelo | DRTHC122XNA1 |
| Capacidade de refrixeración | 12,000 BTU |
| Capacidade de calefacción | 10,600 BTU (Supplemental) |
| Área de cobertura | 450-550 metros cadrados Ft. |
| Voltage | 208 V/230 V |
| Wattage | 1495 vatios |
| Peso do elemento | 75 libras |
| Dimensións do produto (P x A x A) | 20.25 x 24.25 x 14.5 polgadas |
| Nivel de son | 65.4 decibeis |
| Método de instalación | A través do muro |
| Características especiais | Control remoto |
| Cor | Branco |
9. Información da garantía
This Durastar DRTHC122XNA1 Air Conditioner comes with a 2 ano de garantía do fabricante. Please refer to the warranty documentation included with your product for specific terms, conditions, and registration details. Keep your proof of purchase for warranty claims.
10. Atención ao cliente
For technical assistance, troubleshooting beyond this manual, or warranty inquiries, please contact Durastar customer support. Visit the official Durastar websitio para obter a información de contacto e os recursos de asistencia máis actuais.
Durastar Official Websitio: Visit the Durastar Store on Amazon