
Bietrun DX-GAC2000W
Bietrun 2000W Pure Sine Wave Inverter User Manual
Model: DX-GAC2000W
1. Introdución
This manual provides essential information for the safe and efficient operation of your Bietrun 2000W Pure Sine Wave Inverter. Please read it thoroughly before installation and use, and retain it for future reference.
Contido do paquete
Verifica que todos os elementos estean presentes no paquete:
- 1 x Bietrun 2000W Pure Sine Wave Inverter
- 2 x 10AWG 3-foot Battery Cables (Red and Black)
- 1 x Ground Cable
- 1 x mando a distancia
- 4 x fusibles
- 1 x Small Wrench
- Parafusos de montaxe

Image 1.1: The Bietrun 2000W Pure Sine Wave Inverter with its remote control, battery cables, ground cable, fuses, and wrench.
2. Instrucións de seguridade
Observe the following safety precautions to prevent injury and damage to the inverter or connected devices:
- Non abra o inversor casing. Non hai pezas que o usuario poida reparar no interior.
- Ensure proper ventilation around the inverter. Do not block cooling vents.
- Keep the inverter away from water, moisture, flammable materials, and direct sunlight.
- Conecte o inversor só a unha fonte de alimentación de 12 V CC. Conexión a outros voltages pode causar danos.
- Ensure correct polarity when connecting battery cables (Red to Positive, Black to Negative). Reverse polarity will cause damage.
- Always connect the ground cable to a proper earth ground.
- Do not exceed the inverter's rated continuous power output (2000W) or peak surge power (4000W).
- Desconecte o inversor da batería antes de realizar calquera mantemento ou limpeza.
Funcións de protección integradas
The inverter includes multiple protection mechanisms:
- Protección contra sobrecarga
- Baixo Voltage Protección
- Protección GFCI
- Sobrevoltage Protección
- Protección contra sobretemperatura
- Protección contra cortocircuitos
- Protección de conexión inversa
- Protección contra sobrecorriente

Image 2.1: Visual representation of the inverter's comprehensive safety protection system.
3. Características do produto
The Bietrun 2000W Pure Sine Wave Inverter is designed for reliable power conversion with advanced features:
- Saída de onda sinusoidal pura: Provides high-quality AC power (THD < 3%) suitable for sensitive electronics, ensuring stable operation and minimizing damage risk.
- Alta eficiencia: Conversion efficiency exceeding 90% reduces energy loss.
- Potencia continua: Delivers 2000W continuous power with a 4000W peak surge capacity.
- Saída versátil: Features 4 AC outlets, 1 AC wiring terminal, 2 USB ports (5V/2.1A), and 1 Type-C port (5V/2.1A).
- Pantalla LED HD: Provides real-time status updates including input/output voltage, charging status, battery status, current power, and fault codes.
- Control remoto: Allows for convenient power management from a distance.
- Funcionamento silencioso: High-efficiency cooling system with a low-noise fan maintains optimal operating temperature.
- Deseño compacto e duradeiro: Encased in rugged Aluminum Alloy, with dimensions of 19 x 10 x 7 inches and a weight of 12.5 lbs.

Image 3.1: Key features of the Bietrun 2000W Pure Sine Wave Inverter.
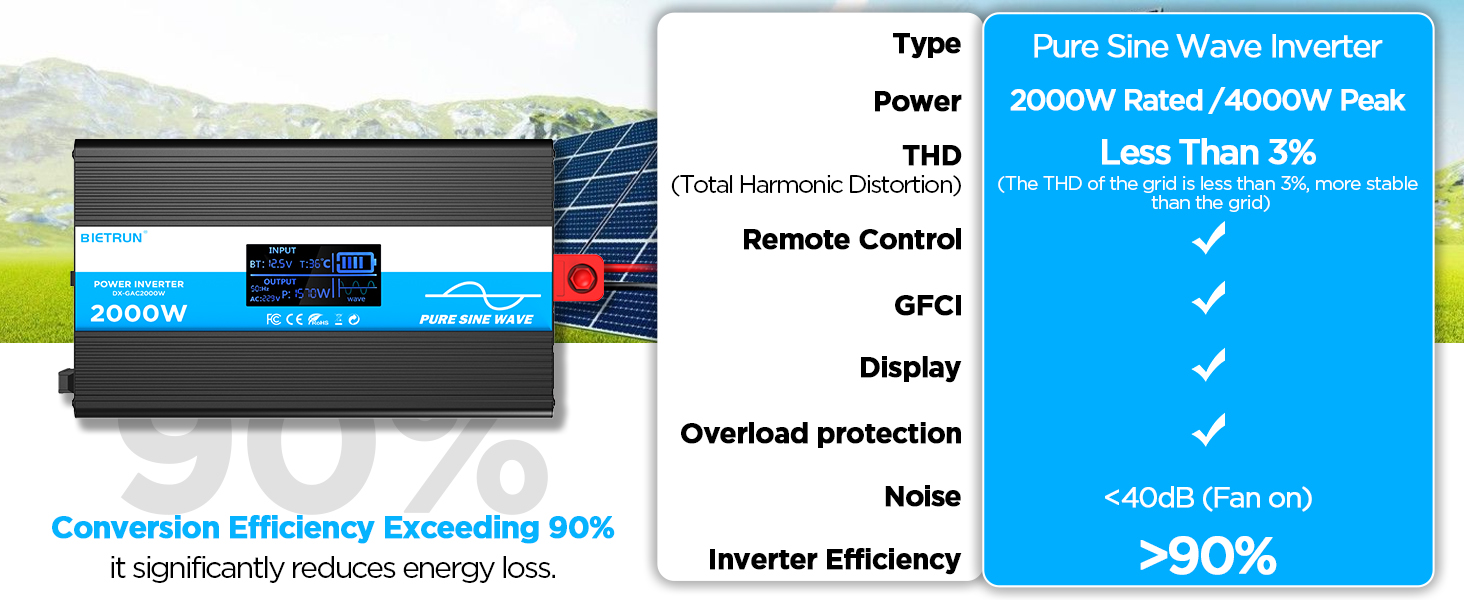
Image 3.2: Illustrates the stable, grid-like output of a pure sine wave inverter compared to unstable power from other types.
4. Configuración e instalación
Localización e montaxe
Choose a dry, well-ventilated location away from direct sunlight, heat sources, and flammable materials. The inverter can be wall-mounted using the provided screws.
Compatibilidade da batería
The inverter is compatible with various 12V battery types, including LiFePO4, LI, SLD, GEL, FLD, and AGM batteries.

Image 4.1: The inverter supports multiple 12V battery chemistries.
Pasos de conexión
- Preparar cables: Use the provided 10AWG 3-foot cables. Ensure all connections are secure.
- Connect Ground Cable: Attach the green/yellow ground cable to the inverter's ground terminal and to a reliable earth ground point.
- Conectar os cables da batería:
- Conecta o vermello battery cable to the inverter's positivo (+) terminal.
- Conecta o negro battery cable to the inverter's negativa (-) terminal.
- Conecte o outro extremo do vermello cable to the battery's positivo (+) terminal.
- Conecte o outro extremo do negro cable to the battery's negativa (-) terminal.
Importante: Ensure correct polarity. A spark may occur during the final connection, which is normal due to capacitor charging.
- Conexións seguras: Double-check all connections for tightness to prevent loose contacts and overheating.
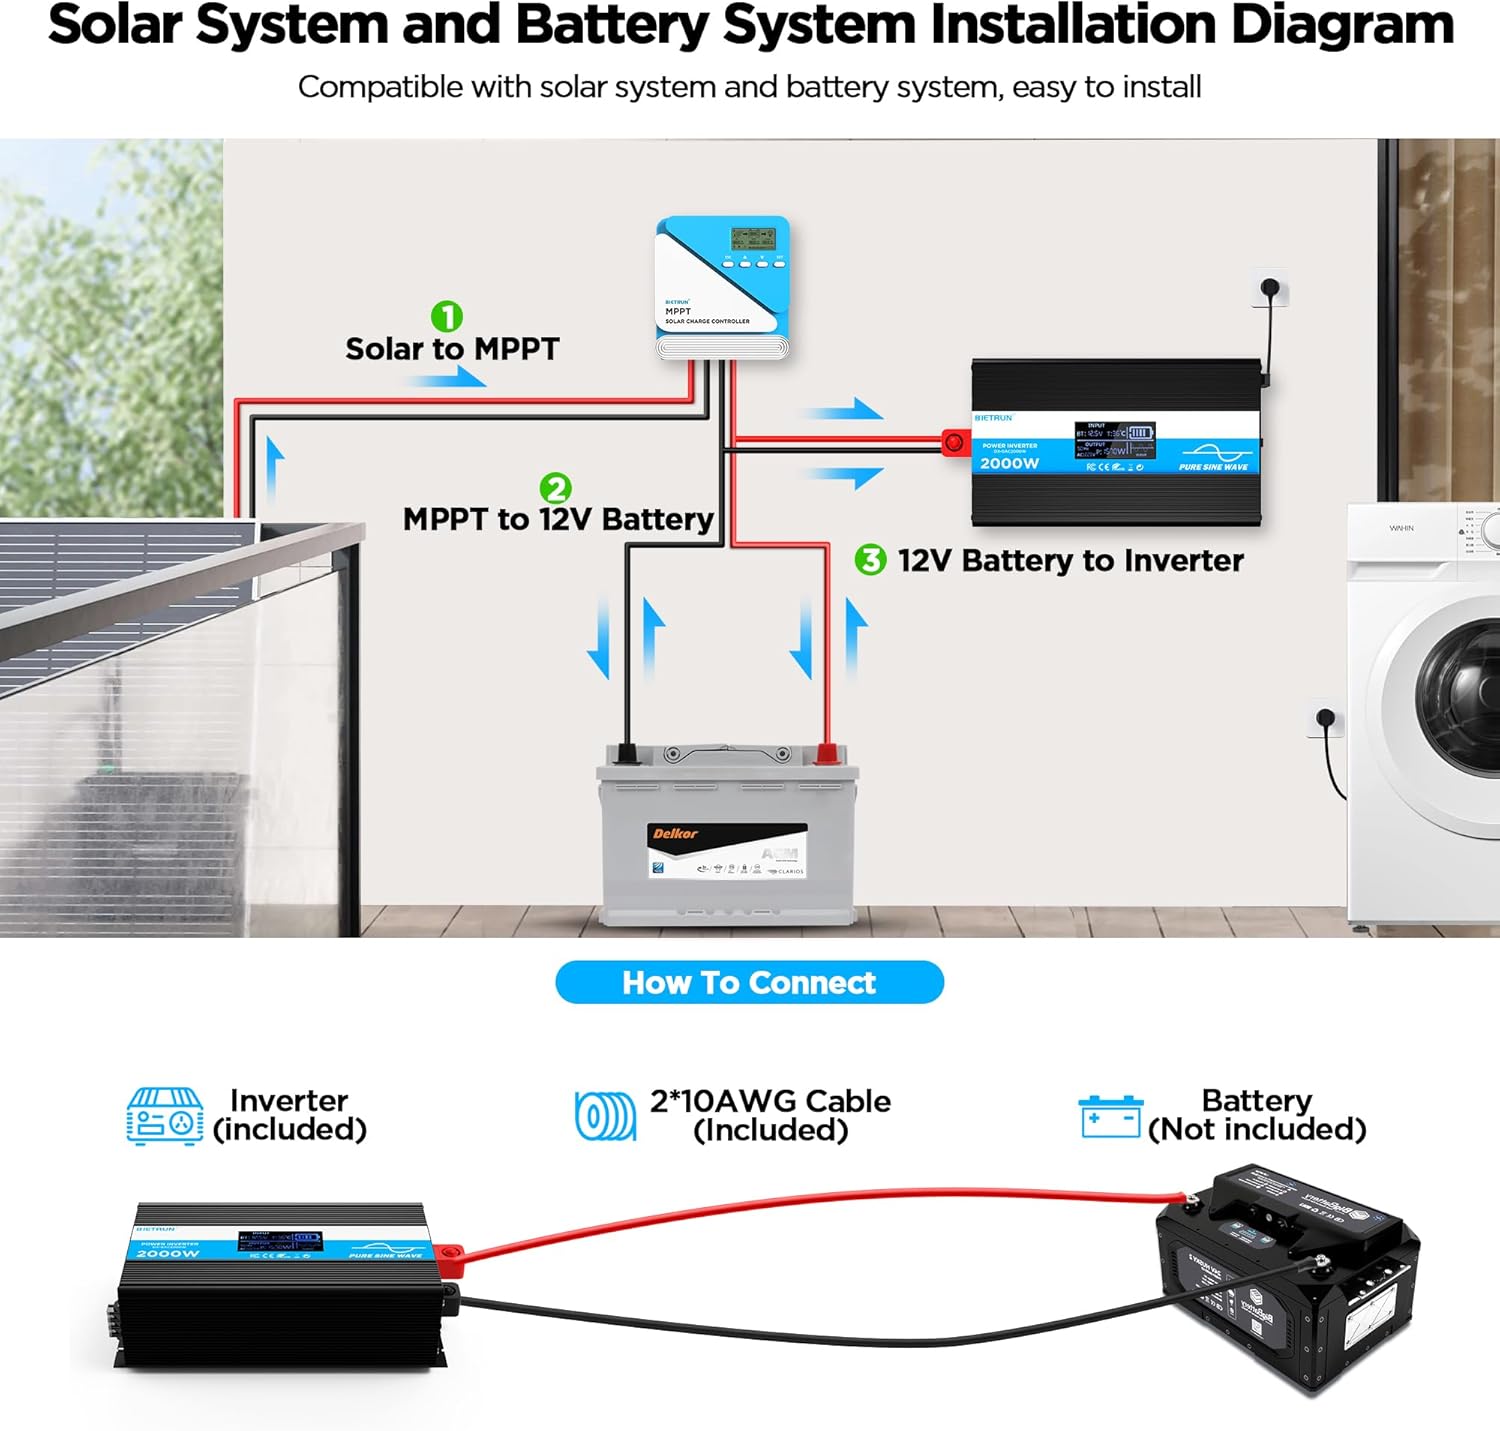
Image 4.2: Basic wiring diagram for connecting the inverter to a 12V battery.
Inverter Interface Overview

Image 4.3: Front panel layout with output interfaces and controls.

Image 4.4: Rear panel layout with battery input terminals and cooling fans.
5. Funcionamento
Encendido/apagado
- Operación manual: Flip the ON/OFF switch on the inverter to the 'ON' position to power on. Flip to 'OFF' to power off.
- Operación de control remoto: Ensure the inverter's 'REMOTE' switch is in the 'ON' position. Use the ON/OFF buttons on the remote control to operate the inverter.
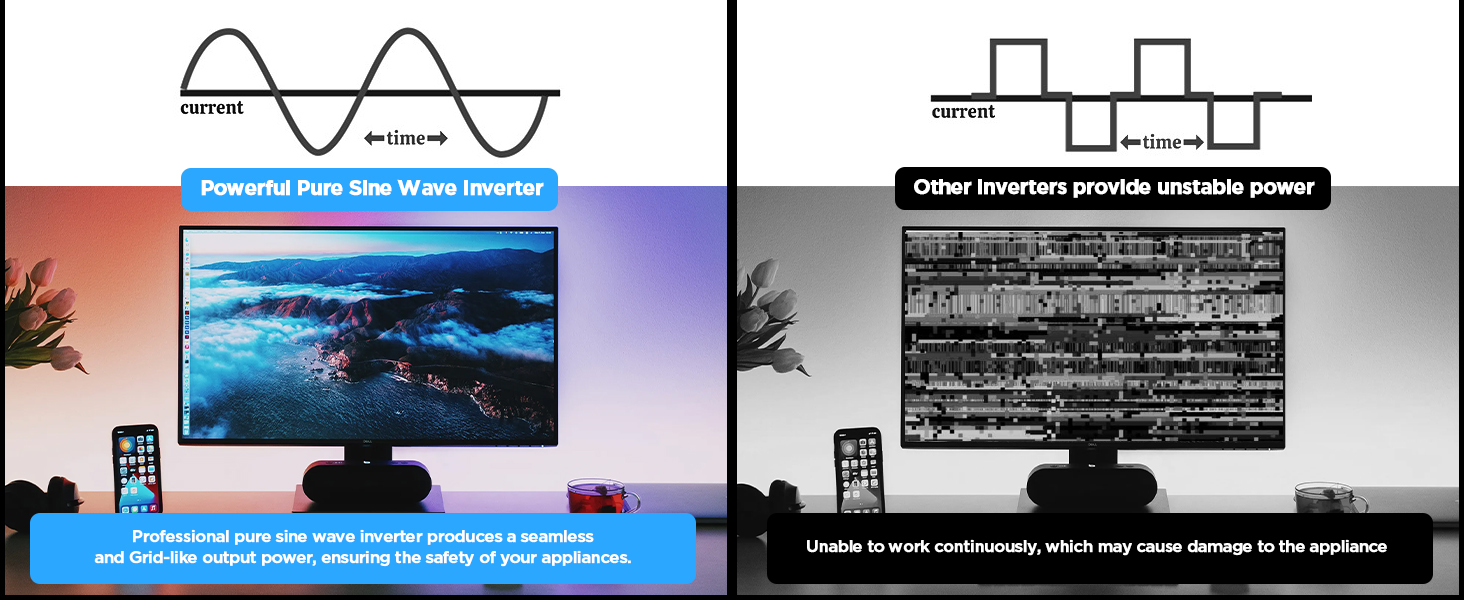
Image 5.1: The remote control allows for convenient operation.
Conectando Dispositivos
Once the inverter is powered on, plug your AC devices into the AC outlets or connect to the AC wiring terminal. USB devices can be connected to the USB or Type-C ports.
Ensure the total power consumption of all connected devices does not exceed 2000W continuously.
6. HD Display Information
The integrated HD display provides real-time operational data and fault indications:
- Entrada: Mostra o volumen da bateríatage (BT) and internal temperature (T).
- Saída: Shows output frequency (Hz), AC voltage (AC), and current power consumption (P).
- Estado da batería: Visual indicator of battery charge level.
- Forma de onda: Indicates pure sine wave output.
- Códigos de falla: Numeric codes appear for specific issues, aiding in troubleshooting.

Image 6.1: The HD display provides comprehensive status updates and fault codes.
Descricións de códigos de avaría
- 2: Baixo Voltage Aviso
- 3: Sobrevoltage Protección
- 4: Baixo Voltage Protección
- 5: Aviso de sobrecarga
- 6: Protección contra sobrecarga
- 7: Protección contra sobretemperatura
- 8: Protección contra curtocircuítos de saída
7 Solución de problemas
If the inverter is not functioning correctly, refer to the display for fault codes and consult the table below:
| Problema | Causa posible | Solución |
|---|---|---|
| O inversor non se acende | Conexións da batería soltas, baixo volume da bateríatage, fusible defectuoso. | Check battery cable connections. Recharge or replace battery. Check and replace fuses if blown. |
| No AC output (Fault Code 8) | Curtocircuíto de saída. | Disconnect all AC loads. Check for short circuits in connected devices or wiring. Reconnect one by one. |
| Overload warning/protection (Fault Code 5/6) | A carga conectada supera a capacidade do inversor. | Reduce the total power of connected devices. Disconnect high-power appliances. |
| Baixo voltage warning/protection (Fault Code 2/4) | Batería voltage é demasiado baixo. | Recharge the battery. Check battery health. |
| Sobrevoltage protection (Fault Code 3) | Vol. De entradatage é demasiado alto. | Verifique o vol. da bateríatage is within the 12V range. Disconnect from charging source if overcharging. |
| Overtemperature protection (Fault Code 7) | Inverter is overheating. | Ensure adequate ventilation. Reduce load. Allow inverter to cool down. Clean fan vents if obstructed. |
If the fault persists after attempting the solutions, contact customer support.
8. Especificacións
| Característica | Especificación |
|---|---|
| Número de modelo | DX-GAC2000W |
| Potencia Continua | 2000 W |
| Potencia de sobrecarga máxima | 4000 W |
| Vol. De entradatage | DC 12 V |
| Vol. De saídatage | CA 110V-120V |
| Forma de onda de saída | Pura Sine Wave |
| Distorsión harmónica total (THD) | < 3 % |
| Eficiencia de conversión | > 90% |
| Saídas AC | 4 |
| Portos USB | 2 (5 V/2.1 A) |
| Porto tipo C | 1 (5 V/2.1 A) |
| Dimensións (L x W x H) | 19 x 10 x 7 polgadas |
| Peso do elemento | 11.13 libras |
| Sistema de refrixeración | Ventiladores dobres |
9. Mantemento
Un mantemento regular garante un rendemento óptimo e unha lonxevidade do seu inversor:
- Limpeza: Periodically clean the exterior of the inverter with a dry, soft cloth. Ensure cooling vents are free from dust and debris. Do not use liquid cleaners.
- Comprobación de conexión: Inspeccione regularmente as conexións dos cables da batería para comprobar se están ben apertados e corroídos. Limpe calquera corrosión cun cepillo de arame e unha solución de bicarbonato de sodio.
- Ventilación: Ensure the inverter always has adequate airflow. Do not operate in enclosed spaces without ventilation.
- Substitución de fusibles: If a fuse blows, replace it only with a fuse of the same type and rating as specified in the package contents.
10. Garantía e soporte
For warranty information or technical support, please refer to the contact details provided with your purchase or visit the official Bietrun websitio. Garde o recibo da compra como xustificante da mesma.
Ask a question about this manual
Ask about setup, troubleshooting, compatibility, parts, safety, or missing instructions. Manuals+ will review the question and use this page’s manual context to help answer it.