
Introdución
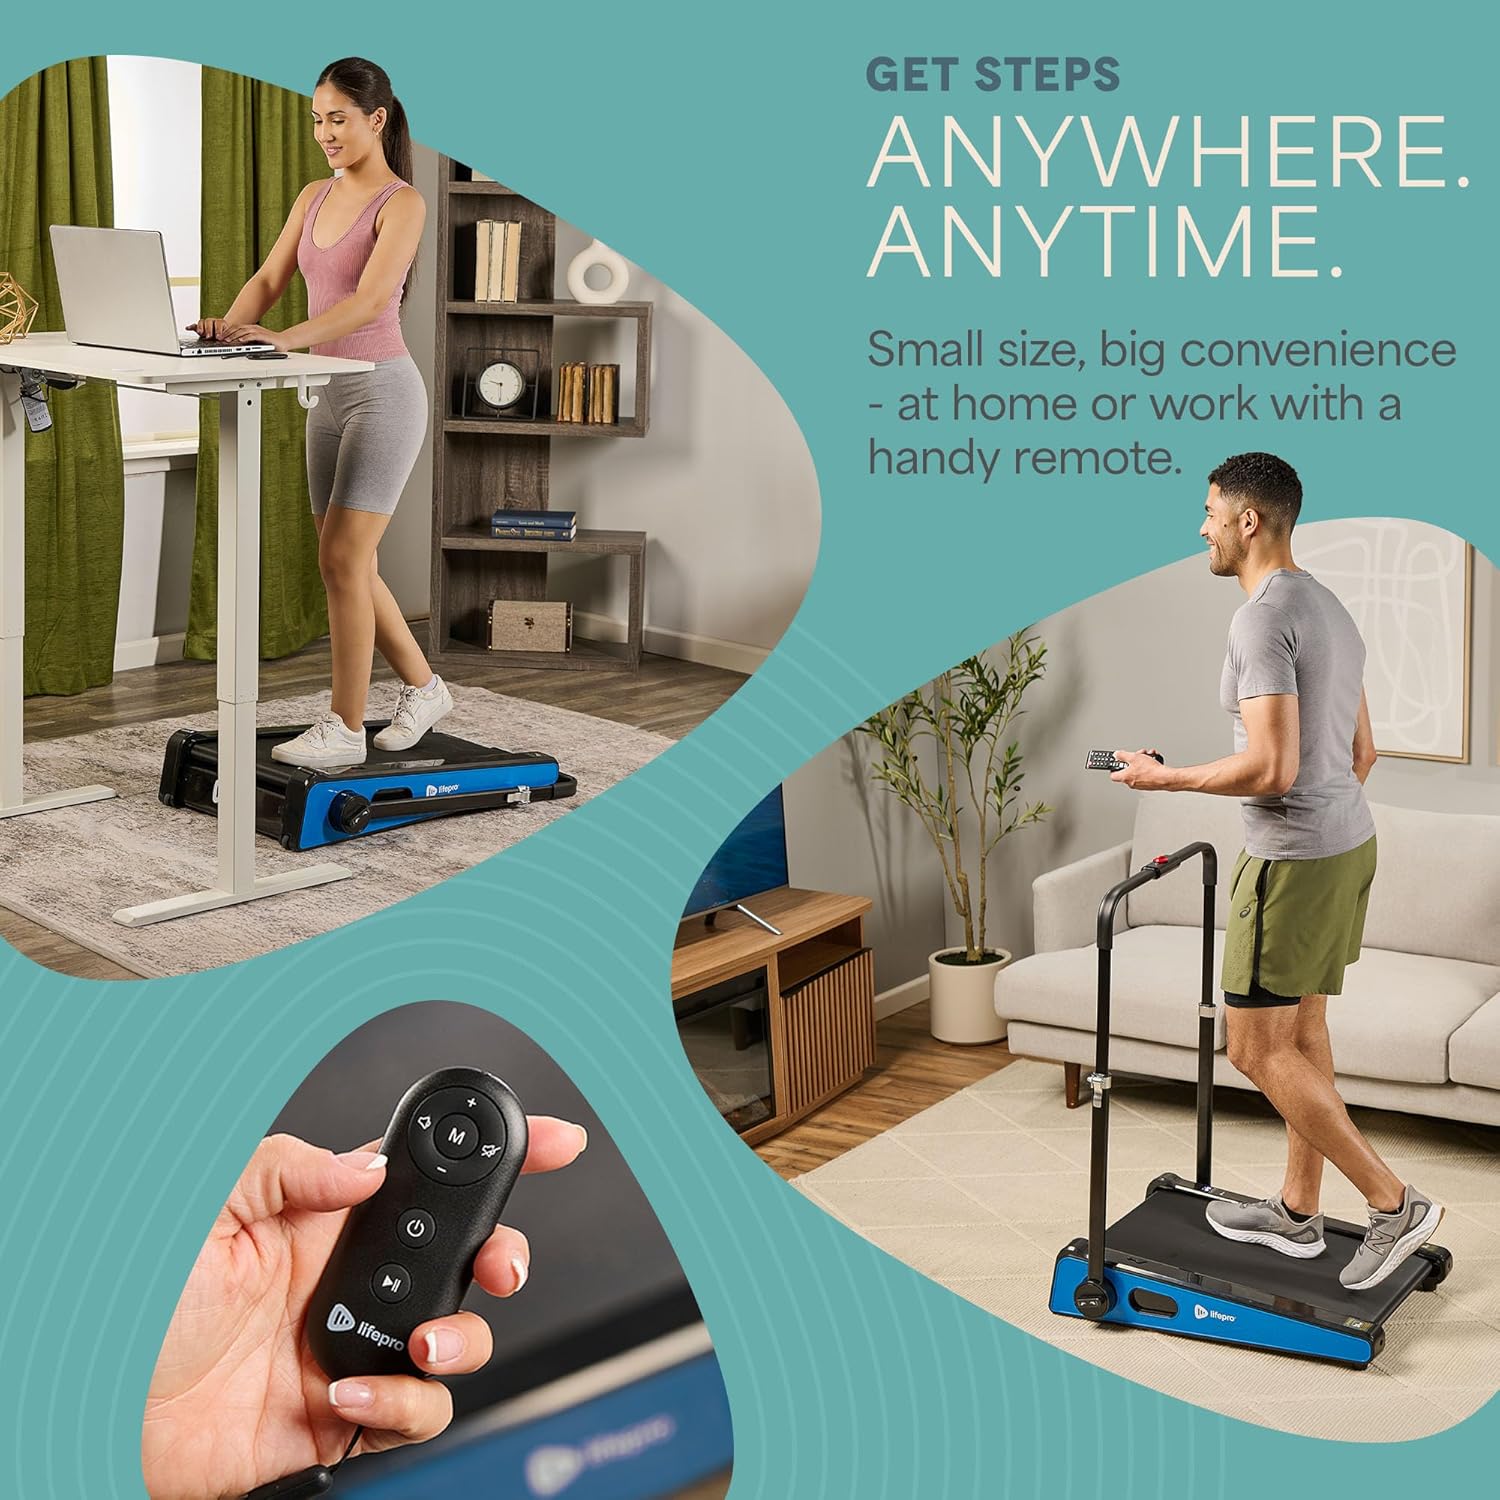
The LifePro Pacer Mini Pro Treadmill is a compact and versatile walking pad designed for light exercise and fitness in both home and office environments. Its adjustable incline and variable speed settings allow for a customized workout experience, helping you stay active throughout your day. This manual provides essential information for the safe and effective use, setup, operation, and maintenance of your Pacer Mini Pro Treadmill.
Información importante de seguridade
Please read and understand all instructions before operating the treadmill. Failure to follow these instructions may result in injury or damage to the product.
- Coloque sempre a cinta de correr sobre unha superficie plana e estable.
- Manteña os nenos e as mascotas lonxe da fita durante a operación.
- Non empregues a cinta de correr se está danada ou non funciona correctamente.
- Consulta cun médico antes de comezar calquera novo programa de exercicios.
- Asegúrese de que o cable de alimentación non estea pinchado nin danado.
- Do not attempt to service the treadmill yourself. Contact customer support for assistance.
Contido do paquete
Verifica que todos os compoñentes estean presentes no paquete:
- LifePro Pacer Mini Pro Treadmill Unit
- Control remoto
- Cable de alimentación
- Lubricante
- Manillar axustable
- Titular da tableta
Configuración
Follow these steps to set up your LifePro Pacer Mini Pro Treadmill:
- Desembalaxe: Retire con coidado a cinta de correr e todos os compoñentes da embalaxe.
- Colocación: Choose a flat, stable surface for the treadmill. Ensure there is adequate space around the unit for safe operation.
- Handlebar and Feet Assembly: While the main unit comes pre-assembled, minimal assembly is required. Attach the adjustable handlebar and the incline feet as instructed in the included quick start guide. Ensure all screws are tightened securely.
- Lubricación inicial: The treadmill may come with some initial lubrication. Refer to the maintenance section for instructions on how to check and apply lubricant if needed before first use.
- Conexión de alimentación: Conecta o cable de alimentación á cinta de correr e despois a unha toma de corrente con conexión a terra.

Instrucións de funcionamento
Operating your Pacer Mini Pro Treadmill is straightforward:
- Encendido: Plug in the treadmill and press the power button on the unit or the remote control. The LED display will illuminate.
- Velocidade de axuste: Use the remote control to increase or decrease the walking speed. The maximum speed is 3 MPH. The current speed will be shown on the LED display.
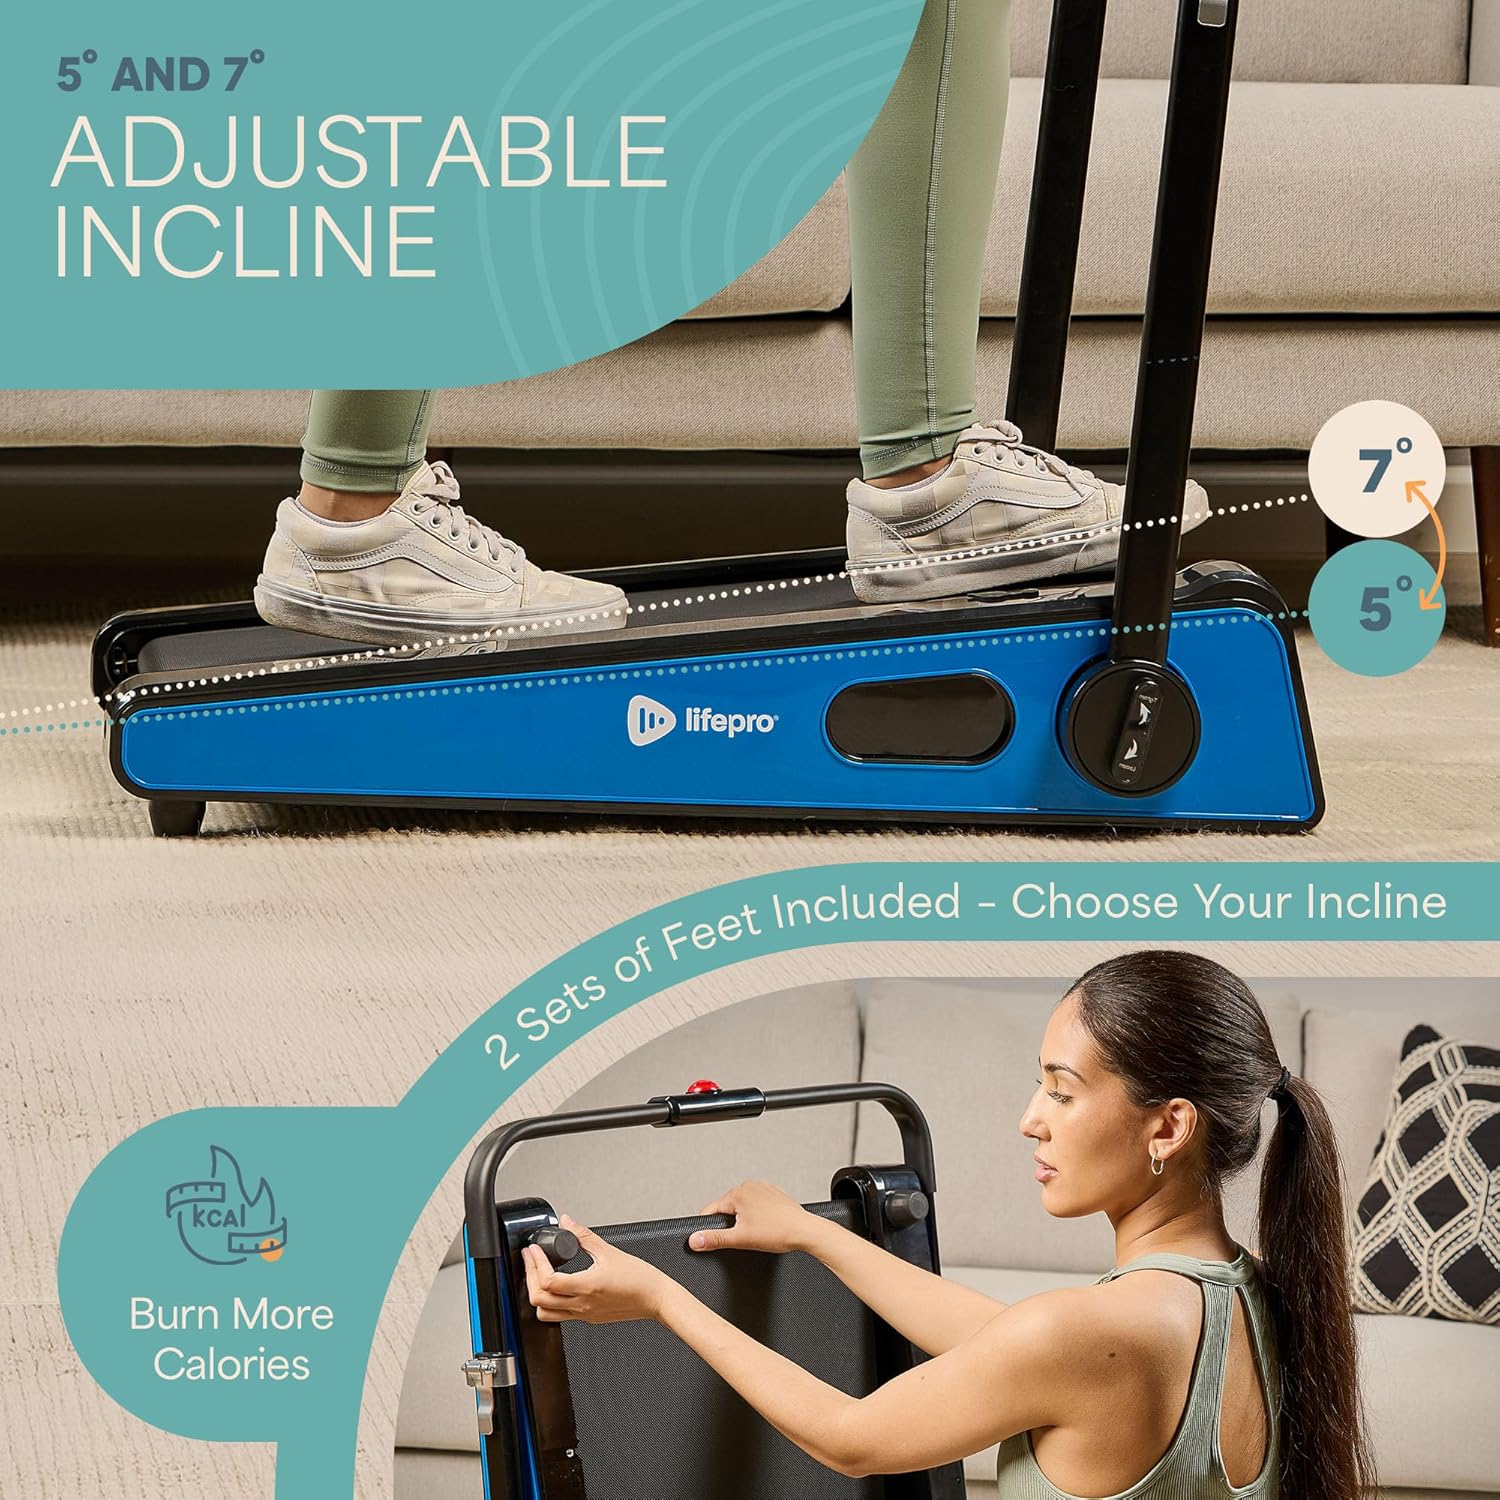
- Axuste da inclinación: The treadmill offers adjustable incline settings of 5 or 7 degrees. To change the incline, manually adjust the feet at the rear of the treadmill. Refer to the setup section and product diagrams for visual guidance.
- Monitorización do teu adestramento: The LED display shows important workout metrics such as speed, calories burned, and distance covered. This helps you track your progress and stay motivated.
- Apagado: To stop your workout, press the stop button on the remote control or the unit. For complete power off, unplug the treadmill from the power outlet.

Mantemento
Un mantemento regular garante a lonxevidade e o rendemento óptimo da súa cinta de correr:
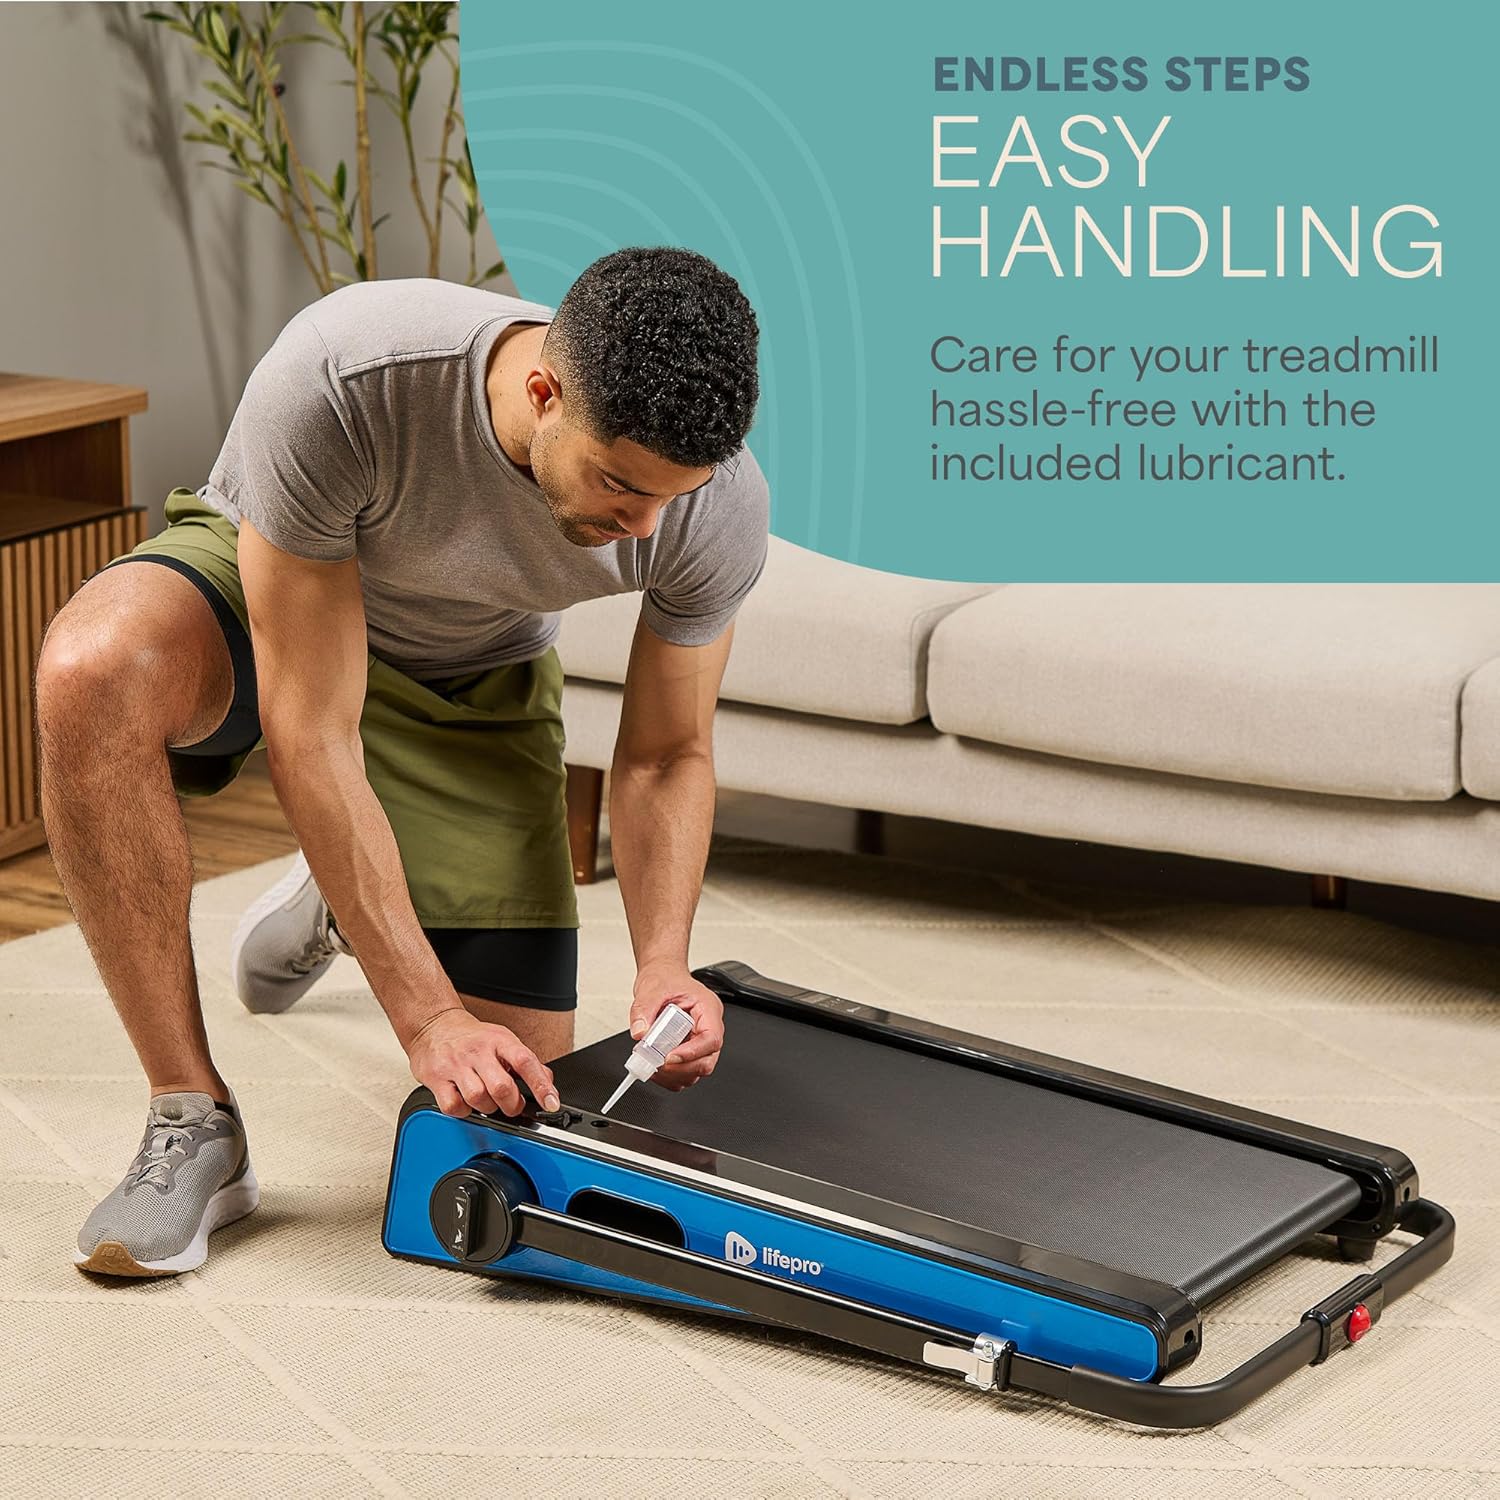
- Lubricación: The walking belt requires periodic lubrication to reduce friction and wear. A dedicated slot on the upper left side of the treadmill allows for easy injection of the provided lubricant. Lubricate as needed, typically every few months depending on usage.
- Limpeza: Limpa a superficie da cinta de correr con anunciosamp un pano despois de cada uso para eliminar a suor e o po. Non empregue produtos de limpeza abrasivos.
- Almacenamento: The Pacer Mini Pro is designed for compact storage. It can be easily stored under a couch, desk, or in a closet thanks to its small footprint and built-in wheels for portability.
Resolución de problemas
If you encounter any issues with your treadmill, refer to the following common solutions:
- A cinta de correr non se acende: Ensure the power cord is securely plugged into both the treadmill and a working electrical outlet. Check the power switch on the unit.
- Correa escorregante ou irregular: The walking belt may require adjustment or lubrication. Refer to the maintenance section for lubrication instructions. For belt tension adjustment, consult the detailed manual or contact customer support.
- Ruídos pouco comúns: Stop using the treadmill immediately and inspect for any loose parts or obstructions. If the noise persists, contact customer support.
For issues not covered here, please contact LifePro customer support for assistance.
Especificacións
| Marca | Life Pro |
| Número de modelo | LP-PCRMP-BLU-VC |
| Cor | Blue with Handlebar |
| Dimensións do produto (P x A x A) | 83.1 cm x 63.5 cm x 104.1 cm |
| Peso do elemento | 53.9 libras |
| Material | Aceiro inoxidable |
| Velocidade máxima | 3 MPH |
| Inclinación axustable | 5 ou 7 graos |
| Característica especial | Deseño compacto |
| Usos recomendados | Light exercise, walking, home and office use |
| Público obxectivo | Adulto |
| Potencia máxima | 1.75 HP |
| Tipo de visualización | LED |
| Fonte de enerxía | Eléctrico con cable |
| Tecnoloxía de conectividade | Ethernet |
| Tipo de contador | Dixital |
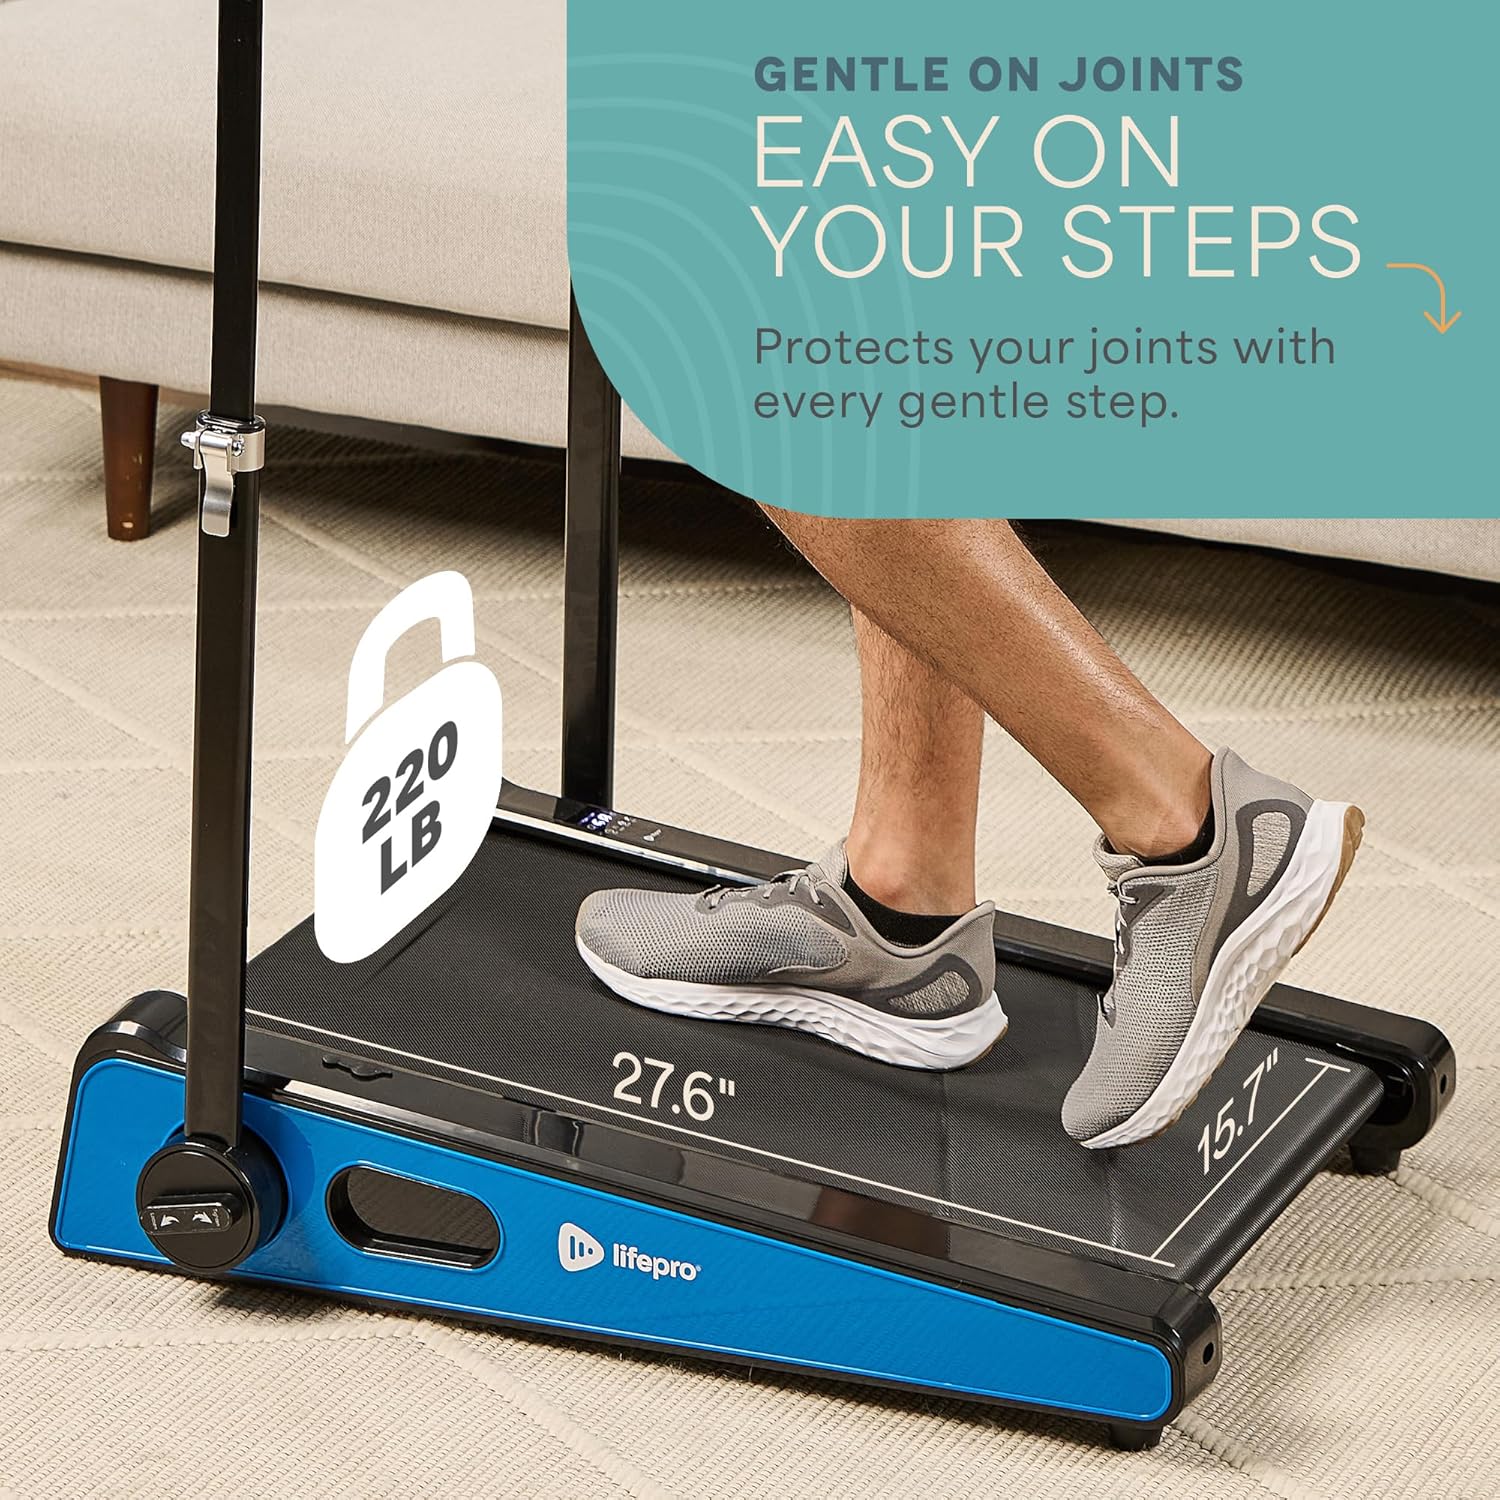
| Recomendación de peso máximo | 220 libras |
| Número de programas | 1 |
| Running Surface Length | 40 polgadas |
| Running Surface Width | 15.7 polgadas |
| Tamaño da pantalla | 30 polgadas |
| Requírese montaxe | Minimal (Handlebar and feet attachment) |
| UPC | 810161332328 |
Garantía e Soporte
LifePro is committed to providing high-quality products and customer satisfaction. The LifePro Pacer Mini Pro Treadmill comes with a garantía de por vida, ensuring peace of mind for your investment.
For any questions, concerns, or technical support, please contact LifePro customer service:
- Websitio: www.lifeprofitness.com (Example link, please replace with actual support link if available)
- Correo electrónico: support@lifeprofitness.com (Example email, please replace with actual support email if available)
- Teléfono: [Insert Phone Number Here]
Please have your model number (LP-PCRMP-BLU-VC) and proof of purchase ready when contacting support.