
Introdución
This manual provides detailed instructions for the installation, operation, and maintenance of your Defiant Vancouver Matte Black Entrance Door Handleset with Interior Knob, model HPX9G3. Please read these instructions carefully before beginning installation to ensure proper function and longevity of your product. Keep this manual for future reference.
Información de seguridade
- Always wear appropriate safety gear, such as safety glasses, during installation.
- Ensure all components are present and undamaged before installation. Do not install damaged parts.
- Empregue só as ferramentas especificadas neste manual.
- Manteña as pezas pequenas lonxe dos nenos.
- Se tes dúbidas sobre algún paso, consulta cun profesional cualificado.
Contido do paquete
Verifique que todos os seguintes compoñentes estean incluídos no seu paquete:
- Exterior Handleset Assembly (Pull Handle and Deadbolt)
- Interior Knob Assembly
- Latch Mechanism (EZ fit latch)
- Placa de folga
- Ferraxes de montaxe (parafusos, eixes)
- Chaves
- Instrucións de instalación (este manual)
Ferramentas necesarias
Normalmente necesítanse as seguintes ferramentas para a instalación:
- Destornillador Phillips
- Cinta métrica
- Lapis
Configuración e instalación
The Defiant Vancouver Handleset is designed for easy installation on most standard doors. A Phillips screwdriver is the primary tool needed.
Paso 1: prepara a porta
Ensure your door has standard bore holes. The latch features an EZ fit design to accommodate both 2-3/8 inch (60mm) or 2-3/4 inch (70mm) backsets. Adjust the latch as needed by twisting the housing.
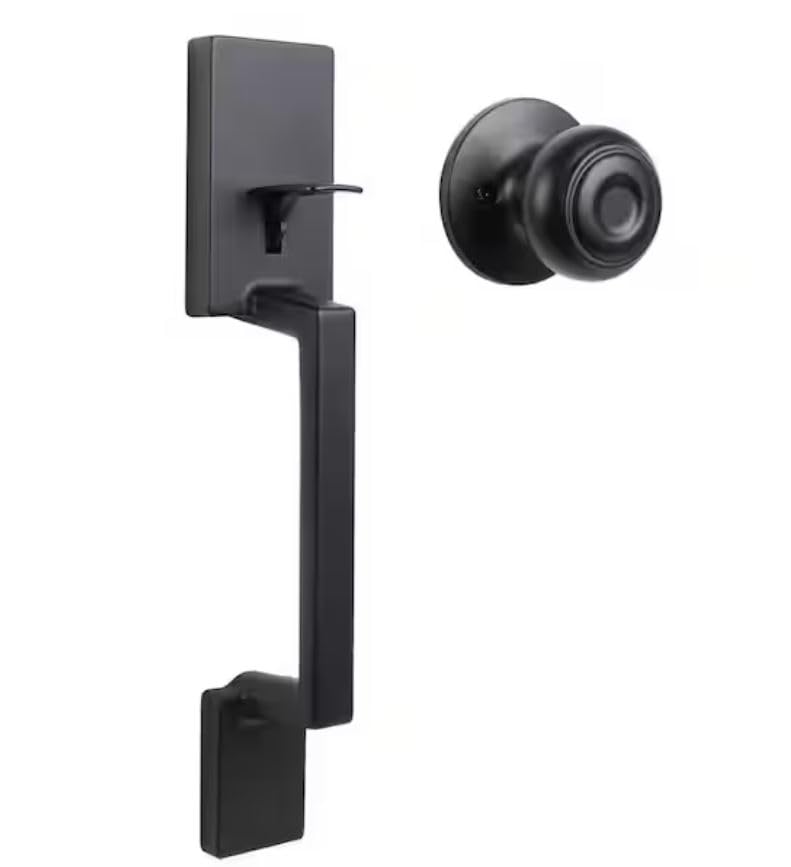
Imaxe 1: View of the Defiant Vancouver handleset components, showing the interior knob, the latch mechanism installed in a door edge, and a portion of the exterior pull handle. This illustrates how the latch fits into the door and connects to the interior knob and exterior handle.
Paso 2: Instala o pestillo
Insert the latch mechanism into the edge bore hole of the door. Ensure the bevel of the latch bolt faces the door frame. Secure the latch with the provided screws. The latch faceplate can be used as a radius faceplate or converted to a drive-in style if required.
Step 3: Install the Exterior Handleset
Position the exterior handleset assembly on the outside of the door, aligning the spindle through the latch mechanism. Ensure the deadbolt mechanism aligns with the upper bore hole.
Step 4: Install the Interior Knob
Place the interior knob assembly on the inside of the door, aligning it with the exterior handleset and the latch spindle. Secure the interior and exterior components using the long mounting screws provided. Tighten screws evenly to prevent binding.
Paso 5: Instala a placa de golpe
Close the door and mark the position of the latch bolt and deadbolt on the door frame. Chisel out a shallow recess for the strike plate and secure it with the provided screws. Ensure the door closes smoothly and latches securely.
Paso 6: Proba de funcionamento
Test the handleset by opening and closing the door, and locking/unlocking the deadbolt and latch from both the interior and exterior. Ensure smooth operation without excessive force.
Operación
Pechando a Porta
- Desde o exterior: Insert the key into the deadbolt cylinder and turn to extend the deadbolt. Turn the key back to the vertical position and remove. The lower handle may also have a locking mechanism depending on the specific model.
- Desde o interior: Rotate the thumb turn on the interior deadbolt to extend the deadbolt. For the knob, ensure it is in the locked position (if applicable, usually by pressing a button or turning a small knob on the interior knob).
Desbloqueando a Porta
- Desde o exterior: Insert the key into the deadbolt cylinder and turn to retract the deadbolt. Turn the key back to the vertical position and remove. To open the door, depress the exterior thumb-piece.
- Desde o interior: Rotate the thumb turn on the interior deadbolt to retract the deadbolt. Turn the interior knob to open the door.
Mantemento
- Limpeza: Limpar o conxunto de asas cun pano suave eamp pano. Evite produtos de limpeza abrasivos, solventes ou produtos químicos agresivos, xa que poden danar o acabado negro mate.
- Lubricación: Periodically apply a small amount of graphite lubricant or a silicone-based spray lubricant to the keyway and latch mechanism to ensure smooth operation. Do not use oil-based lubricants as they can attract dirt.
- Inspección: Regularly check all screws and mounting hardware for tightness. Tighten any loose screws to prevent wobbling or misalignment.
Resolución de problemas
| Problema | Causa posible | Solución |
|---|---|---|
| Door does not latch or lock smoothly. | Misalignment of latch/deadbolt with strike plate; loose screws; debris in mechanism. | Check strike plate alignment and adjust if necessary. Tighten all mounting screws. Clean the latch mechanism. |
| Key is difficult to turn or remove. | Lack of lubrication; bent key; debris in keyway. | Apply graphite lubricant to the keyway. Ensure the key is not bent. Clean the keyway. |
| Handleset feels loose or wobbly. | Parafusos de montaxe soltos. | Tighten all mounting screws on both the interior and exterior assemblies. |
Especificacións
- Modelo: HPX9G3
- Remate: Negro Mate
- Material: Metal (Stainless Steel Handle)
- Dimensións do produto: 12" de longo x 6" de ancho
- Peso do artigo: 2.6 libras
- Retroceso: Adjustable 2-3/8 in. (60mm) or 2-3/4 in. (70mm)
- Tipo de bloqueo: Key Lock (Deadbolt)
- Aplicación: Exterior/Entry Doors
Garantía e Soporte
This Defiant handleset comes with a Garantía limitada de por vida, ensuring durability and performance under normal use. For warranty claims or technical support, please refer to the contact information provided with your purchase documentation or visit the official Defiant websitio.
Conserve o comprobante de compra para efectos da garantía.