
Dapper Supply DP-WPFS1204
User Manual: Dapper Supply Battery Powered Walk Behind Mini Automatic Floor Scrubber Machine
Model: DP-WPFS1204
1. Introdución
Welcome to the Dapper Supply family! This user manual provides essential information for the safe and efficient operation, maintenance, and troubleshooting of your new Battery Powered Walk Behind Mini Automatic Floor Scrubber Machine. Please read this manual thoroughly before operating the machine to ensure optimal performance and longevity.
2. Información de seguridade
A súa seguridade e a dos demais son primordiais. Siga sempre as seguintes pautas de seguridade:
- Le todas as instrucións antes de usar o aparello.
- Do not operate the machine with wet hands or in wet conditions unless specifically designed for it.
- Manteña os nenos e as mascotas lonxe da máquina durante o funcionamento.
- Use only Dapper Supply approved accessories and replacement parts.
- Ensure the machine is unplugged before performing any maintenance or cleaning.
- This machine is designed for tile, vinyl, hardwood, laminate, concrete, and other sealed hard floors. It is not intended for use on carpets or rugs.
- Do not use flammable or combustible liquids with the machine.
- Garde a máquina nun lugar seco e seguro cando non a estea a usar.
3. Produto rematadoview
3.1 Compoñentes
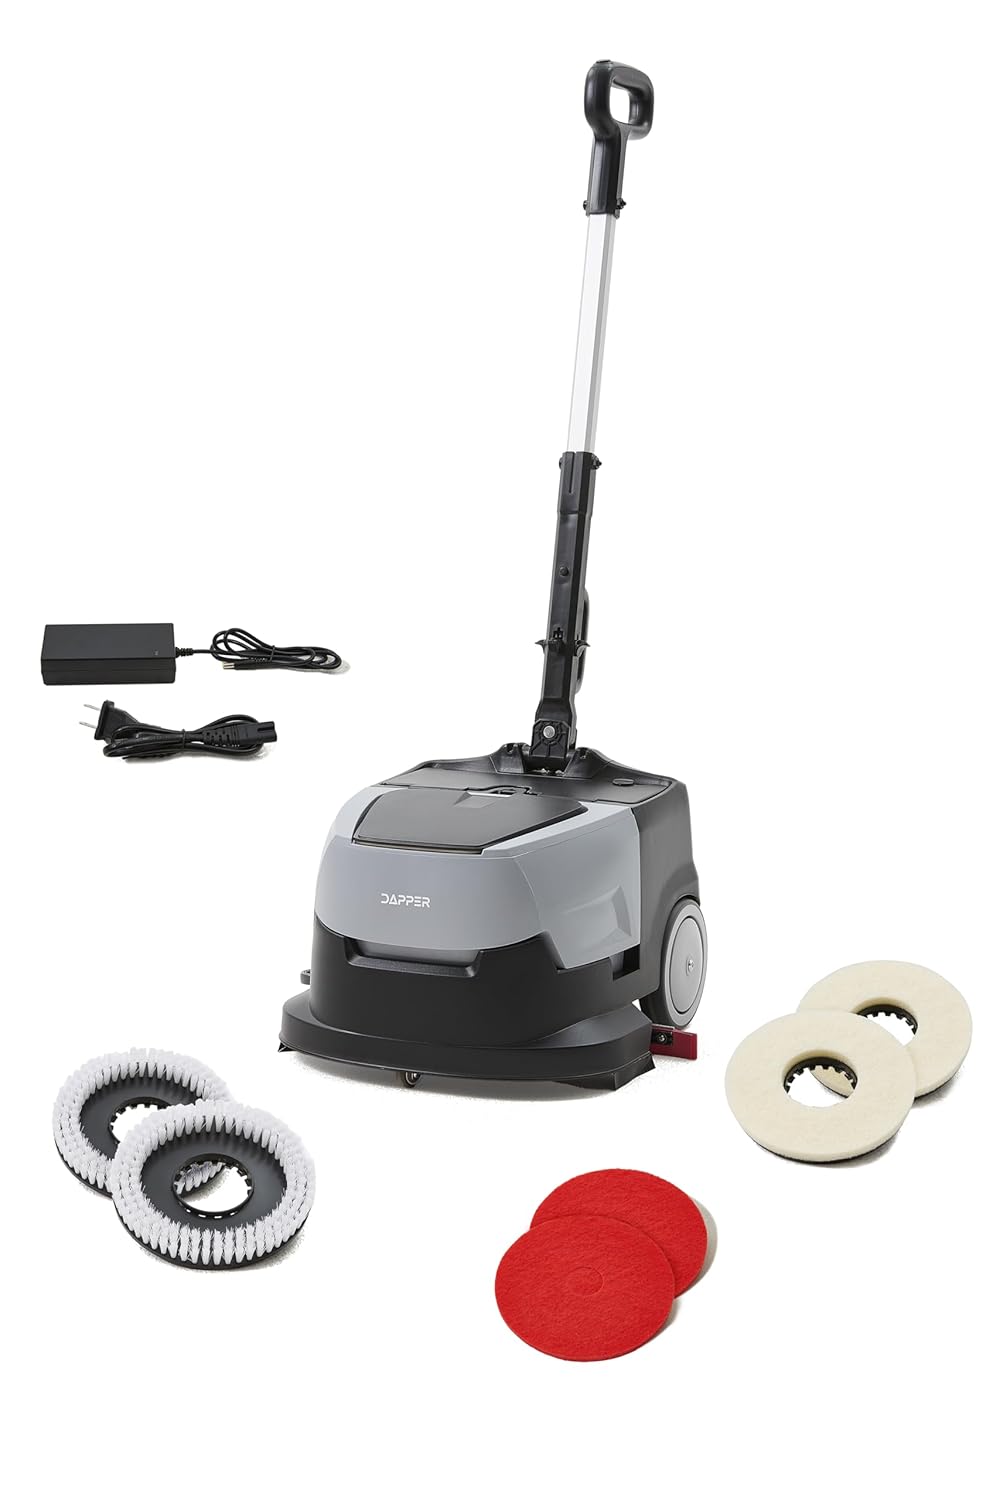
The Dapper Supply Mini Automatic Floor Scrubber comes with the following components:
- Main Scrubber Unit
- Mango axustable
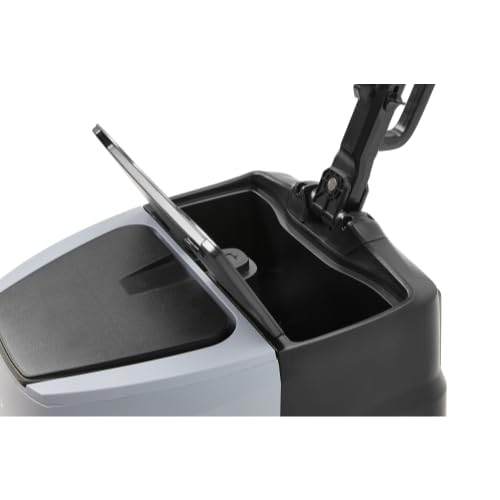
- Solution Tank (1.2-gallon capacity)
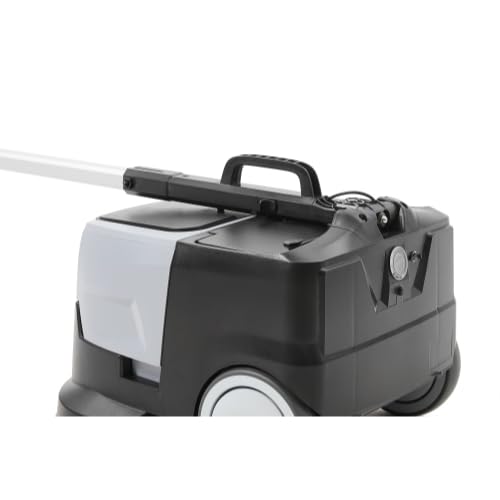
- Recovery Tank (1.5-gallon capacity)
- Cargador e cable de alimentación
- Set of White Scouring Pads (included)
- Scrubbing Brushes (optional/additional purchase)
- Polishing Pads (optional/additional purchase)


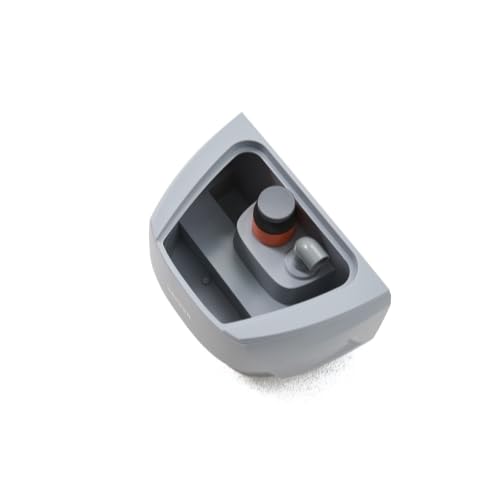


3.2 Características principais
- Compact & Efficient Cleaning: 15-inch cleaning width and 170 RPM brush speed.
- Alta produtividade: Covers up to 12,900 ft² per hour.
- Rendemento de longa duración: Powerful 24V system with up to 90 minutes runtime and 100-minute charge time.
- Tanques dobres: 1.2-gallon solution tank and 1.5-gallon recovery tank for efficient water management.
- Funcionamento silencioso: Operates at just 65 dB, suitable for daytime cleaning.
- Rendemento de secado superior: 17-inch squeegee and 70W suction motor ensure quick water recovery.
- Lightweight & Easy to Maneuver: Weighs 22 lbs, easy to transport and operate in tight spaces.
- Versatile Floor Compatibility: Designed for tile, vinyl, hardwood, laminate, concrete, and other sealed hard floors.
4. Configuración
4.1 Desembalaxe
Carefully remove all components from the packaging. Inspect for any damage during transit. Retain packaging for future storage or transport.
4.2 Asemblea
- Attach the adjustable handle to the main scrubber unit, ensuring it clicks securely into place.
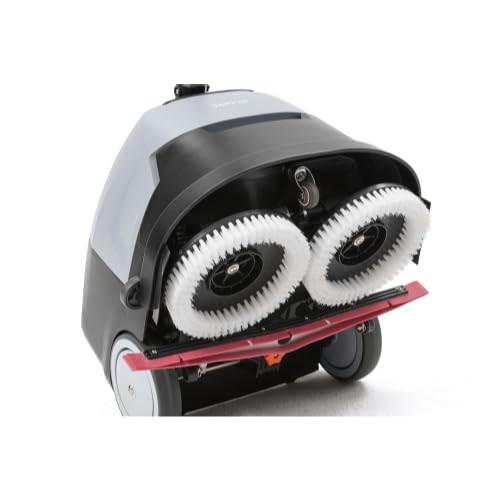
- Open the brush/pad compartment on the underside of the machine.
- Install the desired scrubbing brushes or polishing pads by aligning them with the mounting points and securing them. (Refer to Figure 3.7 for brushes and Figure 3.8 for pads).
- Ensure the recovery tank is properly seated in its compartment. (Refer to Figure 3.3).
4.3 Carga inicial
Before first use, fully charge the machine's battery. The powerful 24V system requires approximately 100 minutes for a full charge.
- Locate the charging port on the machine.
- Connect the charger to the machine and then plug the power cord into a standard electrical outlet.
- O indicador de carga mostrará o estado da carga. Desconéctao unha vez que estea completamente cargado.
Video 4.1: Official product video demonstrating features including charging and operation. This video is provided by Dapper Supply.
5. Instrucións de funcionamento
5.1 Encher o depósito de solución
- Asegúrese de que a máquina estea apagada.
- Open the lid of the solution tank located on the top of the unit. (Refer to Figure 3.4).
- Fill the tank with clean water and an appropriate, low-foaming floor cleaning solution. Do not overfill.
- Securely close the solution tank lid.
5.2 Arranque da máquina
- Asegúrese de que a máquina estea sobre unha superficie plana e estable.
- Press and hold the power button on the handle for approximately 3 seconds until the machine powers on.
- Axuste a manivela a unha altura de funcionamento cómoda.
5.3 Proceso de limpeza
The machine is designed for efficient cleaning of hard floor surfaces.
- Gently push the machine forward to begin scrubbing. The solution will be dispensed, and the brushes/pads will rotate to clean the floor.
- The 17-inch squeegee and 70W suction motor will recover the dirty water into the recovery tank, leaving floors dry and safe to walk on.
- Move the machine in overlapping passes to ensure complete coverage.
- The machine can cover up to 12,900 ft² per hour, making it ideal for small commercial spaces.
5.4 Emptying the Recovery Tank
It is crucial to empty the recovery tank after each use or when it reaches its maximum capacity (1.5 gallons).
- Apague a máquina.
- Remove the recovery tank from the main unit. (Refer to Figure 3.3 and Figure 3.5).
- Carefully pour the dirty water into a suitable drain.
- Rinse the recovery tank with clean water to prevent residue buildup.
- Reinstall the clean recovery tank securely.
6. Mantemento
6.1 Mantemento diario
- After each use, empty and rinse both the solution and recovery tanks thoroughly.
- Clean the squeegee blade to ensure effective water pickup. Inspect for wear and tear.
- Limpe o exterior da máquina cun anuncioamp pano.
6.2 Brush/Pad Replacement
Regularly inspect the scrubbing brushes or polishing pads for wear. Replace them when they show signs of reduced effectiveness.
- Turn off the machine and tilt it back to access the underside.
- Remove the worn brushes/pads by twisting or unlatching them. (Refer to Figure 3.7 and Figure 3.8).
- Install new brushes/pads, ensuring they are securely fastened.
6.3 Almacenamento
When storing the machine for extended periods:
- Ensure both tanks are empty and clean.
- Store the machine in a dry, temperature-controlled environment.
- For optimal battery life, charge the battery fully before storage and recharge every 3-6 months if not in use.
7 Solución de problemas
Consulta a táboa seguinte para ver os problemas comúns e as súas solucións.
| Problema | Causa posible | Solución |
|---|---|---|
| A máquina non se acende. | A batería está baixa ou esgotada. Botón de acendido non premido o tempo suficiente. | Cargue a batería completamente. Manteña premido o botón de acendido durante 3 segundos. |
| Poor water pickup (squeegee not working). | O depósito de recuperación está cheo. Squeegee blade is dirty or worn. Suction motor issue. | Baleirar e limpar o depósito de recuperación. Clean or replace the squeegee blade. Contact customer support if suction motor is faulty. |
| Brushes/Pads not rotating. | Brushes/pads not installed correctly. Obstruction in brush area. | Reinstall brushes/pads securely. Comprobe e elimine os restos. |
| Machine leaves streaks. | Dirty solution tank. Incorrect cleaning solution concentration. Squeegee blade issue. | Clean the solution tank. Adjust solution concentration as per manufacturer's guidelines. Clean or replace squeegee blade. |
8. Especificacións
Technical specifications for the Dapper Supply Mini Automatic Floor Scrubber:
| Característica | Especificación |
|---|---|
| Dimensións do produto | 17 x 17 x 44 polgadas |
| Peso | 22 libras |
| Número de modelo | DP-WPFS1204 |
| Tipo de batería | 1 x batería de 12 V (incluída) |
| Tempo de execución | Ata 90 minutos |
| Tempo de carga | Aproximadamente 100 minutos |
| Ancho de limpeza | 15 polgadas |
| Velocidade do cepillo | 170 RPM |
| Capacidade do tanque de solución | 1.2 litros |
| Capacidade do tanque de recuperación | 1.5 litros |
| Nivel de ruído | 65 dB |
| Ancho da raspadora | 17 polgadas |
| Potencia do motor de succión | 70 W |
| Fabricante | Dapper Supply |
| País de Orixe | China |
9. Garantía e soporte
9.1 Garantía do produto
The Dapper Supply Mini Automatic Floor Scrubber is backed by a full 1-Year Warranty from the date of purchase. This warranty covers defects in materials and workmanship under normal use. Please retain your proof of purchase for warranty claims.
9.2 Atención ao cliente
For technical assistance, troubleshooting not covered in this manual, or warranty inquiries, please contact Dapper Supply customer support:
- Websitio: Visit the Dapper Supply Store on Amazon
- Correo electrónico: support@dappersupply.com (Exampcorreo electrónico)
- Teléfono: 1-800-XXX-XXXX (Ex.ampo número de teléfono)
Ask a question about this manual
Ask about setup, troubleshooting, compatibility, parts, safety, or missing instructions. Manuals+ will review the question and use this page’s manual context to help answer it.