
1. Introdución
Welcome to your new Geevon Small Travel Alarm Clock. This compact and versatile digital alarm clock is designed to provide accurate timekeeping, dual alarms, indoor temperature display, and a convenient backlight function. Its portable design makes it ideal for various settings, including bedrooms, home offices, and travel.

Imaxe 1.1: Acabadoview of the Geevon Small Travel Alarm Clock, highlighting its compact size and key features such as dual alarm, locking function, snooze, backlight, battery power, 12/24 hour display, temperature, and calendar.
2. Configuración
2.1 Instalación da batería
The Geevon Small Travel Alarm Clock requires two (2) AAA batteries for operation. Batteries are not included with the product.
- Localiza o compartimento da batería na parte traseira do reloxo.
- Open the battery cover by sliding it down or lifting the latch.
- Insert two (2) AAA batteries, ensuring correct polarity (+ and - terminals align with the markings inside the compartment).
- Pecha a tapa da batería de forma segura.

Image 2.1: The back of the alarm clock with the battery compartment open, illustrating where to insert the two AAA batteries.
2.2 Configuración inicial da data e da hora
After installing batteries, set the current time and date.
- Manteña premido o SET button (located on the top of the clock) for approximately 3 seconds to enter time setting mode. The hour digit will begin to flash.
- Usa o UP (^) or ABAIXO (v) buttons (on the back) to adjust the hour.
- Prema brevemente SET again to confirm the hour and move to minute setting. Adjust minutes using UP (^) or ABAIXO (v).
- Continue briefly pressing SET to cycle through and set the year, month, and day, adjusting each value with the UP (^) or ABAIXO (v) buttons.
- Preme SET one last time to exit the setting mode and save your changes.
Video 2.1: Demonstration of setting the time and alarm on the Geevon Small Travel Alarm Clock. This video shows the button locations and the step-by-step process for adjusting time, minutes, and alarm settings.
3. Instrucións de funcionamento
Formato 3.1 12/24 horas
To switch between 12-hour (AM/PM) and 24-hour formats:
- No modo de visualización da hora normal, prema brevemente o botón UP (^) button. The display will toggle between the two formats.

Image 3.1: The clock display showing both 12-hour (AM/PM) and 24-hour time formats, illustrating the clear digital readout.
3.2 Visualización da temperatura
The clock displays the indoor temperature. To switch between Celsius (°C) and Fahrenheit (°F):
- No modo de visualización da hora normal, prema brevemente o botón ° C / ° F button (located on the back of the clock).

Image 3.2: The clock display showing the indoor temperature in both Fahrenheit and Celsius, demonstrating the temperature conversion feature.
3.3 Configuración de alarmas (alarma 1 e alarma 2)
The clock features two independent alarms (Alarm 1 and Alarm 2) that can be set for different times or days.
- Para axustar a alarma 1: manteña premida a tecla Alarma 1 button (bell icon) on the back for approximately 3 seconds. The hour digit for Alarm 1 will flash.
- Usa o UP (^) or ABAIXO (v) buttons to adjust the desired alarm hour.
- Prema brevemente Alarma 1 again to confirm the hour and move to minute setting. Adjust minutes using UP (^) or ABAIXO (v).
- Prema brevemente Alarma 1 again to select the alarm repetition mode:
- 1-5: Alarm sounds Monday to Friday.
- 6-7: Alarm sounds Saturday and Sunday.
- 1-7: Alarm sounds every day.
- Prema brevemente Alarma 1 one last time to confirm your settings and exit.
- Repeat the entire process for Alarm 2 using the Alarma 2 botón.
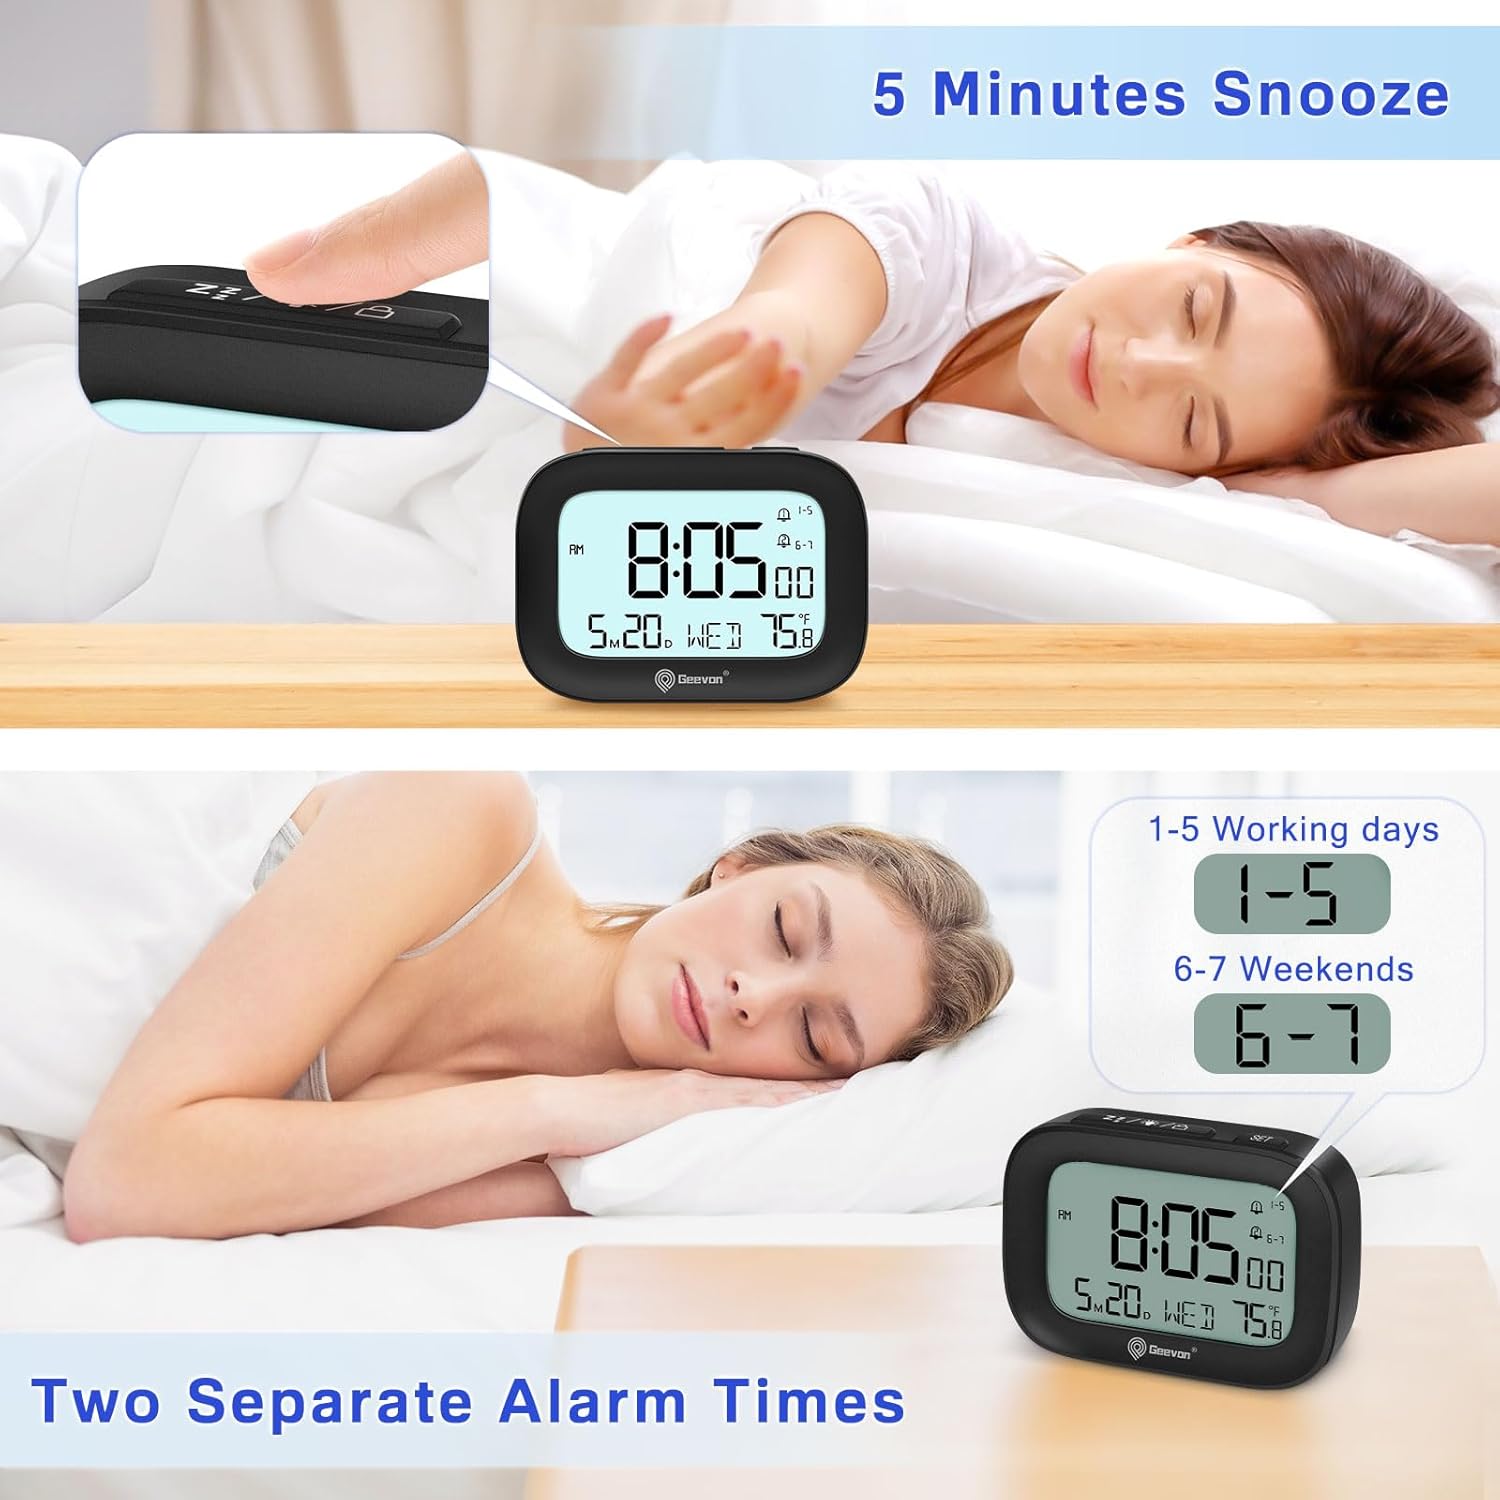
Image 3.3: The clock display illustrating the setup for two separate alarm times, indicating the flexibility for weekday and weekend alarms.
3.4 Activación/desactivación de alarmas
To turn an alarm ON or OFF:
- No modo de visualización da hora normal, prema brevemente o botón Alarma 1 or Alarma 2 botón.
- An alarm icon will appear on the display when the respective alarm is active. The icon will disappear when the alarm is deactivated.
3.5 Función Snooze
Cando soa a alarma:
- Preme o LUZ / SNOOZE button (top of the clock) to activate the snooze function. The alarm will pause for 5 minutes and then sound again.
- The alarm sound is designed to gradually increase in volume over 2 minutes to ensure a gentle waking experience.
3.6 Funcionamento da luz de fondo
To illuminate the display:
- Preme o LUZ / SNOOZE button. The backlight will illuminate for 5 seconds.
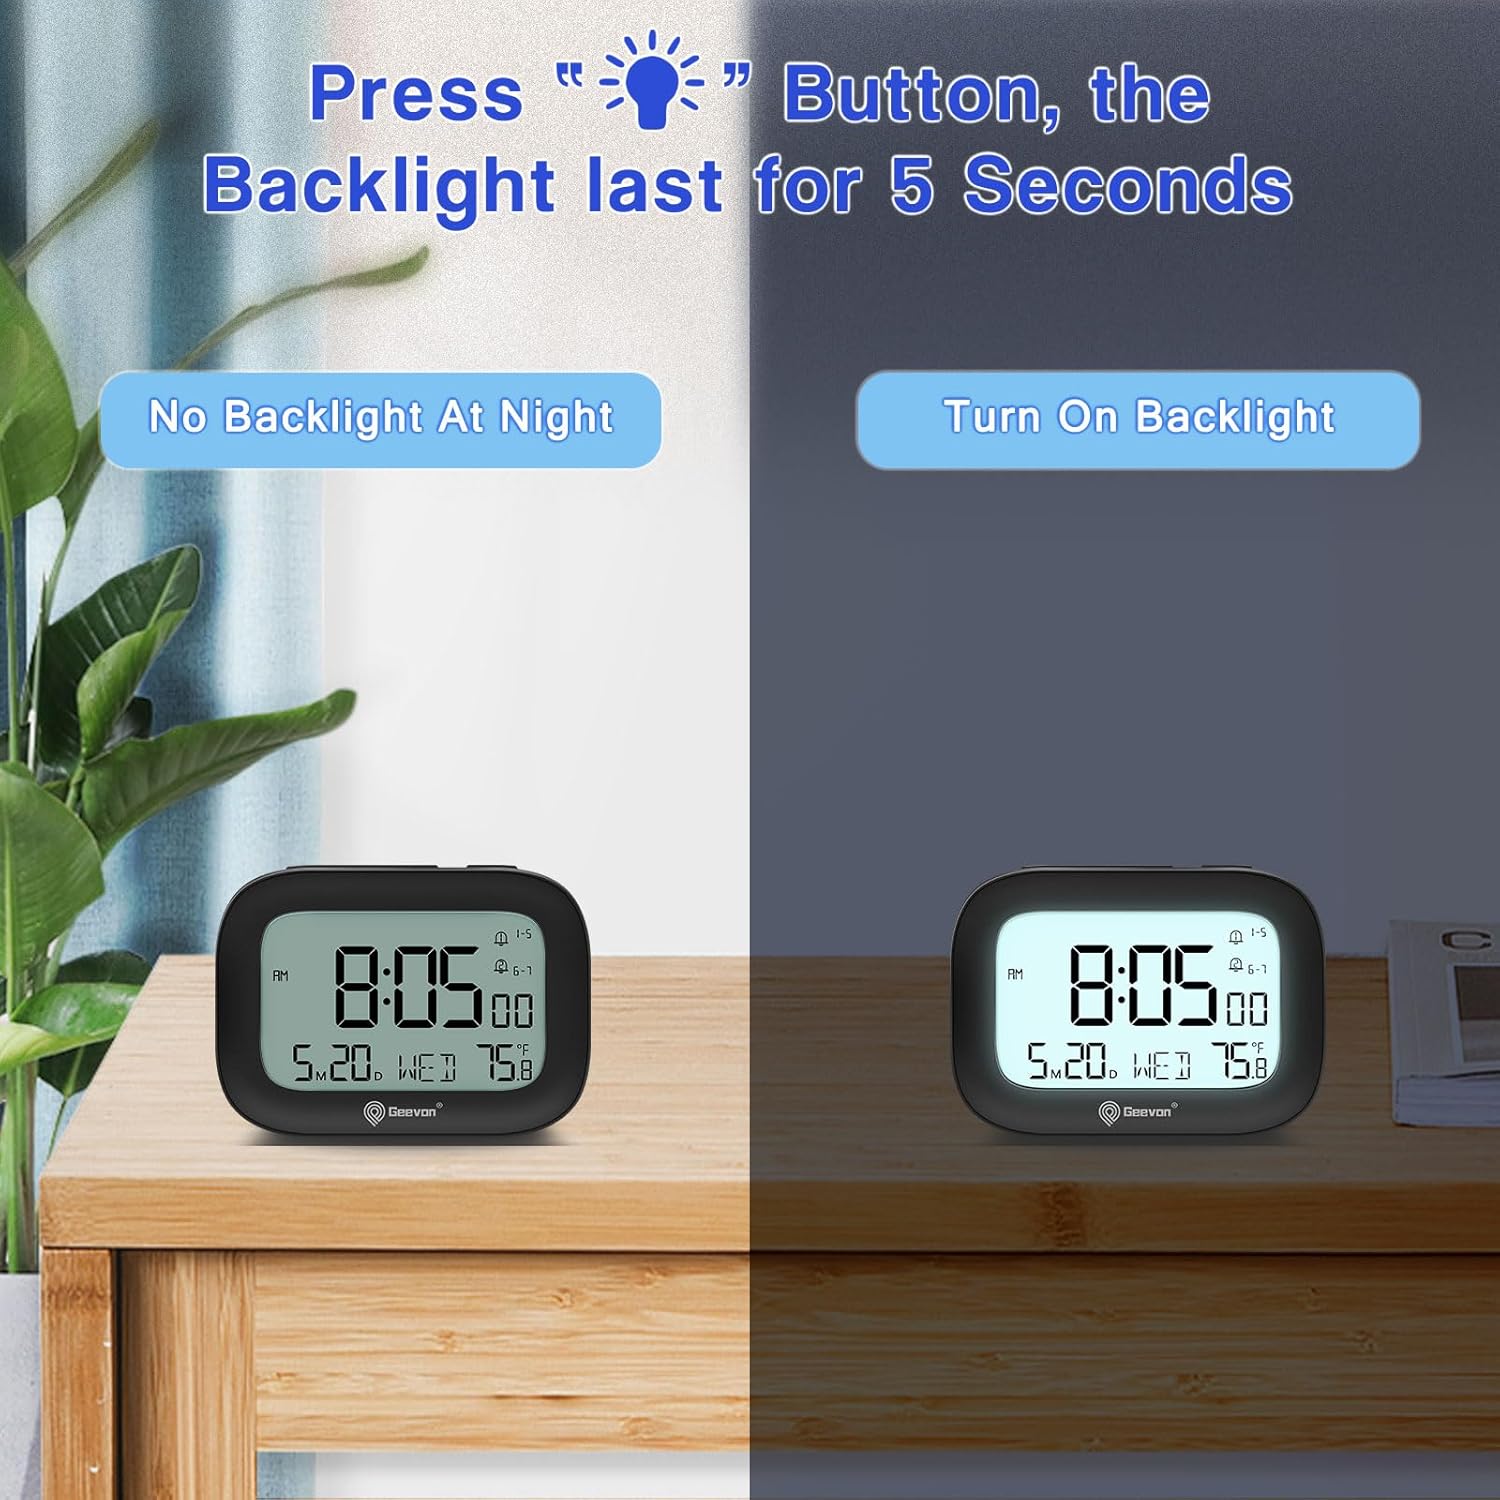
Image 3.4: The clock display with and without the 5-second backlight activated, demonstrating its visibility in low-light conditions.
3.7 Función de bloqueo
To prevent accidental changes to settings or alarms, use the lock function:
- Para bloquear: Prema e manteña prema o botón LIGHT/SNOOZE/LOCK button for approximately 3 seconds until a lock icon appears on the display.
- To unlock: Press and hold the same button for approximately 3 seconds until the lock icon disappears.

Image 3.5: The clock being placed into a bag, illustrating the convenience of the lock function to prevent accidental button presses during travel.
4. Mantemento
4.1 Limpeza
To clean your Geevon Small Travel Alarm Clock:
- Limpa o reloxo cun pano suave e seco.
- Do not use abrasive cleaners, chemical solvents, or spray directly onto the clock, as these may damage the surface or internal components.
4.2 Substitución da batería
Replace batteries when the display dims, becomes erratic, or functions become unreliable.
- Follow the steps in Section 2.1 Battery Installation.
- Always replace both AAA batteries simultaneously to ensure optimal performance.
5 Solución de problemas
| Problema | Causa posible | Solución |
|---|---|---|
| Display is blank or very dim. | As baterías están agotadas ou están mal instaladas. | Comprobe a instalación das pilas e substitúaas por pilas AAA novas. |
| Non soa a alarma. | Alarm is not set or activated; low battery. | Verify the alarm is set correctly and activated (alarm icon visible on display). Replace batteries if low. |
| A hora é incorrecta. | Time was not set properly or batteries were removed. | Restableza a hora e a data seguindo as instrucións da Sección 2.2. |
| Os botóns non responden. | Lock function is active. | Deactivate the lock function by pressing and holding the LIGHT/SNOOZE/LOCK button for 3 seconds. |
6. Especificacións
- Modelo: 250509-B
- Dimensións: 3.5" (W) x 2.36" (H)
- Peso: 0.26 libras
- Fonte de enerxía: 2 pilas AAA (non incluídas)
- Visualización: 3-inch LCD Digital Display
- Características: Dual Alarms, Snooze, 5-second Backlight, Indoor Temperature Display, 12/24 Hour Format, Date, Day of Week, Lock Function, Silent Operation
- Materiais: Acrylonitrile Butadiene Styrene (ABS), LCD, Plastic

Imaxe 6.1: Varias views of the Geevon Small Travel Alarm Clock, including front, top, side, and back, showcasinpolo seu deseño compacto e a disposición dos botóns.
7. Garantía e soporte
7.1 Garantía
This Geevon Small Travel Alarm Clock comes with a 12-month warranty from the date of purchase, covering manufacturing defects and malfunctions under normal use.
7.2 Apoio
For technical assistance, troubleshooting, or warranty claims, please contact Geevon customer support through the retailer's platform where you purchased the product or visit the official Geevon websitio para información de contacto.