
1. Introdución
This manual provides detailed instructions for the safe and effective use of the SEEIRIR KKM198 Digital Multimeter. This device is a versatile tool designed for measuring various electrical parameters, including DC/AC voltage, DC/AC current, resistance, capacitance, and temperature. It features a 4.4-inch touch screen for intuitive operation and includes a VFC (Variable Frequency Control) function for accurate measurements in variable frequency environments.
2. Información de seguridade
Siga sempre as seguintes precaucións de seguridade para evitar lesións persoais ou danos no multímetro:
- Non exceda os valores de entrada máximos especificados para cada rango de medición.
- Ensure test leads are in good condition and properly connected before making any measurements.
- Do not use the multimeter if it appears damaged or if the battery cover is not securely closed.
- Teña extrema precaución ao traballar co voltagpor riba de 30 V CA RMS, 42 V pico ou 60 V CC. Estes voltagsupoñen un perigo de descarga.
- Desconecte sempre a alimentación do circuíto e descargue todas as cargas de alto volumetage capacitors before measuring resistance, capacitance, or continuity.
- Substitúa as pilas canto antes apareza o indicador de pila baixa para garantir lecturas precisas.
3. Produto rematadoview
The SEEIRIR KKM198 Digital Multimeter is equipped with a large touch screen display and intuitive controls for ease of use. Below is an image illustrating the device.
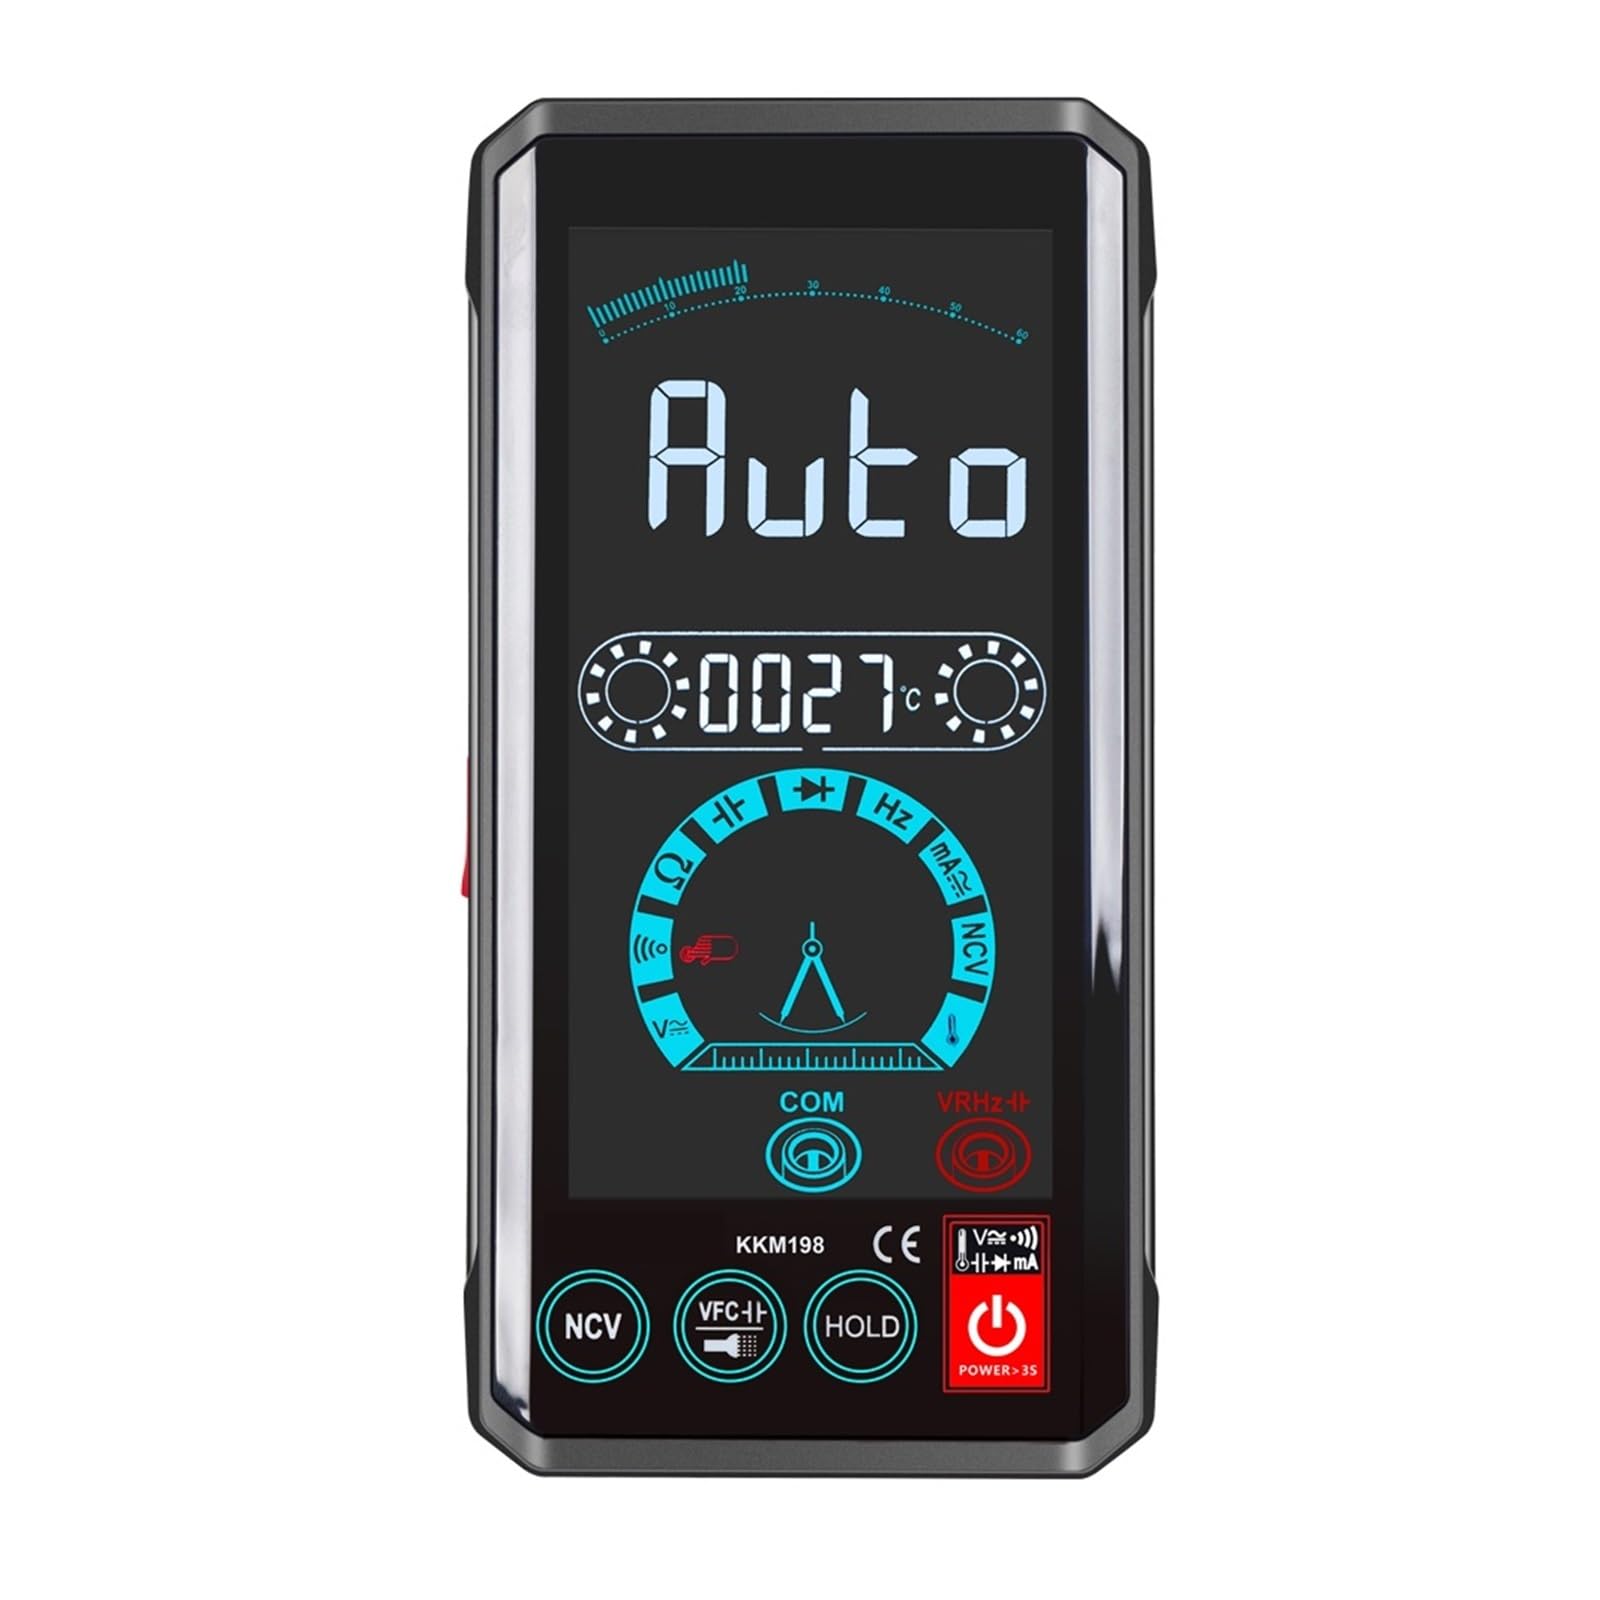
Figura 3.1: Fronte view of the SEEIRIR KKM198 Digital Multimeter, showing its 4.4-inch touch screen interface and connected test leads.
4. Configuración
4.1. Instalación da batería
The KKM198 Multimeter requires batteries for operation. To install or replace batteries:
- Asegúrese de que o multímetro estea apagado e desconecte todos os cables de proba.
- Localiza o compartimento da batería na parte traseira do dispositivo.
- Abra a tapa do compartimento da batería.
- Insert new batteries, observing correct polarity (+ and -).
- Peche ben a tapa do compartimento da batería.
4.2. Conexión dos cables de proba
Connect the test leads to the appropriate input jacks on the multimeter:
- Insira o negro cable de proba no COM conector (común).
- Para a maioría dos volumestage, resistance, capacitance, and temperature measurements, insert the vermello cable de proba no VΩCAPHzTemp jack.
- For current measurements (mA), insert the vermello cable de proba no mA jack.
5. Instrucións de funcionamento
The KKM198 features a touch screen interface for mode selection and function control.
5.1. Acendido/apagado
Press and hold the power button on the device to turn it on or off. The 4.4-inch touch screen will illuminate upon power-on.
5.2. DC/AC Voltage Medición
Para medir voltage:
- Conecte o cable de proba vermello ao VΩCAPHzTemp Jack e o chumbo negro para o COM jack.
- Selecciona o volume de CCtage (VDC) or AC Voltage (VAC) mode on the touch screen.
- Connect the test probes in parallel to the circuit or component being measured.
- Le o voltago valor que aparece na pantalla.
5.3. Medición de corrente DC/AC
Para medir a corrente:
- Importante: Desconecte a alimentación do circuíto antes de conectar o multímetro.
- Conecte o cable de proba vermello ao mA Jack e o chumbo negro para o COM jack.
- Select the DC Current (ADC) or AC Current (AAC) mode on the touch screen.
- Connect the multimeter in serie with the circuit where current is to be measured.
- Aplicar enerxía ao circuíto e ler o valor da corrente.
5.4. Medición da resistencia
Para medir a resistencia:
- Asegúrate de que o circuíto estea desenergizado e de que todos os condensadores estean descargados.
- Conecte o cable de proba vermello ao VΩCAPHzTemp Jack e o chumbo negro para o COM jack.
- Select the Resistance (Ω) mode on the touch screen.
- Conecte as sondas de proba ao compoñente que se vai medir.
- Lea o valor da resistencia.
5.5. Medición de capacitancia
Para medir a capacidade:
- Asegúrese de que o condensador estea completamente descargado antes da medición.
- Conecte o cable de proba vermello ao VΩCAPHzTemp Jack e o chumbo negro para o COM jack.
- Select the Capacitance (CAP) mode on the touch screen.
- Conecte as sondas de proba aos terminais do condensador.
- Lea o valor da capacitancia.
5.6. Medición da temperatura
Para medir a temperatura:
- Conecte o cable de proba vermello ao VΩCAPHzTemp Jack e o chumbo negro para o COM jack.
- Select the Temperature (Temp) mode on the touch screen.
- Place the temperature probe (if included and connected) at the desired measurement point.
- Lea o valor da temperatura.
5.7. VFC Function
The VFC (Variable Frequency Control) function is designed for accurate voltage and frequency measurements in circuits with variable frequency drives or other non-sinusoidal waveforms. Activate this mode via the touch screen when measuring such signals.
6. Mantemento
6.1. Limpeza
Para limpar o multímetro, limpe a carcasa con sprayamp cloth and a mild detergent. Do not use abrasives or solvents. Ensure the device is powered off and disconnected from all circuits before cleaning.
6.2. Almacenamento
Cando non o use durante períodos prolongados, retire as pilas para evitar fugas. Garde o multímetro nun lugar fresco e seco, lonxe da luz solar directa e de temperaturas extremas.
6.3. Substitución da batería
Replace the batteries as described in Section 4.1 when the low battery indicator appears on the display. Using a multimeter with low batteries can lead to inaccurate readings.
7 Solución de problemas
If you encounter issues with your KKM198 Digital Multimeter, refer to the following common problems and solutions:
- Sen visualización: Comprobe a instalación das baterías e asegúrese de que non estean esgotadas.
- Lecturas inexactas: Verify correct mode selection, proper test lead connection, and ensure batteries are not low. Calibrate if necessary (refer to service information).
- No Response from Touch Screen: Power cycle the device. If the issue persists, contact support.
- "OL" ou Indicación de sobrecarga: The measured value exceeds the selected range. Switch to a higher range or verify the circuit conditions.
8. Especificacións
| Parámetro | Valor |
|---|---|
| Número de modelo | KKM198 |
| Tipo de visualización | Pantalla dixital |
| Tamaño da pantalla | 4.4 polgadas |
| Tipo de botón | Botón táctil |
| Samptaxa de ling | Aproximadamente 3 veces por segundo |
| DC Voltage Alcance | 6 V / 60 V / 600 V / 1000 V |
| Vol. ACtage Alcance | 2V / 20V / 200V / 750mV |
| Intervalo de corrente continua | 600 mA ± (1.2 %+10) |
| Rango de corrente alterna | 600 mA ± (1.2 %+10) |
| Rango de resistencia | 600Ω/6kΩ/60kΩ/600kΩ/6MΩ/60MΩ |
| Rango de capacitancias | 10nF / 100nF / 1uF / 10uF / 100uF / 1mF / 10mF / 60mF |
| Temperatura de funcionamento | 0 - 40 °C |
| Dimensións | 14 x 7 x 2.2 cm |
| Peso do elemento | Aproximadamente 10.6 onzas (300 gramos) |
| Medición de inductancia | Non é compatible |
9. Garantía e soporte
The SEEIRIR KKM198 Digital Multimeter is designed for reliability and performance. For warranty information, please refer to the product packaging or the retailer's terms of sale. If you require technical assistance or have questions not covered in this manual, please contact your point of purchase or the manufacturer's customer support for further guidance.