
1. Introdución
This manual provides essential information for the safe and efficient operation, installation, and maintenance of your Treeligo Rooftop Air Conditioner. Please read this manual thoroughly before installation and use, and keep it for future reference.
2. Produto rematadoview & Características
The Treeligo Rooftop Air Conditioner is designed to provide efficient cooling and heating for various recreational vehicles. Its robust construction and advanced features ensure comfort and reliability on your travels.
- Efficient Cooling & Heating Performance: Delivers 9500 BTU of cooling power and heating function, maintaining ideal temperatures. Designed for energy efficiency to reduce power consumption.
- Weatherproof ABS Construction: The outer shell is crafted from high-strength ABS engineering plastics, offering exceptional UV and impact resistance against harsh weather conditions.
- Rendemento estable: Compatible with 12V DC AC systems, ensuring smooth operation with on-board generators or camping power supplies. Supports concurrent operation of multiple devices.
- Funcionamento ultrasilencioso: Features brushless compressors for ultra-quiet performance, ensuring a comfortable and peaceful environment.


3. Especificacións
| Especificación | Valor |
|---|---|
| Nome da marca | Treeligo |
| Información do modelo | Tree-EAC002.18.12.HC |
| Peso do elemento | 70 libras |
| Dimensións do produto | 7 x 28 x 26 polgadas |
| Eficiencia | Alta Eficiencia |
| Capacidade | 70 libras |
| Consumo Enerxético Anual | 10 quilovatios hora ao ano |
| Nivel de ruído | 65 decibeis |
| Tipo de instalación | Azotea |
| Factor de forma | Azotea |
| Características especiais | Fast Cooling, Panel Control, Remote Controlled |
| Cor | Branco |
| Voltage | 12 voltios |
| Wattage | 1000 vatios |
| Tipo de material | ABS |
4. Que hai na caixa
The package includes all necessary components for installation and operation:
- Main Body (Outdoor Unit)
- Panel de moldura interior
- Control remoto
- Varillas de tracción
- Screw Bag (Mounting accessories kit)
- Tira de esponxa
- Tubo de drenaxe
- Manual de instrucións

5. Guía de instalación
Unha instalación axeitada é fundamental para un rendemento e unha seguridade óptimos. Siga estes pasos atentamente.
5.1. Preparación
- Escolla o lugar de instalación: The A/C unit installs at the skylight. Ensure the minimum roof size is 12.59" (L) x 9.45" (W). Suitable for standard roofs.
- Cut Skylight Opening: Create a skylight opening suitable for the size of the skylight, typically >320 x 240mm.
- Bordes limpos: Clean the edges of the skylight opening thoroughly.
- Apply Sponge Rubber Strip: Paste the sponge rubber strip around the opening. After pasting, apply sealant to the inner and outer rings of the sponge rubber strip for a watertight seal.
5.2. Mounting the Outdoor Unit
- Posicionar a unidade: Place the roof-mounted air conditioner on the car roof. Adjust its position to make it stably and snugly fit against the rubber strip.
- Secure with Pull Rods: According to the size of the vehicle's sunroof, fix the pull rod horizontally or vertically on the roof to make it secure. Tighten the mounting screws by hand initially, then with a wrench.
- Install Drain Pipes: Remove the air conditioner cover and install drain pipes at the drainage holes on both sides of the air conditioner.
- Install Air Conditioner Casing: Carefully install the air conditioner casing back onto the unit.
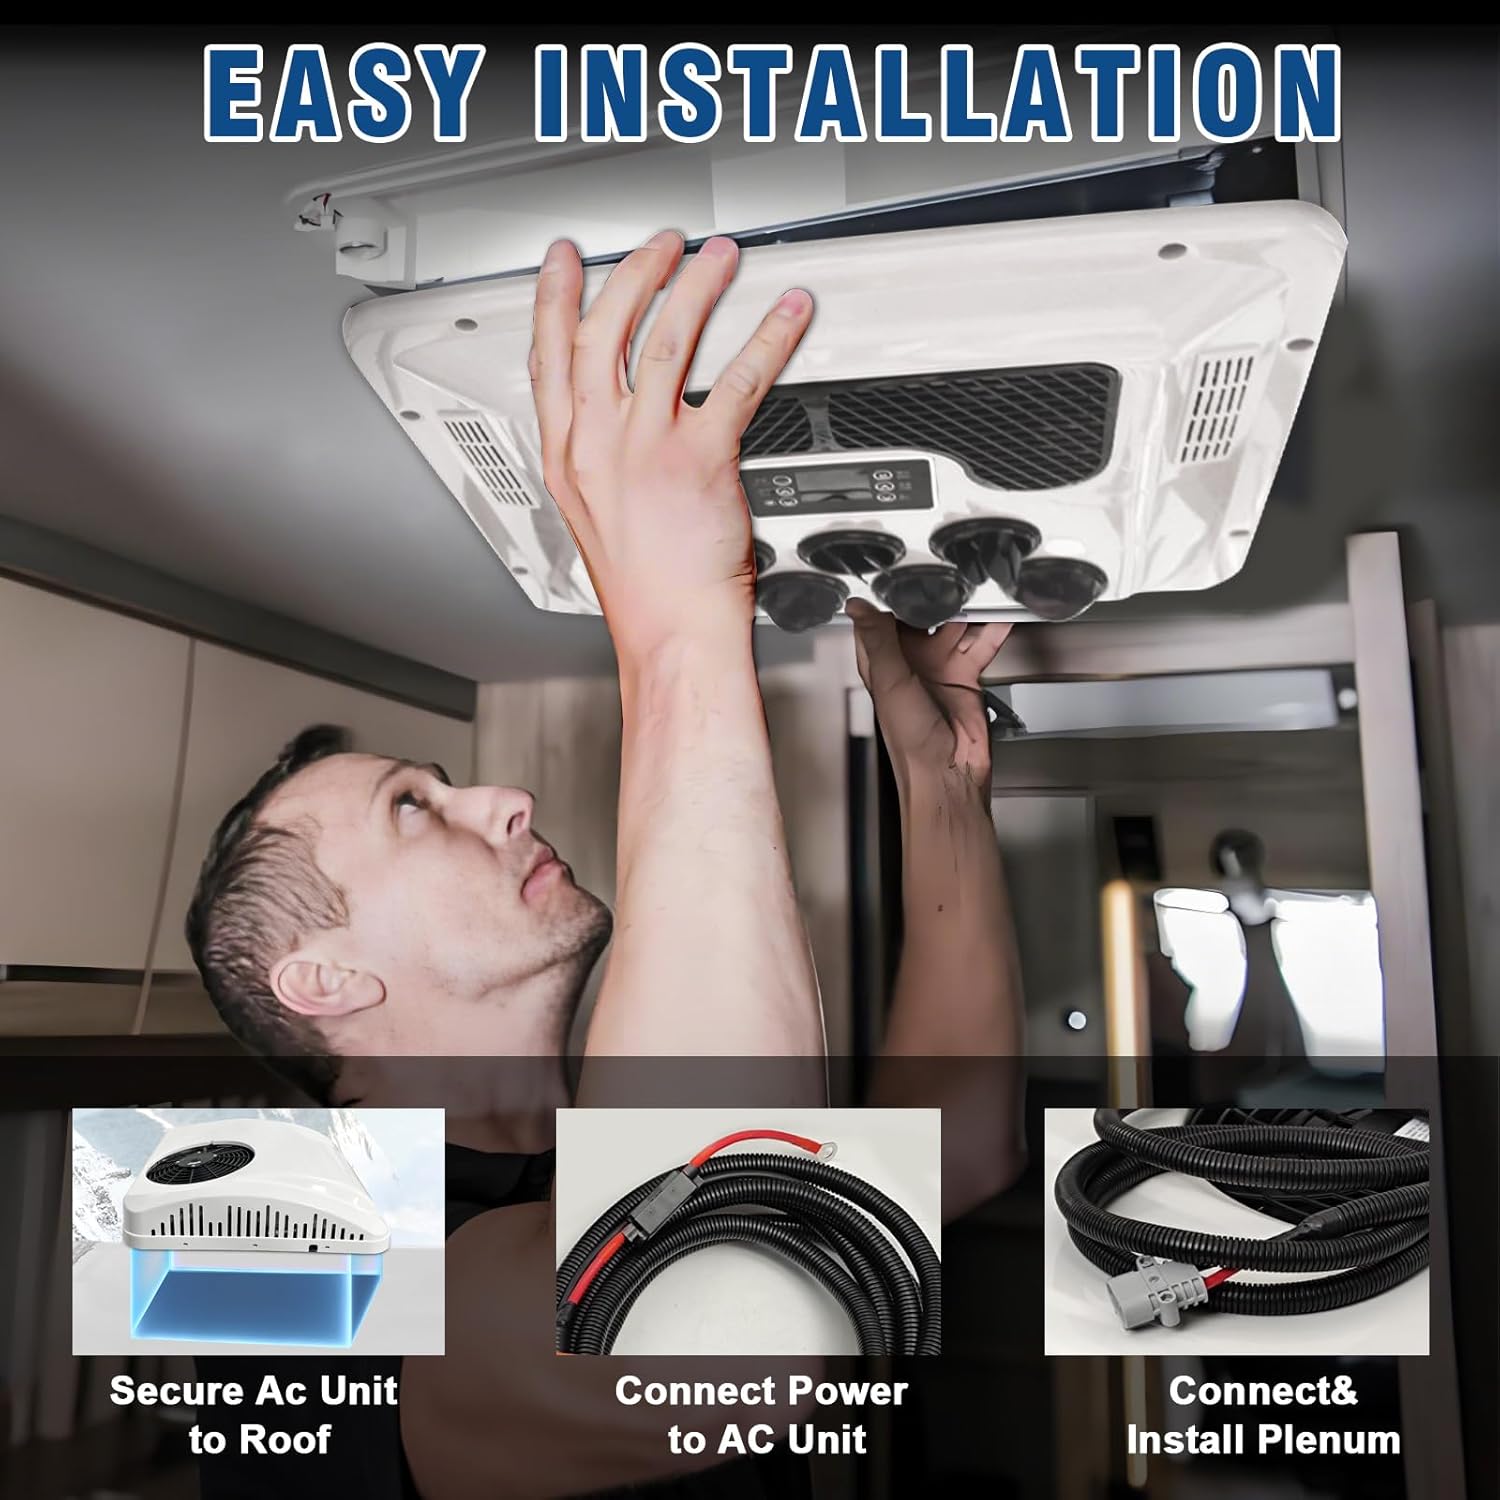
5.3. Wiring and Interior Panel Installation
- Connect Control Panel Wires: The wires of the control panel are connected to the wires of the air conditioner main unit in a one-to-one correspondence.
- Install Interior Trim Panel: Install the air conditioner interior trim panel, ensuring all connections are secure.
- Install Air Intake Filter: Install the air intake filter and cover the bolt holes with bolt decorative caps.
- Conectar fonte de alimentación: Connect the power supply for testing.
6. Instrucións de funcionamento
Your Treeligo RV Air Conditioner can be operated via the integrated control panel or the included remote control.
6.1. Panel de control
The control panel features buttons for power, fan speed, mode selection (cooling/heating), and temperature adjustment. The digital display shows the current temperature and settings.
6.2. Control remoto
The remote control provides convenient access to all functions from a distance, including power, fan speed, mode, and temperature settings.

7. Mantemento
Un mantemento regular garante a lonxevidade e a eficiencia do seu aire acondicionado.
- Filtros de aire limpos: Periodically clean or replace the air filters to maintain optimal airflow and cooling efficiency.
- Inspect Drainage: Ensure the drain pipes are clear of obstructions to prevent water buildup.
- Comproba as conexións eléctricas: Regularly inspect all electrical connections for tightness and signs of wear.
- Exterior limpo: Keep the exterior unit clean from debris, leaves, and dirt to ensure proper heat exchange.
8 Solución de problemas
If you encounter issues with your air conditioner, refer to the following common troubleshooting tips:
- A unidade non se acende: Check the power supply and all electrical connections. Ensure the battery is adequately charged.
- Refrixeración/calefacción insuficiente: Verify that the air filters are clean and not obstructed. Check the temperature settings and ensure the correct mode is selected.
- Ruído inusual: Inspect the unit for any loose parts or debris that might be causing the noise.
- Fuga de auga: Check the drain pipes for blockages or improper installation.
Para problemas persistentes, póñase en contacto co servizo de atención ao cliente.
9. Garantía e soporte
Your Treeligo Rooftop Air Conditioner comes with a manufacturer's warranty. Please refer to the warranty card included in your package for specific terms and conditions.
For technical support, warranty claims, or spare parts, please contact Treeligo customer service through their official channels or the retailer where you purchased the product.
Soporte en liña: Visita o Treeligo Store on Amazon para preguntas frecuentes e recursos adicionais.