
ClokoWe HY300PRO+
CLOKOWE Mini Projector User Manual
Model: HY300PRO+
Introdución
This manual provides detailed instructions for the safe and efficient operation of your CLOKOWE Mini Projector. Please read this manual thoroughly before using the product and retain it for future reference. The CLOKOWE Mini Projector is a portable device designed for versatile projection, featuring built-in streaming apps, Wi-Fi 6, Bluetooth 5.2, 180° rotation, and automatic keystone correction.

Image: The CLOKOWE Mini Projector, a compact white cylindrical device with a lens, shown projecting content onto a curved screen displaying various streaming app logos and a movie scene.
O que hai na caixa
Comprobe que todos os elementos estean presentes ao desembalar:
- CLOKOWE Mini Projector (Model: HY300PRO+)
- Cable de alimentación
- Cable HDMI
- Control remoto
- Manual de usuario (este documento)
Características do produto
The CLOKOWE Mini Projector offers a range of features for enhanced viewing experiences:
- Aplicacións de streaming integradas: Access platforms like YouTube, Disney+, and more directly via Wi-Fi.
- Conectividade versátil: Supports wireless mirroring (iPhone, Android, tablet, laptop) and wired connections (HDMI, USB).
- 180° Rotatable Projection: The projector body can rotate 180° for flexible projection angles, including ceiling projection.
- Corrección trapezoidal automática: Ensures aligned visuals automatically.
- Enfoque manual: Allows for fine-tuning image clarity.
- Wi-Fi 6 & Bluetooth 5.2: Provides fast, stable wireless streaming and audio pairing with external speakers.
- Deseño ultraportátil: Compact size (3.73 × 3.73 × 6.17 inches) and lightweight (0.77 lb).
- High Clarity Display: 8000 Lux brightness, supports 1080P display, with a 0.9:1 short throw ratio.
- Fondos de pantalla personalizables: Upload personal background images via USB.
- Temporizador de apagado automático: Set a timer for controlled usage.

Image: A visual representation of the projector's built-in app store, showing various streaming service icons like Netflix, YouTube, Spotify, and Prime Video on a projected screen.

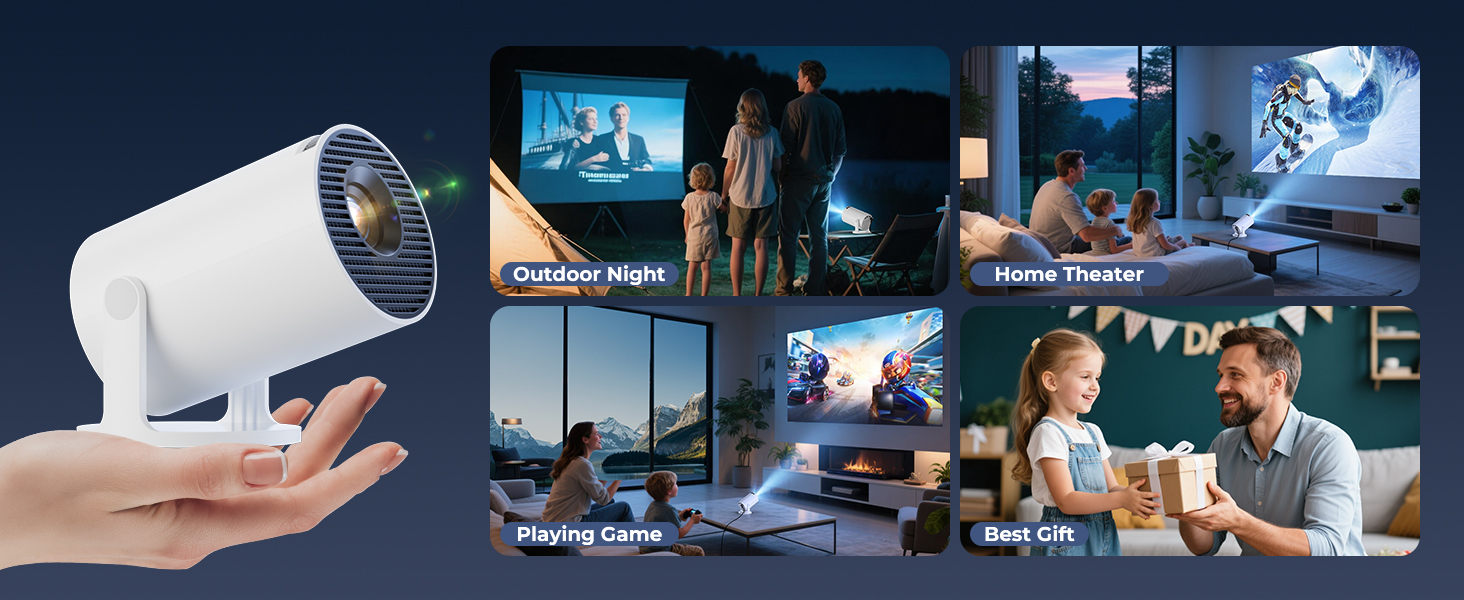
Image: A family watching a movie projected onto the ceiling of a bedroom, demonstrating the 180° rotation feature for ceiling projection.
Guía de configuración
1. Colocación inicial e potencia
- Coloque o proxector sobre unha superficie estable e plana.
- Conecte o cable de alimentación ao proxector e despois a unha toma de corrente.
- Prema o botón de acendido do proxector ou do mando a distancia para acendelo.
2. Adjusting Projection Angle (180° Rotation)
The projector features a 180° rotatable body, allowing projection onto walls, screens, or ceilings without needing a tripod.
- Gently rotate the projector body to achieve the desired projection angle.
- Ensure the lens is facing the intended projection surface.
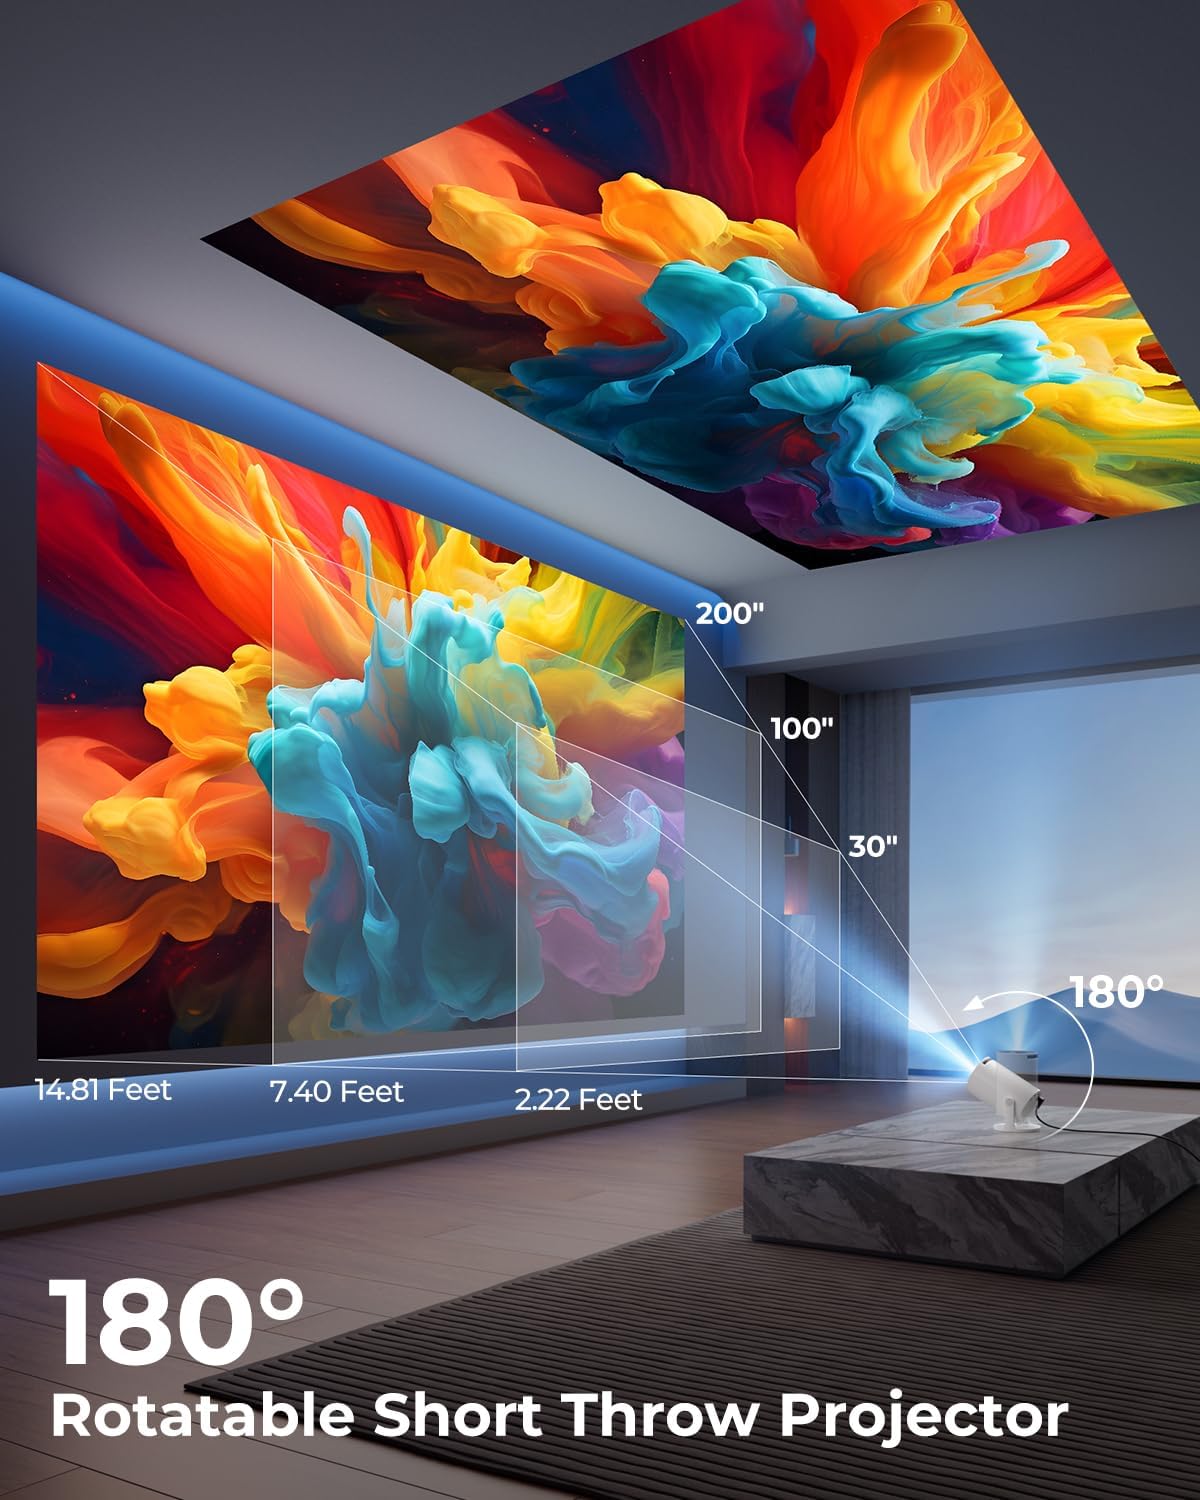
Image: A diagram illustrating the 180° rotation capability of the projector and various projection distances (30", 100", 200") with corresponding throw distances in feet.
3. Enfoque e corrección Keystone
- Corrección trapezoidal automática: The projector will automatically adjust the image to be rectangular. If further adjustment is needed, navigate to the settings menu.
- Enfoque manual: Rotate the focus ring around the lens until the image appears sharp and clear.

Image: A projected image on a wall demonstrating automatic keystone correction and manual focus adjustments, with icons for ±45° Auto Keystone, Manual Focus, and 50%-100% Zoom.
4. Conexión de rede e Bluetooth
- Conexión Wi-Fi:
- Vaia ao menú "Configuración" do proxector.
- Select "Network" or "Wi-Fi Settings".
- Choose your Wi-Fi network from the list and enter the password. The projector supports Wi-Fi 6 (2.4G and 5G).
- Conexión Bluetooth:
- Vaia a "Configuración" e seleccione "Bluetooth".
- Activa o Bluetooth e busca os dispositivos dispoñibles.
- Selecciona o teu altofalante ou auriculares Bluetooth da lista para emparellalos.

Image: A projected image showing Wi-Fi 6 and Bluetooth 5.2 connectivity, with a smartphone mirroring content to the projector and a soundbar connected via Bluetooth.
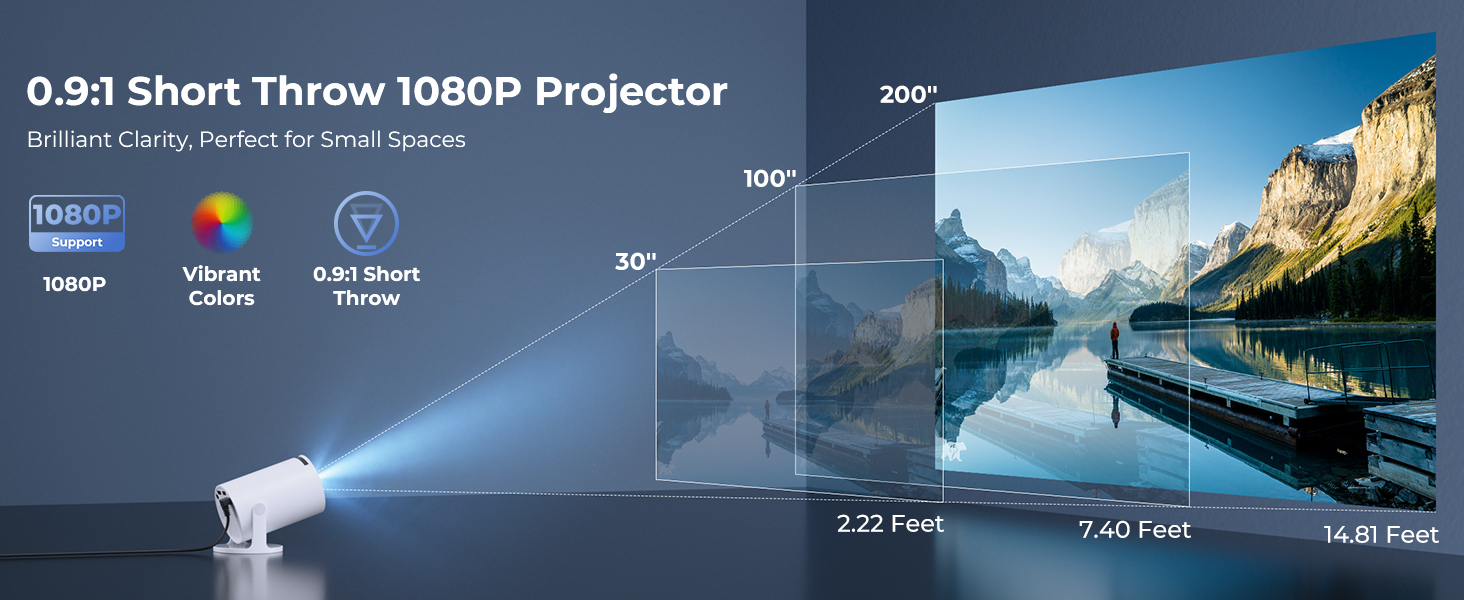
Image: A visual demonstrating Bluetooth 5.2 audio connection, showing the projector wirelessly paired with headphones and a portable speaker.
Instrucións de funcionamento
1. Navegación pola interface
- Use the provided remote control to navigate through menus and select options.
- Basic navigation buttons are also available on the projector unit.
2. Uso de aplicacións integradas
- Once connected to Wi-Fi, access the main interface to find pre-installed streaming applications.
- Select an app (e.g., YouTube, Disney+) and log in with your credentials to start streaming.
3. Espello da pantalla
The projector supports wireless mirroring from compatible smartphones, tablets, and laptops.
- Asegúrate de que o dispositivo e o proxector estean conectados á mesma rede Wi-Fi.
- Seleccione a opción "Duplicación de pantalla" ou "Pantalla sen fíos" no menú do proxector.
- On your mobile device, activate its screen mirroring feature (e.g., AirPlay for iOS, Smart View for Android) and select the projector from the list of available devices.
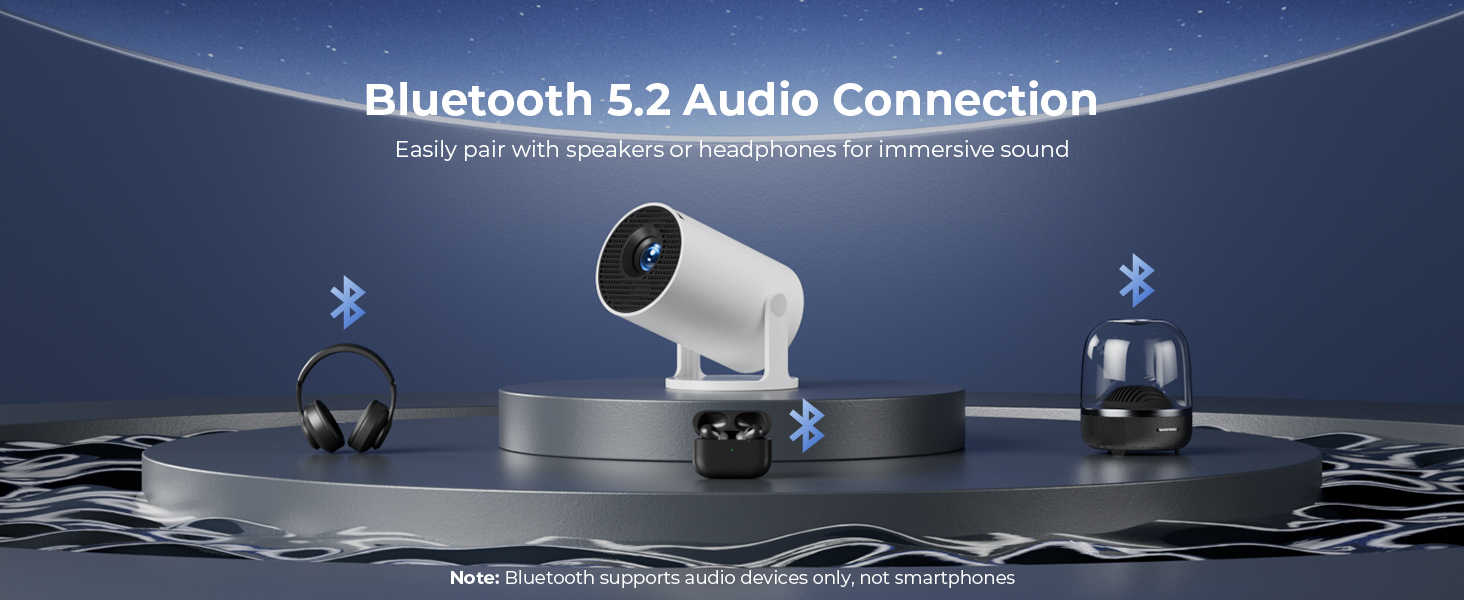
Image: A diagram illustrating Dual-Band Wi-Fi 6 connection for faster, smoother screen mirroring from various devices like smartphones, tablets, and laptops to the projector.
4. Wired Connections (HDMI/USB)
- Connect devices like game consoles, TV sticks, or computers using the HDMI port.
- Use the USB port to play media files directly from a USB drive or to upload custom wallpapers.
- To select the input source, press the "Source" button on the remote control and choose HDMI or USB.
Imaxe: Primeiro plano view of the projector's rear panel, highlighting the HDMI, USB, and power ports, along with an ON/OFF switch and manual focus ring.
5. Custom Wallpapers and Timer
- Custom Wallpapers: Insert a USB drive containing your desired background images. Navigate to the settings to select and apply them.
- Temporizador de apagado automático: Access the system settings to set a timer for the projector to automatically power off after a specified duration.
Mantemento
- Limpeza da lente: Usa un pano suave e sen fiapos deseñado especificamente para lentes ópticas. Non empregues produtos de limpeza abrasivos nin disolventes.
- Limpeza do exterior: Wipe the projector's exterior with a soft, dry cloth. For stubborn marks, lightly dampen o pano con auga.
- Ventilación: Asegúrate de que as aberturas de ventilación do proxector non estean bloqueadas para evitar o sobrequecemento.
- Almacenamento: Cando non o use durante períodos prolongados, garde o proxector nun lugar fresco e seco, lonxe da luz solar directa e de temperaturas extremas.
Resolución de problemas
| Problema | Causa posible | Solución |
|---|---|---|
| Sen imaxe ou imaxe borrosa | Incorrect focus; lens cap on; input source not selected; projector too far/close. | Adjust manual focus; remove lens cap; select correct input source; adjust projection distance. |
| Image is trapezoidal or distorted | Proxector non perpendicular á pantalla. | Utilize automatic keystone correction or manually adjust in settings. Ensure projector is on a level surface. |
| Sen son nin baixo volume | Volume too low; external audio device not connected/paired; projector's internal speaker off. | Increase volume on projector/source device; ensure Bluetooth speaker is paired; check audio settings. |
| O control remoto non responde | Batteries low/dead; obstruction between remote and projector; remote sensor blocked. | Replace batteries; ensure clear line of sight to projector's IR sensor. |
| Problemas de conexión wifi | Incorrect password; out of range; network interference. | Re-enter password; move projector closer to router; restart router and projector. |
Especificacións
| Característica | Detalle |
|---|---|
| Número de modelo | HY300PRO+ |
| Marca | ClokoWe |
| Dimensións do produto | 3.73 x 6.17 x 3.73 polgadas |
| Peso do elemento | 1.61 libras (0.73 kg) |
| Resolución de visualización | 1280 x 720 (Supports 1080P) |
| Brillo | 8000 lux |
| Tecnoloxía de conectividade | Bluetooth 5.2, HDMI, USB, Wi-Fi 6 (2.4G & 5G) |
| Características especiais | Built-in Apps, Digital Keystone Correction, Short Throw (0.9:1), 50%-100% Zoom, 180° Rotatable Projection, Mini Portable Design |
| Usos recomendados | Home Cinema, Gaming, Business, Education |
Garantía e Soporte
The CLOKOWE Mini Projector includes 2-years factory support. For technical assistance, troubleshooting, or warranty claims, please contact ClokoWe customer support through the retailer where the product was purchased or visit the official ClokoWe websitio para información de contacto.
Garde o comprobante de compra para validar a garantía.
Ask a question about this manual
Ask about setup, troubleshooting, compatibility, parts, safety, or missing instructions. Manuals+ will review the question and use this page’s manual context to help answer it.