
1. Introdución
This manual provides comprehensive instructions for the installation, operation, and maintenance of your UNITOPSCI 10.1-inch Android Car Stereo. This unit is specifically designed for Honda Accord 9th Generation 2.0L models manufactured between 2013 and 2017. Please read this manual thoroughly before using the product to ensure proper functionality and safety.
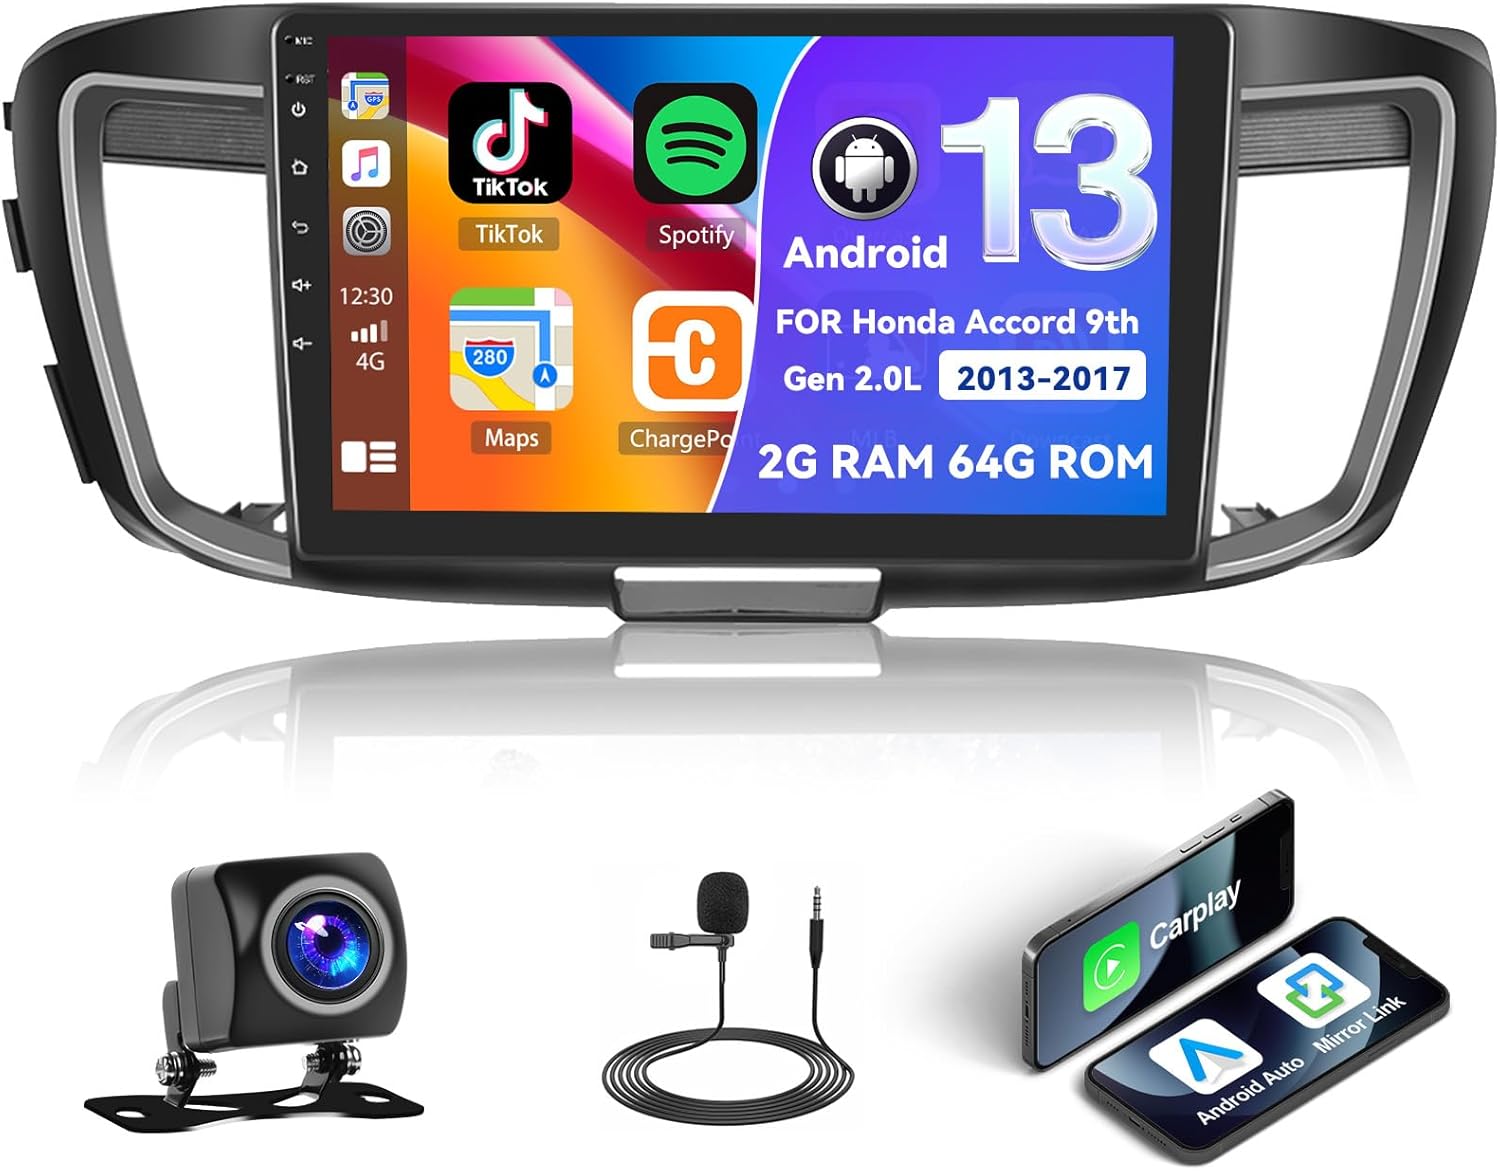
Figure 1.1: UNITOPSCI Android Car Stereo with backup camera, microphone, and smartphone mirroring icons.
2. Información de seguridade
- Do not operate the system in a way that distracts you from driving safely. Always prioritize road safety.
- Asegúrese de que todo o cableado estea conectado correctamente para evitar curtocircuítos ou danos.
- Evite expoñer a unidade a temperaturas extremas, á luz solar directa durante períodos prolongados ou a humidade excesiva.
- Recoméndase unha instalación profesional para garantir o cableado e o funcionamento correctos.
- Manteña o volume a un nivel que lle permita escoitar os sons do tráfico externo.
3. Produto rematadoview
3.1 Características principais
- 10.1-inch Touchscreen Display (1024*600 resolution)
- Android Operating System (2GB RAM + 64GB ROM)
- Wireless/Wired Apple CarPlay and Android Auto
- Dual Mirror Link for Android/iOS phones
- Built-in GPS Navigation with offline map support (HERE WE GO preloaded)
- Conectividade WiFi
- Bluetooth with A2DP/Hands-Free/Phone Book functions
- FM/RDS Radio with 18 preset stations
- Backup Camera Input with automatic display switching
- Steering Wheel Control (SWC) support
- Funcionalidade de pantalla dividida
- Built-in Equalizer System
- Multiple UI Themes (26 options)
3.2 Contido do paquete
- UNITOPSCI Android Car Stereo Unit
- Arneses de cableado
- Antena GPS
- USB Cables (Double USB interface)
- Micrófono externo
- Cámara de respaldo
- Manual de usuario (este documento)
4. Configuración e instalación
4.1 Comprobación de compatibilidade
This car stereo is compatible with Honda Accord 9th Generation 2.0L models from 2013 to 2017 (basic version). It is not compatible with high-end versions that include a large OEM screen or navigation system. Please verify your vehicle's center console and compare it with the provided installation frame images to ensure compatibility.

Figure 4.1: Dashboard compatibility for Honda Accord 9th Gen (2013-2017) 2.0L low-end version. Note: Not suitable for models with existing OEM Navi Screen.
4.2 Pasos da instalación
- Preparación: Disconnect the vehicle's battery to prevent electrical damage.
- Remove OEM Unit: Retire con coidado a radio do coche e o revestimento do taboleiro. Consulte o manual de servizo do seu vehículo para obter instrucións específicas.
- Conectar cableado: Connect the provided wiring harness to the car stereo and the vehicle's existing wiring. Ensure all connections are secure. Connect the GPS antenna, external microphone, and backup camera cables.
- Funcionalidade de proba: Before fully reassembling the dashboard, temporarily connect the battery and power on the unit to test basic functions like power, audio, and display.
- Unidade segura: Mount the new car stereo into the dashboard opening and secure it with screws.
- Remontar: Volva instalar todas as pezas de revestimento do taboleiro.
- Conexión final: Volva conectar a batería do vehículo.
Nota: If your vehicle has an OEM Radio with a Center Navi Screen, additional wiring kits may be required. Contact customer support for assistance.
5. Instrucións de funcionamento
5.1 Encendido/apagado
The unit will typically power on automatically when the vehicle's ignition is turned on. To manually power off or restart, press and hold the power button on the unit or use the software controls.
5.2 CarPlay sen fíos e Android Auto
This unit supports both wireless and wired Apple CarPlay and Android Auto. Connect your smartphone via Bluetooth/WiFi for wireless functionality or use a USB cable for a wired connection. Once connected, you can access phone calls, navigation, music, and other compatible apps directly from the stereo's touchscreen.

Figure 5.1: Wireless CarPlay, Android Auto, and Mirror Link interfaces.
5.3 Navegación GPS
The stereo has built-in GPS and supports both online and offline navigation. The HERE WE GO map application is preloaded. To use offline maps, download the necessary map data via a WiFi connection. For online navigation, ensure the unit is connected to WiFi or a mobile hotspot.

Figure 5.2: GPS Navigation interface and WiFi connection options.
5.4 Bluetooth & FM/RDS Radio
Bluetooth: Pair your smartphone via Bluetooth for hands-free calling, music streaming (A2DP), and automatic phone book download. This enhances safety by allowing you to manage calls without holding your phone.
Radio FM/RDS: Access FM radio stations with 18 preset options. The RDS (Radio Data System) feature displays station information where available. Use the tuner to find news, music, and sports broadcasts.

Figure 5.3: FM/RDS Radio, Bluetooth interface, and Equalizer settings.
5.5 Ligazón de espello
The Mirror Link function allows you to display your Android or iOS phone's screen directly onto the 10.1-inch head unit. This can be achieved via a wired or wireless connection, enabling you to view videos or maps from your phone on the larger screen.
5.6 Control do volante (SWC)
The unit supports your vehicle's existing steering wheel controls. This allows you to adjust volume, change tracks, answer calls, and switch modes without taking your hands off the steering wheel, improving driving safety and convenience. The system includes a learning function for SWC configuration.
5.7 Backup Camera Input
When the vehicle is shifted into reverse gear, the stereo automatically displays the view from the connected AHD backup camera on the 10.1-inch screen. This assists with safe parking and maneuvering.

Figure 5.4: Steering Wheel Control interface and backup camera view con directrices.
5.8 Split Screen & UI Themes
Pantalla dividida: The split-screen feature allows you to run two applications side-by-side on the display, for example, navigation on one side and music playback on the other.
Temas da interface de usuario: The Android radio offers 26 different user interface themes. You can customize the look of your desktop by long-pressing the main interface and selecting your preferred theme.

Figura 5.5: Pantalla dividida view e examples of different UI desktop themes.
6. Mantemento
- Limpeza: Usa un pano suave e seco para limpar a pantalla e a unidade. Evita produtos de limpeza abrasivos ou solventes.
- Actualizacións de software: Periodically check for available software updates to ensure optimal performance and access to new features.
- Temperatura: Do not leave the unit in direct sunlight for extended periods, especially in hot weather, as this can affect its lifespan.
7 Solución de problemas
| Problema | Causa posible | Solución |
|---|---|---|
| A unidade non se acende | Incorrect wiring, blown fuse, vehicle battery issue | Comprobe as conexións de alimentación, inspeccione os fusibles do vehículo e asegúrese de que a batería estea cargada. |
| Sen son | Volume too low, incorrect audio settings, speaker wiring issue | Increase volume, check audio output settings, verify speaker connections. |
| Sinal GPS perdido ou impreciso | GPS antenna obstructed or disconnected, poor satellite coverage | Asegúrese de que a antena GPS estea instalada correctamente e teña unha visión clara view do ceo. Comprobe a conexión da antena. |
| Problemas de conexión Bluetooth | Device not paired, Bluetooth off on phone or stereo | Ensure Bluetooth is enabled on both devices. Re-pair the device. |
| A pantalla táctil non responde | Fallo temporal de software | Restart the unit. If issue persists, perform a factory reset (Factory setting keyword: 000000). |
If you encounter issues not listed here or if troubleshooting steps do not resolve the problem, please contact UNITOPSCI customer support.
8. Especificacións
| Característica | Especificación |
|---|---|
| Sistema | Android |
| Chipset | 8227L-DEMO |
| Tamaño da pantalla | 10.1 polgadas |
| Memoria (RAM+ROM) | 2 GB de RAM + 64 GB de ROM |
| Resolución de pantalla | 1024*600 |
| Chip de radio | MT6625 |
| Potencia de saída | 4 * 45 W |
| Temperatura de traballo | -20℃ a 75℃ (-4°F a 167°F) |
| Poder Ampchip lifier | TDA7388 |
| Banda de Radio | FM/RDS |
| Saída de vídeo | Apoio |
| Micrófono externo | Apoio |
| Pantalla dividida | Apoio |
| Mapas | Mapas sen conexión integrados (require internet para descargar datos) |
| WIFI | Apoio |
| USB | Dobre interface USB |
| Soporte de formato de audio | APE/FLAC/WAV/MP3/WMA etc. |
| Soporte de formato de vídeo | MKV/RMVB/AVI/MP4/MDV etc. |
| Soporte de formato de imaxe | PNG/JPEG/JPG/GIF/WBMP/BNP etc. |
| Factory Setting Keyword | 000000 |
| Linguas | Chinés/inglés/francés/italiano/coreano/xaponés/árabe/español/portugués/ruso/turco/vietnamita/hebreo/polaco/alemán |
| Peso do elemento | 3.08 libras |
| Dimensións do paquete | 17.13 x 7.8 x 4.06 polgadas |
9. Garantía e soporte
Your UNITOPSCI Android Car Stereo comes with a 12-month warranty. Replacement is available within 24 months for qualifying issues. We offer lifetime after-sales consultation and technical support.
For any inquiries, technical assistance, or warranty claims, please contact us:
- Correo electrónico: UNITOPSCI@126.com

Figure 9.1: UNITOPSCI Customer Support Contact Information.


