FOHERE RKY20(R)-N4-3
FOHERE 8000 BTU Portable Air Conditioner and Heater User Manual
Model: RKY20(R)-N4-3
1. Introdución
This manual provides essential information for the safe and efficient operation of your FOHERE 8000 BTU Portable Air Conditioner and Heater. Please read it thoroughly before installation and use, and retain it for future reference.

Image 1.1: FOHERE Portable Air Conditioner and Heater with its remote control.
The FOHERE portable unit offers 5-in-1 functionality, including cooling, heating, dehumidifying, fan, and auto modes, suitable for spaces up to 365 sq.ft. It features an 8000 BTU cooling and heating capacity, ensuring comfort across various seasons.

Imaxe 1.2: Acabadoview of cooling and heating capacities and recommended coverage area.
2. Información de seguridade
Siga sempre as precaucións de seguridade básicas ao usar electrodomésticos para reducir o risco de incendio, descarga eléctrica ou lesións.
Precaucións xerais de seguridade:
- Le todas as instrucións antes de usar o aparello.
- Asegúrese de que a fonte de alimentación coincida co voltage especificado na etiqueta de clasificación.
- Non utilice a unidade cun cable ou enchufe danados.
- Manteña o aparello lonxe de fontes de calor e luz solar directa.
- Non bloquee as entradas ou saídas de aire.
- Desenchufe sempre a unidade antes de limpar ou reparar.
- Este aparello non está pensado para o seu uso por persoas (incluídos nenos) con capacidades físicas, sensoriais ou mentais reducidas, ou con falta de experiencia e coñecementos, a menos que teñan supervisión ou instrucións sobre o uso do aparello por unha persoa responsable da súa seguridade. .
Función de bloqueo infantil:
The unit is equipped with a child lock function to prevent accidental changes to settings. When activated, all other buttons are disabled until the child lock is deactivated.
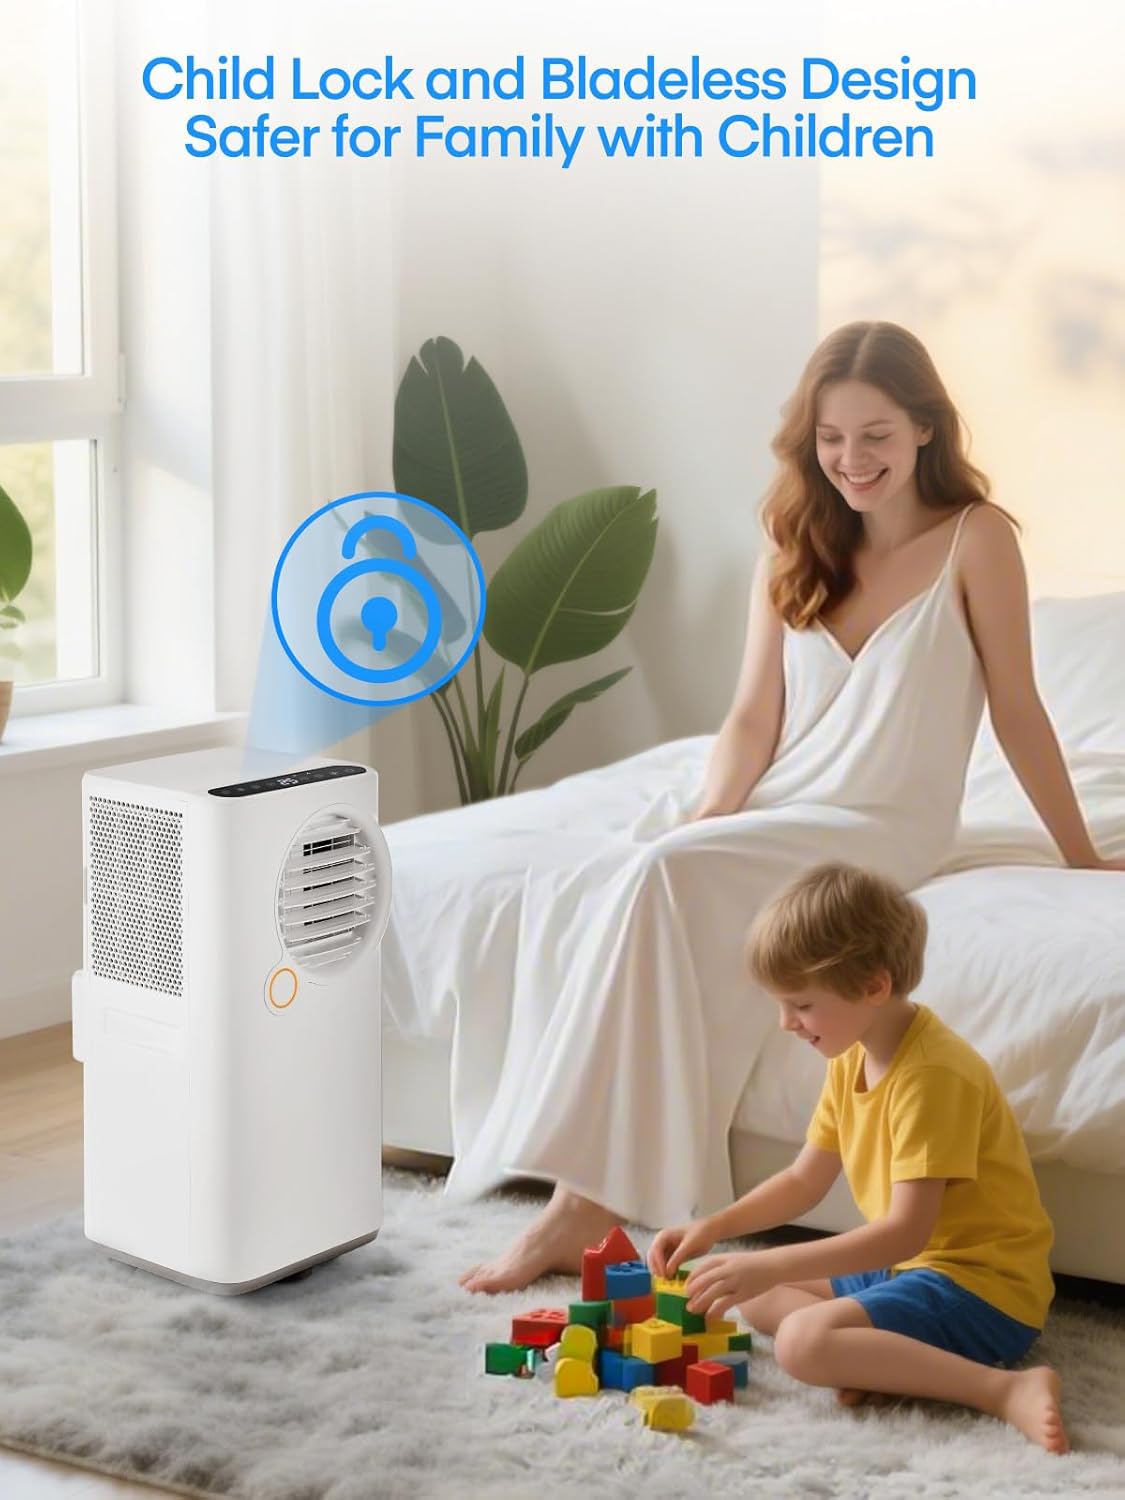
Image 2.1: The child lock feature enhances safety in households with children.
3. Contido do paquete
Verify that all components are present and undamaged upon unpacking. If any items are missing or damaged, contact customer support.
- Unidade de aire acondicionado portátil
- Control remoto
- Mangueira de escape
- Entrada de mangueira
- Saída da mangueira
- Window Kit (Adjustable Sealing Board)
- Manual de usuario
- Water Pipe (for continuous drainage)
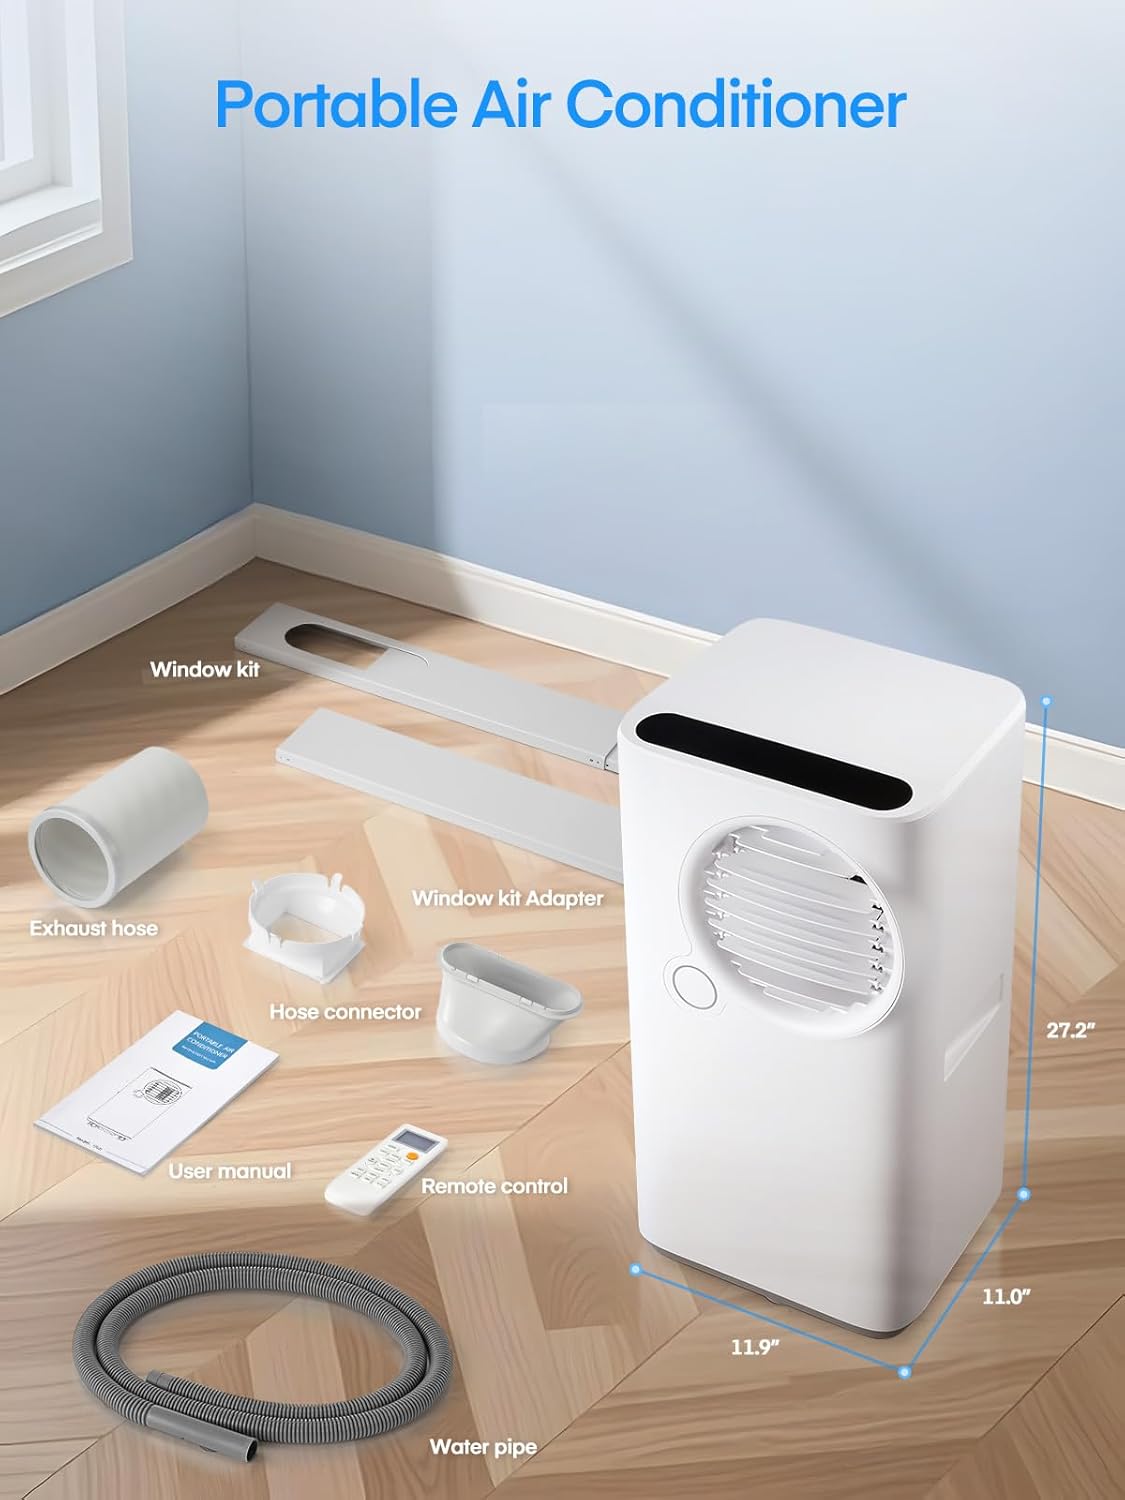
Imaxe 3.1: Todos os compoñentes incluídos no paquete.
4. Produto rematadoview
Familiarízate coas partes principais do teu aire acondicionado portátil.
Características da unidade:
- Panel de control: Located on the top of the unit for direct operation.
- Saída de aire: Front-facing, with adjustable louvers for airflow direction.
- Entrada de aire: Rear-facing, with a removable and washable air filter.
- Saída de aire de escape: Rear connection point for the exhaust hose.
- Casters and Side Handles: For easy mobility between rooms.

Image 4.1: Key features of the portable air conditioner, including the washable filter and mobility options.
5. Configuración e instalación
Follow these steps for proper installation of your portable air conditioner.
Instalación do kit de fiestras:
- Adjust the sealing board to the length of your window opening (suitable for single or double hung/sliding windows). The window kit is adjustable up to 59 inches.
- Secure the adjusted window kit in place within the window frame.
Conexión da mangueira de escape:
- Connect the hose inlet to one end of the exhaust hose.
- Connect the hose outlet to the other end of the exhaust hose.
- Attach the hose inlet to the exhaust port on the back of the air conditioner unit.
- Insert the hose outlet into the opening of the installed window kit, ensuring a snug fit to prevent air leakage.

Image 5.1: Step-by-step guide for window kit and exhaust hose installation.

Imaxe 5.2: Ex.amples of two common window installation methods.
6. Instrucións de funcionamento
Your FOHERE portable air conditioner can be operated using either the control panel on the unit or the remote control.

Image 6.1: Operating the unit via remote control or the integrated control panel.
Funcións do panel de control e do control remoto:
- Botón de encendido: Activa / apaga a unidade.
- Botón de modo: Cycles through Cooling, Heating, Fan, Dehumidify, and Auto modes.
- Botóns de axuste de temperatura (arriba/abaixo): Axusta a temperatura desexada.
- Botón de velocidade do ventilador: Selecciona a velocidade do ventilador (Baixa, Media, Alta).
- Botón do temporizador: Axusta o temporizador de acendido/apagado de 24 horas.
- Botón de modo de suspensión: Activates/deactivates sleep mode for quiet, energy-efficient operation.
- Botón de balance: Controls the wide-angle air supply (automatic left/right adjustment).
- Botón de bloqueo infantil: Activa/desactiva o bloqueo infantil.
Modos de funcionamento:

Image 6.2: The 5-in-1 multifunctional modes available.
- Modo de arrefriamento: Provides rapid cooling. Blue light indicator.
- Modo de calefacción: Provides warmth. Orange light indicator.
- Modo de ventilador: Circulates air without cooling or heating. Green light indicator.
- Modo de deshumidificación: Reduces humidity. White light indicator.
- Modo automático: Automatically selects operation mode based on ambient temperature.
Sleep Mode and Timer:
The sleep mode adjusts temperature and fan speed for quiet operation and energy efficiency during sleep. The 24-hour timer allows for scheduled ON/OFF times.
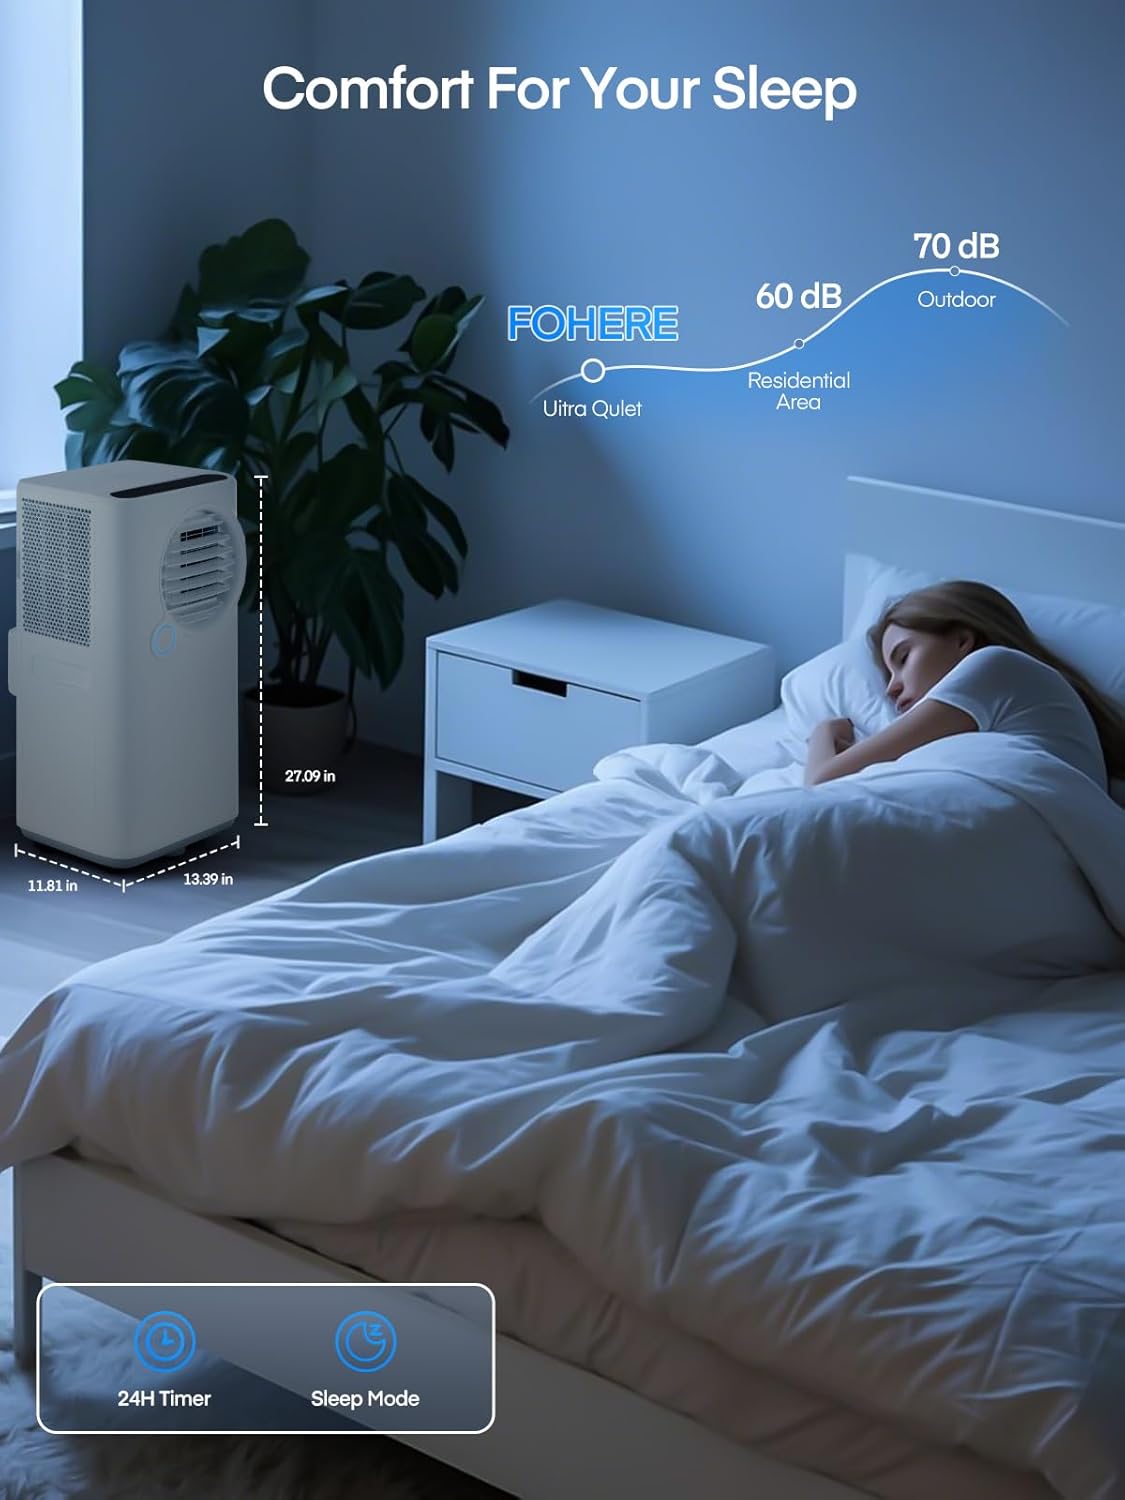
Image 6.3: Sleep mode provides a comfortable and quiet environment.
Indicador de auga chea:
A red light will illuminate when the internal water tank is full, indicating that it needs to be drained.
7. Mantemento
Un mantemento regular garante un rendemento óptimo e unha maior duración da súa unidade.
Limpeza do filtro de aire:
The unit features a removable and washable air filter. It is recommended to clean the filter every two weeks to maintain air quality and unit efficiency.
- Desconecte o aire acondicionado da toma de corrente.
- Retire o filtro de aire da parte traseira da unidade.
- Lava o filtro con auga morna e xabón. Enxáguao ben.
- Deixe que o filtro seque completamente ao aire antes de volvelo inserir na unidade.
Drenaxe de auga:
When the water full indicator light is red, the internal water tank needs to be drained. For continuous drainage, connect the included water pipe to the drainage port.
Almacenamento:
Before long-term storage, ensure the unit is completely drained of water and the filter is clean and dry. Store the unit in a cool, dry place, covered to protect it from dust.
8 Solución de problemas
Consulta esta sección para ver os problemas comúns e as súas solucións.
| Problema | Causa posible | Solución |
|---|---|---|
| A unidade non se acende | Sen subministración de enerxía; Bloqueo infantil activado | Check power cord connection and outlet; Deactivate child lock. |
| Refrixeración/quecemento insuficiente | Air filter dirty; Air inlets/outlets blocked; Room size too large; Window kit not properly sealed | Clean air filter; Clear obstructions; Ensure unit is appropriate for room size; Re-seal window kit. |
| Water full indicator is on | Internal water tank is full | Baleirar o depósito de auga. |
| A unidade é ruidosa | Unit not on a flat surface; Fan speed too high | Place unit on a level surface; Reduce fan speed. |
If the problem persists after attempting these solutions, please contact FOHERE customer support.
9. Especificacións
| Especificación | Detalle |
|---|---|
| Información do modelo | RKY20(R)-N4-3 |
| Peso do elemento | 53.5 libras |
| Dimensións do produto | 13.3 x 14.2 x 26.9 polgadas |
| Potencia de refrixeración | 8000 unidades térmicas británicas (BTU) |
| Capacidade de calefacción | 8000 unidades térmicas británicas (BTU) |
| Área de refrixeración | Ata 365 pés cadrados |
| Nivel de ruído | 51 decibeis |
| Voltage | 120 voltios |
| Wattage | 1080 vatios |
| Refrixerante | R-32 |
| Tipo de material | Plástico |
| Características especiais | Child Lock, Dust Filter, Fast Cooling, Heating And Cooling Function, Remote Controlled |
10. Garantía e soporte
For warranty information or technical support, please refer to the warranty card included with your product or contact FOHERE customer service directly. Keep your purchase receipt as proof of purchase.
Ask a question about this manual
Ask about setup, troubleshooting, compatibility, parts, safety, or missing instructions. Manuals+ will review the question and use this page’s manual context to help answer it.