
1. Introdución
This manual provides instructions for the assembly, operation, and maintenance of the MONTECH X5M Micro ATX Gaming PC Case. The X5M is designed for high airflow and features pre-installed ARGB fans, a glass side panel, and an integrated GPU holder.
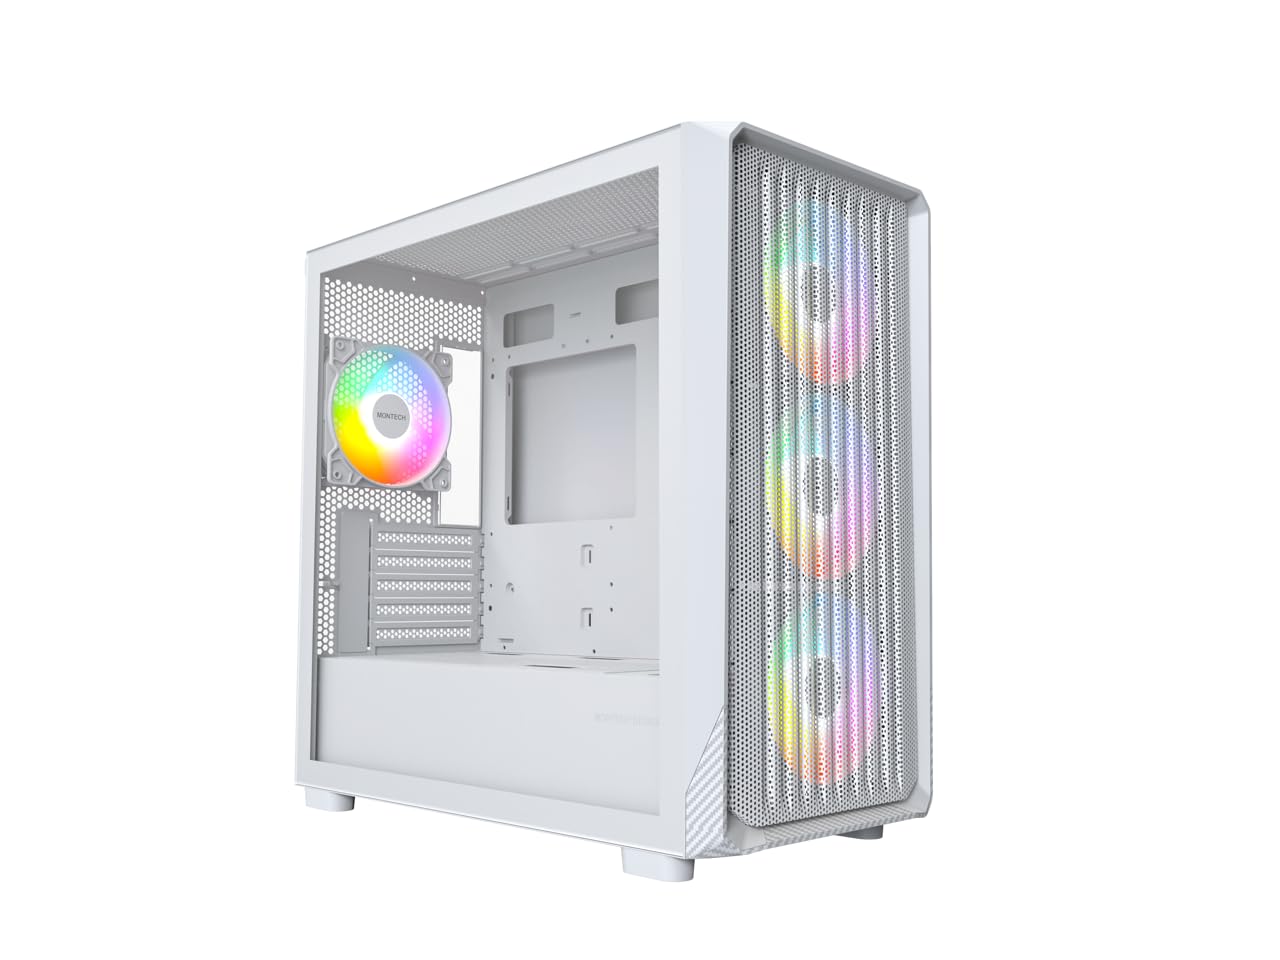
Figure 1: MONTECH X5M Micro ATX Gaming PC Case (White variant).
2. Características clave
- Integrated GPU Holder: An adjustable GPU support stand is included to provide physical support for graphics cards.
- Deseño de alto fluxo de aire: Optimized structure for efficient cooling.
- Ventiladores ARGB preinstalados: Four 120mm ARGB fans are pre-installed for immediate cooling and customizable lighting.
- Panel lateral de vidro temperado: Proporciona unha clara view de compoñentes internos.
- Carbon Fiber Print Accents: Aesthetic detailing on the front panel.
- Conectividade versátil: Front I/O panel includes USB 2.0, USB 3.0, USB Type-C, and audio ports.

Figura 2: Máisview of the MONTECH X5M case highlighting internal layout and ARGB fans.
3. Especificacións
| Marca | Montech |
| Nome do modelo | X5M |
| Tipo de caso | Torre media Micro ATX |
| Compatibilidade da placa base | Micro ATX |
| Ventiladores preinstalados | 4 ventiladores ARGB de 120 mm |
| GPU Length Support | Ata 405 mm |
| CPU Cooler Height Support | Ata 165 mm |
| PSU Length Support | Ata 230 mm |
| Bahías de almacenamento | Up to 2 HDDs & 4 SSDs |
| Portos de E / S dianteiros | 1x USB 2.0, 1x USB 3.0, 1x USB Type-C, Mic & Audio, LED Button, Power Button |
| Método de arrefriamento | Aire |
| Soporte para radiadores AIO | Top: Up to 360mm; Front: Up to 360mm |
| Material | Plastic with Carbon Fiber Accents, Tempered Glass |
| Peso do elemento | 14.3 libras (6.49 kg) |

Figure 3: Close-up of the carbon fiber print detailing on the front panel of the X5M case.
4. Configuración e instalación
Follow these steps for installing components into your MONTECH X5M PC case. Ensure your system is powered off and unplugged before beginning any installation.
4.1. Preparación do caso
- Carefully remove the tempered glass side panel by unscrewing the thumb screws and sliding it off.
- Retire o panel lateral traseiro para acceder á área de xestión de cables.
4.2. Instalación da placa base
- Instala a protección de E/S (se non está preinstalada na placa base) na abertura traseira da caixa.
- Align your Micro ATX motherboard with the standoffs inside the case.
- Fixe a placa base cos parafusos proporcionados.
4.3. Instalación da fonte de alimentación (PSU)
- Place the PSU into the dedicated compartment at the bottom rear of the case.
- Fixe a fonte de alimentación con parafusos na parte traseira da caixa.
4.4. Storage Device Installation (HDDs/SSDs)
The X5M supports up to 2 HDDs and 4 SSDs.
- SSD de 2.5 polgadas: Mount SSDs onto the designated brackets behind the motherboard tray or on the PSU shroud.
- Discos duros de 3.5 polgadas: Install HDDs into the drive cage located under the PSU shroud.
4.5. Instalación da tarxeta gráfica (GPU)
- Retire as tapas das ranuras PCIe necesarias da parte traseira da caixa.
- Insert the GPU into the appropriate PCIe slot on your motherboard.
- Fixa a GPU con parafusos.
- Adjust the integrated GPU support stand to provide stability for your graphics card.
4.6. Instalación do ventilador e do radiador
The X5M comes with four 120mm ARGB fans pre-installed. Additional fans or AIO radiators can be installed as follows:
- Arriba: Supports 3x 120mm or 2x 140mm fans, or AIO radiators up to 360mm.
- Fronte: Supports 3x 120mm or 2x 140mm fans, or AIO radiators up to 360mm.
- Traseira: Admite 1 ventilador de 120 mm.
- Cubre PSU: Supports 2x 120mm fans.

Figure 4: Illustration of airflow within the MONTECH X5M case and the pre-installed ARGB fans.

Figure 5: Diagram detailing fan and radiator support locations and sizes within the X5M case.
4.7. Xestión de cables
Utiliza os recortes para o paso de cables e os puntos de suxeición que hai detrás da bandexa da placa base para organizar os cables. Isto mellora a circulación do aire e a estética.
4.8. Front I/O Panel Connections
Connect the front panel cables (USB 2.0, USB 3.0, USB Type-C, HD Audio, Power Switch, Reset Switch, LED) to the corresponding headers on your motherboard. Refer to your motherboard manual for specific header locations.

Figure 6: Front I/O panel of the MONTECH X5M, showing USB 2.0, USB 3.0, USB Type-C, Mic & Audio jacks, LED button, and Power button.
5. Funcionamento
5.1. Acendido
After all components are installed and cables connected, replace the side panels. Connect your monitor, keyboard, mouse, and power cable. Press the Power Button on the front I/O panel to start your system.
5.2. Control do ventilador ARGB
Os ventiladores ARGB preinstalados pódense controlar de dúas maneiras:
- Dedicated LED Button: Use the LED button on the front I/O panel to cycle through 25 built-in lighting modes.
- Sincronización da placa base: Connect the ARGB cables to a compatible 5V 3-pin ARGB header on your motherboard. Use your motherboard's RGB software (e.g., ASUS Aura Sync, MSI Mystic Light Sync, GIGABYTE RGB Fusion, ASRock Polychrome Sync) to synchronize and customize lighting effects.
6. Mantemento
Un mantemento regular axuda a garantir un rendemento óptimo e unha maior duración dos compoñentes do teu PC.
- Limpeza do filtro de po: Periodically remove and clean the dust filters (located on the top, front, and bottom) to maintain optimal airflow. Use compressed air or a soft brush.
- Limpeza exterior: Limpe as superficies exteriores cun suave, damp pano. Evite produtos de limpeza abrasivos.
- Limpeza de interiores: With the system powered off and unplugged, use compressed air to remove dust from internal components and fans.
7 Solución de problemas
- O sistema non se acende:
- Ensure the power cable is securely connected to the PSU and the wall outlet.
- Check that the PSU switch is in the "ON" position.
- Verify all front panel connectors (especially the Power Switch) are correctly attached to the motherboard.
- Confirm the 24-pin ATX and 8-pin CPU power cables are securely connected to the motherboard.
- Os ventiladores non xiran / Os RGB non se iluminan:
- Check that all fan power cables are securely connected to the fan hub or motherboard headers.
- Ensure ARGB cables are properly connected to the fan hub or a compatible 5V 3-pin ARGB header on the motherboard.
- If using motherboard synchronization, verify that the RGB software is installed and configured correctly.
- Try cycling through modes using the dedicated LED button on the front panel.
- Sen saída de visualización:
- Ensure your monitor cable is connected to the graphics card (GPU) and not the motherboard's integrated graphics port (unless you are using integrated graphics).
- Volva colocar a tarxeta gráfica na súa ranura PCIe.
- Check that the GPU power cables are securely connected.
8. Garantía e soporte
8.1. Información da garantía
The MONTECH X5M PC Case comes with a 1 anos de garantía do fabricante. This warranty covers defects in materials and workmanship under normal use. For specific terms and conditions, please refer to the official Montech websitio ou póñase en contacto co servizo de atención ao cliente.
8.2. Atención ao cliente
For further assistance, technical support, or warranty claims, please visit the official Montech website or contact their customer service department. You can find contact information on the Montech websitio: www.montechpc.com