
Beleeb BLB-KTS-D1315
Beleeb BLB-KTS-D1315 13x15 Inch Drop-In Bar Sink User Manual
Model: BLB-KTS-D1315
1. Información importante de seguridade
Lea atentamente todas as instrucións antes da instalación e o uso. Garde este manual para futuras consultas.
- Asegúrese de que se cumpran todas as normas locais de fontanería e construción durante a instalación.
- Use equipos de protección individual (EPI) axeitados, como lentes e luvas de seguridade, durante a instalación.
- Peche a subministración principal de auga antes de comezar calquera traballo de fontanería.
- Handle the sink with care to avoid damage or injury.
- Non empregues produtos de limpeza abrasivos nin produtos químicos agresivos na superficie do lavabo, xa que poderían danar o acabado.
2. Produto rematadoview
The Beleeb BLB-KTS-D1315 is a 13x15 inch drop-in bar sink constructed from 18-gauge stainless steel. It features a 9-inch deep single bowl, designed for versatile use in kitchens, RVs, and bars.
2.1 Características principais
- Tamaño compacto: 13x15x9 inch dimensions, ideal for smaller spaces.
- Construción duradeira: 18-gauge stainless steel with an upgraded millet-grain 3D embossed surface for enhanced scratch resistance.
- Drenaxe eficiente: Slight bottom slope and X-guide design with bottom water grooves for rapid water drainage.
- Redución de ruído: 3mm thick rubber padding and special moisture-absorbing coat to reduce noise and prevent condensation.
- Accesorios incluídos: Basket strainer, 114mm large-diameter drain, stainless steel bottom grid.
2.2 Compoñentes incluídos
Verifique que estean presentes todos os compoñentes antes de comezar a instalación.

Figura 1: Sink body, mounting clips, drain assembly, and bottom grid.
- Sink Body
- Drainage Grid (Bottom Grid)
- Drain Outlet (Basket Strainer and Drain Assembly)
- Mounting Clips (if applicable for topmount installation)
- Installation Template (usually included for cutout)
3. Instrucións de instalación
This section provides general guidelines for top-mount installation. Consult a professional plumber if you are unsure about any steps.
3.1 Ferramentas e materiais necesarios
- Luvas e lentes de seguridade
- Jigsaw or appropriate cutting tool
- Broca
- Cinta métrica e lapis
- Silicone sealant (kitchen and bath grade)
- Pinza ou chave axustable
- Desaparafusador
3.2 Preparación da encimera
- Medir e marcar: Use the provided template (if available) or the sink's dimensions to mark the cutout area on your countertop. Ensure proper clearance from cabinets and walls. The sink exterior dimensions are approximately 13 inches (length) by 15 inches (width).
- Cortar a abertura: Carefully cut the marked opening in the countertop using a jigsaw or suitable cutting tool. Ensure the edges are smooth.
- Bordes de selado: Apply a waterproof sealant to the raw edges of the countertop cutout to prevent moisture damage.

Figura 2: Sink dimensions and recommended cutout for top-mount installation.
3.3 Sink Installation
- Install Faucet and Accessories (Optional): If your sink has pre-drilled holes for a faucet or soap dispenser, install them onto the sink before placing the sink into the countertop opening.
- Aplicar sellador: Apply a continuous bead of silicone sealant around the perimeter of the sink's underside rim that will contact the countertop.
- Posición do sumidoiro: Carefully lower the sink into the countertop opening, ensuring it is properly aligned. Press down firmly to create a seal.
- Asegurar con clips: Attach the mounting clips (if provided) to the underside of the sink rim and tighten them against the countertop to secure the sink in place. Do not overtighten.
- Limpar o exceso de selante: Immediately wipe away any excess silicone sealant that squeezes out from under the rim.
3.4 Drain Assembly Installation
- Prepare Drain: Apply plumber's putty or a silicone bead around the flange of the basket strainer.
- Inserir drenaxe: Insert the basket strainer into the sink's drain opening from the top.
- Seguro desde abaixo: From underneath the sink, attach the rubber gasket, friction washer, and locknut to the drain body. Tighten securely with an adjustable wrench.
- Conectar fontanería: Connect the drain assembly to your household plumbing system according to local codes. Ensure all connections are watertight.
4. Funcionamento
The Beleeb bar sink is designed for straightforward use. Once installed and connected to the water supply and drainage, it functions like any standard kitchen or bar sink.
- Caudal de auga: Use your installed faucet to control water flow and temperature.
- Drenaxe: The sink's sloped bottom and X-guide design facilitate quick water drainage. The included basket strainer prevents large debris from entering the drain.
- Uso de accesorios: The stainless steel bottom grid can be placed in the sink to protect the bottom surface and allow items to air dry.
5. Coidados e mantemento
Un coidado axeitado garantirá a lonxevidade e o aspecto do seu fregadero de aceiro inoxidable.
5.1 Limpeza diaria
- After each use, rinse the sink thoroughly with water to remove food particles and residue.
- Wipe the sink dry with a soft cloth to prevent water spots, especially in hard water areas.
- Use a mild dish soap and a soft sponge or cloth for general cleaning.
5.2 Evitando danos
- Evitar abrasivos: Do not use steel wool, abrasive pads, or harsh chemical cleaners (e.g., bleach, ammonia-based products) as they can scratch or stain the stainless steel finish.
- Evitar arañazos: While the 3D embossed surface is scratch-resistant, avoid dragging sharp or heavy objects across the sink surface. The included bottom grid helps protect the sink.
- Protección térmica: Do not place extremely hot pots or pans directly into the sink without protection, as extreme temperature changes can affect the material over time.
- Prevención da ferruxe: Remove any iron-containing objects (e.g., cast iron pans, steel wool fragments) from the sink promptly to prevent rust spots.
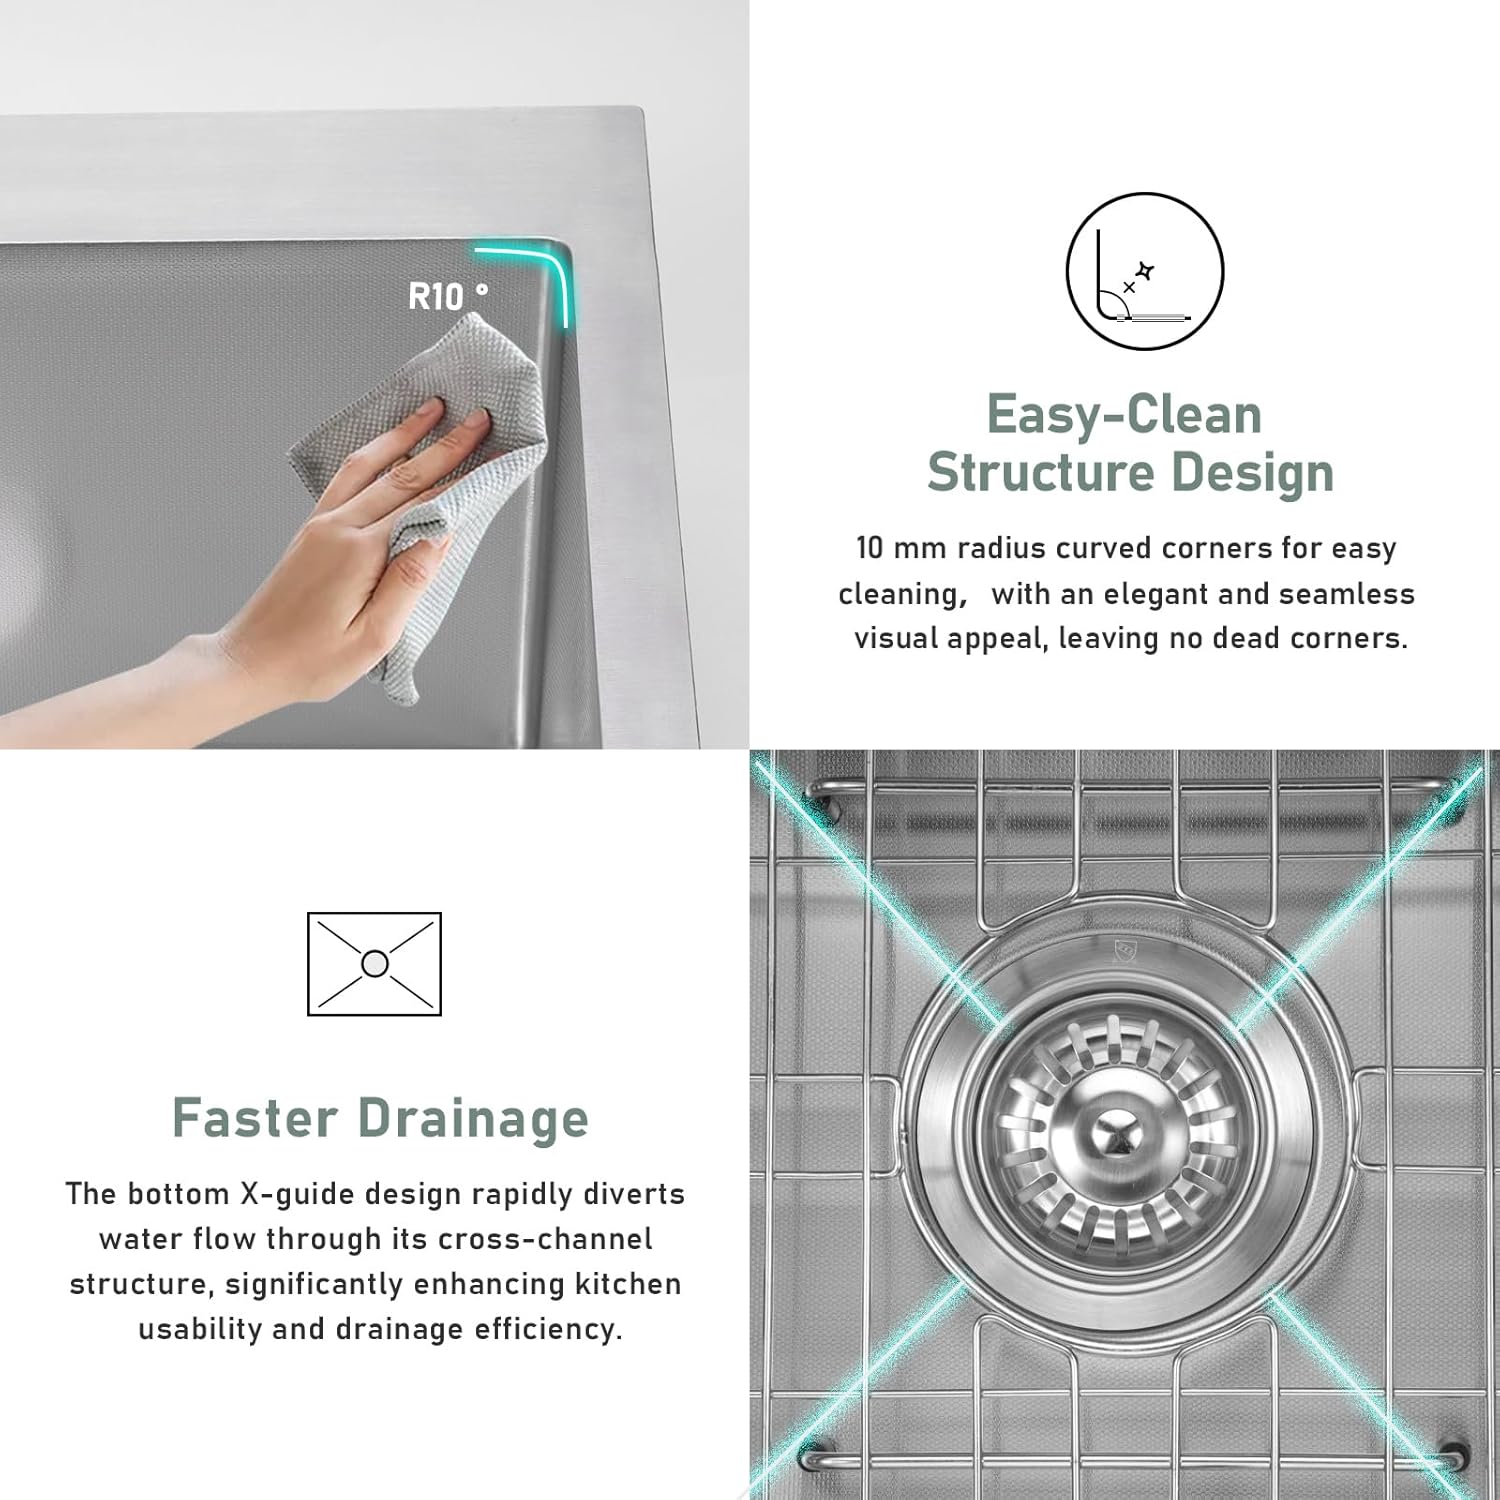
Figura 3: The R10 curved corners and easy-clean structure design facilitate simple maintenance.
6 Solución de problemas
| Problema | Causa posible | Solución |
|---|---|---|
| Water spots or streaks | Hard water deposits; not drying the sink after use. | Wipe the sink dry after each use. For existing spots, use a stainless steel cleaner or a solution of vinegar and water, then rinse and dry. |
| Drenaxe lenta | Drain clogged with food particles or debris. | Remove the basket strainer and clear any obstructions. Use a drain cleaner if necessary, following product instructions. |
| Manchas de ferruxe | Exposure to iron-containing objects or harsh chemicals. | Remove rust spots with a non-abrasive stainless steel cleaner. Prevent by avoiding prolonged contact with iron and harsh chemicals. |
| Water pooling slightly in the sink bottom | Minor variations in manufacturing or installation. | This is often minimal and does not affect function. Ensure the sink is level during installation. A squeegee can be used to direct water to the drain. |
7. Especificacións do produto
| Característica | Detalle |
|---|---|
| Marca | Beleeb |
| Número de modelo | BLB-KTS-D1315 |
| Tipo | Drop-In Bar Sink / Kitchen Sink |
| Material | Aceiro inoxidable de calibre 18 |
| Remate | Millet Grain (3D Embossed) |
| Cor | Aceiro inoxidable |
| Exterior Dimensions (Length x Width x Height) | 13 polgadas x 15 polgadas x 9 polgadas |
| Profundidade do recipiente | 9 polgadas |
| Tipo de drenaxe | Grid (Basket Strainer) |
| Peso do elemento | 14.67 libras (6.67 kg) |
| Tipo de instalación | Countertop (Topmount) |
8. Garantía e soporte
For warranty information and customer support, please refer to the product packaging or contact Beleeb customer service directly. Keep your purchase receipt as proof of purchase.
For further assistance, visit the official Beleeb store: Beleeb Store on Amazon
Ask a question about this manual
Ask about setup, troubleshooting, compatibility, parts, safety, or missing instructions. Manuals+ will review the question and use this page’s manual context to help answer it.